Loading ...
Loading ...
Loading ...
7
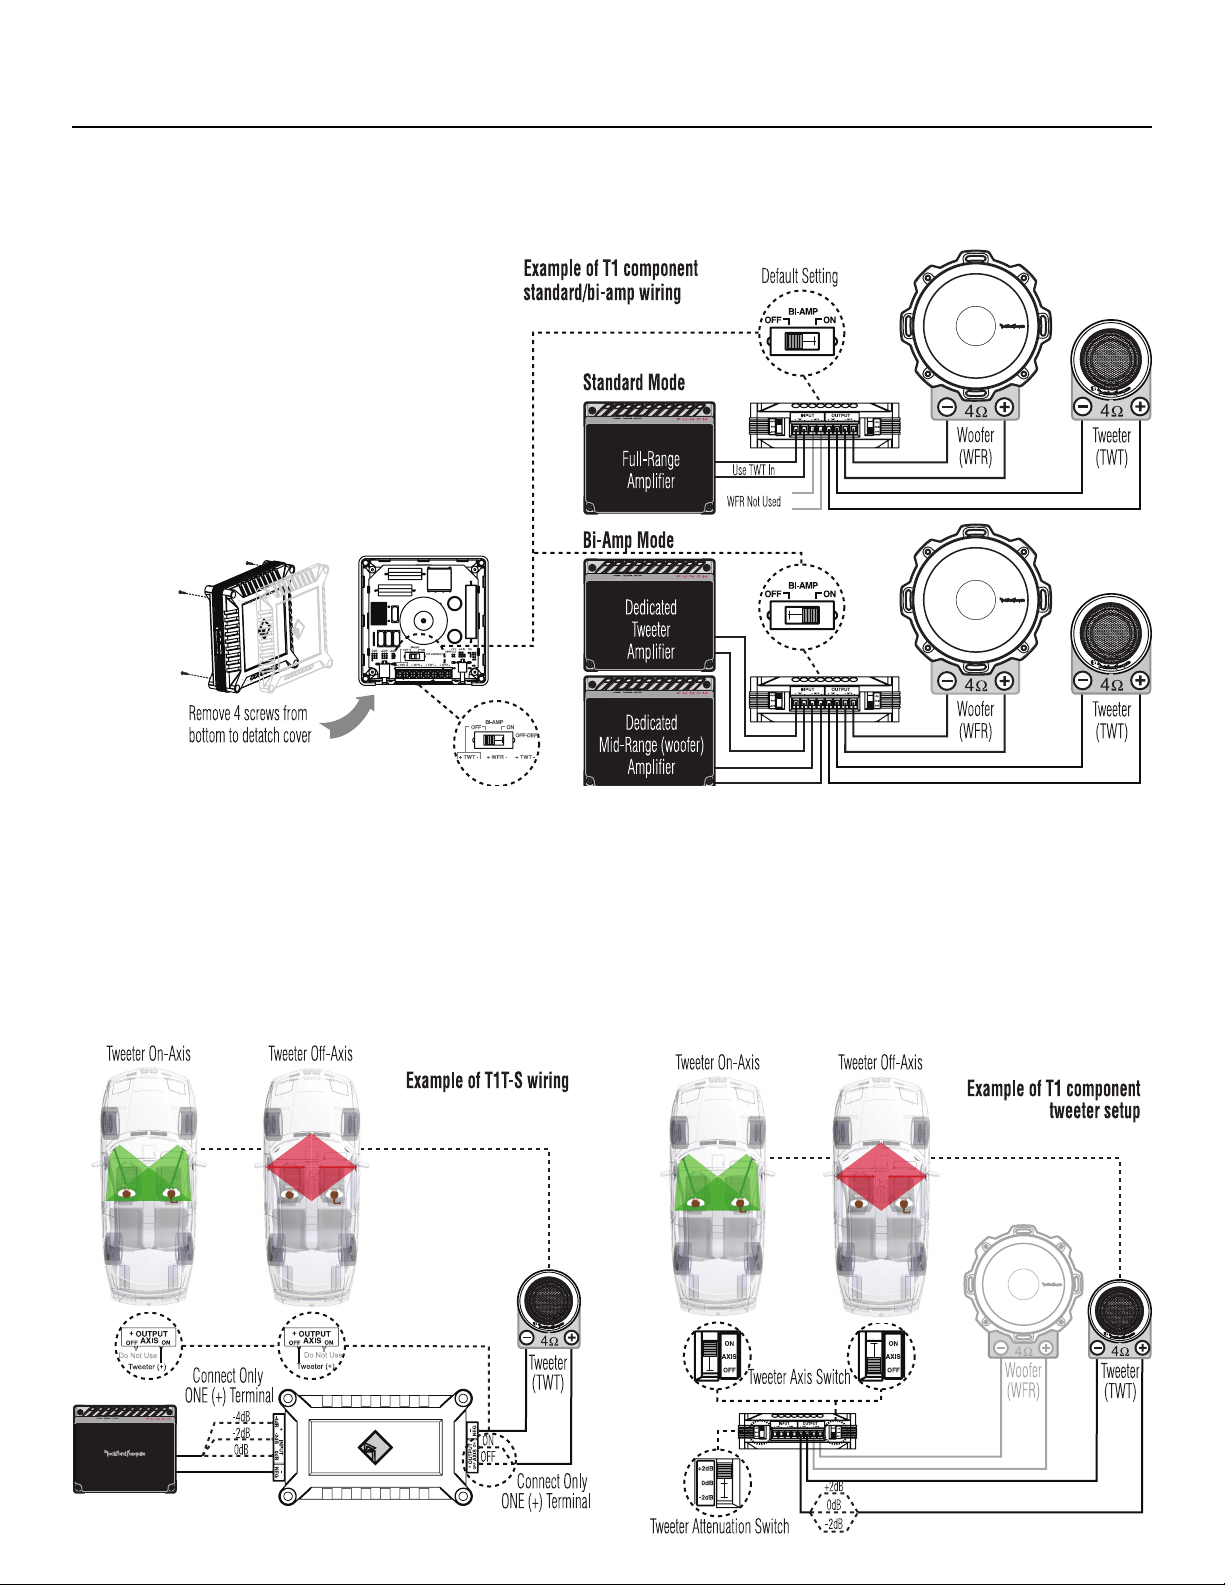
Wiring
Standard
1. Use illustration for proper connection and be sure to maintain speaker
polarity.
2. Use only “TWEETER” input(s).
Bi-amp
1. Use illustration for proper connection and be sure to
maintain speaker polarity.
2. Remove 4 screws from crossover bottom to detatch cover.
3. When BI-AMP switched OFF for one amplifier, use only
“TWT” input.
4. When BI-AMP switched ON for two dedicated amplifier,
use both “TWT” and “WFR” inputs
T1T-S Crossover
1. Use illustration for proper connection.
2. Be sure to maintain speaker polarity.
3. Connecting the positive wire to 0dB matches the amplitude of the
tweeter to the mid-range (woofer).
4. Connecting positive wire to -2dB or -4dB to reduce the amplitude of
the tweeter -2dB or -4dB lower than the mid-range, (ideal for tweeters
located high in door panels and mid-range low in the kick panel).
Tweeter ON/OFF Axis Switch
1. Set to ON or OFF to match position of tweeter relative to listener.
Default OFF position satisfies most installations.
Tweeter Attenuation Switch
1. 0dB matches the amplitude (no increase/no attenuation) of the tweeter
to the same level as the mid-range (woofer).
2. +2dB increases and -2dB reduces the amplitude of tweeter in relation
to the mid-range, (ideal when matching offset installation like tweeters
located high in door panels and midranges low in kick panels).
Installation/System Setup
illus.-4.1
illus.-3.2
illus.-3.1
Loading ...
Loading ...
Loading ...