Loading ...
Controls and Features
GENERAL USAGE GUIDE
It is very important that your car be clean and dry before applying wax. Any wax protection will wear
longer and protect better if applied directly to the paint.
A good quality liquid wax is recommended because of its ease of application, but a paste wax will also
work with a little more effort. Hard paste wax, however, should be applied by hand, then removed
using this unit.
Always use the bonnet recommended for each step (directions follow) to achieve the best results.
Any areas inaccessible to the waxer/polisher should be waxed and finished by hand.
CAUTION: TO AVOID THE RISK OF PERSONAL INJURY OR PROPERTY DAMAGE:
• MAKE SURE THE POLISHER IS IN THE OFF POSITION BEFORE PLUGGING THE
POLISHER INTO AN APPROPRIATE POWER OUTLET.
• Place the power cord over your shoulder to avoid contact with the polisher head or the
surface while the unit is running.
• Always start and stop waxer/polisher on or against the work surface. If you turn the
waxer/polisher ON without the applicator bonnet touching your work surface, the bonnet
may fly loose and cause injury or property damage. Make sure the waxer/polisher
with
bonnet securely attached is lightly resting on the surface you intend to polish at all times
when the Power Switch is in the ON position.
• Use only manufacturer-supplied bonnets with this unit.
STEP 1: SURFACE PREPARATION
• Wash your car or surface thoroughly to remove all dirt and oil. Pay special attention to
areas that attract excessive layers of dirt such as, areas around wheel wells and next to
bumpers.
• After washing, move the car or surface you’re working on to a dry area out of direct
sunlight and allow the surface to dry and cool.
STEP 2: WAX APPLICATION
1. With the foam pad facing up, securely attach the smooth Wax On
Applicator Bonnet (bonnet with the plastic liner), making sure the
bonnet is centered on the foam head.
2. Apply wax directly on the Wax Applicator Bonnet, adequately
covering the entire bonnet, and also spread a small amount of
wax to the bonnet edges.
3. Invert the waxer/polisher and place the bonnet directly on the
surface you want to apply the wax to before sliding the Power
Switch to the ON position.
Note:
You can also substitute a good grade of cleaning compound at this
step if the surface is oxidized.
4. Slide the Power Switch to the ON position and steer the
waxer/polisher in long sweeping strokes in a criss-cross figure-
eight pattern, working the wax/cleaner
into the surface.
IMPORTANT: DO NOT APPLY PRESSURE TO THE UNIT. The weight of the polisher is adequate to
do the task correctly.
5. Apply more wax to the bonnet as necessary to maintain a thin even coat on the surface being
polished.
Notes:
Applying more wax than necessary adds no more protection to the surface and
makes the Step 3 (wax removal) more difficult.
It’s easiest to apply wax to the entire surface before starting the removal phase.
For best results, refer to the specific application recommendations of the wax
product being used.
STEP 3: WAX REMOVAL
1. With the foam pad facing up, securely attach the terry cloth Wax Removal Bonnet (double-sided
bonnet without the plastic liner), making sure the bonnet is centered on the foam head.
2. Invert the waxer/polisher and place the bonnet directly on the surface you want to remove the wax
from before sliding the Power Switch to the ON position.
3. Slide the Power Switch to the ON position and follow the same long sweeping strokes in a criss-
cross figure-eight motion previously described, gliding the polisher over the surface, again
permitting the weight of the unit to do the work.
4. Occasionally it becomes necessary to remove the bonnet and shake out the dried polish residue to
avoid streaking. Make sure the polisher is lightly resting on the surface and remains on the
surface when stopping the unit and before powering up the unit again.
5. After removing the wax from all the major flat surfaces, use the edge of the pad to reach curved
or concave surfaces.
STEP 4: FINISH POLISHING
1. With the foam pad facing up, securely attach the foam-padded smooth cloth Polishing Bonnet,
making sure the bonnet is centered on the foam head.
2. Invert the waxer/polisher and place the bonnet directly on the surface you want to polish before
sliding the Power Switch to the ON position.
3. Slide the Power Switch to the ON position and follow the same figure-eight motion described
previously, gliding the polisher over the surface, again permitting the weight of the unit to do the
work.
4. Small areas, such as near and around mirrors, should be finished by hand.
CARE AND MAINTENANCE
Lubrication
Self lubricating bearings are used in this tool and periodic relubrication is not required. However, it is
recommended that, once a year, you take or send the tool to a service center for a thorough cleaning
and inspection. Refer to the “Service Information” section of this Instruction Manual.
Cleaning
All three bonnets can be safely cleaned by hand washing in warm soapy water. Allow bonnets to fully
dry before use.
Plastic parts may be wiped clean with a soft damp cloth. NEVER use solvents when cleaning any
plastic part as this may damage the finish. DO NOT IMMERSE THE WAXER OR ATTACHED FOAM PAD
IN WATER.
Storage
Store the waxer in a “pad-up” position to prevent the attached foam pad from compressing or being
set in a wrong position.
ACCESSORIES
This waxer/polisher is supplied with three accessories (the Wax Applicator Bonnet, Wax Off Bonnet
and Polishing Bonnet). Replacement accessories are available from your local dealer or authorized
service center.
If you need assistance regarding accessories, please call: 1-800-544-6986.
WARNING:
The use of any accessory not supplied for use with this tool could be
hazardous.
SPECIFICATIONS
A 37.0:rewoP
V021:egatloV
NIM/535,4:deepS
Pad Size: 7"
Cable length: 3m
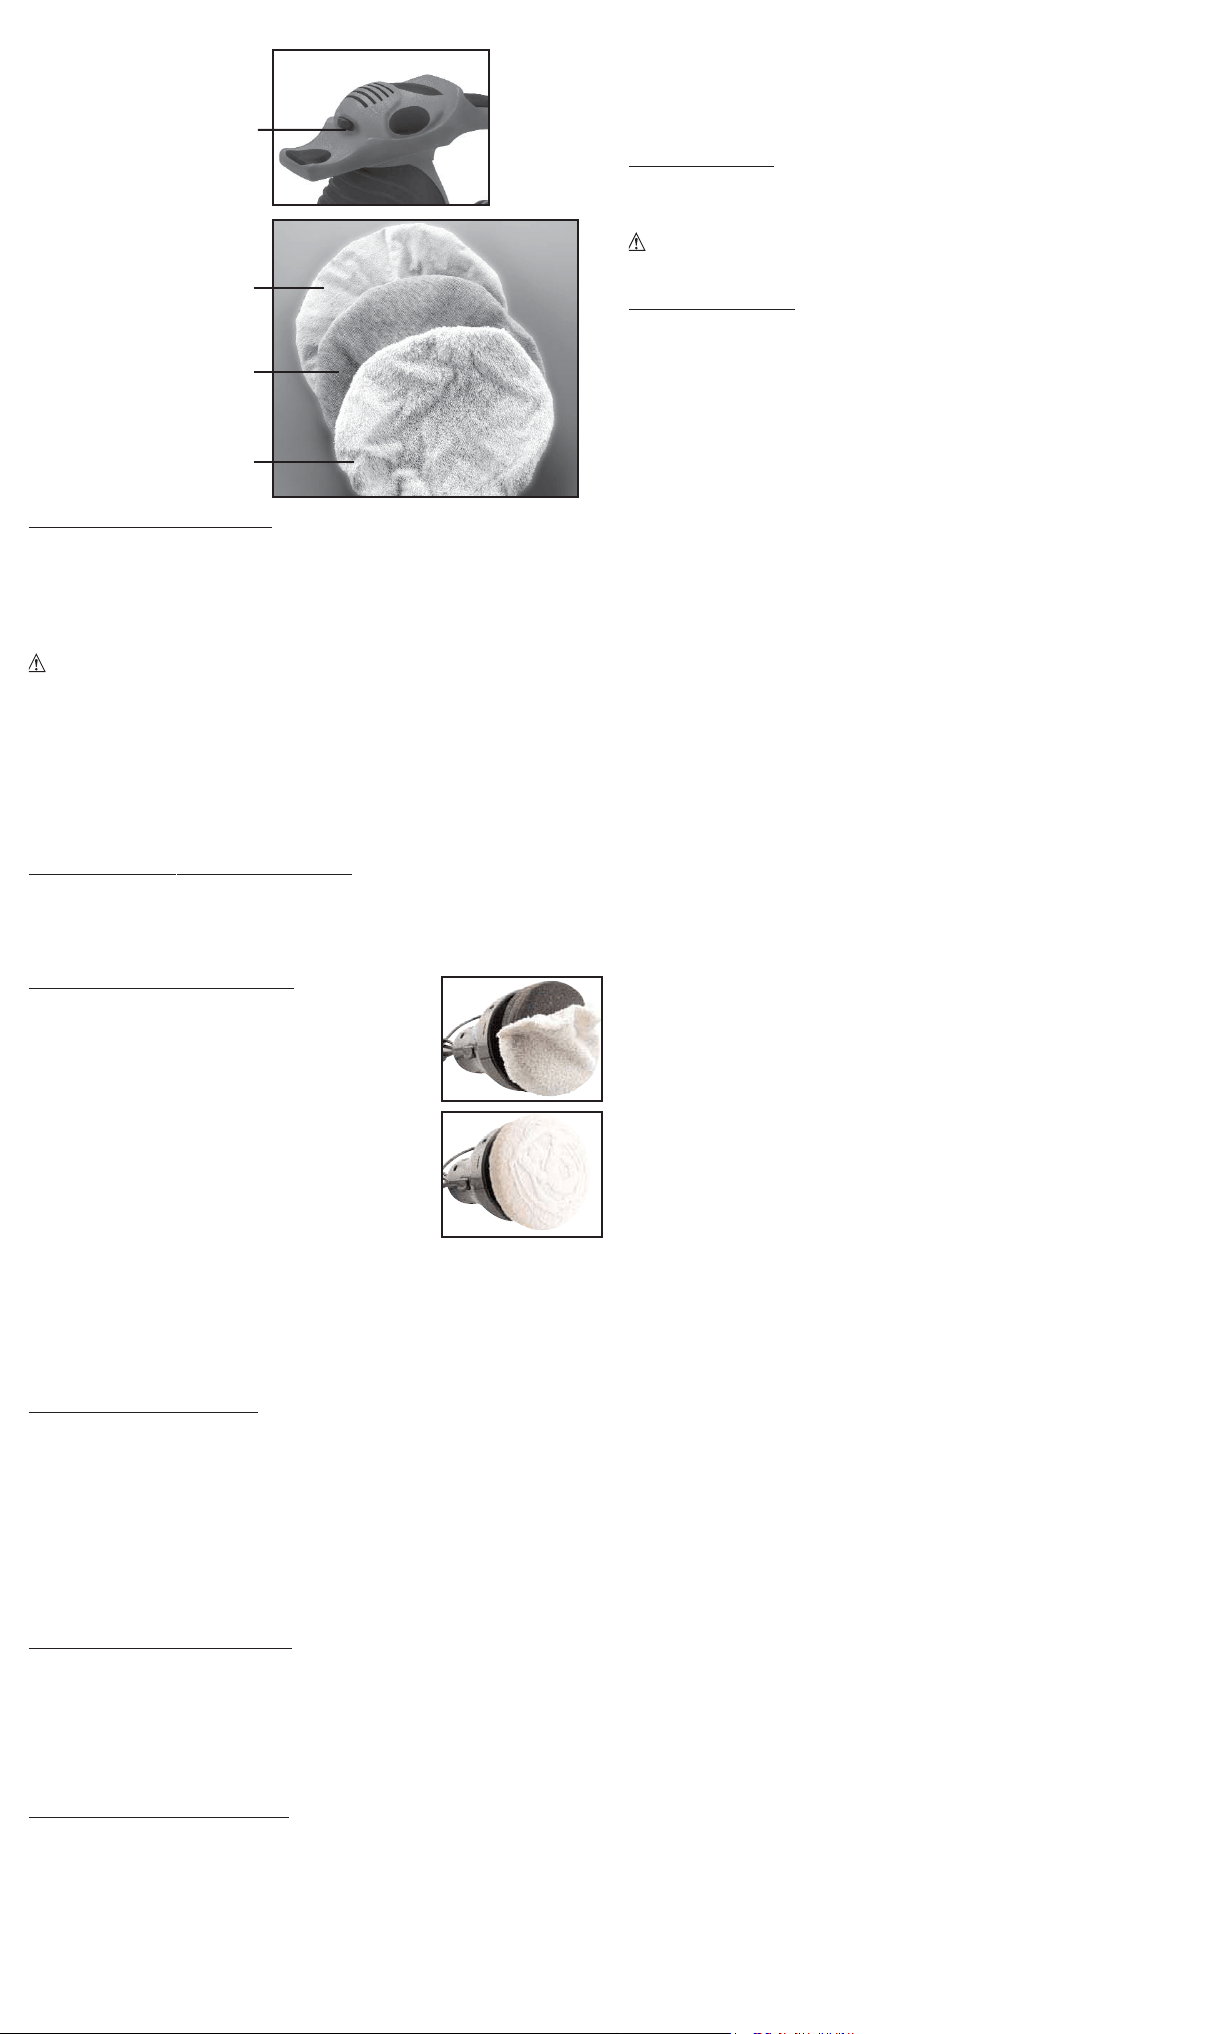
ON/OFF POWER SWITCH
POLISHING BONNET
(FOAM PADDED SMOOTH
CLOTH)
WAX OFF BONNET
(DOUBLE-SIDED TERRY
CLOTH)
WAX APPLICATOR
BONNET (TERRY CLOTH
WITH PLASTIC LINER)
W007B_ManualEN_SP_012908.qxp 1/29/2008 11:01 AM Page 3