
Loading ...
Loading ...
Loading ...
9
Unpacking
Carton Contents
• Cordless snow shovel
• Adjustable handle, bolt and knob
• Joint-xing knob and bolt
• Manual with registration card
NOTE: In order to operate this snow shovel, you will need to
additionally purchase either the EcoSharp
®
(model iBAT40)
or EcoSharp
®
PRO (model IBAT40XR) lithium-ion battery
and either the EcoSharp
®
charger (model iCHRG40) or the
EcoSharp
®
charger (model iCHRG40-DPC).
1. Carefully remove the cordless snow shovel and check to
see that all of the above items are supplied.
2. Inspect the product carefully to make sure no breakage or
damage occurred during shipping. If you nd damaged or
missing parts, DO NOT return the unit to the store. Please
call the Snow Joe
®
+ Sun Joe
®
customer service center at
1-866-SNOWJOE (1-866-766-9563).
NOTE: Do not discard the shipping carton and packaging
material until you are ready to use your new cordless snow
shovel. The packaging is made of recyclable materials.
Properly dispose of these materials in accordance with
local regulations.
IMPORTANT! The equipment and packaging material are
not toys. Do not let children play with plastic bags, foils
or small parts. These items can be swallowed and pose a
suocation risk!
Assembly
Connecting the Upper + Lower Tubes
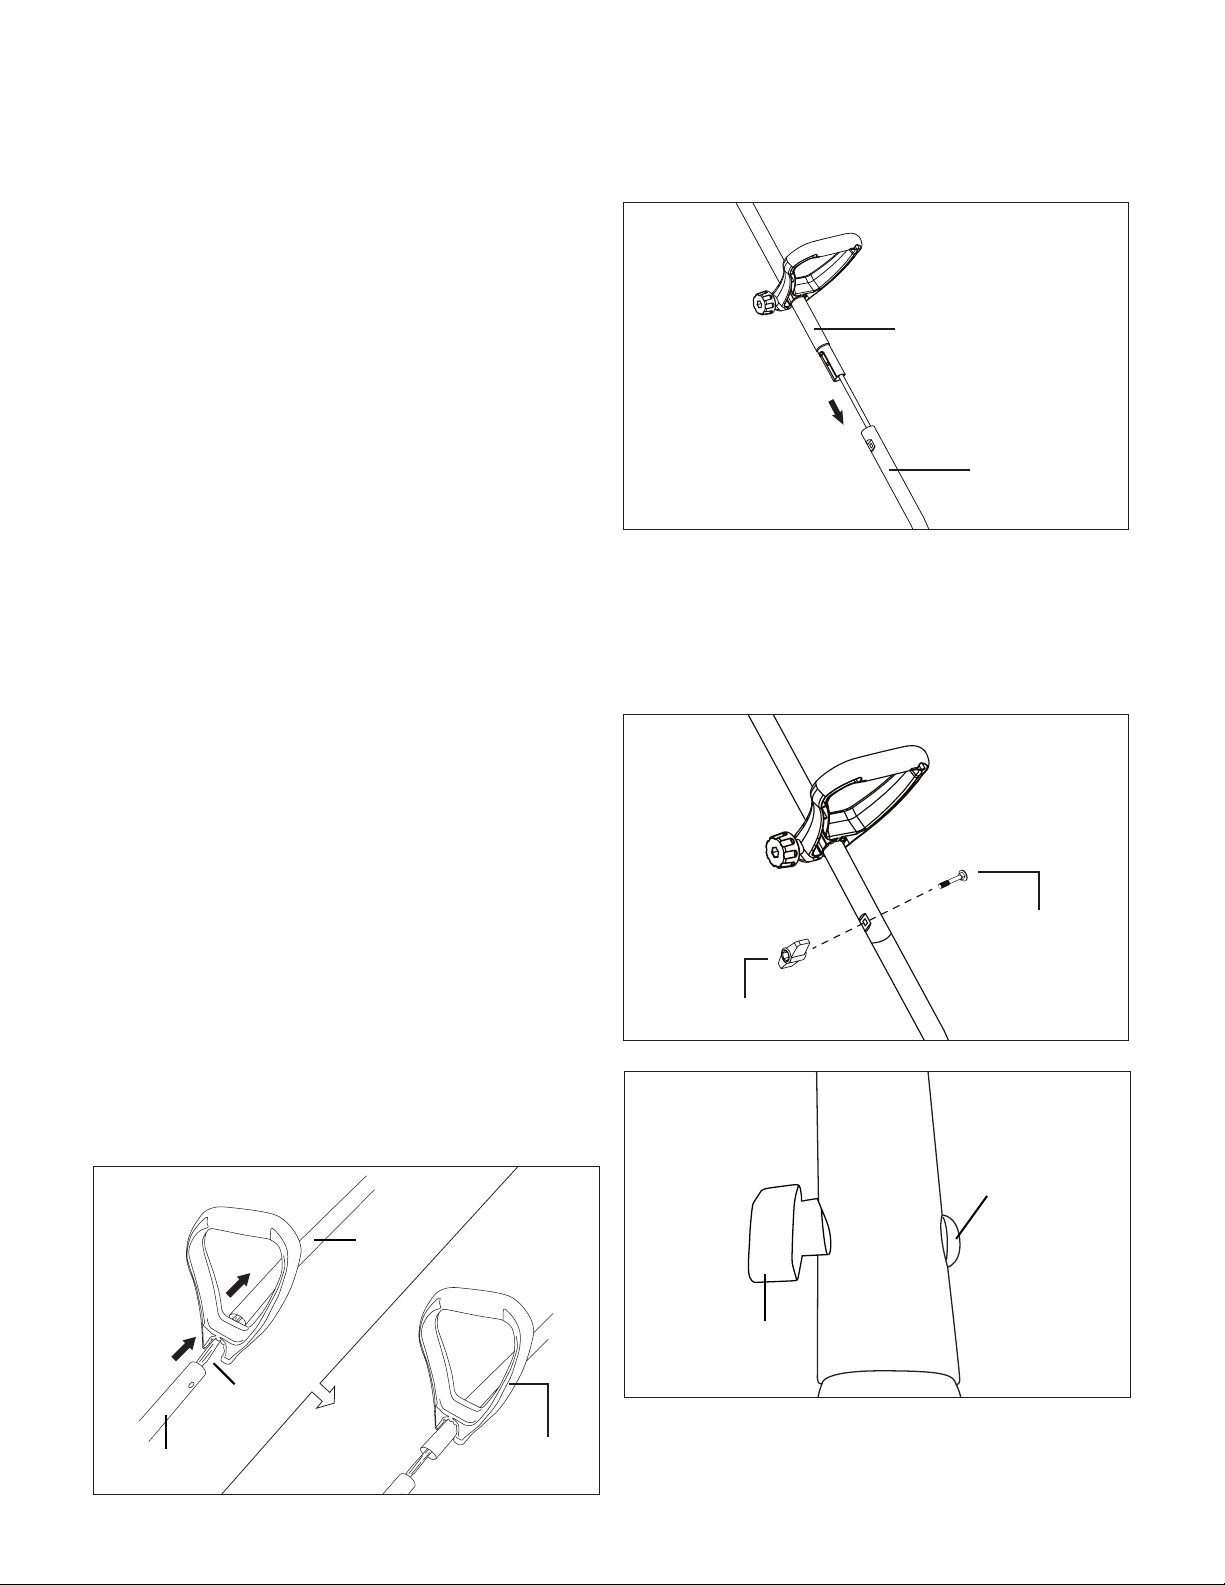
1. Before connecting the upper and lower tubes, make sure
the handle knob and bolt are removed from the adjustable
handle, then slide the adjustable handle onto the upper
tube at the middle section (Fig. 1). Reinstall the handle
knob and bolt onto the adjustable handle (Fig. 5).
NOTE: Do not try to install the adjustable handle after the
tubes are assembled.
2. Slide the upper tube inside the lower tube and align the
screw holes (Fig. 2).
3. Insert the joint-xing bolt through the aligned holes in the
upper and lower tubes and secure the other end with the
joint-xing knob (Figs. 3 & 4).
NOTE: You may have to carefully move the wiring inside
the tube to one side if it blocks the path of the bolt. (Use
the shipping wire to maneuver the electrical wiring; do not
use a sharp tool.)
Fig. 1
Upper
tube
Adjustable
handle
Middle
section
Lower tube
Fig. 2
Upper tube
Lower tube
Fig. 3
Joint-xingbolt
Joint-xingknob
Fig. 4
Joint-xingknob
Joint-xingbolt
Loading ...
Loading ...
Loading ...