Loading ...
Loading ...
Loading ...
12
5. Clean the cutting blades and the discharge area. Remove
wood sticks or objects that may clog the blades. Check
the blades for damage.
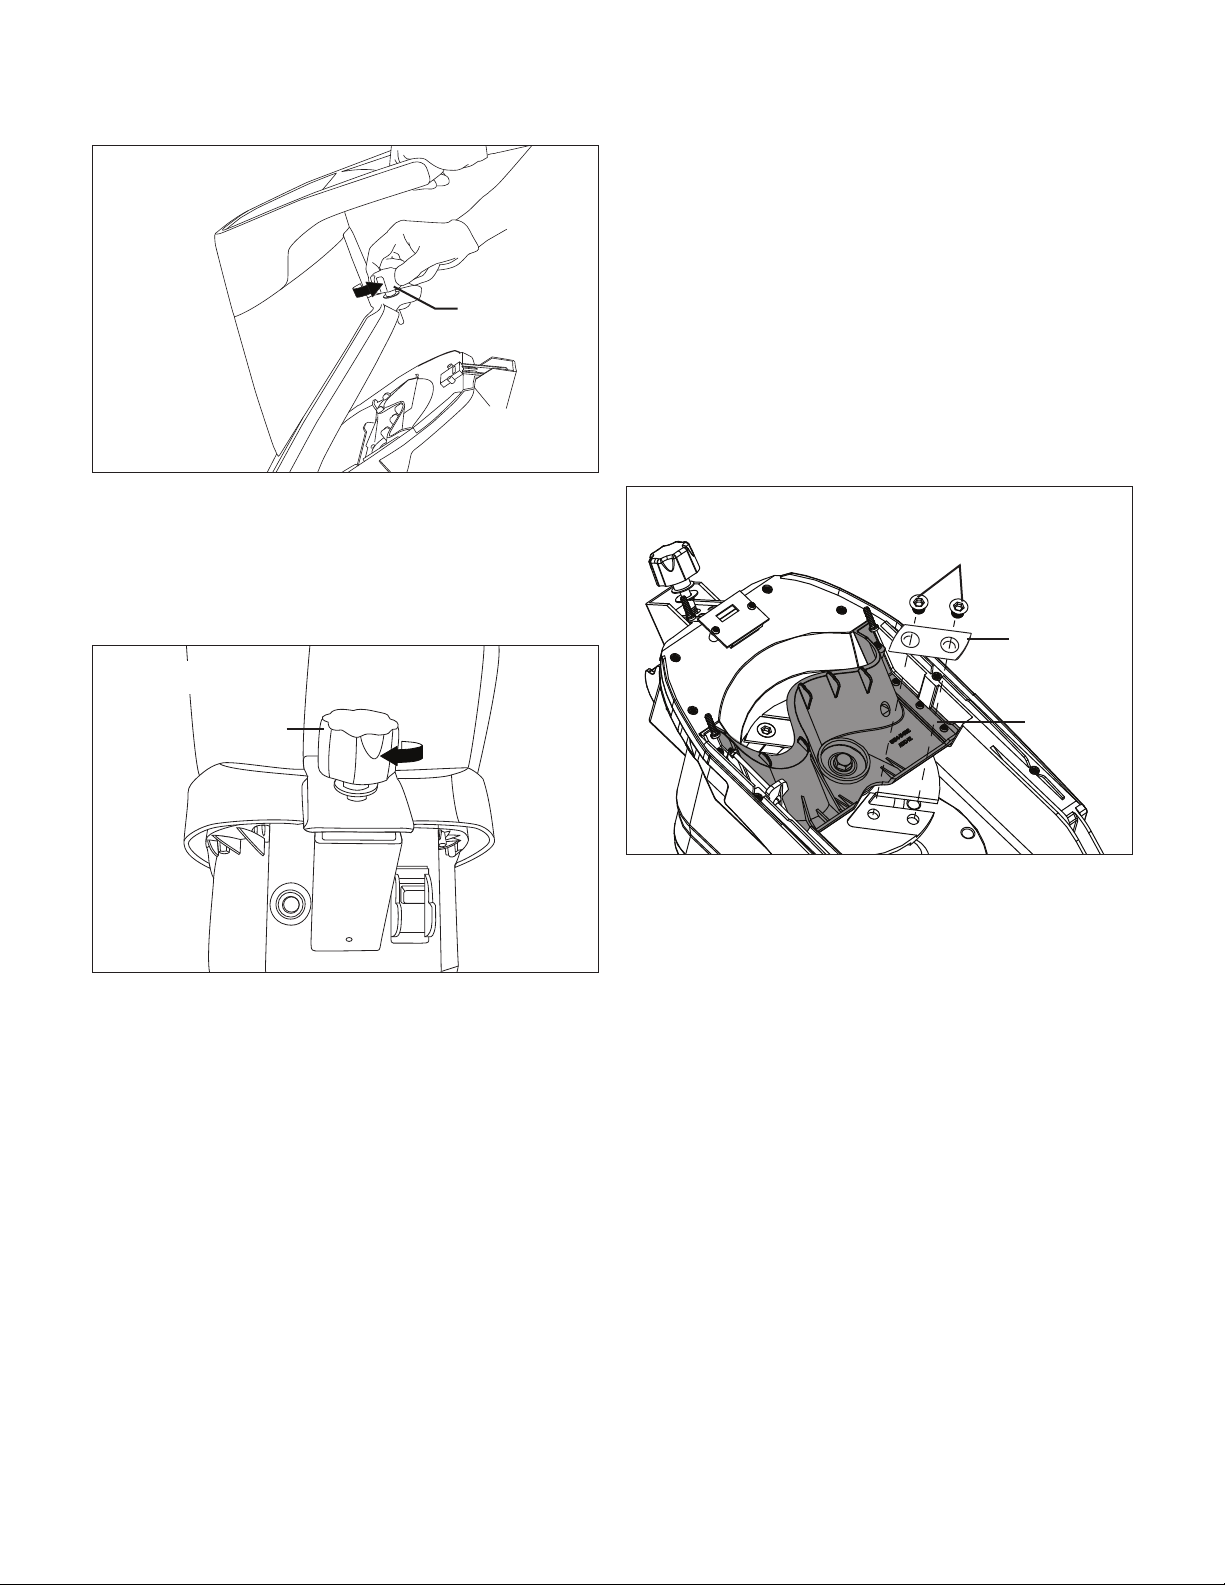
6. After cleaning the inside of the wood chipper + shredder,
replace the hopper and lock the hopper locking knob by
turning it clockwise (Fig. 18).
Cutting Blade Replacement
The wood chipper + shredder has two reversible blades that
are attached to a rotary plate with two bolts. Before any
maintenance or cleaning is done on the blades, always turn
the switch o and disconnect the plug from the outlet.
mWARNING! Be sure to wear protective gloves when
handling the blades.
IMPORTANT: Only use original replacement parts specied for
this wood chipper + shredder.
You can purchase a replacement blade (Model CJ601E-RBLD) and
other genuine replacement parts by ordering online at snowjoe.com
or, to order by phone, contact Snow Joe
®
+ Sun Joe
®
customer
service at 1-866-SNOWJOE (1-866-766-9563). The use of parts
that do not meet the original equipment specications may lead
to improper performance of the wood chipper + shredder, may
compromise operator safety, and will void the manufacturer's
warranty.
1. Stop the motor and disconnect the unit from the power
supply.
2. Unscrew the hopper locking knob counterclockwise to
open the hopper (Fig. 17).
3. Align the cutting head past the splash guard so that the
blade bolts can be removed; secure the cutting head
from rotating by inserting a rod (e.g. a screwdriver) or rag
between the cutting head and body. Unscrew the blade
bolts using the supplied hex key, and remove the blade
(Fig. 19).
4. Reverse the direction of the original blade, or install a new
blade. Align the slots on the blade with the grooves on the
cutting head. Tighten the bolts with the supplied hex key
(Fig. 19).
5. Repeat step 3 and 4 to replace the other blade.
6. Replace the hopper; tighten the hopper locking knob by
turning it clockwise.
Fig. 17
Hopper
locking knob
OFF
ON
REMOVE
TO LOCK
C
I
R
C
U
I
T
B
R
E
A
K
E
R
P
R
E
S
S
T
O
R
E
S
E
T
Fig. 18
Hopper
locking
knob
Fig. 19
Bolts
Blade
Splash
guard
Loading ...
Loading ...
Loading ...