User Manual
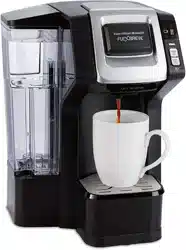
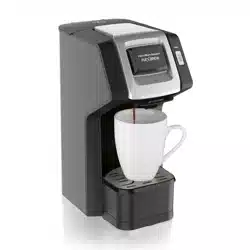
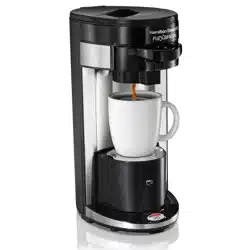
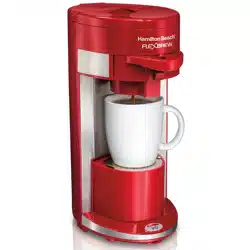
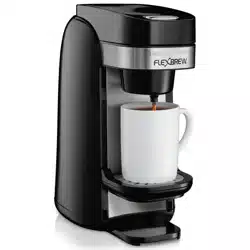
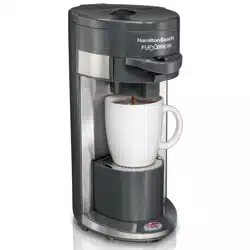
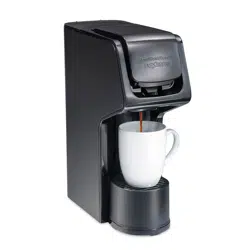
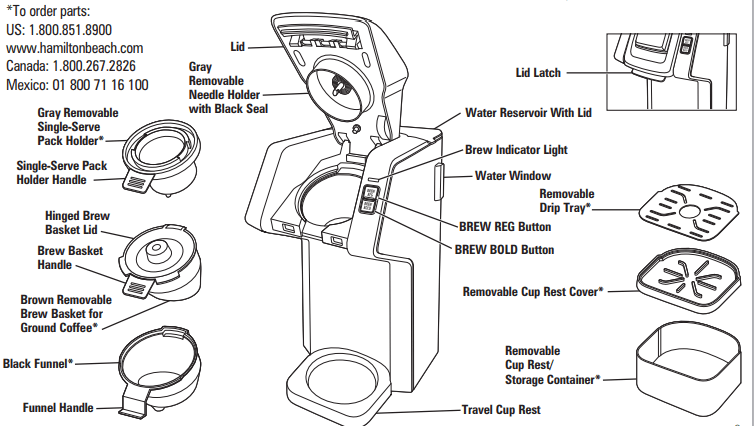
Parts and Features
BEFORE FIRST USE: Wash all removable parts in hot, soapy water. Rinse and dry. Brew one cycle with water and discard water.
How to Brew a Single-Serve Pack
WARNING Burn Hazard.
If overflow occurs, unplug and allow coffee maker to cool. To avoid hot coffee overflowing:
- Fill reservoir with cup or travel mug of water into which coffee will be brewed. • Fully insert cup or travel mug on drip tray.
- Do not lift lid during brewing process.
- If brew process is stopped early, water must be drained from unit. Place a large mug on drip tray/cup rest. Press BREW REG or BREW BOLD button. Failure to drain unit can cause next cup brewed to overflow.
CAUTION Cut Hazard.
Removable single-serve pack holder has a sharp needle. Piercing needle on underside of lid also is sharp. Use caution when handling.
NOTES:
- Use only cold water in reservoir. Do not use hot water.
- Do not reheat coffee in machine.
- Do not use creamer or nondairy creamer in reservoir.
- After brewing hot cocoa single-serve packs, brew a water-only cycle without a single-serve pack to avoid possibility of clogging piercing needle.
- Coffee maker brews all water added.
- Press BREW REG or BREW BOLD button again to STOP brewing midcycle. Remaining water must be removed. See warning statement above.
- If brew indicator light flashes three times, lid is not closed. Lower lid until it clicks to lock. Press BREW REG or BREW BOLD button.
- Do not brew coffee without removable needle holder locked into place.
1. Plug into outlet.
2. Lift lid latch until lid clicks into place.
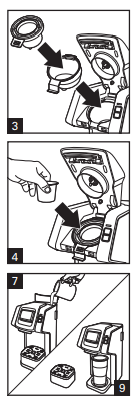
3. Insert funnel in opening. Place gray removable single-serve pack holder in funnel, aligning handle with funnel handle.
4. Place a pack into single-serve pack holder. Do not remove foil.
5. Close lid and snap in place to pierce single-serve pack.
6. Lift water reservoir lid.
7. Fill cup or travel mug into which coffee will be brewed and add water to water reservoir. 10 oz. (296 ml) of water is MAX amount for single-serve packs.
8. Close lid.
9. Use cup rest for a cup or mug and remove cup rest for a travel mug.
10. Press BREW REG or BREW BOLD button to start brewing. The brew indicator light will light up to show that coffee maker is brewing. The coffee maker will shut off automatically when brewing is complete.
11. Press BREW REG or BREW BOLD button to turn off. Unplug.
12. Funnel and single-serve pack holder should be rinsed after every use.
How to Brew Single-Serve Ground Coffee
CAUTION Cut Hazard.
Piercing needle on underside of lid is sharp. Use caution when handling.
NOTES:
- Use only cold water in reservoir. Do not use hot water.
- Do not reheat coffee in machine.
- Do not use creamer or nondairy creamer in reservoir.
- Do not use hot cocoa powder or mix in brew basket.
- Coffee maker brews all water added.
- If finer ground coffee is used, coffee will continue to drip after light has gone off.
- Press BREW REG or BREW BOLD button again to STOP brewing midcycle.
- Remaining water must be removed. See warning statement above.
- If brew indicator light flashes three times, lid is not closed. Lower lid until it clicks to lock. Press BREW REG or BREW BOLD button.
- Do not brew coffee without removable brew basket with lid closed in place.
- If you have sediment from coffee, add a #1 paper cone coffee filter to brown removable brew basket.
- Do not brew coffee without removable needle holder locked into place.
- Plug into outlet.
- Lift lid latch until lid clicks into place.
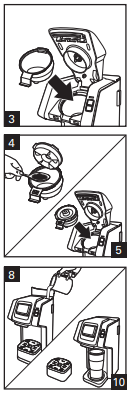
- Insert funnel in opening. Open brew basket lid; then place brown removable brew basket on counter top.
- Add ground coffee to brown removable brew basket (3 tablespoons [44 ml]) maximum.
- Close brew basket lid. Place brew basket in funnel, aligning handle with funnel handle.
- Close lid and snap in place to latch lid closed.
- Lift water reservoir lid.
- Fill cup or travel mug into which the coffee will be brewed and add water to the water reservoir.
- Close water reservoir lid.
- Use cup rest for a cup/mug OR remove cup rest for a travel mug.
- Press BREW REG or BREW BOLD button to start brewing. The brew indicator light will light up to show that coffee maker is brewing. The coffee maker will shut off automatically when brewing is complete.
- Press BREW REG or BREW BOLD button to turn off. Unplug.
- Funnel and brew basket should be rinsed after every use.
Care and Cleaning
General Cleaning
All coffee makers should be cleaned at least once a month (once a week for areas with hard water).
1. Unplug and allow to cool.
2. Hand-wash all removable parts in hot, soapy water. Rinse and dry or wash in TOP RACK only of dishwasher. DO NOT use “SANI” setting when washing in dishwasher. “SANI” cycle temperatures could damage your product.
3. Wipe outside of coffee maker with a soft damp cloth.
Routine Cleaning
1. Plug into outlet.
2. Pour 3/4 cup (177 ml) of plain white vinegar and 3/4 cup (177 ml) of cold water into reservoir.
3. Place a 14-oz. (414-ml) or larger cup or travel mug underneath to catch water/vinegar solution. Press BREW REG or BREW BOLD button once. When solution starts dispensing, press BREW REG or BREW BOLD button again to stop brewing and allow vinegar to clean. After 30 minutes, press BREW REG or BREW BOLD button and allow it to finish brew cycle. When brew cycle is finished, empty cup and rinse. Run 2 to 3 cycles of cold tap water. The unit is cleaned and ready to brew coffee.
4. Unplug.
Clogged Needle
1. Unplug and allow to cool.
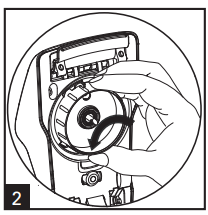
2. Remove gray removable needle holder in lid by turning arrow from locked icon (  ) to the unlocked icon (
  ).
).
3. Bend a small paper clip. Insert tip of paper clip through hole of the piercing needle and up into shaft of piercing needle to ensure grounds have been removed.
4. To replace gray removable needle holder, insert tab between lock icon (  ) and unlock icon (
  ) and turn to right to lock.
Troubleshooting
Coffee maker will not brew/coffee not dispensing.
- The piercing needle may be clogged. Always remove gray removable needle holder. Clean piercing needle in lid of coffee maker as shown on page 6.
- Mineral deposits have formed. Clean coffee maker following directions in the Care and Cleaning section.
- Too little water. Need 15 oz. (444 ml) or more.
Coffee tastes bad.
- Too much water was added or too much or too little ground coffee was added. Change amount of water to coffee grounds or use less water with coffee packs.
- Poor coffee quality and freshness.
- Poor water quality (use filtered or bottled water).
Coffee sediment in cup.
- Rinse funnel after each use.
- Try a more coarsely ground coffee or add a #1 paper cone coffee filter to brew basket. Make sure hinged lid is closed on removable brew basket.
Coffee overflows from brew basket.
- Use removable brew basket with lid for ground coffee.
- Use a lesser amount of ground coffee. 3 tablespoons (44 ml) is maximum amount of grounds to brew.
- When using whole bean coffee, a standard automatic drip coffee grind will yield best results. Be careful not to overgrind, since very finely ground coffee can cause overflow.
- Black seal around needle in removable needle holder is missing. Carefully place seal around needle and push until in place.
- Rinse funnel after each use.
Coffee overflows from mug or travel mug.
- To prevent coffee overflowing from a mug/travel mug, use same mug/travel mug to brew into that was used to fill water reservoir. Do not add more than 14 ounces (414 ml) of water. There may also be additional water in system that is causing overflow. Remove brew basket or single-serve pack holder. Press and hold BREW REG or BREW BOLD button to remove any remaining water.
Coffee single-serve pack bursts.
- There is variability in single-serve pack manufacturing process which causes some types of single-serve packs to be weaker at seams so foil seal fails. Try a different brand.
Coffee overflows from mug or travel mug.
- To prevent coffee overflowing from a mug/travel mug, choose the correct cup size.
 illuminated.
- Add water to water reservoir.
All  flashing.
- Brew process was interrupted and water needs to be purged from coffee maker. Follow “How to Purge” on page 6 to allow cup size to be selected.
Brew indicator light flashes:
- 2 times: Coffee maker needs to be cleaned. See page 6.
- 3 times: Coffee maker lid is not closed properly. Push lid down to lock into place.
- 7 times: Coffee maker needs to be cleaned. See page 6.
- 8 times: Needle is clogged. Always remove gray removable needle holder and follow “Clogged Needle” on page 6.
Water remaining below water reservoir.
- This is normal if the reservoir has been removed and water is remaining.
Water on countertop.
- Water reservoir is not placed properly onto coffee maker. Remove reservoir and carefully slide the reservoir down into place. There should be very little space between coffee maker and water reservoir.