Loading ...
Loading ...
Loading ...
INSTALLATION
If you intend to do the installation yourself,
we recommend that you possess some skill
in the proper use of hand and power tools.
You should have a thorough understanding
of local building and fire codes and a famil-
iarity with the area behind the wall or ceiling
into which you plan to install your speakers.
Install speaker wires before installing
speakers. Wire meeting appropriate
building and fire codes must be used. Use
at least 18 gauge wire or heavier for the
utmost in sound quality. Wiring is best
performed by an experienced professional.
If you are in doubt that you possess the
necessary skills or tools, consult your Polk
Audio dealer, or a professional installer.
You Will Need:
• Pencil for marking the location
of installation.
• Keyhole saw, utility knife or material-
appropriate cutting tool for drywall
or other wall material.
• Level.
• Screwdriver, preferably powered,
with Phillips head bit.
• Power drill with appropriate bit
(optional, for starting wall cut).
Follow These Easy Steps:
1. Prior to installation, hold the speaker
in your chosen location to make sure
it safely clears obstacles such as studs,
corners, beams, lighting fixtures and
door/window frames. Your cutout must
be at least 1" (25mm) from adjoining walls
or ceiling, internal studs or plumbing.
2. Using the template, trace the installation
location with a pencil. Use a level to
make certain the template is straight
and plumb. This is the exact cutout
size (figures 10a & 10b).
3. Carefully cut a hole with the appropriate
cutting tool for your wall or ceiling
material. Start the hole by drilling on
the inside of the tracing (with the drill
bit touching the line). Use this hole to
insert the saw or knife and begin cutting
(figure 11).
4. Once you have cut the hole, fish your
previously positioned wiring out of the
hole and connect the speaker. Follow
the hookup directions included with your
receiver. Strip 3/8" (9.5 mm) of insulation
from each of the two conductors of the
wire to expose the bare metal and twist
each of the conductors into a single
unfrayed strand (so you have two
unfrayed strands). Connect the wire from
the red terminal (+) of your amplifier or
receiver to the red terminal (+) on your
speaker and the wire from the black
terminal (–) of your amplifier or receiver
to the black terminal (–) on your speaker.
Most wire has some indicator (such as
color-coding, ribbing or writing) on one
of the two conductors to help you
maintain consistency (figure 12).
5. To install the speaker, first carefully
remove the grille using a straightened
paperclip or other pointed metal tool.
Insert the point into one of the grille
perforations near a corner and lift
the grille free. Never use a knife or
screwdriver to pry between the grille
and the speaker frame. This will
damage your speaker.
6. Loosen the rotating wall clamps by
unscrewing them. Make sure that the
rotating wall clamps are flipped inward
so that your speaker fits into your cutout
without nicking your wall. Then place
the speaker carefully into the cutout
(figure 13).
+
_
+
_
+
_
+
_
LEFT RIGHT
AMP
6 Polk Audio Customer Service 800-377-7655 (Outside USA & Canada: 410-358-3600) Customer Service Hours of Operation: Monday-Friday, 9AM-6PM EST [email protected] 7
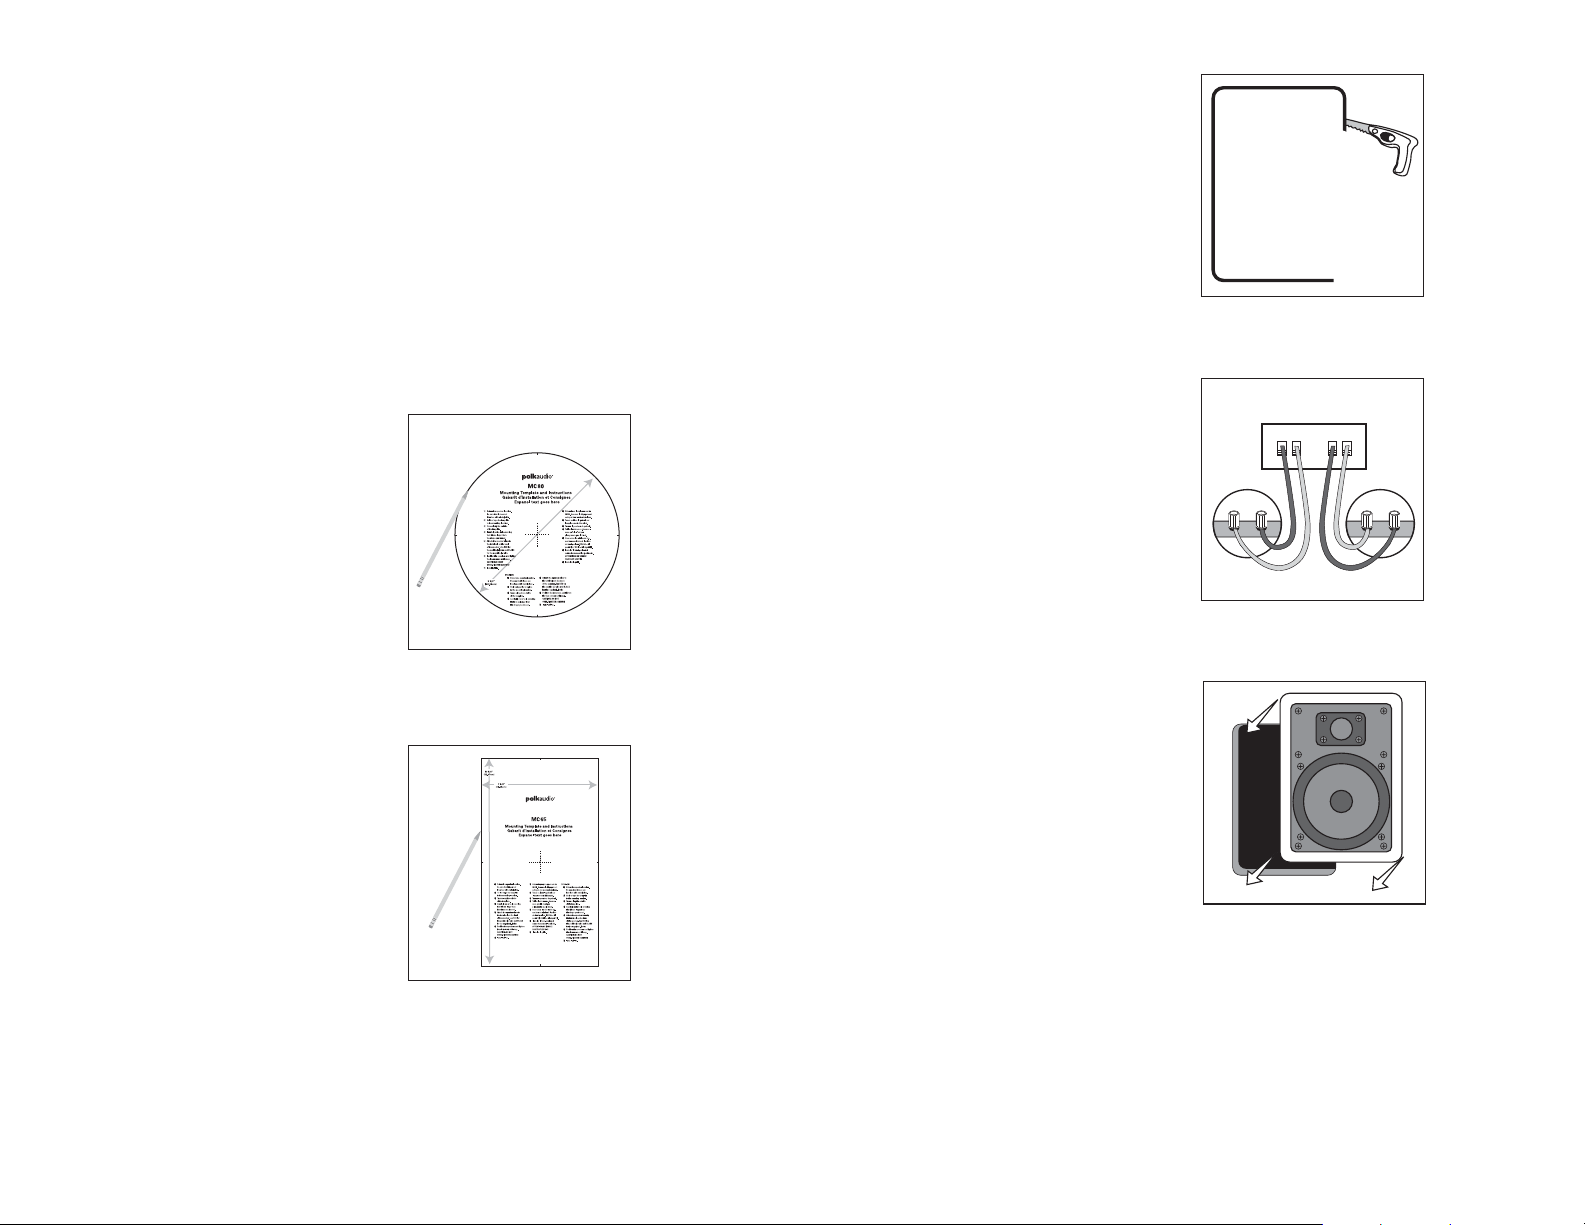
Figure 10a—Round Template:
Trace within the pop-out area.
Figure 10b—Rectangular Template:
Trace around the template.
Figure 11—Cut the hole with the appropriate tool.
Figure 12—Hook up the speaker wires.
Figure 13—Place the speaker carefully
into the cutout.
Loading ...
Loading ...
Loading ...