
Loading ...
Loading ...
Loading ...
11
5. Make sure that the feeding funnel and the ejection slot are
clean and clear of all waste material.
6. Make sure that all nuts, bolts and screws are tight and
secure.
7. Always have any damaged or worn parts repaired, or
replaced by qualied personnel.
Adjusting the Counterplate
During the operation of the unit, the distance between
the blade and the counterplate will become bigger, which
will cause incomplete shredding. To obtain an optimum
shredding result and prevent damage to the blade, the
counterplate must be adjusted at regular intervals. To adjust
the counterplate, follow the instruction below.
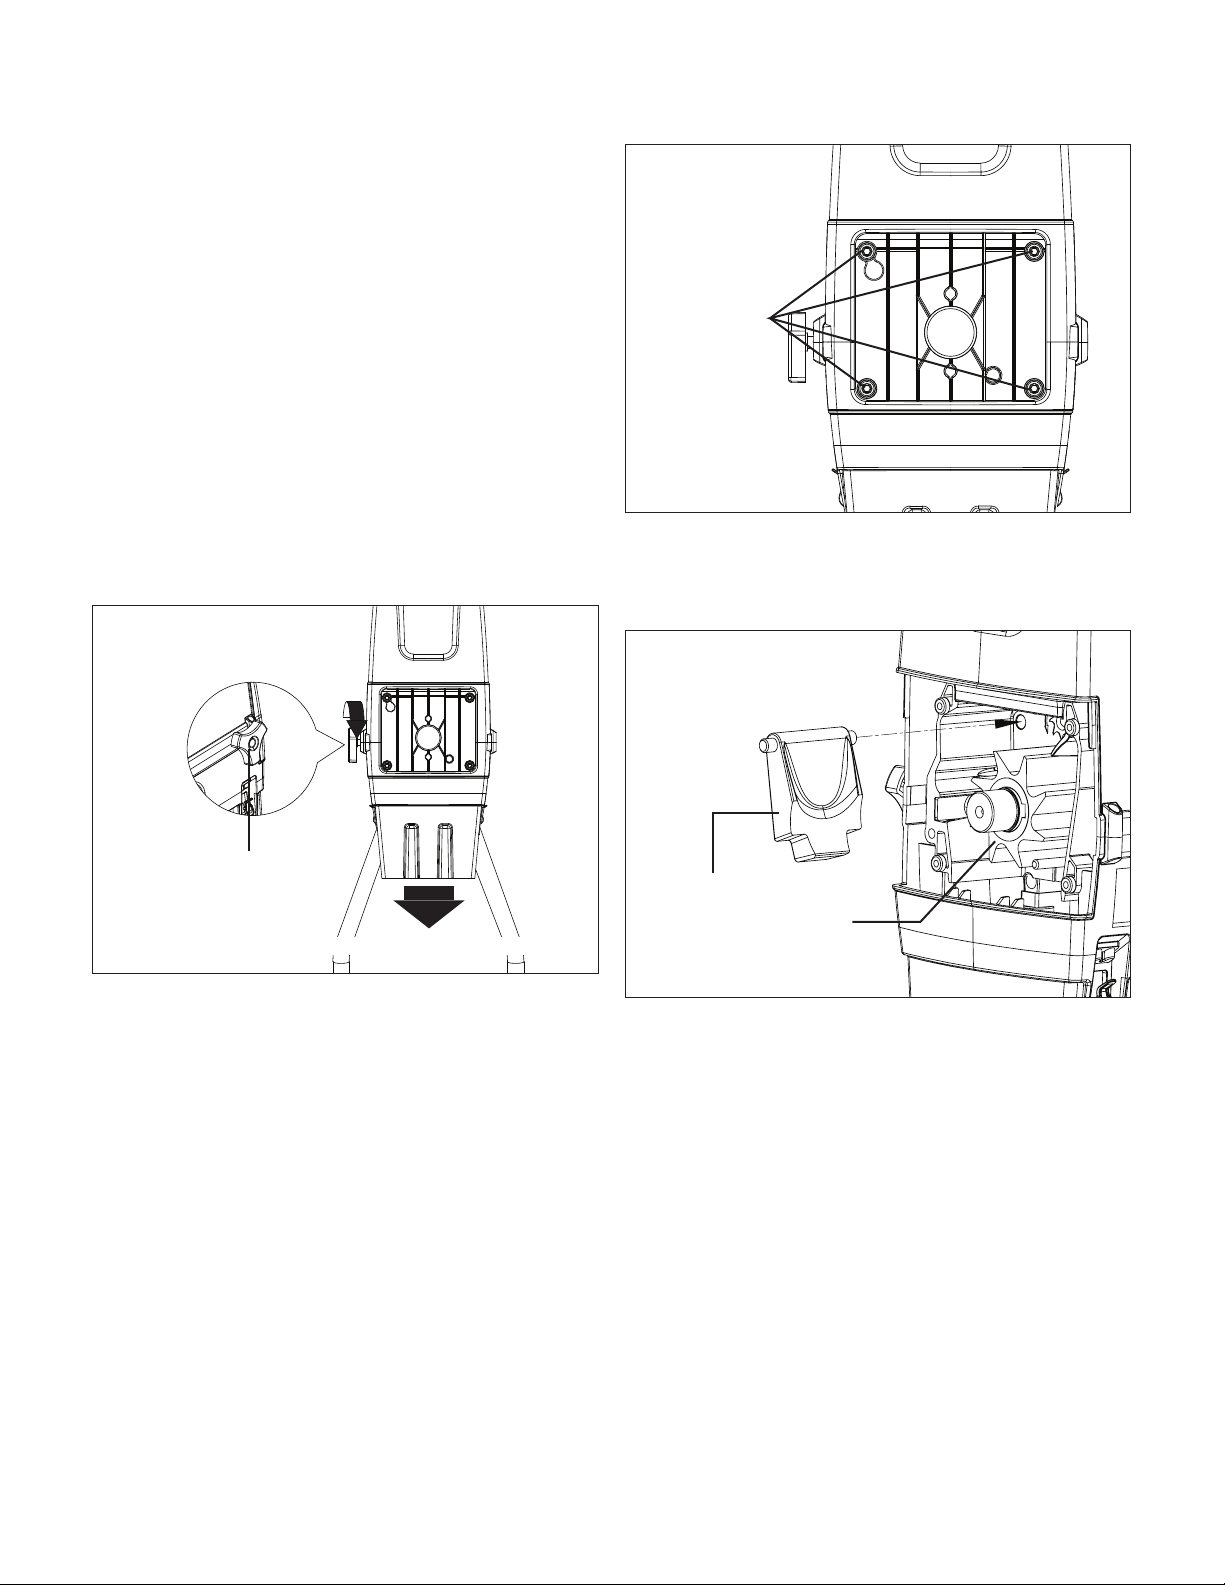
1. Stop and unplug the unit.
2. Turn the counterplate adjusting knob clockwise until a
slight friction noise can be heard and some ne aluminum
shavings fall from the ejection slot (Fig. 11).
3. Plug on the unit and resume working.
Counterplate Replacement
mWARNING! Always wear gloves when cleaning and
maintaining the inside of the unit.
1. Stop and unplug the unit.
2. Open the hopper cover by loosening the 4 screws that
secure it (Fig. 12).
3. The counterplate is located on the left side of the
blade, inserted in a small hole. Simply take out the old
counterplate and replace a new one in the original position
(Fig. 13).
4. Replace the hopper cover and secure with the original 4
screws. The electric wood chipper + shredder is ready for
use.
Storage
Follow the steps below to prepare the electric wood chipper +
shredder for storage:
1. Disconnect the power supply to the wood chipper +
shredder.
2. Clean the wood chipper + shredder with a damp cloth or
hand brush.
3. Inspect the wood chipper + shredder carefully for worn,
loose, or damaged parts. Check connections and screws
and tighten if necessary. Pay special attention to the
counterplate and replace if it shows signs of wear. Refer
to the Care + Maintenance section.
Fig. 11
Fine aluminum chips drop
Counterplate adjusting
knob
Fig. 12
Loosen the
4 screws
Fig. 13
Counterplate
Cutting blade
Loading ...
Loading ...
Loading ...