Loading ...
Loading ...
Loading ...

6
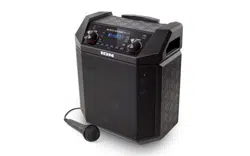
8. Display: Displays the current radio station, battery status, and Bluetooth status.
• Charging Indicator:
• When the power cable is connected, movement of the battery segments shows the battery is
charging. When fully charged, all battery segments will be lit without blinking.
• When the power cable is disconnected, the battery segment shows the level of the battery.
• When the battery level is low, the bottom battery segment will blink.
• If a front panel button is not pressed within 60 seconds, the battery level indicator will turn off (to
save energy). The battery level indicator will reappear when any button is pressed. Also, when the
battery gets to the lowest battery icon segment, the battery level indicator will turn back on.
• Lightning Bolt Icon: The lightning bolt icon will illuminate when the power cable is connected to wall
power.
• Bluetooth Icon: The Bluetooth icon will be lit solid when a device is paired to Block Rocker Plus.
• Power Icon: The power icon will be lit when Block Rocker Plus is powered on. The power icon will not be
lit when Block Rocker Plus is powered off.
• Bass Boost Icon: The Bass Boost icon will be on when the Bass Boost function is activated. The icon
will be off when the function is deactivated.
9. Master Volume Control: This adjusts the speaker’s main mix volume, which includes the Microphone Input,
Auxiliary Input, Radio, and the audio of a paired Bluetooth device.
10. Microphone Input with Volume Control (1/4”): This mono input accepts a 1/4” (6.35 mm) input such as a
microphone, guitar, or other musical instrument.
11. Auxiliary Input: This stereo 1/8” (3.5 mm) input can be used to connect a CD player, MP3 player, or other audio
source.
12. USB Charging Port: Connect your device’s charge cable here to charge it. USB charging only functions when
the unit’s power is turned on.
Top Panel
1. NFC: Tap your NFC (near-field communication) supported and enabled device here to pair
your phone by gently bumping on the ‘N’ logo.
Rear Panel
1. Power Cable Input: Insert the included power cable here to charge the unit.
Note that the Block Rocker Plus can be used with the power cable while it
simultaneously charges the battery.
2. Fuse Cover: If the unit’s fuse is broken, use a screwdriver or other tool to lift
this tab to replace the fuse. Replace it with a fuse of the same rating. Using
a fuse with an incorrect rating can damage the unit and/or fuse.
1
1
2
Loading ...
Loading ...
Loading ...
