Loading ...
Loading ...
Loading ...

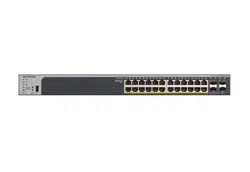
24-Port Gigabit (Hi-Power) PoE+ Ethernet Smart Managed Pro Switch with 2 SFP Ports
Configure Switching User Manual184
10. In the Host Timeout field, specify the time that the switch must wait for a report for a
particular group on a particular interface before it deletes that interface from the group.
Enter a value between 1 and 3600 seconds. The default is 260 seconds.
11. In the Max
Response Time field, specify the time that the switch must wait after sending a
query on an interface because it did not receive a report for a particular group on that
interface.
Enter a value greater or equal to 1 and less than the group membership interval in
seconds. The default is 10 seconds.
The configured value must be less than the group
membership interval.
12. In the MRouter
Timeout field, specify the time that the switch must wait to receive a query
on an interface before removing it from the list of interfaces with multicast routers attached.
Enter a value between 0 and 3600 seconds. The default is 0 seconds. A value of zero
indicates an infinite time-out, that is, no expiration.
13. From the Fast
Leave Mode menu, select whether fast leave mode is enabled.
The option are Enable and Disable. The default is Disable.
14. Click the Apply
button.
Your settings are saved.
View, search, or clear the IGMP snooping table
You can view and clear all entries in the Multicast Forwarding Database that were created for
IGMP snooping.
To view, search, or clear the IGMP snooping table:
1. Connect your
computer to the same network as the switch.
You can use a WiFi or wired connection to connect your computer to the network, or
connect directly to a switch that is off-network using an Ether
net cable.
2. Launch a web browser.
3. In the address field of your web browser, enter the IP address of the switch.
If you do not know the IP address of the switch, see
Access the switch on-network and
connected to the Internet on page 18 or Access the switch off-network on page 27.
The Local Device Login page displays.
If you did not yet register the switch
with your NETGEAR account, the Register to unlock
all features page displays. For more information, see
Register the switch on page 31.
4. Enter one of the following passwords:
• After initial login, enter your local device password.
By default, the local device password is
password.
Y
ou must change this password
at initial login.
Loading ...
Loading ...
Loading ...
