1
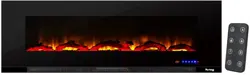
WALL MOUNT ELECTRIC FIREPLACE
EF-BLT13-36 EF-BLT13-42
EF-BLT13-50 EF-BLT13-60
OWNERS MANUAL
NO VENTILATION REQUIRED
PRODUCES SAFE AND EFFICIENT HEAT
PLEASE READ THIS ENTIRE MANUAL BEFORE USING UNIT
120-VOLT / 1300-WATT
SAVE THIS MANUAL FOR FUTURE USE

2
CONSUMER SARETY INSTRUCTIONS
Read this manual before installing and operating this appliance. Failure to follow these
instructions may result in electrical shock, property damage, personal injury, and will
void the warranty. Do not store or use gasoline, or any other flammable liquids and
vapors, in the vicinity of this appliance. Keep this manual for future reference.
IMPORTANT SAFETY INSTRUCTIONS
To reduce the risk of fire, electrical shock, or personal injury, the following must be read
before using or plugging this electric fireplace into an electrical outlet:
1. Read all the instructions before installation and use.
2. This heater is hot when in use. To avoid burns, do not let bare skin touch hot
surfaces. Keep combustible materials such as furniture, pillows, bedding, papers,
clothes, and curtains at least 3 feet away from the front of the heater, and keep
them away from the sides and rear of heater as well.
3. Extreme caution is necessary when any heater is used by or near children, and
whenever the heater is left operating and unattended.
4. Do not operate any heater with a damaged cord or plus, or after the heater has
malfunctioned or has been dropped or damaged in any manner. Return heater to
an authorized service facility for repair.
5. Do not use outdoors.
6. This heater is not intended for use in bathrooms, laundry areas, and other similar
indoor locations where water is housed or used. Never located heaters where it
may fall into a bathtub or other water source.
7. Do not run cord under carpeting. Do not cover cord with throw rugs, runners, or
any flooring textile. Keep the cord away from traffic areas where it can be tripped
over.
8. To disconnect heater, turn control to OFF, then remove the plug from the outlet.
Always unplug the heater when not in use.
9. Connect plug to a properly grounded outlet only.
10. Do not insert or allow foreign objects to enter any of the ventilation or exhaust
openings as this may cause an electric shock, fire, or damage to the heater.
11. To prevent a possible fire, do not block air intakes or exhaust in any manner.
12. Do not use on soft surfaces, such as a bed, where openings may become
blocked.
3
13. This heater has hot and potentially sparking parts inside. Do not use the heater in
any areas where gasoline, paint, or any other flammable materials are used or
stored.
14. Avoid the use of an extension cord as it may overheat and cause a fire.
15. Always disconnect power before performing any cleaning or maintenance.
16. When transporting or storing the heater, keep in a dry location that is free from
excessive vibration in order to avoid damage.
17. Use this heater only as described in the manual. Any other use that is not
recommended by the manufacturer may cause fire, electrical shock, and injury.
18. The flame effect is powered by a motor. It is normal for this motor to at least
make some noise as it slowly rotates to create the beautiful flame effect. Some
rooms with more or less furnishing may result in varying noise amplification.
19. Every effort has been made to ensure packing materials are kept outside of the
plastic bag, which covers your heater in the box. There is a possibility that some
packing may have lodged into the heater vent. If you notice this upon close
inspection, please remove it. When turning on your heater for the first time it is
normal for the heater to emit a little “new heater” smell, which will quickly
dissipate.
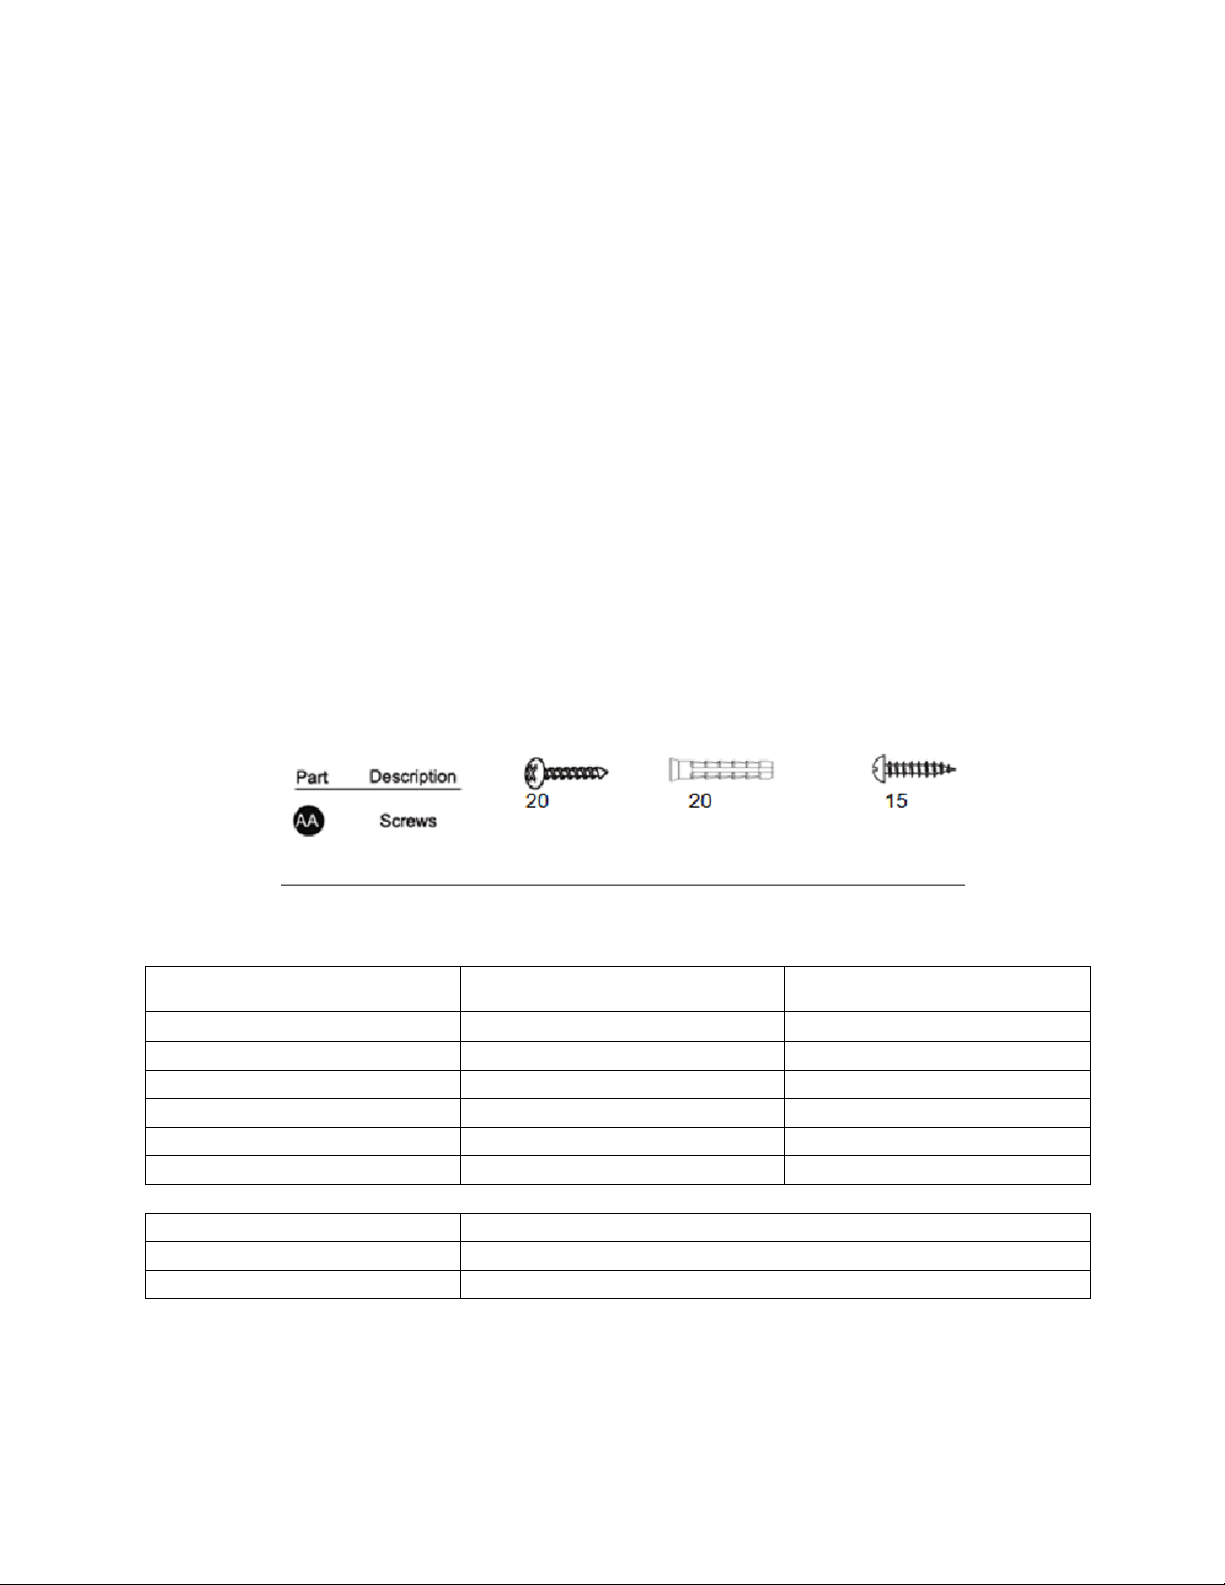
HARDWARE CONTENTS
PRODUCT SPECIFICATIONS
Length
Height
Depth
36.0”
19.8”
4.7”
42.0”
19.8”
4.7”
50.0”
19.8”
4.7”
60.0”
19.8”
4.7”
72.0”
19.8”
4.7”
78.0”
19.8”
4.7”
Description
Wall Mount Electric Fireplace
Voltage
120V AC, 60Hz
Watts
Max 1300W
4
INSTALLATION OVERVIEW
Site Selection - Your new electric fireplace may be wall mounted, installed into existing
framing, or built into a wall. Review and consider all of the following conditions for
installation:
- Electric fireplace dimensions
- Unit requires a minimum of two wall studs in order to ensure a secure installation.
There are two possible installation methods: built-in and wall-mounted.
Note: A 15-Amp, 12-Volt circuit is required. A dedicated circuit is preferred, but not
essential.
UNPACKIING AND TESTING FIREPLACE
Carefully remove the unit from the box. Prior to installing the unit, test to make sure the
unit operates properly. To do this, plug the unit’s power supply cord into a 120-volt
grounded outlet.
BEFORE YOU INSTALL
1. Select a location that is not exposed to moisture or dust, and is away from high
traffic locations, and away from objects that may catch fire or potentially block
electric fireplace’s openings such as drapes, pillow, furniture, textiles, etc.
2. For the best effect, install the fireplace out of direct sunlight and away from direct
overhead lighting.
3. As much as possible, select a location near an existing electrical outlet. Do not
use an extension cord with this appliance.
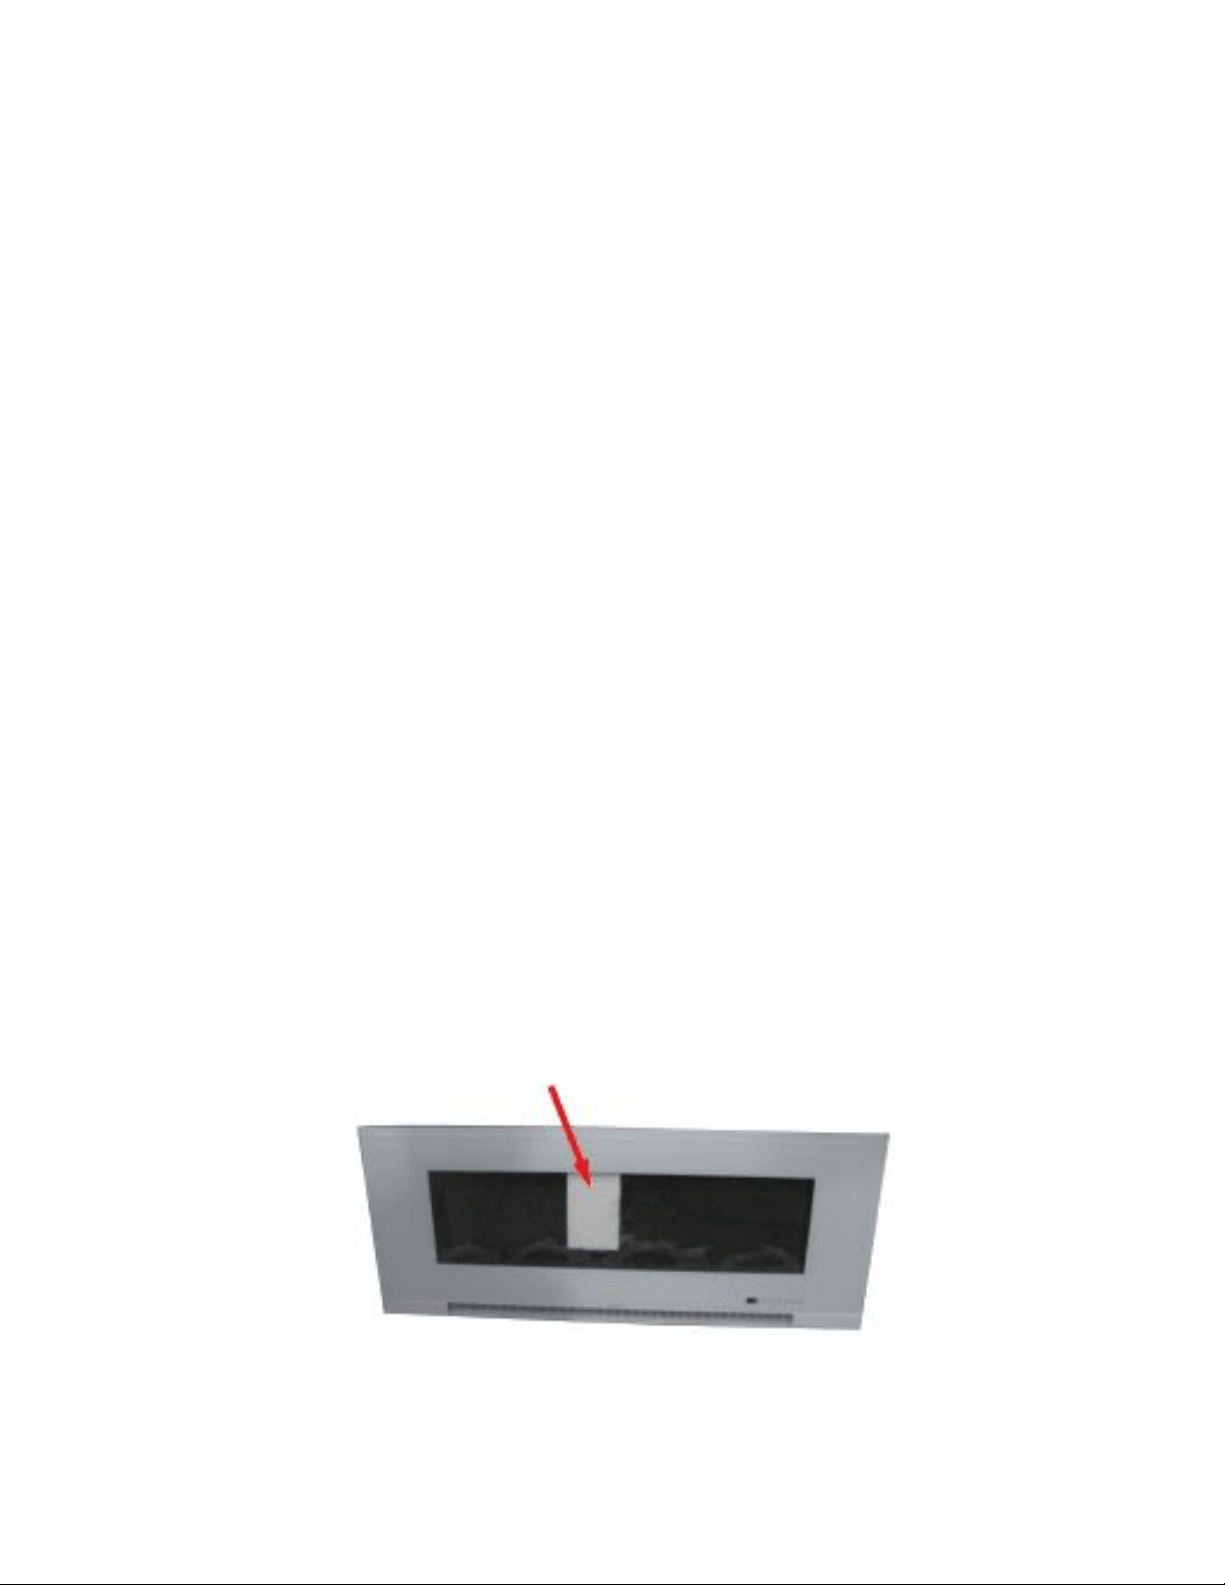
4. Remove electric fireplace, foam glass panel, pebbles, and all hardware from box
and remove all packaging-related materials prior to installation. NOTE: There is
foam inside the unit that must be removed before installation occurs.

5
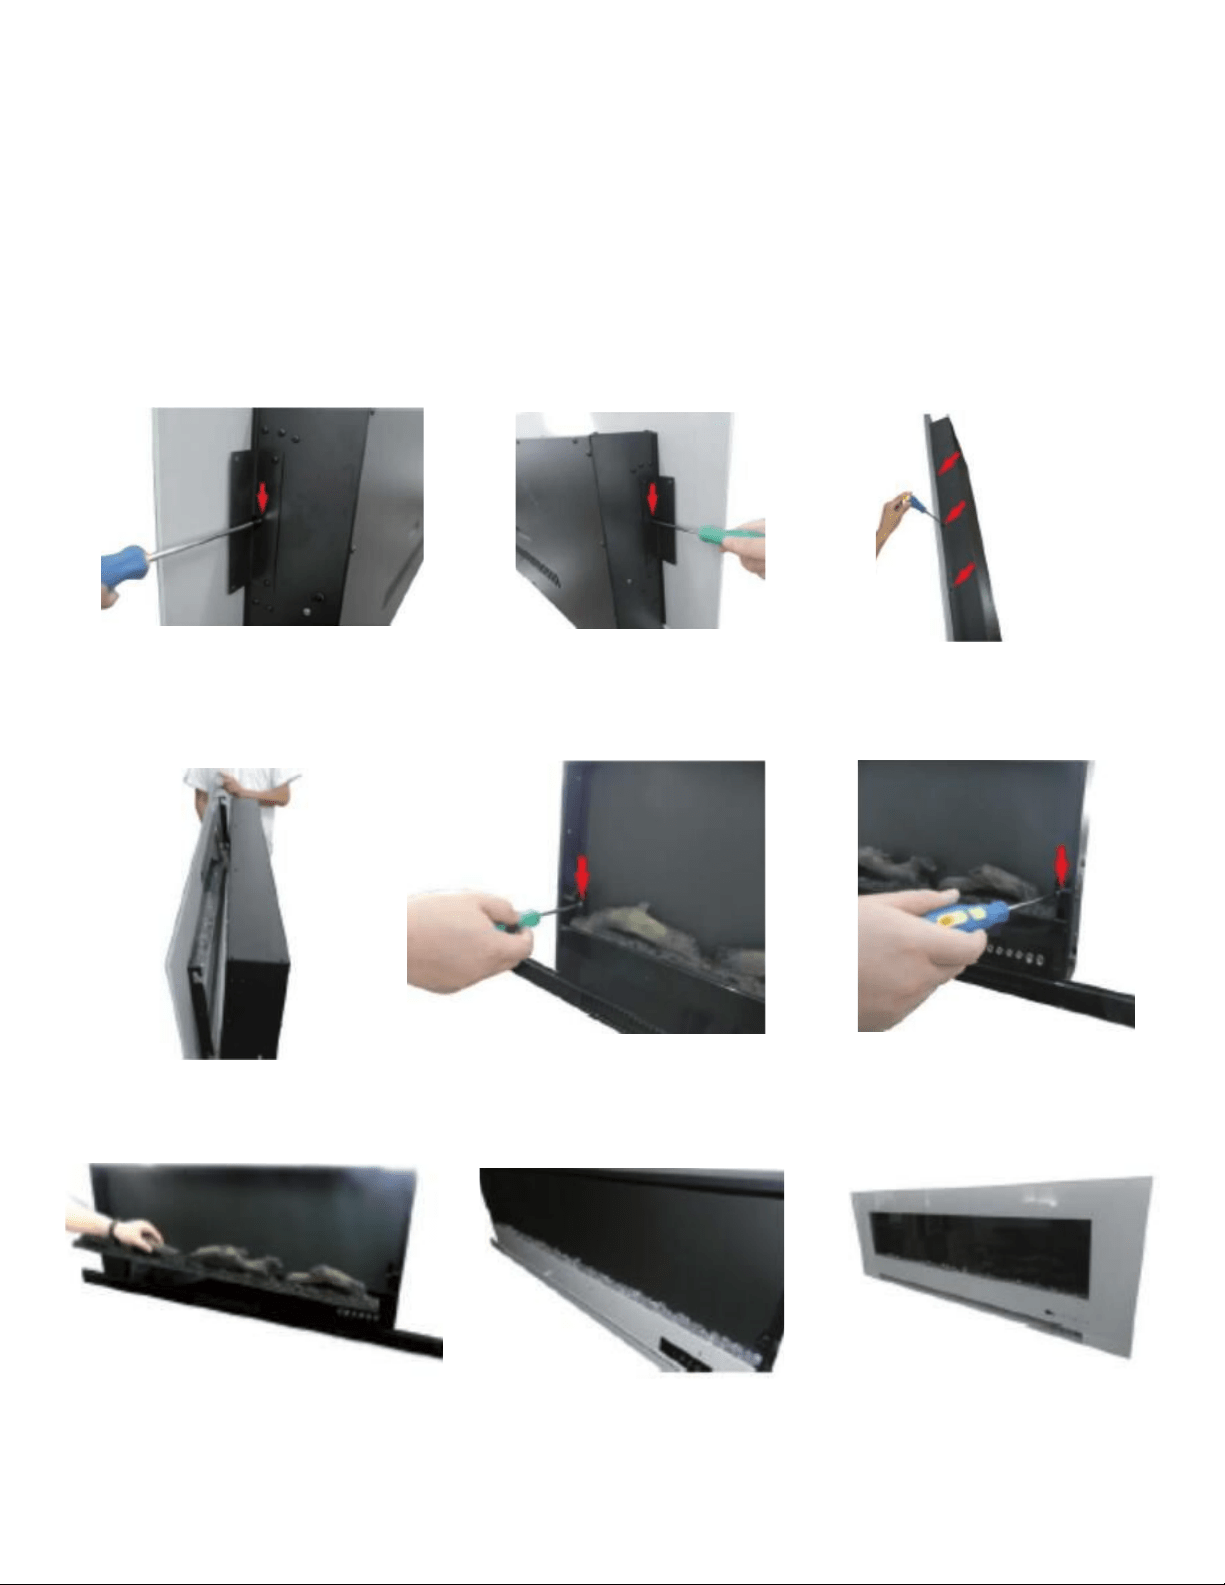
• Remove the outer glass around the bracket and mounting screws (red arrows)
(1) (2) (3)
• Remove the outer glass from the fireplace (4)
• Take out the foam
• Install the outer glass to the fireplace as seen below by lifting the panel and lining
up with the top bracket. Next, fasten panel to the fireplace as shown below, and
screw the brackets to the appliance with mounting screws (red arrows) (1) (2) (3)
• Please use care with the outer glass bracket screws
5. Plug in the unit then press the power key on the unit or remote control (ensure
that the batteries are installed to remote control). Next, ensure the LED lights are
working correctly.
6. Press the ON/OFF button to turn off the unit, and then pull the plug from the
socket. Store the fireplace in a safe, dry and dust-free location until you are ready
to proceed with the installation.
CRYSTAL PIECES INSTALLATION
6
1. Remove the outer glass around the bracket, and mounting screws (red arrows)
(1) (2) (3)
2. Carefully remove the glass (4)
3. Remove the log set, and adjust the screws (red arrow) (5) (6) (7)
4. Arrange the crystals where you removed the log set (8)
5. Cautiously reattach glass with bracket screws
`1 2 3
4 5 6
7 8 9
7
BUILT-IN INSTALLATION (FOR NEW CONSTRUCTIONS AND RENOVATED AREAS)
1. Select a location that is not exposed to any moisture and is located at least 3-feet
away from any combustible materials such as curtains and drapes, furniture,
bedding, papers, etc.
2. Place the appliance in your selected location to see how it will look after
installation.
3. Mark the desired location on the floor, and store electric fireplace in a safe, dry
and dust-free location.
4. Prepare a wall with a framed opening to accommodate the size of your electric
fireplace. Leave a gap of at least 1/4-inch around the edge of the unit. Any new
wiring must be done in compliance with local and national codes, and any other
applicable regulations.
WARNING
To prevent contact with sagging or loose insulation, the electric fireplace must not be
installed against a vapor barrier or exposed to insulation. Overheating could occur and a
fire may result from this.
Do not attempt to wire your own new outlets or circuits. To reduce the risk of injury,
electric shock and fire, call a licensed electrician for professional assistance.
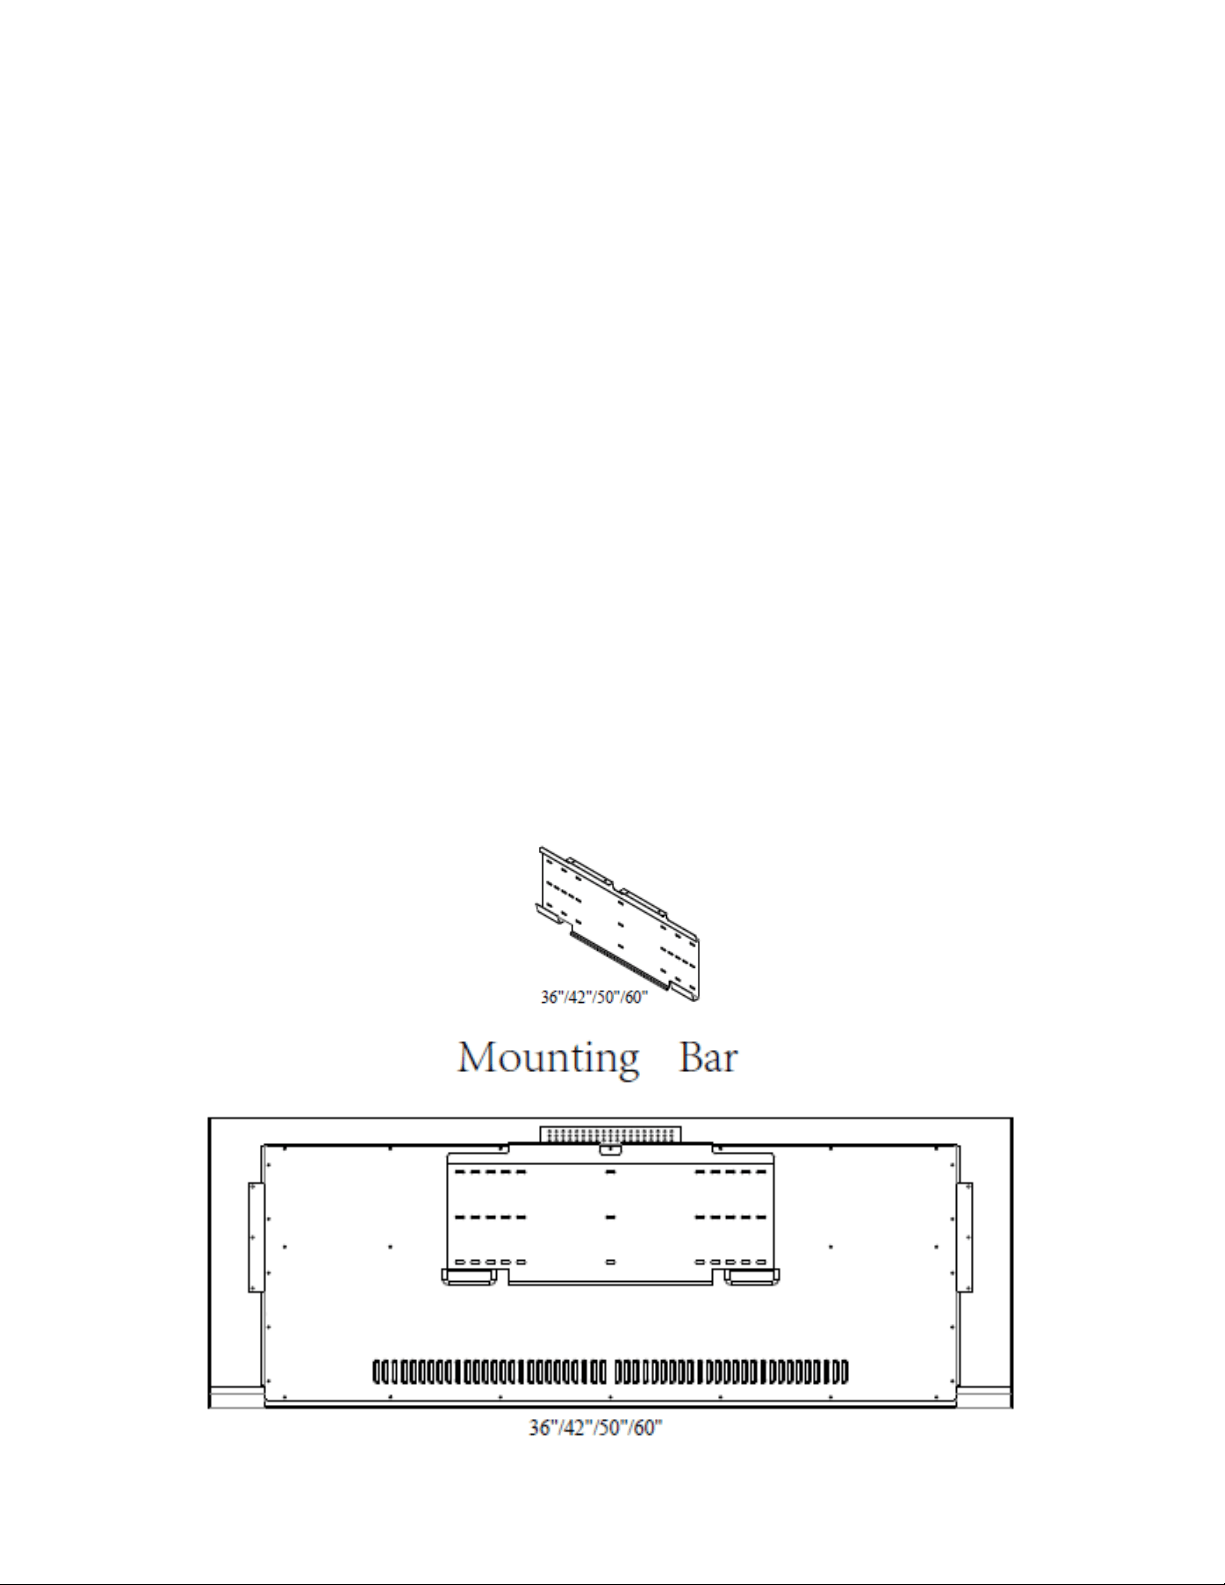
The mounting bracket comes attached to the back of the unit and must be removed for
installation. You will need to first install on the wall and then reattach the unit to it.
8
The power cord must not be pinched or placed against any sharp edges.
Do not blow or place insulation against the electric fireplace.
This electric fireplace is tested and listed for use only with the approved optional
accessories. Use of optional accessories not specifically tested for this electric fireplace
could void the warranty and/or result in a serious safety hazard.
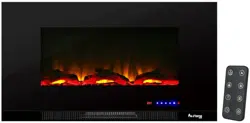
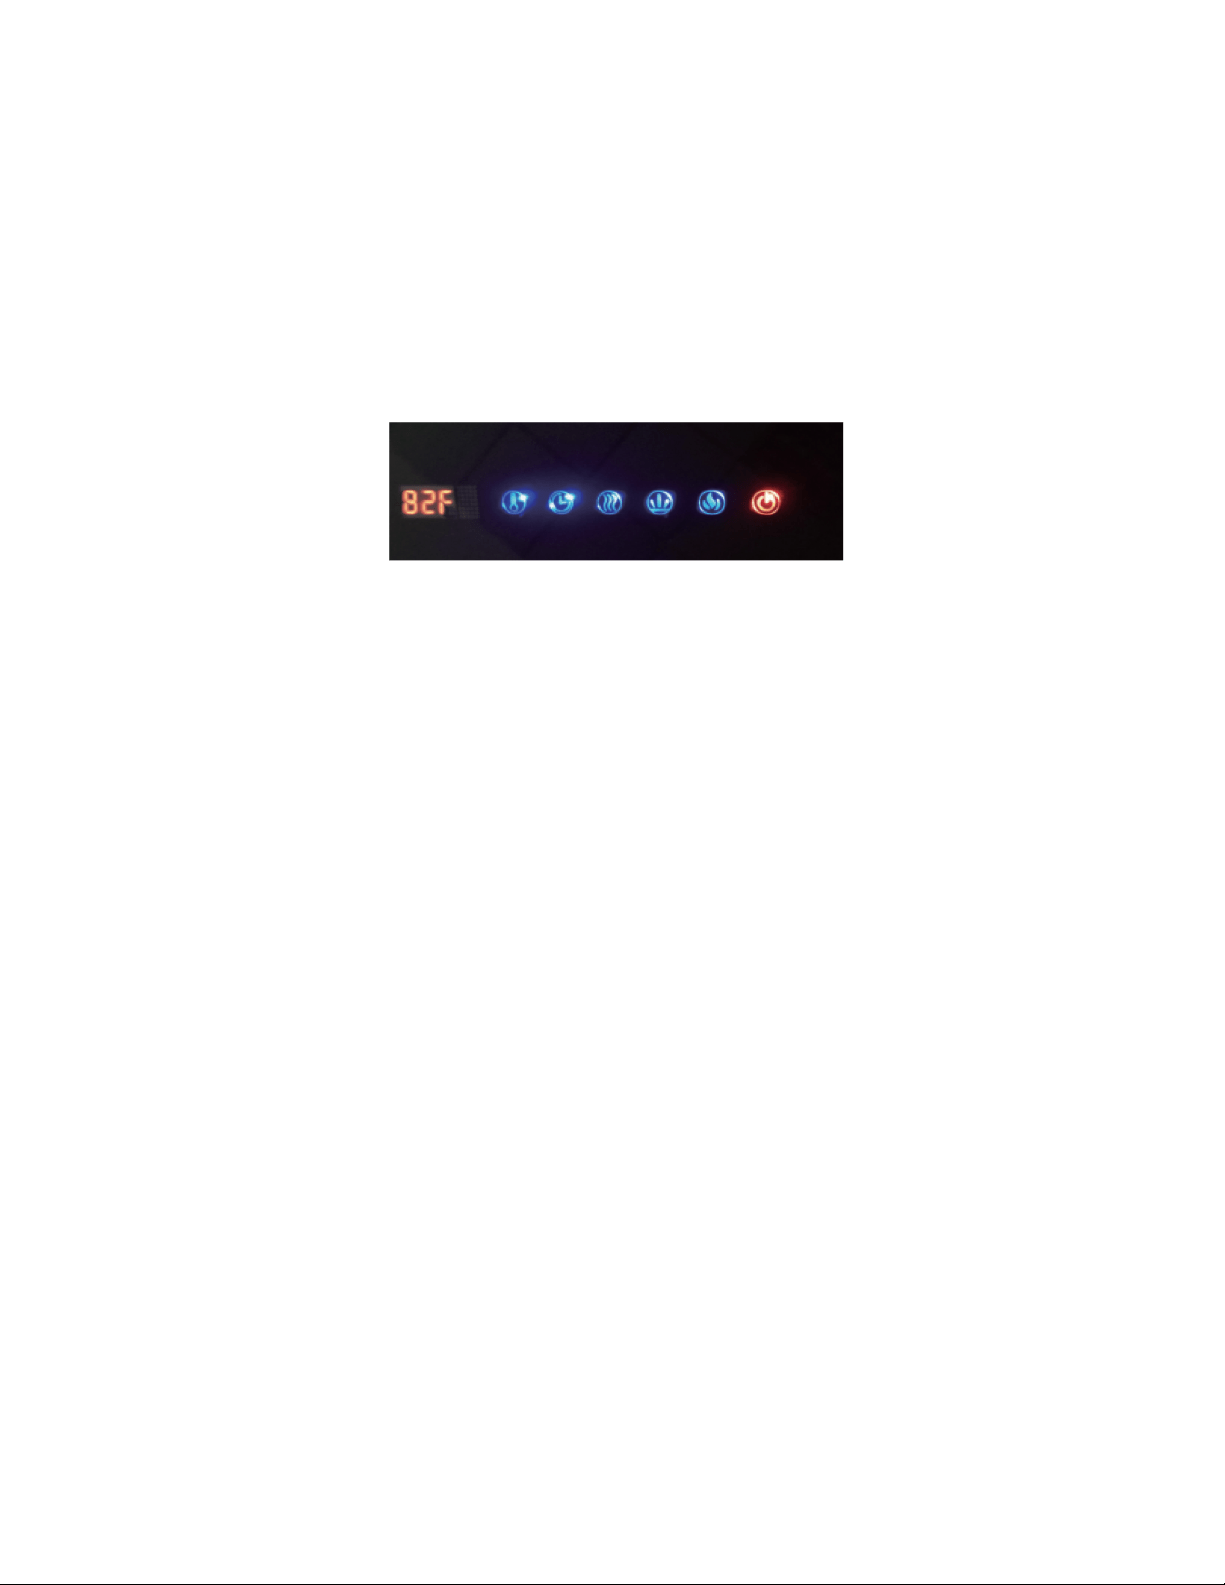
CONTROL PANEL FUNCTIONS
LOCATION – The master power switch is located on the right side of the unit. The
control panel in located on the right corner of the glass.
MASTER SWITCH – The master switch controls the power supply to the electric
fireplace. Turn the switch to “I” to connect the power and turn the switch to “O” to turn
the power off. There will be a chiming sound when turning to “I”.
POWER ON/OFF - Touch the button once (flame will light up) to turn the power on for
all functions. Touch the button again to turn all functions off.
FLAME ADJUSTMENT – Touch the button to turn the flame effect on. There are 10
total options for color change. They are as follows:
• F1 – orange
• F2 – orange and green
• F3 – green
• F4 – green and blue
• F5 – blue
• F6 – blue and orange
• F7 – blue, orange and green
• F8 – blue and red
• F9 – red
• F10 – all colors on a loop
CHARCOAL COLOR FIRE – Touch the button to turn the charcoal color fire effect on.
There are 10 options for charcoal color change. They are as follows:
9
• C1 – orange
• C2 – orange and green
• C3 – green
• C4 – green and blue
• C5 – blue
• C6 – blue and orange
• C7 – blue, orange and green
• C8 – blue and red
• C9 – red
• C10 – all colors on a loop
HEAT SETTINGS
This electric fireplace consists of a fan-forced electric heater with two heat settings:
• LO – 750-watts (press the button once to activate)
• HI – 1350-watts (press the button twice to activate)
This electric fireplace displays temperature two ways, Celsius (C) and Fahrenheit (F).
The unit defaults to Fahrenheit when turned on.
Note: the heater’s fan will continue to run for a short time after turning unit off, and will
turn off automatically after the heater has cooled down.
TIMER
This fireplace is equipped with a timer ranging from 1-hour to 9-hours, and can be
programmed in 1-hour increments. Touch the button once for every 1-hour increment.
Do not leave the electric fireplace unattended.
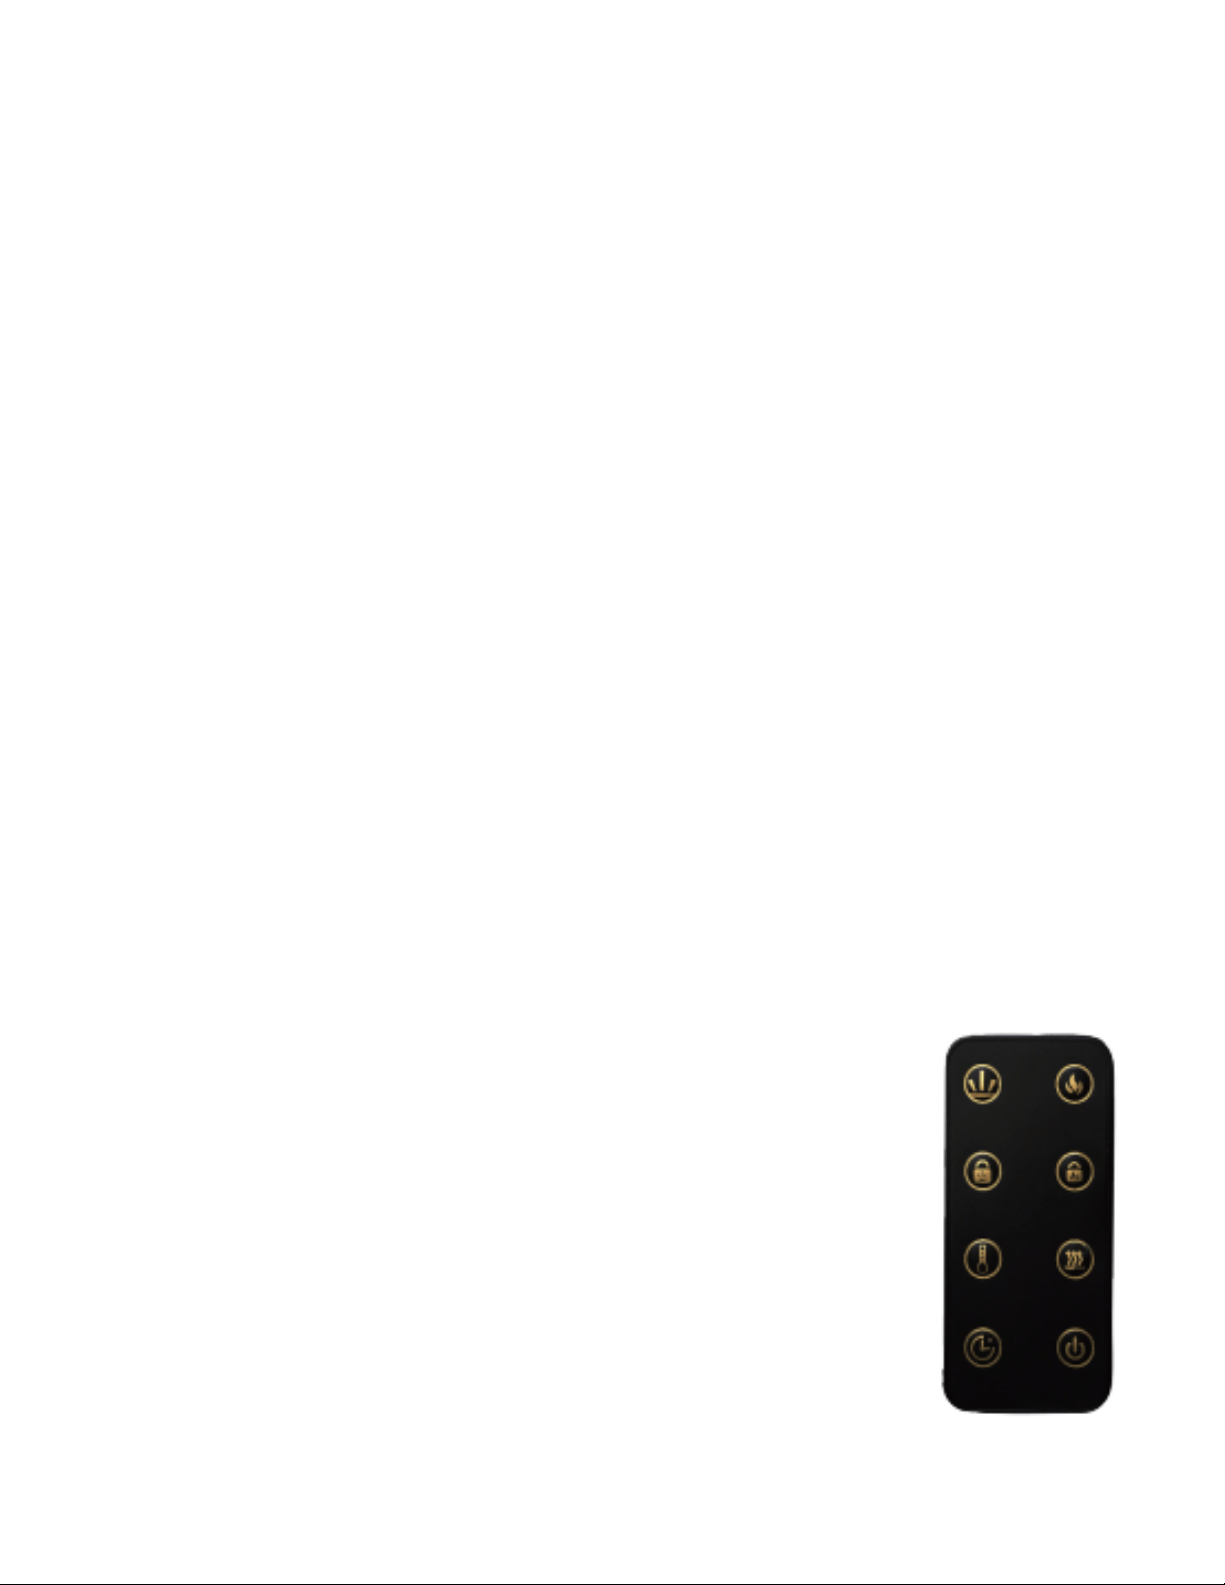
REMOTE CONTROL FEATURES
Install the CR025 3V battery (included) into the remote control before
use. The master switch must be turned to “I” to operate the remote
control. Almost all the functions are the same as on the control panel
as previously listed above, however the No.1 and No.2 lock button are
for the charcoal fire. You can press the NO.2 button to lock any
changing color during display. F0 will display a loop. To choose any
charcoal fire you like during display press C0.
TEMPERATURE LIMITING CONTROL

10
This electric fireplace is equipped with a temperature limiting control device. Should he
fireplace reach an unsafe temperature, the unit will automatically turn off. To reset, turn
off and plug the unit, wait 5 minutes, and plug it back in again to continue use.
SYMPTOM
POSSIBLE CAUSES
SOLUTION
Fireplace doesn't work.
Fireplace inner
components are
overheating, or the home
circuit breaker has tripped.
Reset switch by turning
master switch off and
waiting for 5 minutes,
then turning it back on.
Flame is not moving.
Wiring may be loose, or
the flame’s motor may be
defective.
Call Customer Service
for instructions.
Dim or poorly visible flames,
or pebbles
aren’t glowing.
LED lights are burnt out, or
the wiring is loose.
Call Customer Service
for instructions.
Flame sputters.
Flame’s motor is defective.
Call Customer Service
for instructions.
Remote control does not
work.
Low battery. Master switch
is in “OFF” position.
Change the battery for
remote control. Check to
make sure the master
switch is turned on.
Circuit breaker trips, or fuse
blows when
the unit is on.
Improper circuit current
rating.
Call Customer Service
for instructions.
Heater does not provide
heat when turned on.
Thermal switch has been
tripped, or circuit breaker
has been tripped.
Turn the unit off and unplug
the unit for 5 minutes. Plug
back in and turn on the unit.
Turn off circuit breaker that
supplies electricity to the
unit, wait 5 minutes, then flip
circuit breaker back on.
Unit turns off and will not
turn on.
Appliance has overheated
and its safety device has
caused the thermal switch
to disconnect, or house
circuit breaker has tripped.
Unplug the appliance, allow
to cool for 15 minutes, then
plug back in. Reset the
house circuit breaker.
CLEANING

11
Turn the heater to the OFF position, and unplug from the outlet. Use a vacuum or duster
to keep heater and vent area clean from dust and dirt. The exterior of the electric
fireplace should be cleaned with a damp cloth or duster. Do not use any abrasive
cleaners, liquid sprays, or any other clear that may scratch the surface.

12
LIMITED WARRANTY
This warrants to the original purchaser that this product is free from defects in material and
workmanship as of the date of purchase and that it will, under normal use and proper care,
remain so for 1 year from the date of purchase. Missing or initially defective parts will be
replaced free of charge during the period of this limited warranty. If parts are unavailable,
comparable replacement or refund will be given. The original dated sales receipt is required for
all warranty claims. This warranty does not cover damage which has occurred during transport
from the point of purchase to the consumer’s home. This warranty does not cover glass,
lightbulbs, or batteries.
This product is for residential use only. Any and all commercial use of this product voids all
warranties, and frees the manufacturer from all liability. Read and fully understand all assembly
and operating instructions, and all safety information and warnings, before use. The following
will void this warranty: damage caused by tampering with, modifying, or altering the electric
fireplace in any manner; damage due to incorrect assembly, improper care, misuse, or abuse;
damage from being used with the wrong power source; water damage; damage caused from
the electric fireplace being used outdoors; damage caused from the electric fireplace being used
for excessive periods of time; damage caused by the electric fireplace being used in any
commercial application; damage from use as a primary heat source; other misuse and abuse
not specifically listed herein.
This product is not intended to be used as a primary heat source. e-Flame USA, it’s
directors, officers, or agents, will not be liable to the purchaser or any third party, whether in
contract, in tort, or on any other basis, for any indirect, special, punitive, exemplary,
consequential, or incidental loss, cost, or damage arising out of or in connection with this sale,
maintenance, use, or inability to use this product, even if e-Flame USA, or its directors, or
agents have been advised of the possibility of such losses, costs, or damages that exceed the
purchase price of the product. Some states do not allow the exclusion or limitation of incidental
or consequential damages, so the above limitation or exclusion may not apply to the purchaser.
This limited warranty gives you specific legal rights, and you may also have other rights, which
vary from state-to-state.
Thank you for purchasing this product! If you have any questions about the assembly or
operation of this product, are missing any parts, or have defective parts, please email us at