
Loading ...
Loading ...
Loading ...
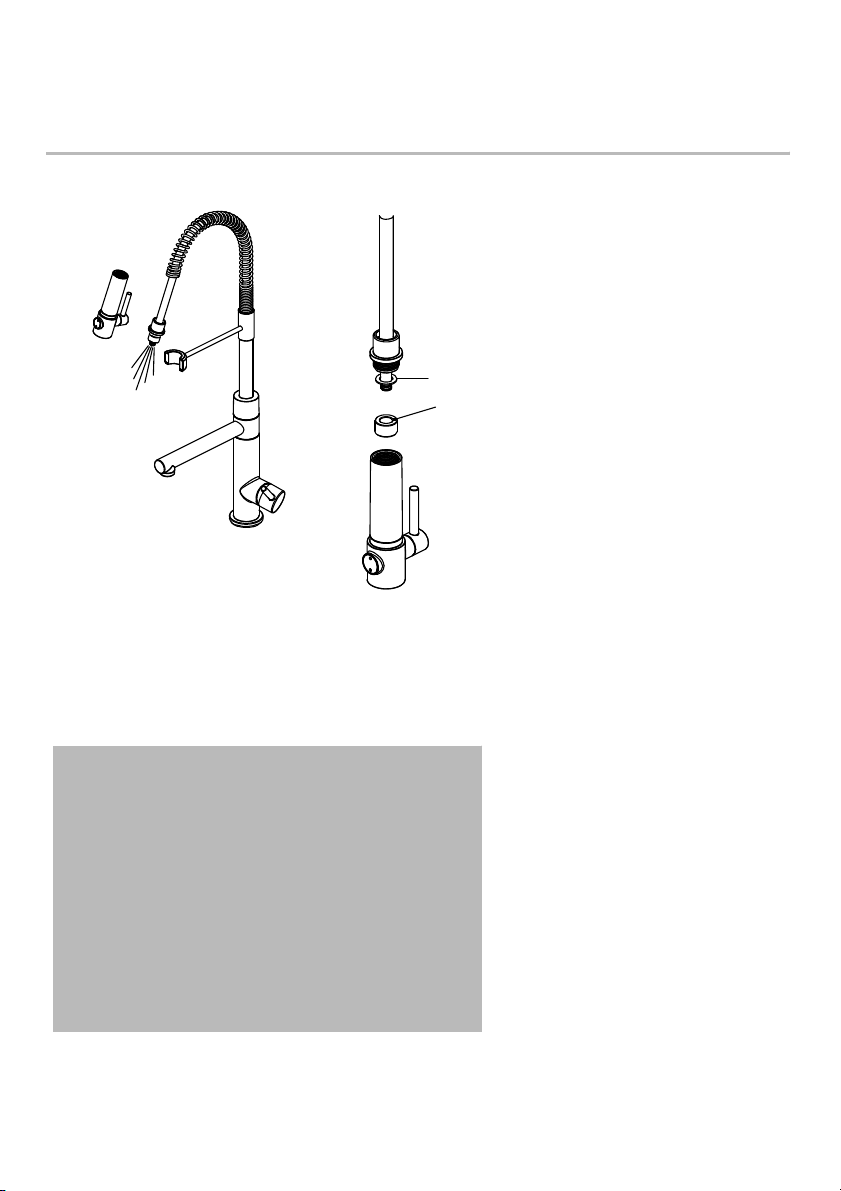
Step 5. Flushing and checking for leaks /
Étape 5. Vidange et vérification des fuites
Pull the hose assembly out of
the spout and remove the spray
head by unscrewing it from the
hose in a counterclockwise
direction. Be sure to hold the
end of the hose down into the
sink and turn the faucet on to
the warm position where it
mixes hot and cold
water.
Flush the water lines for one
minute. This flushes away any
debris that could cause damage
to internal parts. Check for leaks.
Reinstall the spray head by hand
tightening it back onto the
spray hose.
Retirer l’ensemble du tuyau du
bec et retirer la tête de
pulvérisation en la dévissant du
tuyau dans le sens inverse des
aiguilles d'une montre. Veiller à
maintenir l'extrémité du tuyau
dans l'évier et à ouvrir le robinet
en position tiède où l'eau
chaude et l’eau froide se
mélangent.
Vider les conduites d'eau
pendant une minute. Cela
permet d'évacuer les débris qui
pourraient endommager les
parties internes. Vérifier s'il y a
des fuites.
Réinstaller la tête de
pulvérisation en la serrant à la
main sur le tuyau de
pulvérisation.
1
2
NOTES:
1. Do not lose the rubber washer (1) when installing
the sprayer back on.
2. The magnet end marking with a black dot should
be toward the hose for correct magnet installation.
REMARQUES
1. Ne pas perdre la rondelle en caoutchouc (1) lors
de la réinstallation du pulvérisateur.
2. Le marquage de l'extrémité de l'aimant avec un
point noir doit être orienté vers le tuyau pour une
installation adéquate de l'aimant.
9
Loading ...
Loading ...
Loading ...