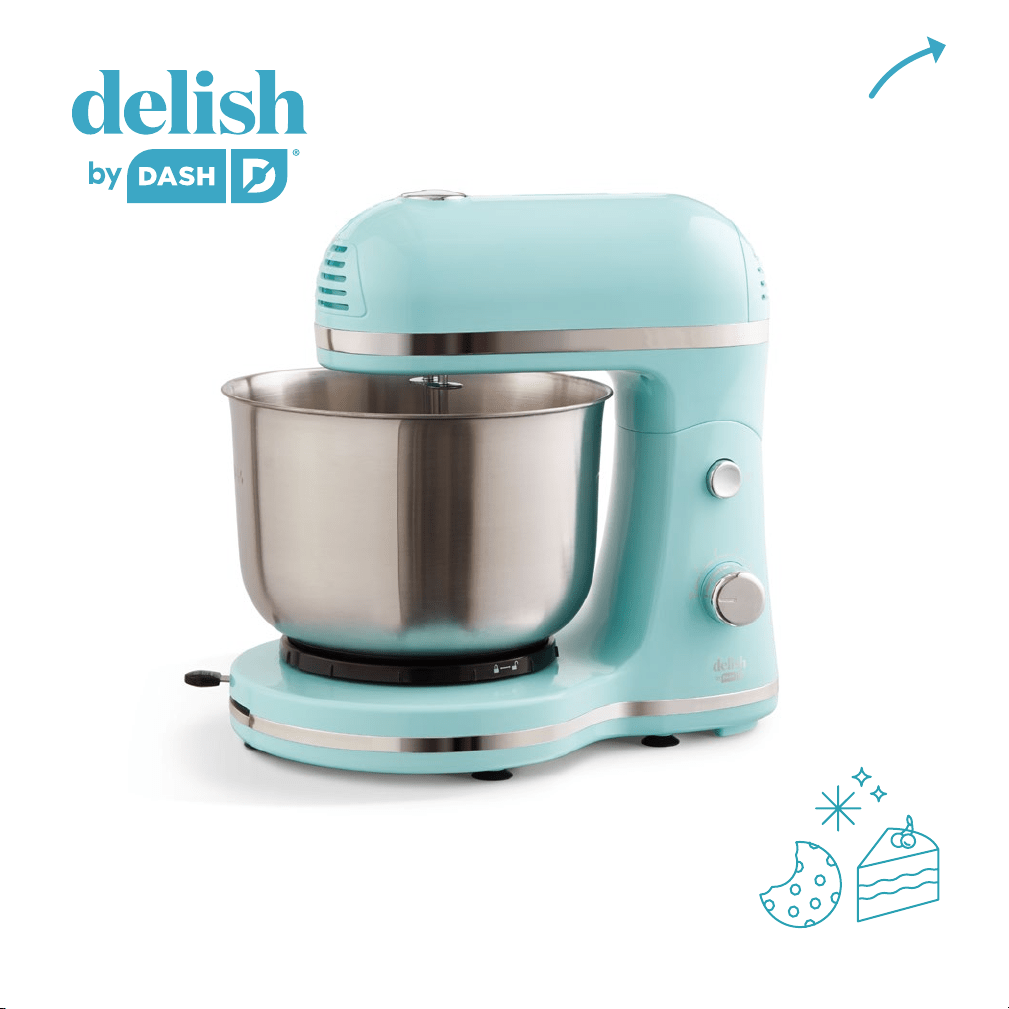
#DCSM350
STAND MIXER
Instruction Manual | Recipe Guide
r
e
c
i
p
e
s
i
n
s
i
d
e
!

· 2 ·
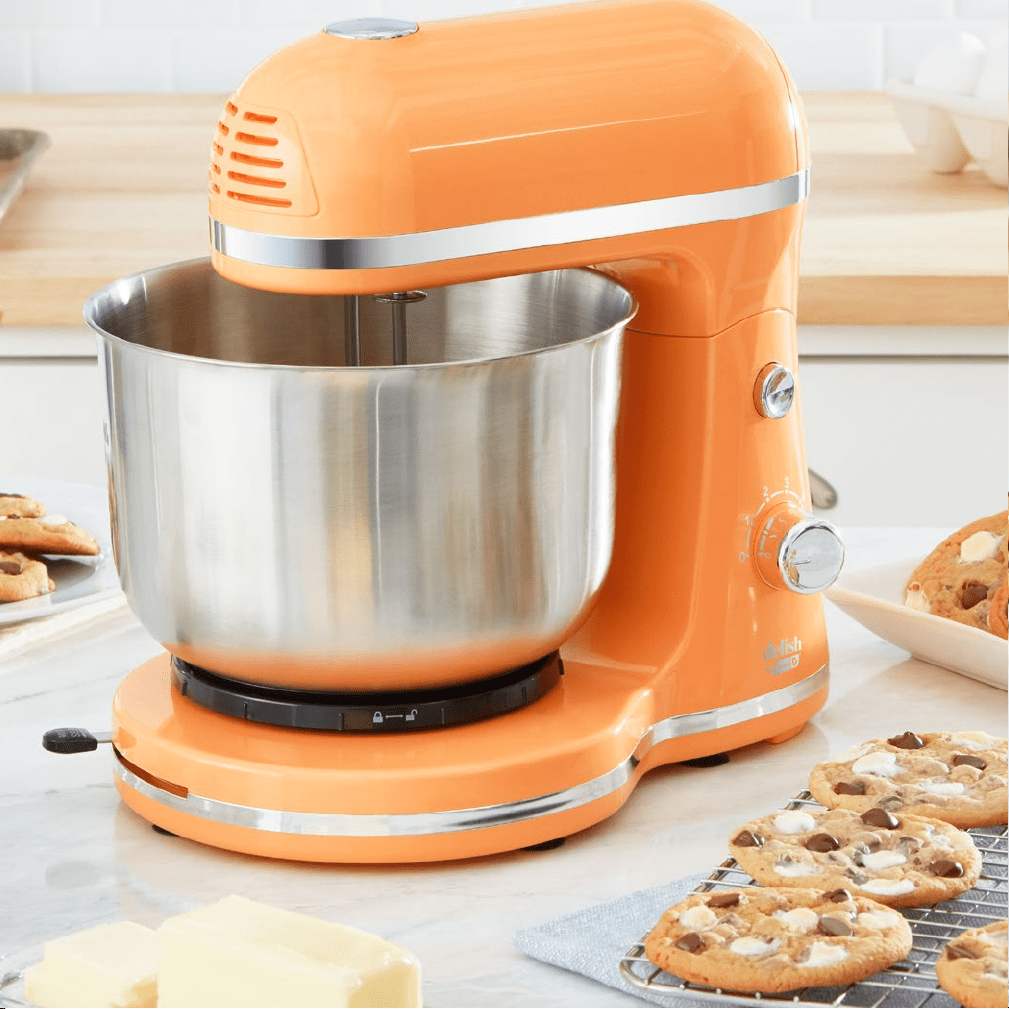
The kitchen team at Delish, the fastest
growing food media site on the internet,
and the appliance experts at Dash have
teamed up to create this one-of-a-kind
kitchen line. With your beautiful new Delish
by Dash, the possibilities are endless.
Inside you’ll nd top-rated recipes from
Delish, as well as some of the Delish
food editors’ favorite desserts from their
second cookbook, Insane Sweets.

· 3 ·
Important Safeguards ................................................................ 4-7
Parts & Features ........................................................................... 8
Using Your Stand Mixer ......................................................... 10-14
Tips & Tricks ............................................................................... 16
Attachments ................................................................................ 18
Cleaning & Maintenance............................................................. 19
Troubleshooting .......................................................................... 20
Recipes .................................................................................. 23-45
Customer Support....................................................................... 46
Warranty ..................................................................................... 47
STAND MIXER

· 4 ·
important safeguards
• This appliance is intended for household and indoor
use only.
• The appliance is not to be used by persons
(including children) with reduced physical, sensory
or mental capabilities, or lack of experience
and knowledge, unless they have been given
supervision or instruction.
• Children being supervised not to play with the
appliance.
• Switch off the appliance and disconnect from supply
before changing accessories or approaching parts
that move in use.
• If the supply cord is damaged, it must be replaced
by the manufacturer, its service agent or similarly
qualied persons in order to avoid a hazard.
• This appliance can be used by children aged from
8 years and above and persons with reduced
physical, sensory or mental capabilities or lack of
experience and knowledge if they have been given
supervision or instruction concerning use of the
appliance in a safe way and understand the
hazards involved.
• Cleaning and user maintenance shall not be made
by children without supervision.
• This appliance is for food mixing use only. Do not
misuse it for other purpose.
• Always disconnect the appliance from the supply
if it is left unattended and before assembling,
disassembling or cleaning.
• This appliance shall not be used by children. Keep
the appliance and its cord out of reach of children.
• CAUTION: In order to avoid a hazard due to
inadvertent resetting of the thermal cut-out, this
appliance must not be supplied through an external
switching device, such as a timer, or connected to a
circuit that is regularly switched on and off by
the utility.
• WARNING: Never continuously use the mixer on
any setting for more than 15 minutes. Always allow
the motor to cool down before using again.
• Unwrap your product with care, and ensure that
none of the plastic, cardboard or polystyrene
packaging remains on the product.
• In order to protect yourself from any risk of
electrocution, do not place the power cable or
device in water or any other liquid.
• Always disconnect the appliance from the supply
if it is left unattended and before assembling,
disassembling or cleaning.
• Never use a device if the plug or power cable are
damaged, or after a malfunction or if it has suffered
any kind of damage.
• The use of accessories not recommended by the
manufacturer could result in injury. Only use the
accessories provided with the device.
• Do not use outside or on/near heat sources.
• Do not leave the cable hanging off the edge of a
table or work surface. Do not let it come in contact
with hot surfaces or the components of the device
which heat up during use. Do not place the device
under or near curtains or window dressings.
• This device is intended solely for the purpose for
IMPORTANT SAFEGUARDS: PLEASE READ AND
SAVE THIS INSTRUCTION AND CARE MANUAL.
ATTENTION: It is extremely important to read ALL instructions and safety information before use.
Important Safeguards

· 5 ·
Important Safeguards
IMPORTANT SAFEGUARDS: PLEASE READ AND
SAVE THIS INSTRUCTION AND CARE MANUAL.
which it was designed; namely, domestic use.
• The device must be placed on a at and
stable surface.
• This device requires the constant presence of an
adult user when in operation or hot, even
once unplugged.
• Do not pull on the cord to unplug the device. In
order to unplug the device, pull the plug from
the socket.
• Do not plug in or unplug the device with wet hands.
• This device is not designed to be activated by an
external timer or a remote control system.
• Ensure that your electrical installation is suitable for
the power of the Stand Mixer.
• Before use, check that the mains voltage
corresponds to that on the name plate of the device.
Should an extension cable prove necessary, use a
grounded cable and take every precaution to ensure
that nobody trips over it.
• The device is intended for use in domestic and
similar applications, such as farms, kitchen areas
reserved for the staff in shops, ofces and other
professional settings, by customers in hotels, motels
and other premises of a residential nature or in bed
and breakfast-type accommodation.
• In order to prevent the device from overheating, do
not place it in a corner, against a wall, or on a fragile
surface, such as a glass table, tablecloth, varnished
furniture or ‘Bulgomme’-style table protector.
• Ensure that every part of the device is cleaned
before use.
• Do not ll the bowl to more than 2/3 of its capacity.
• Switch off the appliance and disconnect from supply
before changing accessories or approaching parts
that move in use.
• Never mix hot liquids (milk-based beverages etcup).
Risk of burns! Allow hot liquids to cool before
mixing them.
• Before connecting, check that the voltage indicated
on the appliance (bottom of the appliance)
corresponds with the main voltage in your home.
• If this is not the case, consult your dealer and do
not use.
• This appliance may be tted with a non-rewireable
plug. If you need to change the fuse in a non-
rewireable plug, the fuse cover must be retted. If
the fuse cover is lost or damaged, the plug must not
be used until a replacement is obtained (available
from the appliance manufacturer).
• If the plug has to be changed because it is not
suitable for your socket, or becomes damaged,
it should be cut off and appropriate plug tted
following the wiring instructions. The plug removed
must be disposed of safely as insertion into a mains
socket is likely to cause an electrical hazard.
• This equipment must be disconnected from the
outlet when not in use.
• Do not allow this unit to be exposed to water.

· 6 ·
important safeguards
• Lisez toutes les instructions.
• Retirez tous les sacs et emballages de l’appareil
avant utilisation.
• Utilisez l’appareil uniquement sur une surface
stable et sèche.
• Assurez-vous que l’appareil est nettoyé à fond
avant de l’utiliser.
• Pour éviter les chocs électriques, ne pas plonger
le cordon, les ches, le bloc moteur ou des
pièces électriques dans de l’eau ou dans d’autres
liquides. Ne plongez pas les mains dans l’eau.
• Une surveillance étroite est nécessaire quand un
appareil est utilisé par ou à proximité des enfants.
Les enfants doivent être surveillés pour s’assurer
qu’ils ne jouent pas avec l’appareil.
• Cet appareil n’est pas destiné à être utilisé par
des personnes (y compris les enfants) avec des
capacités physiques, sensorielles ou mentales
réduites, ou sans expérience et connaissances
à moins qu’une personne responsable de leur
sécurité supervise l’utilisation.
• Éteignez l’appareil, puis débranchez-le de la
prise lorsqu’il n’est pas utilisé, avant d’assembler
ou de désassembler des pièces et avant de le
nettoyer. Pour débrancher, saisissez la che et
retirez-la de la prise. Ne tirez jamais sur le cordon
d’alimentation. Si le Mixeur commence à mal
fonctionner pendant son utilisation, débranchez
immédiatement le cordon. N’utilisez pas ou ne
tentez pas de réparer vous-même l’appareil.
• N’utilisez pas l’appareil si le cordon ou la che
sont endommagés, après un dysfonctionnement
ou une chute ou encore un dommage
quelconque de l’appareil. Retournez l’appareil à
l’établissement de service agréé le plus proche
pour examen, réparation ou réglage.
• Pour tout entretien autre que le nettoyage,
veuillez contacter StoreBound directement
au 1-800-898-6970 de 7h à 19h du lundi au
vendredi ou par courrier électronique à support@
storebound.com.
• Assurez-vous que l’appareil est en position «0»
(OFF) avant de débrancher le cordon
du mur.
• Évitez d’utiliser des accessoires qui ne sont
pas recommandés par le fabricant de l’appareil,
car ils pourraient provoquer un incendie, une
électrocution ou des blessures.
• AVERTISSEMENT: Ne pas utiliser le mixeur
pendant plus de 15 minutes d’aflée car le moteur
MESURES DE SÉCURITÉ IMPORTANTES:
VEUILLEZ LIRE ET CONSERVER CE MANUEL
D’UTILISATION.
ATTENTION: Il est extrêmement important de lire TOUTES les instructions et informations de sécurité
avant utilisation.
Mesures de Sécurité Importantes

· 7 ·
risque de surchauffer. Laissez le moteur refroidir
entre deux utilisations consécutives.
• Cet appareil ne doit être utilisé que pour mélanger
des ingrédients mous tels que de la farine, de la
crème, des œufs ou des liquides crémeux. Pour
éviter d’endommager votre Mixeur, n’essayez pas
de mélanger des ingrédients durs.
• Eviter le contact avec les pièces mobiles.
Pour réduire les risques de blessures et/ou de
dommages à l’appareil, ne mettez pas vos mains,
vos cheveux, vos vêtements ou d’autres objets à
proximité ou dans le Mixeur pendant l’utilisation.
• Ne retirez aucune pièce lorsque l’appareil est en
cours d’utilisation ou branché.
• Tous les composants inclus avec le Mixeur sont
compatibles avec ce produit seulement. N’utilisez
pas ces pièces sur d’autres produits similaires.
• Ne pas utiliser à l’extérieur. Cet appareil est conçu
pour un usage domestique uniquement.
• Ne laissez pas le cordon pendre du bord
de la table ou du comptoir, ni toucher des
surfaces chaudes.
• Ne placez pas l’appareil sur ou à proximité d’un
brûleur à gaz chaud, d’un brûleur électrique ou
dans un four chauffé.
• Ne pas utiliser l’appareil autrement que pour
l’usage auquel il est destiné.
• Si une pièce telle qu’un l ou une che est
endommagée ou si le mélangeur fonctionne mal,
arrêtez immédiatement l’opération et consultez
les sections Dépannage et Garantie.
• Un cordon d’alimentation court et détachable
est fourni an de réduire les risques liés à
l’enchevêtrement ou à la chute d’un cordon
plus long.
• Des cordons d’alimentation plus longs et
détachables sont disponibles et peuvent être
utilisés si vous les utilisez avec précaution.
• Si vous utilisez un cordon d’alimentation plus long
et détachable, les caractéristiques électriques
marquées du jeu de câbles doivent être au moins
aussi élevées que celles de l’appareil. Le cordon
doit être disposé de manière à ne pas se poser
sur le comptoir ou la table où il pourrait être tiré
par des enfants ou trébuché par inadvertance.
Si l’appareil est du type mis à la terre, la rallonge
doit être un cordon à 3 ls du type mise à la terre.
MESURES DE SÉCURITÉ IMPORTANTES:
VEUILLEZ LIRE ET CONSERVER CE MANUEL
D’UTILISATION.
Mesures de Sécurité Importantes
· 8 ·
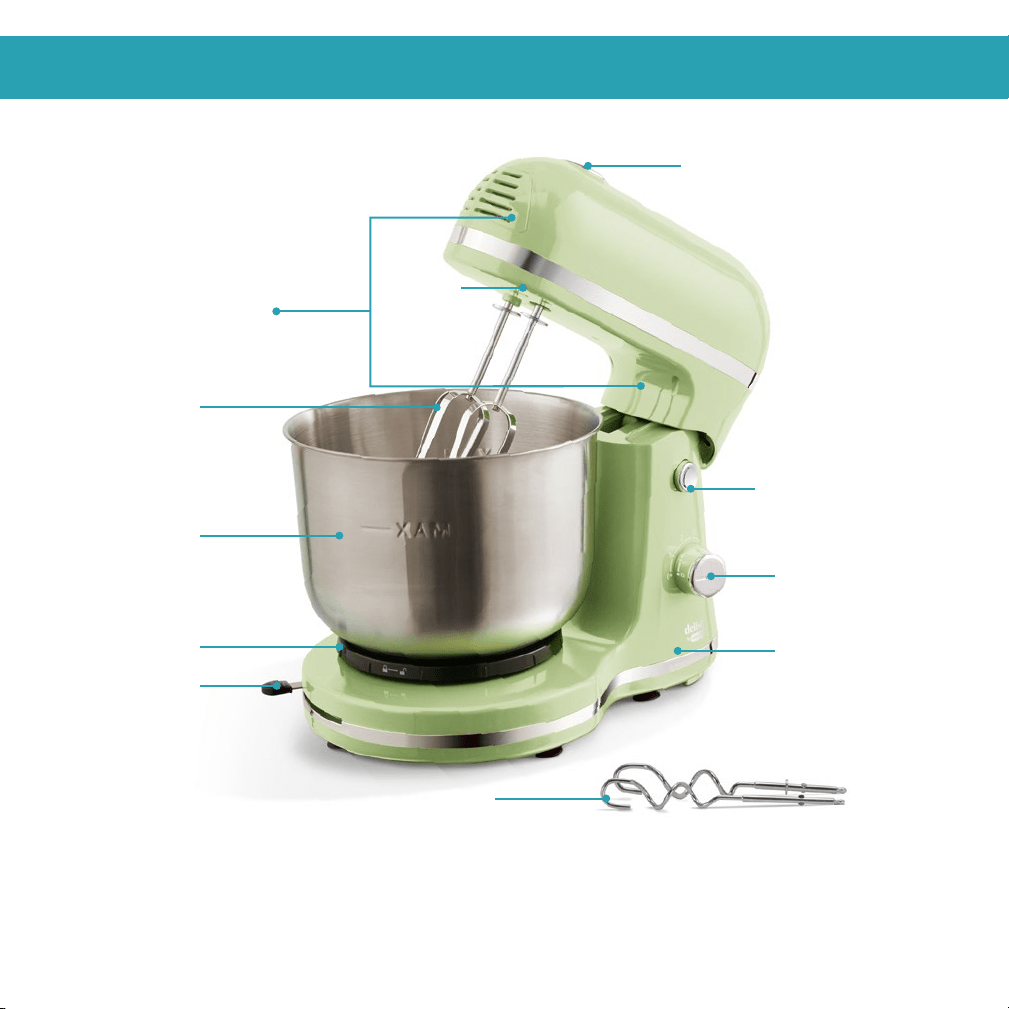
Parts & Features
Beater
Shaft
Motor
Head
*Beaters
Stainless
Steel Bowl
Rotating
Plate
Bowl Shift
Lever
Speed
Adjustment Dial
Tilt Release
Button
Main Base
Dough Hooks
Eject Button
*NOTE: There is a Left and Right Beater and Dough Hook.
They must be inserted into the Left and Right Beater Shafts respectively.
· 9 ·

· 10 ·
Before First Use
1
Unwrap the Stand Mixer and the various components and check that each part is in
good condition.
2
Remove all stickers and labels on the product, apart from those bearing the mandatory
information on the base of the product.
3
Read all these instructions carefully, adhering to the usage and safety guidelines. Keep these
instructions and inform any other potential users.
4
Clean the device with a damp cloth and a small amount of washing up liquid if necessary. Dry
carefully with a dry cloth. Do not use any aggressive cleaning agent, nor abrasive sponge, so
as not to damage the product.
5
Before using the Stand Mixer for the rst time, or after a long period of disuse, it should be
cleaned with fresh or soapy water.
6
Never place the base of the Stand Mixer in water. This risks damaging the motor and could
cause electrocution.
7
Do not use the Stand Mixer for more than 15 minutes continuously. Turn the Stand Mixer off
and allow the motor to cool after 15 minutes of continuous use in order to prevent overheating
and avoid damage to the device.
8
Only use the Dough Hooks when making bread or pizza dough, or any other thick paste. Using
the Beaters with this type of dough may damage the device, since the Beaters should be used
for more liquid preparations, e.g. creams, meringue, cake batter, etc.
· 11 ·
Before First Use Using Your Stand Mixer
A B
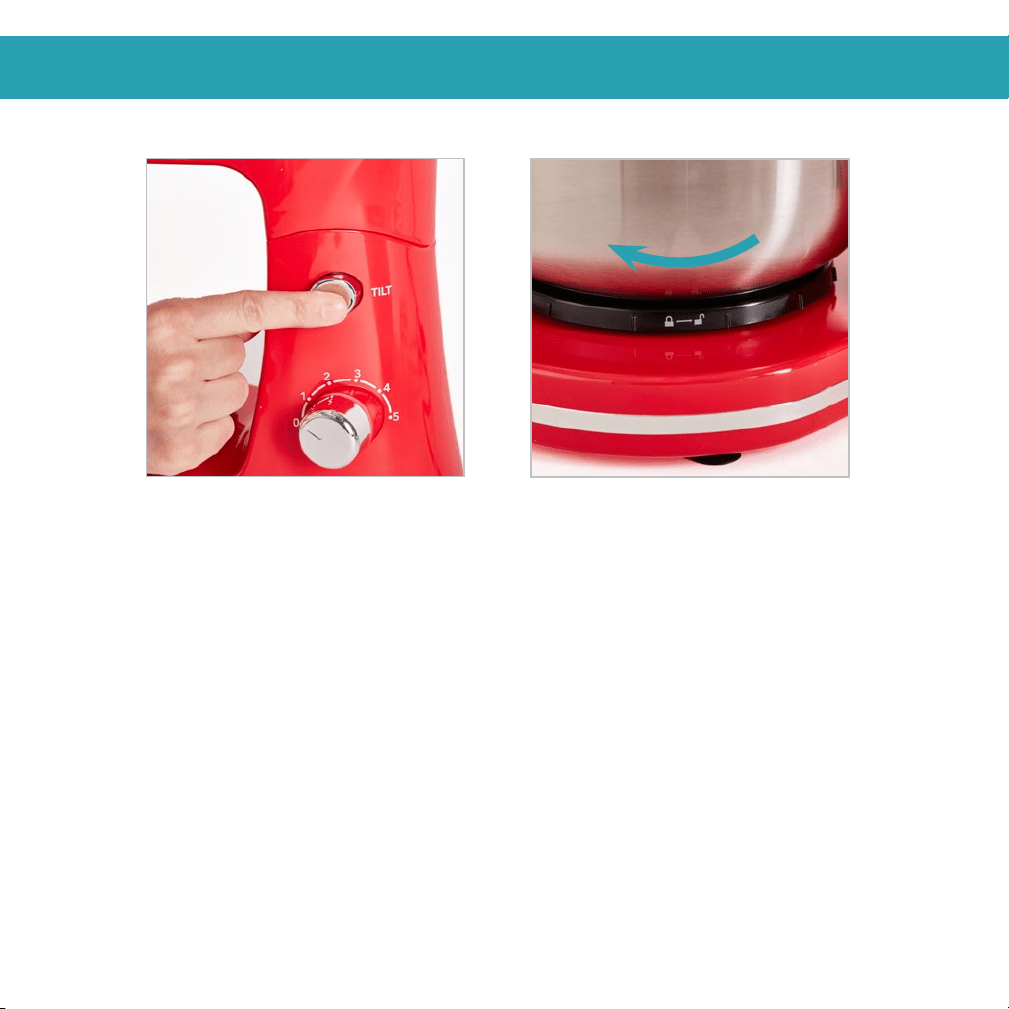
1
Ensure that the Stand Mixer is not plugged in before setting up. Raise the Head of the
Stand Mixer by pressing the Tilt Release Button (photo A) and Lifting.
2
Place the Stainless Steel Bowl on the Base of the Stand Mixer and turn the Bowl clockwise
to tighten (photo B). If removing the Stainless Steel Bowl, turn counterclockwise to loosen.
· 12 ·
Using Your Stand Mixer
C D
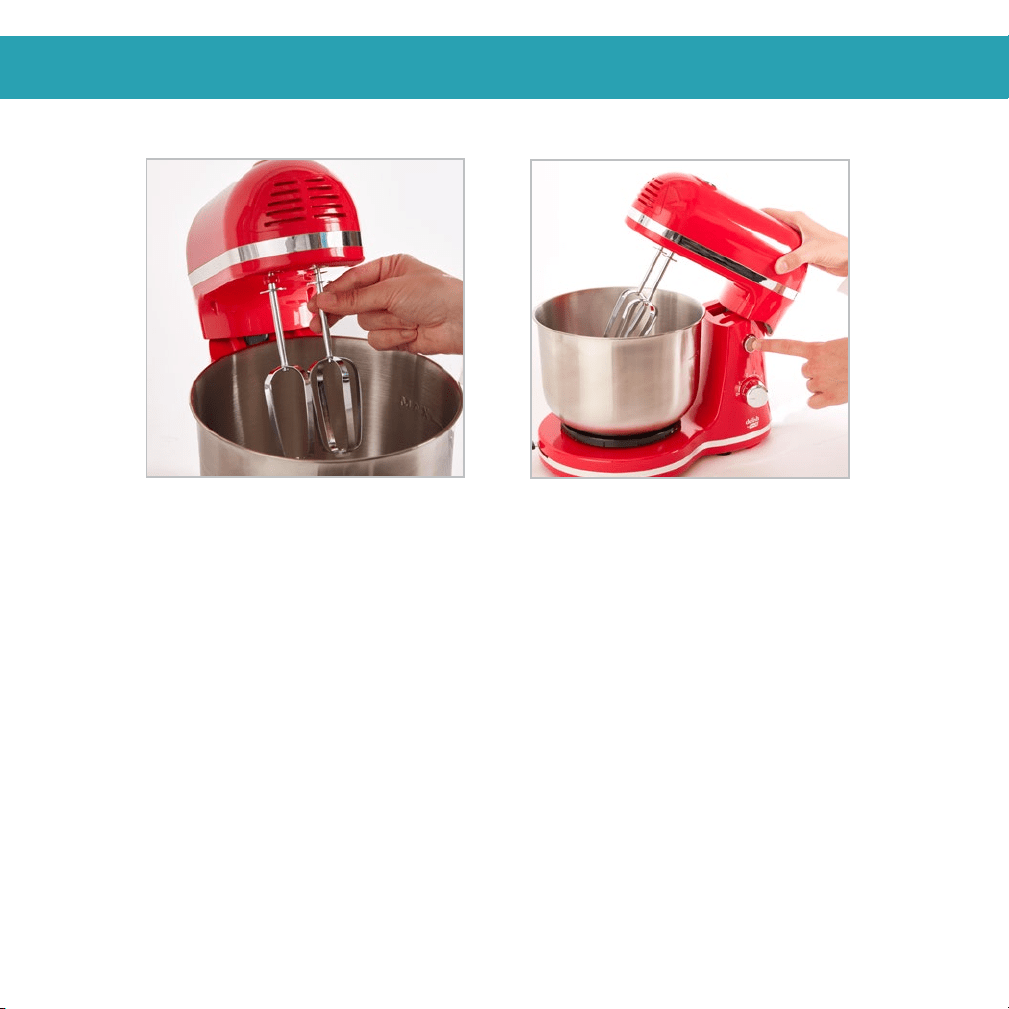
3
Add the Beaters or Dough Hooks to the Head of the Stand Mixer (photo C). They will
stick rmly in place.
4
Lower the Head of the mixer by pressing the Tilt Release Button (photo D) and add
your ingredients.
· 13 ·
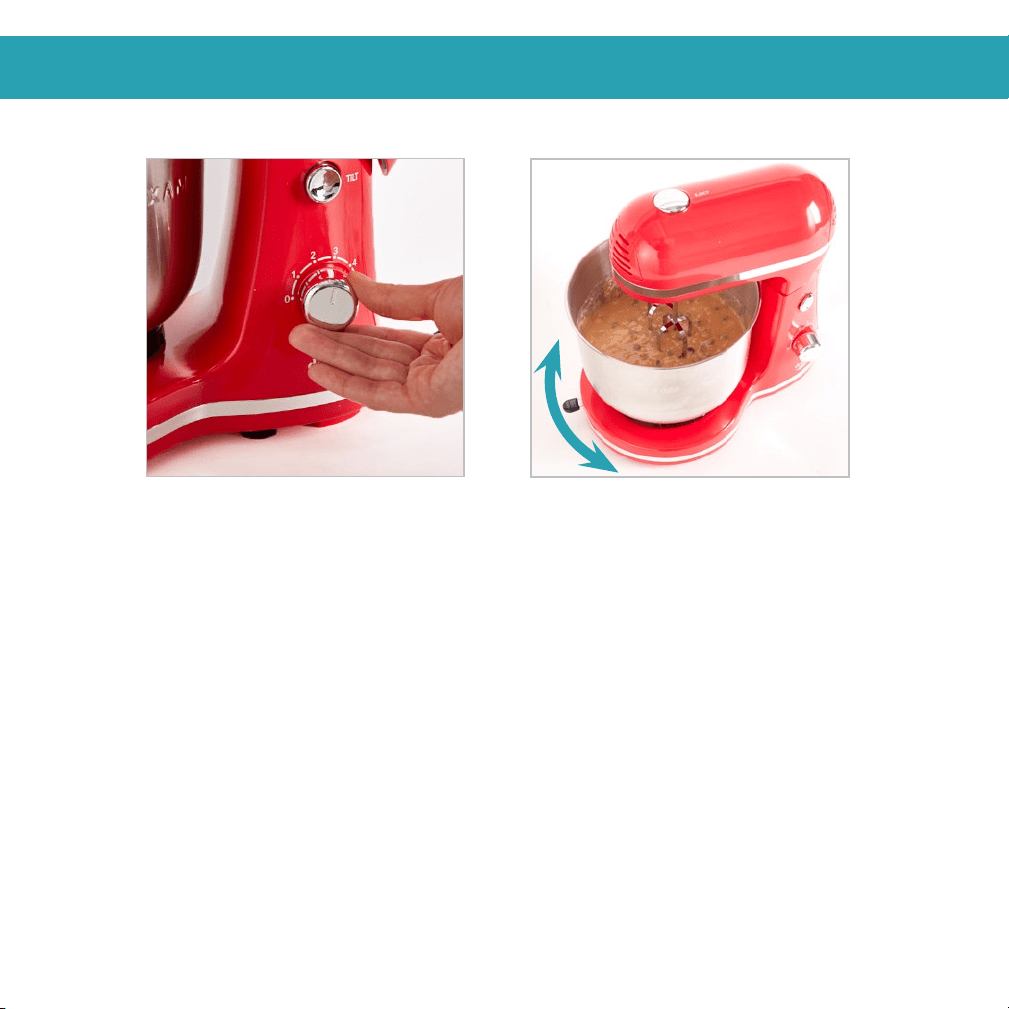
5
Ensure the Speed Adjustment Dial is set to 0 and plug in the Stand Mixer.
6
Use the Speed Adjustment Dial to turn on the Stand Mixer to your desired speed (photo E).
The higher the gear, the greater the power of the Stand Mixer.
7
While mixing, use the Bowl Shift Lever (photo F) to move the Stainless Steel Bowl from side to
side, ensuring more thorough mixing.
Using Your Stand Mixer
E F
NOTE: When using, increase the speed gradually for best results. It is not recommended
to rapidly turn the Stand Mixer up to the highest speed. Always start from 0.
NOTE: Continuous working time should be limited to 15 minutes when using the Dough Hooks.

· 14 ·
Using Your Stand Mixer
G H
8
Once mixing is completed, reduce speed to 0 and unplug the Stand Mixer.
9
Press the Tilt Release Button and Lift to remove. Press the Eject Button (photo G) and
remove the Beaters or Dough Hooks for cleaning (photo H).
j
a
l
a
p
e
ñ
o
p
o
p
p
e
r
d
i
p
o
n
p
a
g
e
3
9
!
· 15 ·
j
a
l
a
p
e
ñ
o
p
o
p
p
e
r
d
i
p
o
n
p
a
g
e
3
9
!

· 16 ·
Tips & Tricks
• Your Stand Mixer works best with small batches. Too much mix will negatively affect the
performance of the Mixer.
• Certain doughs and batters may get stuck against the sides or wrapped around the Beat-
ers. Use the Bowl Shift Lever to help solve this problem.
• The Mixing Bowl is designed specifically for this product. Do not attempt to use another
mixing bowl.
• There is a Left and Right Beater and Dough Hook. They must be inserted into the Left and
Right Beater Shafts respectively.
• Do not use the Mixer on any setting for more than 15 minutes at a time as the motor may
overheat. Allow motor to cool between consecutive uses.
• Your Mixer should only be used to mix soft ingredients such as flour, cream, eggs, or
creamy liquids. To avoid damaging your Mixer, do not attempt to mix hard ingredients.
· 17 ·
· 18 ·
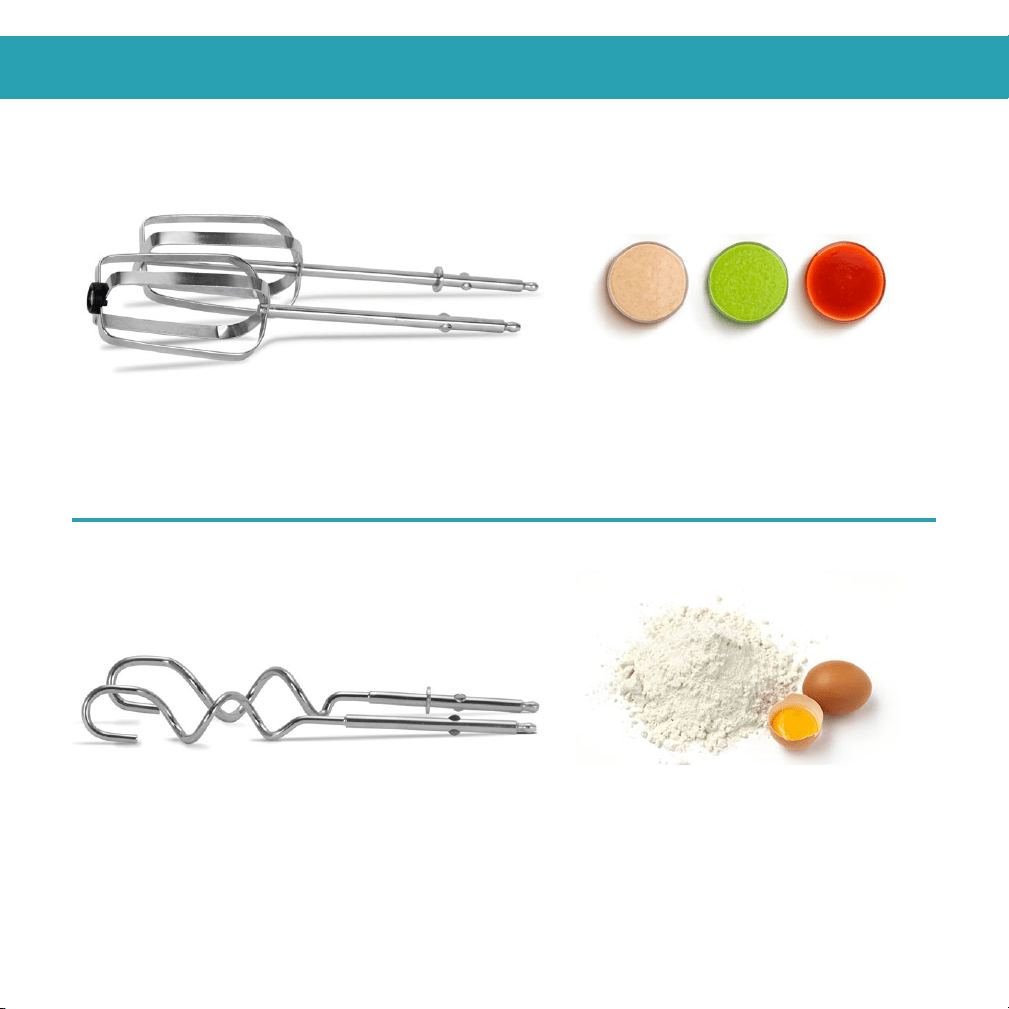
Attachments
BEATERS
DOUGH HOOKS
USAGE: Only use for liquids. Great for sauces, creams, and meringues, or any other liquid mixtures.
Some recipes may require you to start mixing with Beaters then switch to Dough Hooks once dry
ingredients are added.
USAGE: Use for non-liquid mixes. Great for butters, batters, doughs, frostings, mashed potatoes
and mousse or any other non-liquid mixture. Some recipes may require you to start mixing
with Beaters then switch to Dough Hooks once dry ingredients are added.

· 19 ·
Cleaning & Maintenance
Clean your Mixer thoroughly before using. Make sure to turn your Mixer to the “0” or (OFF) setting
before unplugging and cleaning. Both the Mixing Bowl and Beaters are dishwasher safe. After each
use, the Mixer should be cleaned properly.
1
Turn the Mixer to the “0” (Off) setting before unplugging and cleaning.
2
Tilt the Motor Head upwards and press the Eject Button to remove Beaters.
3
Turn the Mixing Bowl counterclockwise until it detaches from the Main Base.
4
Wash both Mixing Bowl and Beaters in warm, soapy water.
5
Wipe down the Main Base with a damp dish cloth.
DISASSEMBLY AND CLEANING
WARNING: Do not submerge the motor in water or any liquid. The Main Base is not
dishwasher safe.
!

· 20 ·
Troubleshooting
While Dash products are durable, you may encounter one or more of the problems listed below. If the issue
is either not solved by the solutions recommended below or not included on this page, please
contact our Customer Support Team at 1-800-898-6970 or [email protected].
PROBLEM SOLUTION
The Beaters are not turning. Make sure there is nothing stuck inside the Beater Shaft.
Make sure the Beater labeled with an “L” is in the left socket
and the Beater labeled with an “R” is in the right socket.
There is a burning odor coming
from the Mixer.
Turn off and unplug the Mixer. Allow the motor to cool down
before resuming use of the appliance.
This may occur when the mixture is extremely thick or the
appliance has been running continuously for 15 minutes or
more, causing the motor to overheat.
My mixture keeps getting stuck on
the side of the bowl or wrapped
around the gears.
Use the Bowl Shift Lever to help solve this problem.
b
r
o
w
n
u
g
a
r
b
b
q
c
h
i
c
k
e
n
o
n
p
a
g
e
3
8
!

· 21 ·
b
r
o
w
n
u
g
a
r
b
b
q
c
h
i
c
k
e
n
o
n
p
a
g
e
3
8
!

· 22 ·
c
l
a
s
s
i
c
c
o
f
f
e
e
c
a
k
e
o
n
p
a
g
e
3
0
!

· 23 ·
RECIPE
GUIDE
DELISH STAND MIXER

· 24 ·
FOR THE COOKIES
1½ cups (2½ sticks) butter,
softened
1 cup brown sugar
½ cup granulated sugar
2 teaspoons pure vanilla
extract
2 large eggs
2¾ cups all-purpose our
1 teaspoon baking soda
¾ teaspoon kosher salt
2 cups semisweet
chocolate chips
FOR THE S’MORES
8 graham crackers
8 marshmallows, halved
lengthwise
8 chocolate squares
Ingredients:
S’mores Stued
Cookies
1
Preheat oven to 375ºF and line two large baking sheets with parchment paper. In a
medium bowl, whisk together our, baking soda, and salt.
2
In the Delish Stand Mixer, beat butter and sugars until light and uffy. Add eggs, one at a
time, and vanilla and beat until combined. Add dry ingredients to wet ingredients and beat
until just combined, then fold in chocolate chips.
3
Make s’mores: Between two graham cracker squares, sandwich halved marshmallow
and one square chocolate.
4
Using two large scoops of cookie dough, cover entire s’more until no graham cracker is
visible. Repeat until all dough and s’more ingredients are used. Refrigerate on prepared
baking sheets for 10 to 15 minutes.
5
Bake cookies until lightly golden, 12 to 14 minutes. Let cool 10 minutes before serving.
Directions
Makes 8 cookies | Total time: 30 minutes

· 25 ·

· 26 ·
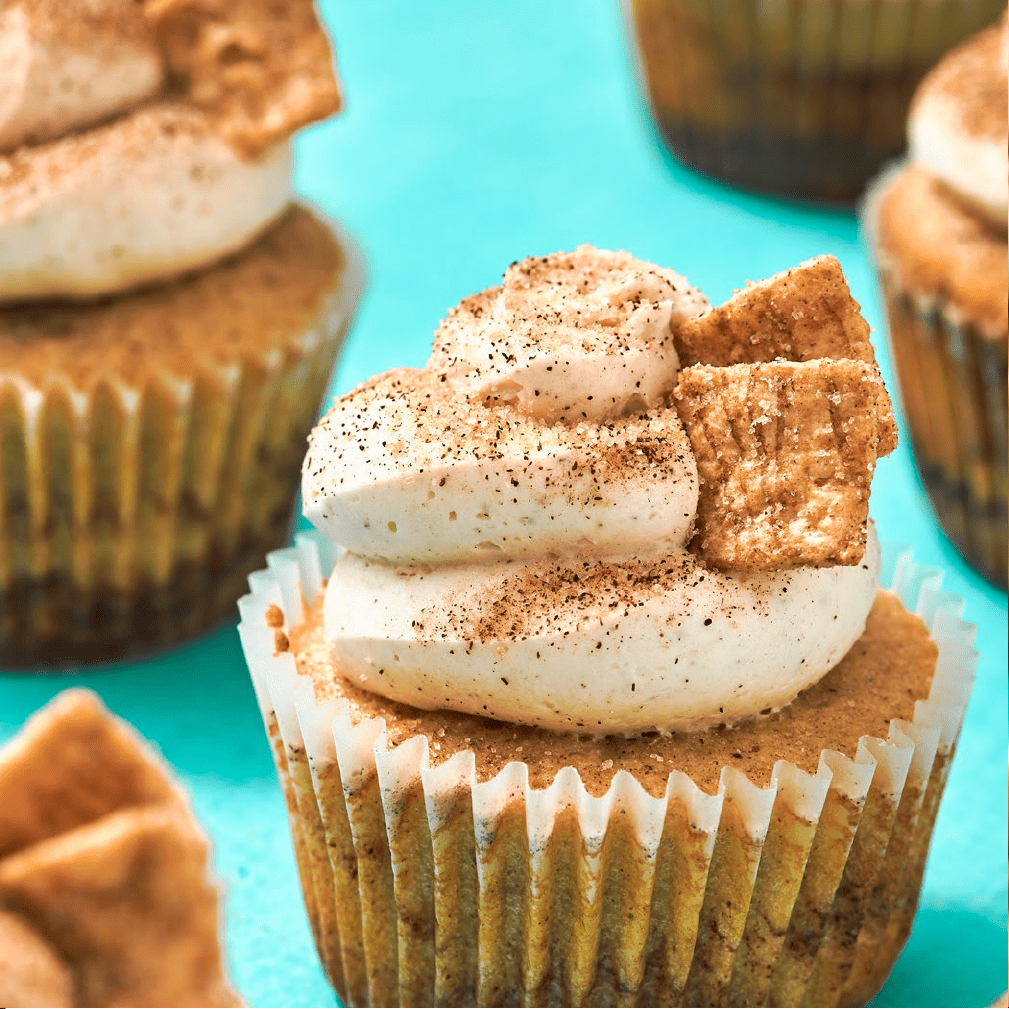
FOR THE CUPCAKES
2 cups all-purpose our
3 tablespoons cornstarch
1½ teaspoons baking powder
1 teaspoons ground cinnamon
1 teaspoons kosher salt
1 cup (2 sticks) butter, softened
1½ cups granulated sugar
2 large eggs, plus 1 large egg
white
¾ cup whole milk
¼ cup cinnamon sugar
Cinnamon Toast Crunch, for
garnish
FOR THE FROSTING
1¼ cups (2½ sticks) butter,
softened
3 ¾ cups powdered sugar
1¼ teaspoons pure vanilla
extract
¾ teaspoon ground cinnamon
Pinch kosher salt
3 to 4 tablespoons heavy
cream
Ingredients:
1
Make cupcakes: Preheat oven to 350°F and line two mufn tins with 24 cupcake liners. In a
medium bowl, whisk together our, cornstarch, baking powder, cinnamon, and salt.
2
In the Delish Stand Mixer, beat butter and sugar until light and uffy. Add eggs and egg white,
one at a time, until combined. Add half the dry ingredients to the wet ingredients, beating until just
combined. Add milk, beating until combined, then mix in remaining dry ingredients.
3
Fill cupcake liners with 1 tablespoon batter, then sprinkle with a layer of cinnamon sugar. Repeat
layering, then top with 1 tablespoon more batter. Bake until slightly golden on top and a toothpick
inserted into the middle of each cupcake comes out clean, about 20 minutes.
4
Let cool in pans 5 to 10 minutes, then transfer to a wire rack to cool completely.
5
Make frosting: In a stand mixer, beat butter until light and uffy. Add powdered sugar, vanilla, cin-
namon, and salt and beat until combined. Gradually add heavy cream, one tablespoon at a time,
until creamy. Transfer frosting to a piping bag t with a large round tip.
6
Pipe frosting onto cooled cupcakes. Garnish with Cinnamon Toast Crunch before serving.
Directions
Cinnamon Toast
Crunch Cupcakes
Makes 24 cupcakes | Total time: 1 hour 20 minutes

· 28 ·
FOR THE FILLING
1¼ cups creamy peanut
butter
¹
3
/
cup powdered sugar
FOR THE COOKIES
¾ cup (1½ sticks) butter,
softened
¾ cup packed brown sugar
½ cup granulated sugar,
plus more for rolling
1 large egg
1 teaspoon pure vanilla
extract
1¼ cups all-purpose our
¾ cup unsweetened cocoa
powder
¾ teaspoon baking soda
¾ teaspoon kosher salt
Ingredients:
1
Preheat oven to 350°F and line two large baking sheets with parchment paper. Make
lling: In a medium bowl, stir together peanut butter and powdered sugar until smooth.
Using a small cookie scoop, scoop mixture into 22 balls onto prepared baking sheet and
freeze until rm, 30 minutes.
2
In the Delish Stand Mixer, beat butter and sugars until light and uffy, then add egg and
vanilla and beat until combined. Add our, cocoa powder, baking soda, and salt and beat
until combined.
3
Scoop a heaping tablespoon of dough and atten into a pancake-like circle. Top with a
frozen peanut butter ball, then wrap edges of dough around peanut butter ball and pinch
to seal, adding more dough if necessary to completely cover peanut butter. Roll stuffed
cookie dough ball in sugar and transfer to prepared baking sheets, spacing cookies 2
inches apart. Repeat with remaining dough.
4
Bake until cookies are set, about 12 minutes. Serve warm or at room temperature.
Directions
Buckeye Cookies
Makes 22 cookies | Total time: 1 hour 20 minutes


· 30 ·
FOR CAKE
¾ cup (1½ sticks) unsalted
butter, softened to room
temperature
1¼ cup granulated sugar
¼ cup brown sugar
3 large eggs
1¼ cup sour cream
1 teaspoon vanilla extract
2¼ cup all-purpose our
¼ cup cornstarch
2 teaspoons baking powder
½ teaspoon baking soda
1 teaspoon kosher salt
FOR STREUSEL
½ cup packed light brown
sugar
1 cup all-purpose our
1½ teaspoons ground
cinnamon
Pinch nutmeg (optional)
Pinch kosher salt
6 tablespoons butter,
melted
¾ cup toasted pecans,
chopped
Ingredients:
1
Preheat oven to 350°F and line a 9x13-inch pan with parchment paper. In the Delish
Stand Mixer, cream the butter and sugars together until light and uffy, 3 to 4 minutes.
Add eggs one at a time, then beat in sour cream and vanilla until just combined.
2
In another large bowl, whisk together our, cornstarch, baking powder, baking soda, and
salt. Slowly add dry ingredients into wet ingredients and beat until just incorporated.
3
Make streusel: In a medium bowl, whisk together brown sugar, our, cinnamon, nutmeg if
using, and salt. Stir in butter.
4
Add half the batter into prepared baking pan and spread in an even layer. Top with half
the streusel, then add remaining batter and spread to edges of pan. Top with remaining
streusel and bake until a toothpick inserted into the center comes out clean, 50 to
55 minutes.
Directions
Makes 12 servings | Total time: 1 hour 20 minutes
Classic
Coee Cake

· 31 ·
Ingredients:
Makes 2 pizzas | Total time: 2 hours 50 minutes
1
Grease a large bowl with cooking spray and set aside. In a small bowl, stir together lukewarm
water and sugar, then sprinkle over yeast and let sit until frothy, about 8 minutes.
2
In the bowl of the Delish Stand Mixer, combine our, salt, and oil. Pour in yeast mixture, then
mix with dough hook until a shaggy dough forms. Continue to mix until dough feels elastic and
only slightly tacky.
3
Form into a tight ball, place into your oiled bowl, and cover with a clean dish towel. Let rise in a
warm spot in your kitchen until doubled in size, about an hour and a half.
4
Gently punch down dough, then divide in 2, and roll into balls. At this point, you can freeze
one, or make two pizzas. Let dough balls rest as you preheat oven to 500°F and grease a
large baking sheet with olive oil. Sprinkle all over with half of the cornmeal.
5
On your work surface, gently atten one ball of dough and roll with a rolling pin until about 12”
in diameter. Carefully transfer to prepared baking sheet and brush dough with oil. Then, add
your sauce to the middle of the dough and spread outwards with a spoon or ladle, leaving
about 1” for the crust. Top with slices of fresh mozzarella.
6
Bake until crust is golden and cheese is melty, about 15 minutes. Drizzle with olive oil.
Directions
FOR DOUGH
1¼ cup lukewarm water
1 tablespoon granulated
sugar
1 packet (2¼ teaspoons)
active dry yeast
3 cup all-purpose our
2 teaspoons kosher salt
¼ cup extra-virgin olive oil
FOR PIZZA
Extra-virgin olive oil, as
needed
¼ cup coarse cornmeal
1 cup marinara, divided
1 pound fresh mozzarella,
thinly sliced, divided
Fresh basil leaves, for
garnish
Pizza
Dough

· 32 ·
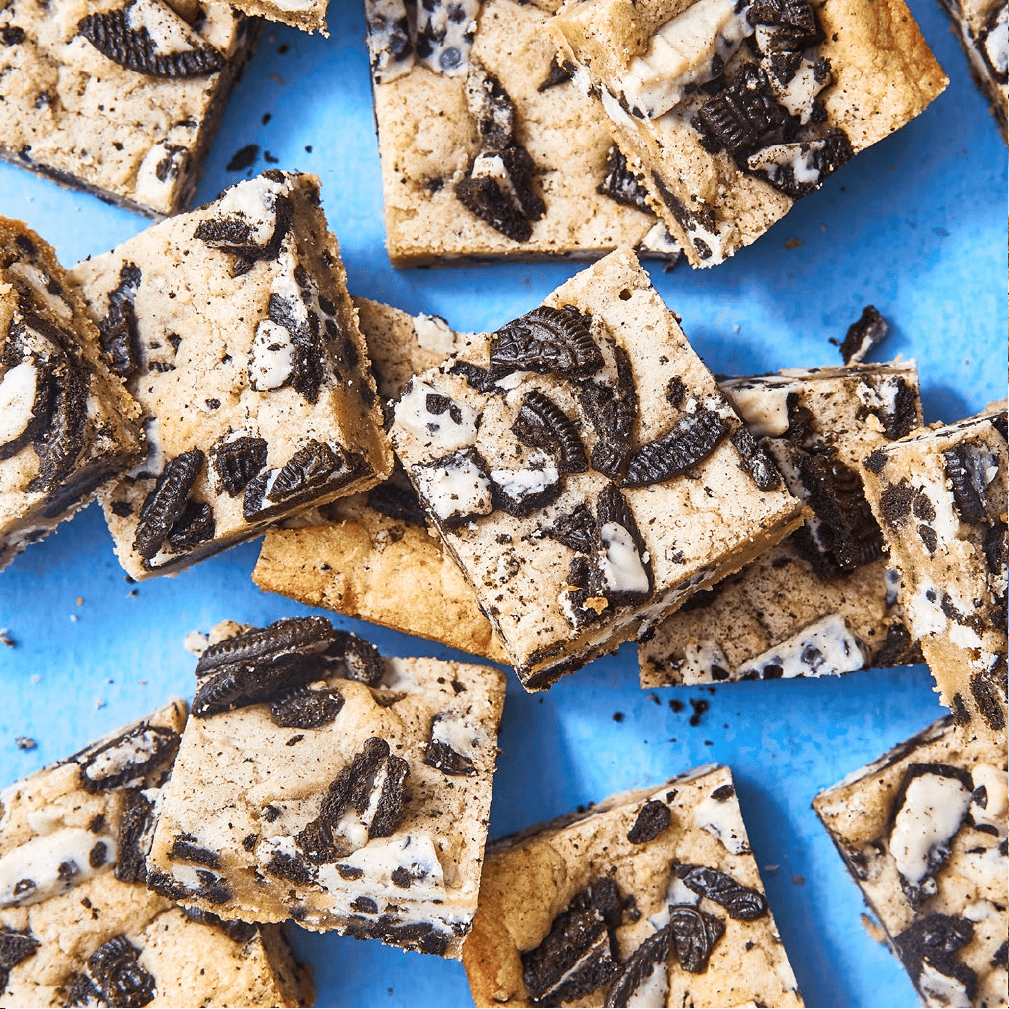
2¼ cup all-purpose our
1 teaspoon kosher salt
½ teaspoon baking soda
¾ cup (1½ sticks) butter, melted
1 cup granulated sugar
½ cup packed brown sugar
2 large eggs
1 teaspoon pure vanilla extract
1½ cup chopped Hershey’s
Cookies ‘N’ Creme Bars, divided
1½ cup chopped Oreos
®
(about 15
Oreos
®
), divided
Ingredients:
1
Preheat oven to 350°F and line a 9x13-inch pan with parchment paper,
leaving a 2-inch overhang. In a medium bowl, whisk together our, salt,
and baking soda.
2
In the Delish Stand Mixer, beat melted butter and sugars until combined.
Add eggs, one at a time, until combined, then add vanilla. Gradually add
dry ingredients to wet ingredients and beat until just combined. Fold in 1
cup each chopped Cookies ‘N’ Creme Bars and Oreos
®
.
3
Press batter into prepared pan and top with remaining ½ cup each
chopped Cookies ‘N’ Creme Bars and Oreos
®
.
4
Bake until edges are just golden, about 22 minutes. Let blondies cool in
pan 10 minutes, then transfer to a wire rack to let cool completely before
slicing into squares.
Directions
Cookies ‘N’ Cream
Blondies
Makes 15 blondies | Total time: 50 minutes

· 34 ·
Makes 13 cookies | Total time: 1 hour
Best-Ever
Snickerdoodles
2½ cups all-purpose our
1 tablespoon plus 1 teaspoon ground
cinnamon, divided
2 teaspoons cream of tartar
1 teaspoon baking soda
1 teaspoon kosher salt
1 cup (2 sticks) butter, softened
1¼ cups granulated sugar, divided
½ cup packed brown sugar
2 large eggs
Ingredients:
1
Preheat oven to 350°F and line two large baking sheets with parchment paper. In
a medium bowl, whisk together our, 1 teaspoon cinnamon, cream of tartar, baking
soda, and salt.
2
In the Delish Stand Mixer, beat butter, 1 cup granulated sugar, and brown sugar
until light and uffy.
3
Add eggs, one at a time, and beat until combined. Add dry ingredients to wet ingre-
dients and beat until combined.
4
In a shallow bowl, whisk together remaining ¼ cup granulated sugar and 1 table-
spoon cinnamon.
5
Using a large cookie scoop, scoop dough (about 3 tablespoons) and roll into a
ball, then roll in cinnamon sugar and transfer to prepared baking sheets, spacing
cookies 2 inches apart.
6
Bake until cookies begin to crack, about 13 minutes. Repeat with remaining dough.
Directions


· 36 ·
FOR THE BROWNIES
Cooking spray
¾ cup (1½ sticks) melted butter
1½ cups granulated sugar
½ cup cocoa powder
4 large eggs
2 tsp vanilla extract
¾ cup all-purpose our
½ tsp kosher salt
FOR THE COOKIE DOUGH
½ cup (1 stick) butter, softened
¹
3
/
cup powdered sugar
1½ cups almond our
1 tsp pure vanilla extract
½ tsp kosher salt
½ cup mini chocolate chips
Ingredients:
1
Preheat oven to 350°F. Line an 8x8-inch pan with parchment paper and grease with
cooking spray. In a large bowl, whisk together melted butter, sugar, and cocoa powder.
Add eggs, one a time, then add vanilla. Stir in our and salt until just combined.
2
Pour batter into prepared pan and bake until a toothpick inserted into middle of brownie
comes out with only a few moist crumbs, about 28 minutes. Let cool completely.
3
Meanwhile, in the Delish Stand Mixer, beat butter and powdered sugar until light and
uffy. Add almond our, vanilla, and salt and beat until smooth. Fold in chocolate chips.
4
Spread cookie dough over cooled brownies in a thick even layer. Refrigerate 20 minutes,
then slice into squares.
Directions
Cookie Dough
Brownies
Makes 9 brownies | Total time: 1 hour


· 38 ·
Makes 6 servings | Total time: 4 hours and 25 minutes
2 lb. boneless skinless
chicken breasts
1 cup barbecue sauce, plus
more for drizzling
½ cup brown sugar
¼ cup bourbon
¼ cup Italian dressing
2 teaspoons garlic powder
1 teaspoon paprika
Kosher salt
Freshly ground black
pepper
6 Potato buns
Coleslaw, for serving
Ingredients:
1
In a slow cooker, add chicken breasts, barbecue sauce, brown sugar, bourbon, Italian
dressing, garlic powder and paprika. Season with salt and pepper.
2
Toss until well coated, then cover and cook on high for 4 hours or on low for 6 hours.
3
Shred chicken by placing it in the Delish Stand Mixer and using beaters on a medium
speed. Serve on buns with a drizzle of barbecue sauce and a spoonful
of coleslaw.
Directions
Brown Sugar
BBQ Chicken

· 39 ·
Directions
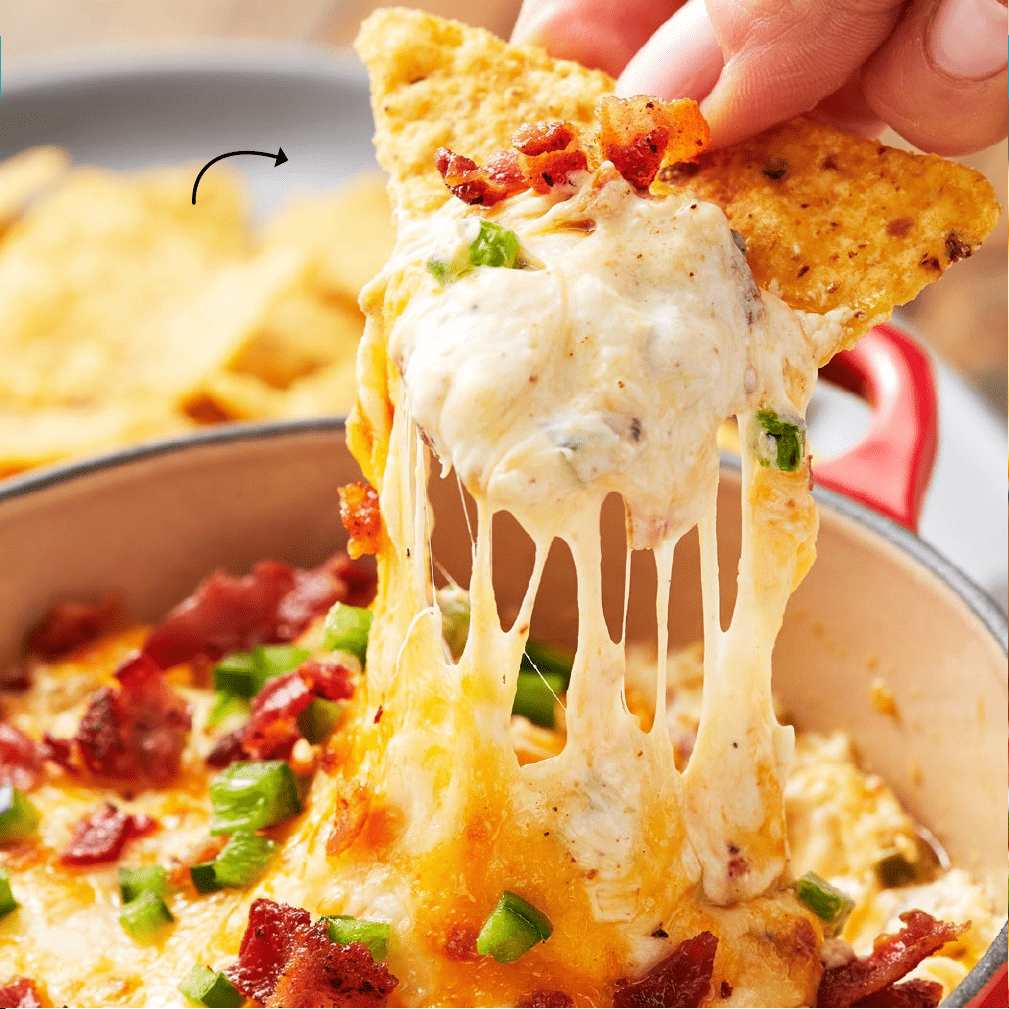
Makes 4-6 servings | Total time: 30 minutes
Jalapeño
Popper Dip
Ingredients:
1
Preheat oven to 350ºF. In a large nonstick skillet over medium
heat, cook bacon in batches until crispy, about 8 minutes. Drain on
a paper towel–lined plate, then chop.
2
In the Delish Stand Mixer, stir together cream cheese, mayo, sour
cream, garlic powder, most of the cooked bacon (reserve some for
topping), most of the jalapeños (reserve some for topping),
and 1 cup each of cheddar and Monterey Jack. Season with
salt and pepper.
3
Transfer to a small oven-safe skillet or baking dish and sprin-
kle with remaining ½ cup each of cheddar and Monterey Jack,
cooked bacon, and jalapeño.
4
Bake until dip is golden and bubbly, 15 to 20 minutes. (If desired,
broil 3 minutes to get cheese extra-golden.) Serve with tortilla
chips or baguette slices.
10 slices bacon
1 (8-oz.) block cream cheese,
softened
¹
3
/
cup mayonnaise
¹
3
/
cup sour cream
1 teaspoon garlic powder
2 jalapeños, minced
1½ cup shredded cheddar
1½ cup shredded Monterey Jack
Kosher salt
Freshly ground black pepper

· 40 ·
FOR THE CUPCAKES
1 (15-oz) box vanilla
cake mix
1 (12-oz) can ginger beer
½ teaspoon ground ginger
FOR THE FROSTING
1 cup (2 sticks) butter,
softened
4 cups powdered sugar,
divided
¼ cup vodka
2 tablespoons lime juice
(about 1 lime), plus 1
tablespoon lime zest
Small lime slices
20 sprigs fresh mint
Ingredients:
1
Make cupcakes: Preheat oven to 350ºF and line two mufn tins with 20 cupcake liners.
In the Delish Stand Mixer, whisk together cake mix, ginger beer, and ground ginger until
fully incorporated.
2
Fill cupcake liners ¾ full with batter. Bake until a toothpick inserted into the middle of each
comes out clean, about 18 minutes.
3
Let cupcakes cool in pans for 5 to 10 minutes, then transfer to a wire rack to
cool completely.
4
Make frosting: In the Delish Stand Mixer, beat butter until uffy. Add 3 cups powdered
sugar and beat until smooth, then add vodka and lime juice and zest and beat until incor-
porated. Add remaining 1 cup powdered sugar and beat until smooth. Transfer to a piping
bag tted with large open star tip.
5
Pipe frosting onto cooled cupcakes and garnish with a slice of lime and sprig of mint.
Directions
Moscow
Mule Cupcakes
Makes 20 cupcakes | Total time: 1 hour 15 minutes


· 42 ·
COOKING SPRAY
18 graham crackers,
crushed
¾ cup (1½ sticks) melted
butter
½ cup granulated sugar
FOR THE FILLING
4 (8-ounce) blocks cream
cheese, softened
½ cup sour cream
1
¹
3
/
cups granulated sugar
6 large eggs
2 teaspoons pure vanilla
extract
1 teaspoons kosher salt
Neon food dye in 6 colors
Ingredients:
1
Preheat oven to 325°F and grease an 9x13-inch pan with cooking spray. Make crust: In
a medium bowl, stir together crushed graham crackers, melted butter, and sugar until
combined. Press into prepared pan.
2
Make lling: In the Delish Stand Mixer, beat cream cheese, sour cream, and sugar until
smooth. Add eggs, vanilla, and salt and beat until combined. Pour about half the cheese-
cake mixture into pan.
3
Divide remaining half cheesecake mixture among six small bowls (one bowl for each
color you’re using) and add a couple drops food coloring to each bowl. Stir to combine,
adjusting color as desired.
4
Add spoonfuls of the dyed cheesecake mixture to the plain cheesecake mixture,
alternating colors until you’ve used up the whole mixture. Using a butter knife,
swirl colors together.
5
Place pan inside a large roasting pan and pour in enough boiling water to come halfway
up the sides. Bake until only slightly jiggly, about 45 minutes. Turn off oven and prop open
oven door slightly. Let cool in oven 1 hour. Remove pan from water and refrigerate until
rm, 3 hours, or up to overnight. Slice into bars before serving.
Directions
Rainbow
Cheesecake Bars
Makes 20 cheesecake bars | Total time: 4 hours (including chilling)


· 44 ·
½ cup (1 stick) butter, softened
½ cup granulated sugar
¾ cup packed light brown sugar
1 large egg
1 teaspoon pure vanilla extract
1¾ cups all-purpose our
¾ teaspoon baking soda
½ teaspoon kosher salt
1¼ cups semisweet chocolate
chips, divided
Pinch aky sea salt
FOR SERVING
Vanilla ice cream
Caramel sauce, warmed
Chocolate syrup
Ingredients:
1
Preheat oven to 350°F and grease a 10-inch ovenproof skillet with cooking spray. In
the Delish Stand Mixer, beat butter and sugars until light and uffy. Beat in egg and
vanilla. Add our, baking soda, and salt and mix until just combined. Gently fold in 1
cup chocolate chips.
2
Press dough into prepared skillet and top with remaining ¼ cup chocolate chips and
sprinkle with aky sea salt. Bake until edges are golden, 20 to 24 minutes.
3
Serve warm with ice cream, caramel, and chocolate syrup.
Directions
Chocolate Chip
Skillet Cookie
Makes 12 cookies | Total time: 40 minutes


· 46 ·
Customer Support
7am
–
7pm
Our customer support teams in the US and Canada are at
your service Monday - Friday during the times below.
Reach us at 1 (800) 898-6970 or [email protected]
Dash values quality and workmanship and stands behind this
product with our Feel Good Guarantee
™
. To learn more about
our commitment to quality, visit bydash.com/feelgood.
8am
–
8pm
9am
–
9pm
10am
–
10pm
Hey Hawaii! You can reach our customer service team from 5AM to 5PM.
And also, Alaska, feel free to reach out from 6AM - 6PM.
feel good
guarantee
™

· 47 ·
STOREBOUND, LLC – 1 YEAR LIMITED WARRANTY
Your StoreBound product is warranted to be free from defects in material and workmanship for a period of
one (1) year from the date of the original purchase when utilized for normal and intended household use.
Should any defect covered by the terms of the limited warranty be discovered within one (1) year, StoreBound,
LLC will repair or replace the defective part. To process a warranty claim, contact Customer Support at
1-800-898-6970 for further assistance and instruction. A Customer Support agent will assist you by troubleshooting
minor problems. If troubleshooting fails to x the problem, a return authorization will be issued. Proof of purchase
indicating the date and place of purchase is required and should accompany the return. You must also include your
full name, shipping address, and telephone number. We are unable to ship returns to a PO box. StoreBound will
not be responsible for delays or unprocessed claims resulting from a purchaser’s failure to provide any or all of the
necessary information. Freight costs must be prepaid by the purchaser.
Send all inquiries to [email protected].
There are no express warranties except as listed above.
REPAIR OR REPLACEMENT AS PROVIDED UNDER THIS WARRANTY IS THE EXCLUSIVE REMEDY OF
THE CUSTOMER. STOREBOUND SHALL NOT BE LIABLE FOR ANY INCIDENTAL OR CONSEQUENTIAL
DAMAGES OR FOR BREACH OF ANY EXPRESS OR IMPLIED WARRANTY ON THIS PRODUCT EXCEPT
TO THE EXTENT REQUIRED BY APPLICABLE LAW. ANY IMPLIED WARRANTY OF MERCHANTABILITY OR
FITNESS FOR A PARTICULAR PURPOSE ON THIS PRODUCT IS LIMITED IN DURATION TO THE DURATION
OF THIS WARRANTY.
Some states do not allow the exclusion or limitation of incidental or consequential damages, or limitations on how
long an implied warranty lasts. Therefore, the above exclusions or limitations may not apply to you. This warranty
gives you specic legal rights and you may also have other rights, which vary from state to state.
Oreo® is a registered trademark of the National Biscuit Company. Hershey’s Cookies ‘n’ Creme is a trademark
and brand of Hershey’s Chocolate & Confectionery LLC.
REPAIRS
DANGER! Risk of electric shock! The Dash Delish Stand Mixer is an electrical appliance.
Do not attempt to repair the appliance yourself under any circumstances.
Contact Customer Support regarding repairs to the device.
Warranty
TECHNICAL SPECIFICATIONS
Voltage 120V ~ 60Hz
Power Rating 350W
Stock# DCSM350_20200423_V4
This product has passed food
safety testing in accordance
with FDA guidelines.
FOOD
SAFE

· 48 ·
DELISH.COM BYDASH.COM