Loading ...
Loading ...
Loading ...
7
www.warmlite.co
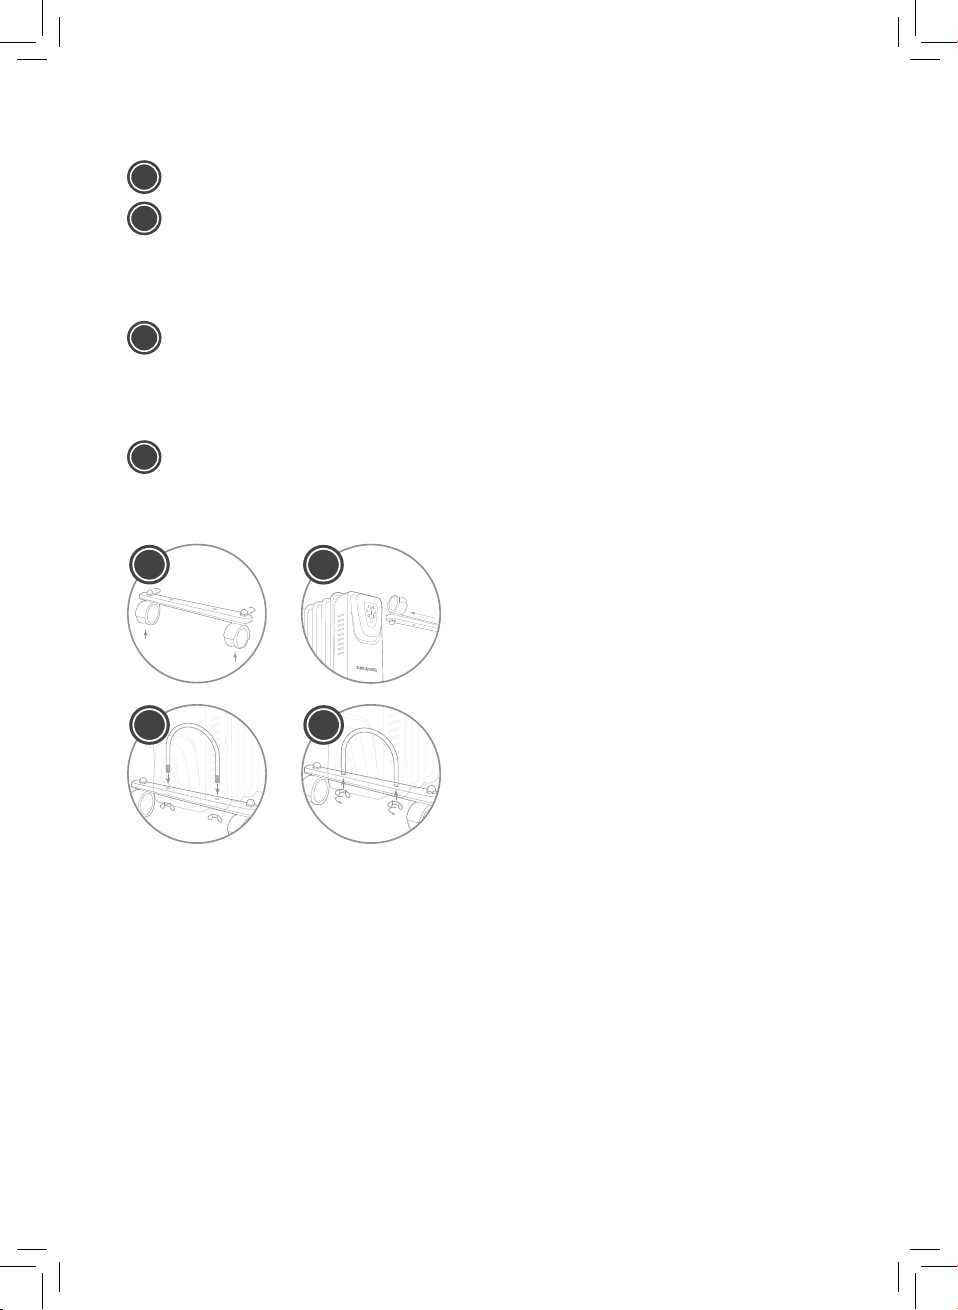
ASSEMBLY
A
Fit the Castor units to the cross bars.
B
Turn the radiator upside-down on a
scratch-free and stable surface to
prevent damage to the paint nish or
your oor surfacing.
C
Fit the two Castor units to the radiator by
placing the U bolts between the
outermost ns on each side of the
radiator.
D
Securely fasten the two Castor units onto
the radiator by screwing two Wing Nuts
onto each Foot.
Once turned to the upright position, allow the oil
to settle and wait for at least half an hour before
using.
USING YOUR APPLIANCE
NOTE: It is normal if your heater emits some
smell and fumes, when it is turned on for the rst
time or has not been used for a long period of
time. This should disappear after the heater has
been on for a short while.
1. Set the radiator thermostat to the minimal
position and with wall socket power switch
in the ‘OFF’ position, insert the plug to the
power supply.
2. The thermostat will automatically maintain
your desired room temperature.
3. Set the power switch to the ‘ON’ position.
4. Turn the thermostat control clockwise
all the way round until you hear a click,
this sound indicates that the oil heater is
activated, the indicator is ON. Continue
turning the thermostat control clockwise to
its highest setting.
5. When the indicator light is ON, the heater is
activated. The indicator light turns ON and
OFF repeatedly during use. This is normal
and shows that the thermostat is keeping
the radiator at your desired temperature.
6. There are three heat settings:
• Switch 1 = Low Heat
• Switch 2 = Medium Heat
• Both Switches = High Heat
A
C
B
D
Loading ...
Loading ...
Loading ...