User Manual Fireplace TV Stand
INSTALLATION INSTRUCTION
Position your completed mantel close to its final location. Make sure you can access the back of the mantel as your electric fireplace appliance will be installed from back.
Using a Phillips head screwdriver, remove the screws and the metal mounting center opening. Next unpack the electric fireplace appliance carefully. Position the appliance behind the fireplace with front facing the wood mantel. With the help of an adult assistant, lift the appliance and gently slide it into the opening in the mantel. Make sure the appliance is centered left and right in the opening. Be careful when placing appliance and adjusting, bottom of appliance could scratch the finish of the base/hearth of your fireplace. Re-attach the mounting brackets with the Phillips head screwdriver, and supplied screws
DO NOT OVER TIGHTEN. With the help of an assistant, carefully lift completed unit and place it with the front facing out in the final location you have chosen for your fireplace. Make sure to secure the electrical cord before lifting or moving completed fireplace. When choosing a final location, make sure you will have clear access to grounded electrical outlet.

Grounding Instructions:
This heater is for use on 120 volts. The cord has a plug as shown at (A) in figure 1. An adapter as shown at (C) is available for connecting three-blade grounding-type plugs to two-slot receptacles. The green grounding lug extending from the adapter must be connected to a permanent ground such as a properly grounded outlet box. The adapter should not be used if a three-slot grounded receptacle is available.

ELECTRICAL CONNECTION
The unit comes standard with 6 feet (1.8M) three-wire cord, exiting from the rear of the fireplace. Plant installation to avoid the use of an extension cord.
CLEANING TRIM
Clean the metal trim using a soft cloth, slightly dampened with citrus oil-based product, and buff with a clean soft cloth. DO NOT use brass polish or household cleaners as these products will damage the metal trim. Citrus oil-based products can be obtained at supermarkets or hardware stores.
MAINTENANCE
The motors used on the fan and the flame generator assembly are pre-lubricated for extended bearing life and require no further lubrication. However, periodic cleaning/vacuuming of the fan/heater unit is recommended. Make sure the unit is turned OFF and unplugged whenever you are cleaning the heat of the fireplace.
PACKAGE CONTENTS

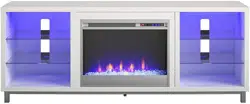
INSTALLING THE ACRYLIC CRYSTALSANDSIDELIGHT
1. remove the 4 screws on the back left and right sides of the firebox that bold the glass front In place.
2. Carefully remove the glass front.
3. Arrange the acrylic crystal along the inset window ledge at the glass front.
4. Reinstall the glass front.
5. Line up the holes on the front with the holes On the firebox and insert and tighten 4 screws To hold the glass front in place.
6. Find the 2 LED light bars from the package and plug into both side of the electric fireplace

OPERATING INSTRUCTION
CONTROL PANEL ACCESS
The control panel can be accessed at upper-right corner of the appliance
OPERATION INSTRUCTION WITHOUT REMOTE

POWER
The POWER button turns the appliance on or off. It has a memory function; the button turns off all functions at once but retains the settings in the memory. By pressing the button again, the unit will turn on at the same settings. If the TIMER has set & time has expired all functions will stop. Press the POWER button start the appliance.
FLAME
The FLAME control switch manages the flame brightness. There are 4 brightness levels and an off position. Each time the FLAME button is pressed, the intensity of the flame decrease. When adjusting the FLAME button, a number indicating the brightness of the flame will be visible on the digital display. After turning on the digital display, if nothing happens within 10 seconds, the digital display will turn off. There is a downlight over the ember bed. When the FLAME button is in the ON position, the downlight will turn on, it will turn off in the OFF position.
The FLAME button has a locking function. Press and hold the FLAME button for 5 seconds. The downlight will turn off and the ember bed will flash 6 times, it is confirming the flame function is locked. When you want to unlock the flame function, repress and hold the FLAME button for 5 seconds, the ember bed will flash 6 times, and both the flame light and down light will keep the original state.
HEATER
The HEATER button turns the heater on and off. When in the ON position, press and hold the HEATER button for 5 seconds and enter temperature adjustment mode. In the adjustment mode, the digital display will flash at 0.5-second intervals. There are 11 temperature settings:72℉-74℉-76℉-78℉-80℉-82℉-ON-64℉---72℉(22℃-23℃-24℃-25℃-26℃-27℃-ON-18℃---22℃) After the temperature is selected the digital display will flash 5 times and exit from setting status. After turning on the digital temperature display, if nothing happens within 10 seconds, the digital display will expire. Temperature unit convert function: With the heater is ON the position, press and hold the power icon for 5 seconds, current temperature unit display will flash 3 timers and convert to another temperature unit. Lock & unlock heater function: press and hold the heater icon for 10 seconds, and the ember bed will flash 6 times, indicating that the heater function is locked. To unlock the heater function, just repress and hold the heater icon for 10 seconds again, then the ember bed will also flash 6 times indicating the heater function is unlocked and recovering the original states which you have set.
TIMER
The TIMER has adjustable setting at range from 30 minutes to 6 hours and OFF. As shown the following: 30 minutes-1h-2h-3h-4h-5h-6h-OFF. If the digital display turns on and nothing happens within 10 seconds, the digital display will auto shut off. Once you have set the timer, and the timer is up, the ember bed will flash 6 timers and close all the functions and enter standby mode. In this mode, you should touch the power icon to restart the appliance.
OPERATING INSTRUCTION WITH REMOTE

POWER
The POWER icon turns the appliance on and off. It has a memory function, press the power button once to turns power on. Pressing the power button again will turn the power off.
FLAME
The FLAME button manages the flame brightness. Each time the flame button has pressed the intensity of the flame brightness. There are four brightness levels you can cycle through including the OFF setting. When adjusting the flame button a number will appear on the digital display indicating the brightness of the flame. The FLAME button does not have a locking or unlocking flame function.
HEATER
The HEATER button turns the heater on and off. When pressing the HEATER button on the remote, the default setting temperature is 82℉(22℃). The HEATER button does not have locking or unlocking heater function
TIMER
The TIMER button on the remote has the same function as the TIMER button on the control panel. It can adjust timer range from 30mins-1h-2h-3h-4h-5h-6h. The timer setting will be visible on the digital display.
INCREASE/DECREASE BUTTON 
With the heater on, press the Increase/Decrease button to change the desired temperature. There are 11 temperature settings: 72℉-74℉-76℉-78℉-80℉-82℉-ON-64℉---72℉(22℃-23℃-24℃-25℃-26℃-27℃-ON-18℃---22℃).
BATTERIES REPLACEMENT
1. Turn the remote control over, and locate the battery cover

2. Remove the battery cover by sliding it towards the bottom end of the remote control.

3. Insert two AAA batteries into the battery socket, the battery has two poles(positive and negative), the flat side is negative pole, make sure the batteries are firmly seated into the remote control

4. Reinstall the battery cover, making sure it clicks into position

NOTE: Do not use old and new batteries together
IMPORTANT INSTRUCTIONS
When using electrical appliances, basic precautions should always be followed to reduce the risk of fire, electrical shock, and/or injury including the following:
1. Read all instructions before using this heater.
2. This heater is hot when in use. To avoid burns, do not let bare skin touch hot surfaces. If provided, use handles when moving this heater. DANGER: High temperature may be generated under certain abnormal conditions. Do not partially or fully cover or obstruct the front of the heater. WARNING: In order to avoid overheating, do not cover the heater. It cannot be used in a closet.
3. CAUTION: The appliance should not be used by children or persons with reduced physical, sensory or mental capabilities.
4. Children should be advised not to play with the appliance.
5. Always unplug this appliance when not in use.
6. Do not operate any heater with a damaged cord or plug or after the appliance malfunctions, or if it has been dropped or damaged in any manner.
7. If the supply cord is damaged, it must be replaced by the manufacturer, its service agent, or similarly qualified persons in order to avoid a hazard.
8. Any repairs to this fireplace should be carried out by a qualified service person.
9. Under no circumstances should this fireplace be modified. Parts having to be removed for servicing must be replaced prior to operating this fireplace again.
10. Do not use outdoors.
11. This heater is not intended for use in bathrooms, laundry areas, and similar indoor locations. Neverlocatethis appliance where it may fall into a bathtub or other water container.
12. Do not run the cord under carpeting. Do not cover cord with throw rugs, runners, or the like. Arrange the cord away from traffic areas and where it will not be tripped over.
13. To disconnect this appliance, turn the controls to the off position, then remove the plug from the outlet.
14. Connect to a properly grounded outlet only.
15. This appliance, when installed, must be electrically grounded in accordance with local codes or, in the absence of local codes, with the current CSA C22.1 Canadian Electrical Code or for USA installations, follow local codes and the National Electrical Code, ANSI/NFPA NO.70.
16. There is a protective thermostat limiter inside the heater. When the inner temperature over heats, the thermostat limiter will shut off the power supply to avoid the risk of fire damage to the appliance.
17. The heaters must not be located immediately below a socket-outlet.
18. Do not insert or allow foreign objects to enter any ventilation or exhaust opening as this may cause electric shock or fire, or damage the appliance.
19. To prevent a possible fire, do not block air intake or exhaust in any manner. Do not use on soft surfaces, like bed, where opening may become blocked
20. This appliance has hot and arcing or sparking parts inside. Do not use where gasoline, paint, or flammable liquids are used or stored. This fireplace should not be used as a drying rack for clothing. Christmas stockings or decorations should not be hung in the area of it.
21. Use this appliance only as described in the manual. Any other use not recommended by the manufacturer may cause fire, electric shock, or injury to persons.
22. Always plug heaters directly into a wall outlet/receptacle. Never use with an extension cord or relocatable power tap (outlet/power strip).
23. This product contains a button battery. If swallowed, it could cause severe injury or death in just 2hours.