Loading ...
Loading ...
Loading ...
9
How to Empty
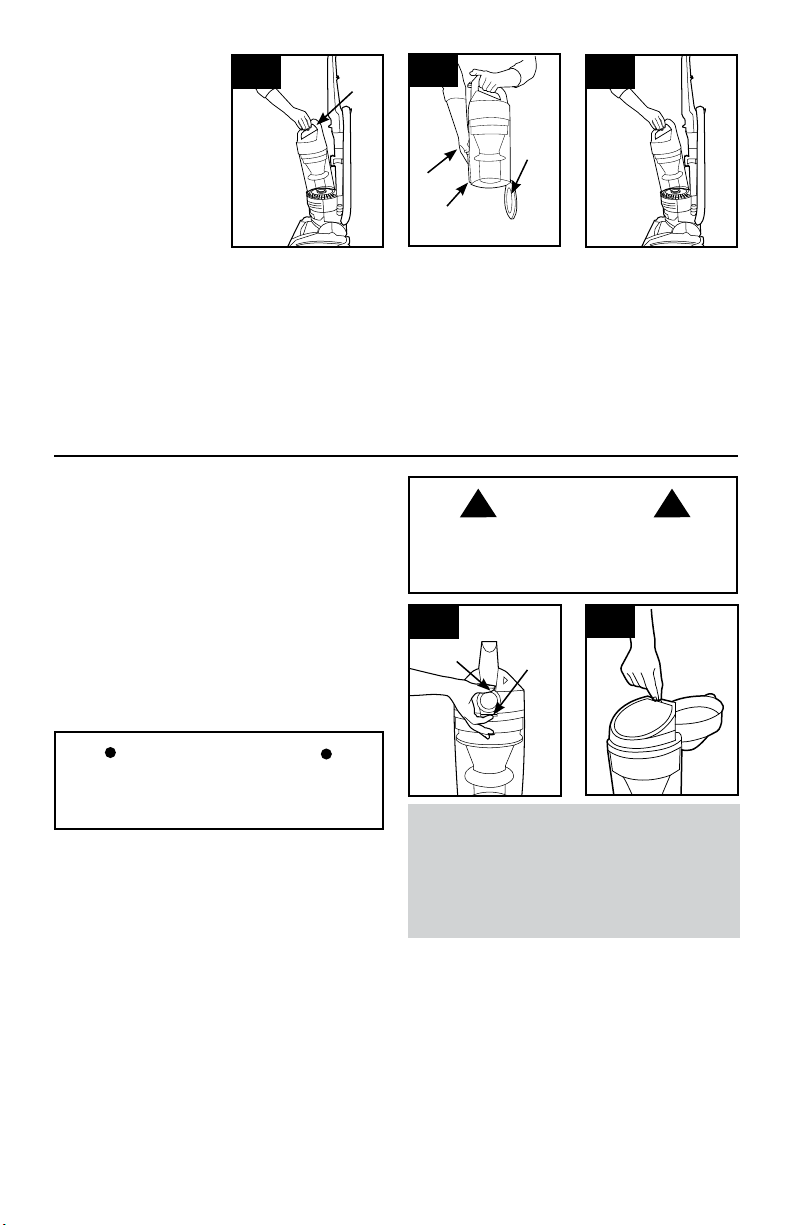
4.3 Press dirt cup
release button (A) and
pivot cup out.
4.4 Hold dirt cup over
trash receptacle, push
dirt cup door release
lever (B) to open dirt
cup door (C).
Close dirt cup door (C).
Press firmly to secure
at front (D).
4.5 Place bottom of dirt
cup into vacuum body
first. Pivot dirt cup into
vacuum body and press
firmly until it locks into
place.
4.4
B
C
To maintain optimal performance, filters should
be cleaned at least every two months under
normal use.
Rinsable Filter: How to Clean
Remove dirt cup as described in Fig. 4.3.
4.6 Pull up on dirt cup latch (A) to open.
4.7 Pull on the filter to remove Rinsable Filter.
Hold filter under running water for two minutes to
remove dirt and debris. Squeeze filter twice while
underwater. Remove from water and squeeze a
final time to remove excess water.
FILTERS: When to Clean
4.7
CAUTION
! !
To reduce the risk of injury from moving parts
- Unplug vacuum before servicing. Do not use
vacuum without dirt cup or filters in place.
D
IMPORTANT
Allow filter to dry completely before replacing.
Dry filter on edge so air circulates on both sides
of filter. This may take up to 24 hours.
Replace filter, tab side out.
Close lid securely by pushing at (B) until it clicks as
shown in Fig. 4.6.
Replace dirt cup as described in Fig 4.5.
4.6
A
B
When used and maintained properly, your Rinsable
Filter should not need replacement within the
warranty period. If desired, additional filter is
available at Hoover.com or call 1-800-944-9200.
Ask for Hoover
®
Part No.303173001.
What to Buy: Rinsable Filter
Actual model may vary from images shown.
DIRT CUP
4.3
A
4.5
Loading ...
Loading ...
Loading ...