Loading ...
Loading ...
Loading ...
20
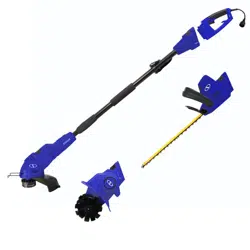
2. Lift and remove the spool out of the hub (Fig. 41) and
clean out any dirt or grass residue.
3. In case of jams or tangled line, unwrap about 6 inches
(15 cm) of line to ensure that it's not damaged.
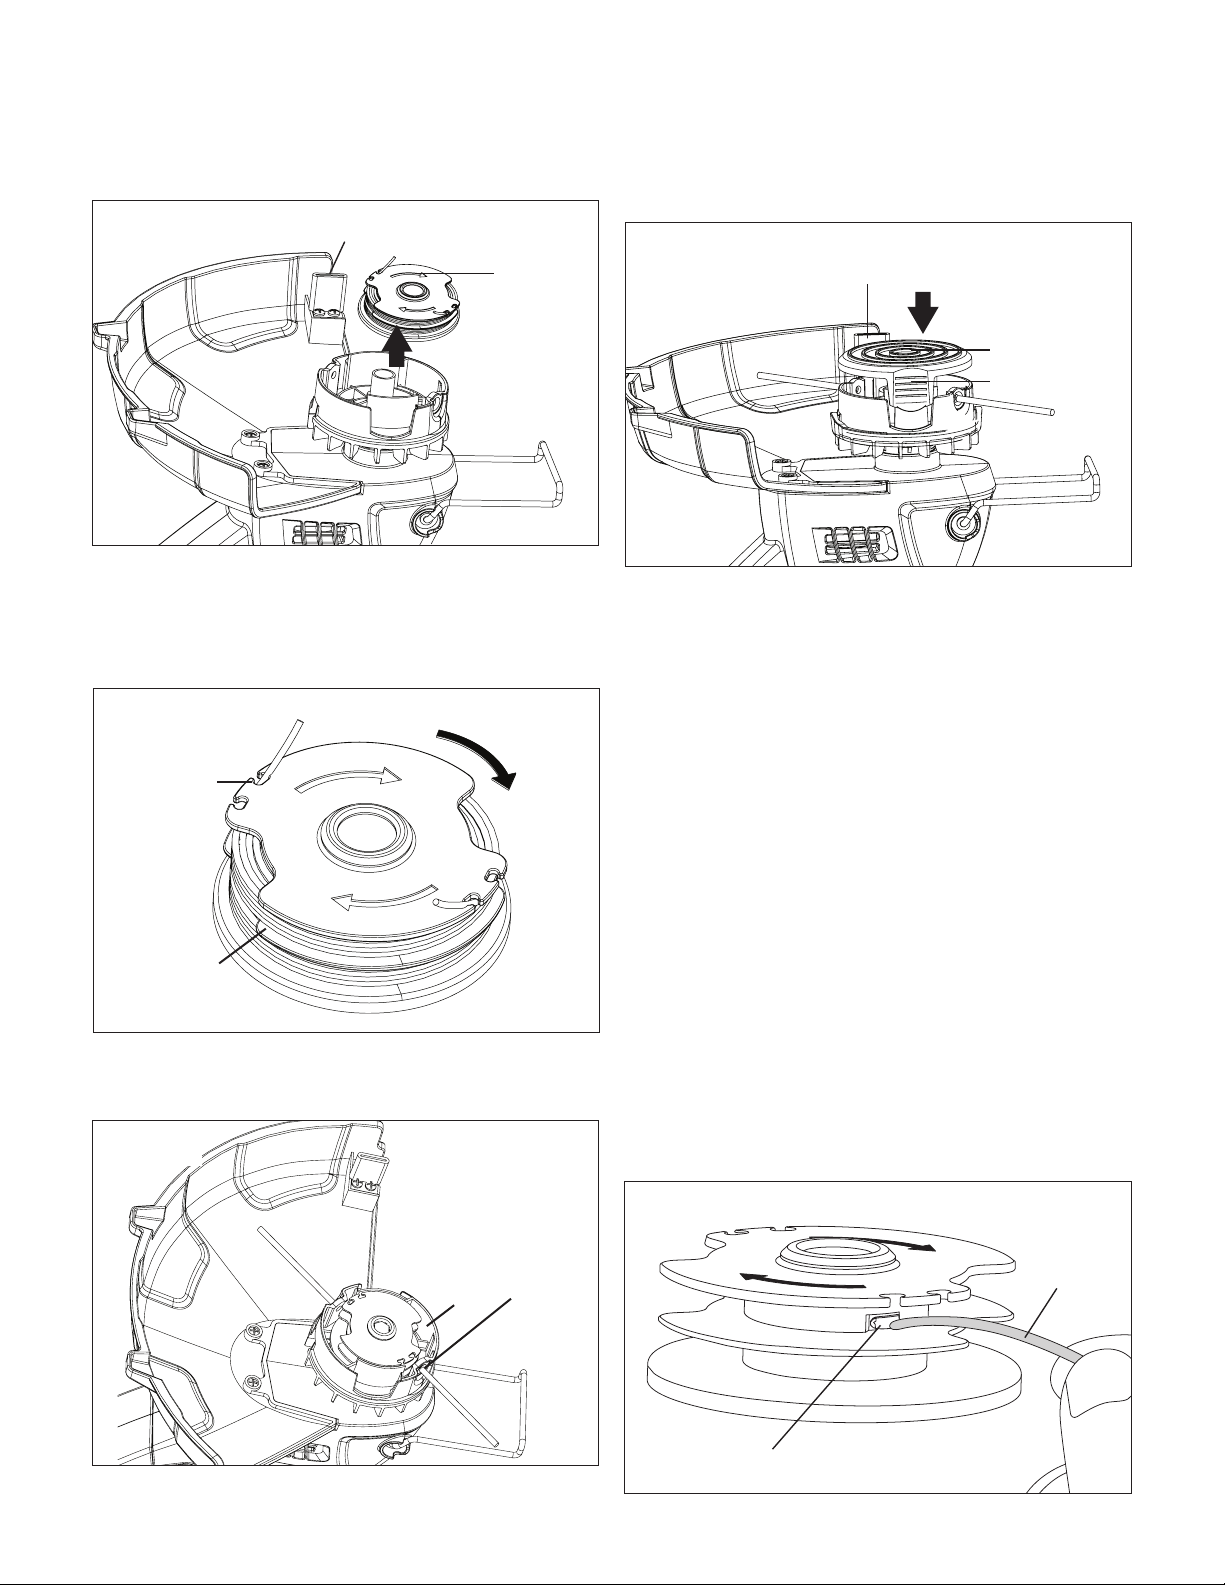
4. If it appears undamaged, rewind it and hook each line end
through the two slots on each side of the spool (Fig. 42).
This will temporarily prevent the spool from unwinding.
5. Unhook the line from the slot and carefully reinsert through
its respective slot on each side of the hub and gently
press the spool down (Fig. 43).
6. Reinstall the spool cover by depressing the release tabs
into their slots in the hub, and push down until the spool
cover clicks into place (Fig. 44).
7. Remove line cutter guard to resume normal operation.
8. Connect the tool to a power source and turn the tool
on. In a few seconds, you will hear the line being cut
automatically to the proper length.
Winding the Line
NOTE: A dual-line factory wound spool
(model GTS4000E-RS-6PK) is available for easy spool
replacement on the GTS4000E electric grass trimmer.
Visit sunjoe.com to purchase this accessory online. Should
you wish to wind the line yourself, the instructions are provided
below. Self-winding, however, is NOT recommended because
if the line is not wound properly it can cause the trimmer’s auto
feed system to malfunction. For this reason, users are strongly
urged to purchase the pre-wound spool.
1. Unplug the grass trimmer.
2. To remove the spool from the trimmer hub, follow steps
1 and 2 from the section "Replacing the Spool + Clearing
Jams and Tangled Lines" beginning on page 19.
3. Take two lines, each with maximum length of 13.1 ft. (4 m)
and maximum diameter of 0.063 in. (1.6 mm) per slot.
Insert the end of one line in one of the eyes of the spool
and wind on the line according to the indicated direction
of winding. Please make certain that the line is wound on
evenly and tightly (Figs. 45 – 47).
Fig. 41
Spool
Cutter guard
Fig. 42
Spool
Slot
Fig. 43
Hub
Slot
Fig. 44
Spool cover
Cutter guard
Tab
Fig. 45
Eye of the spool
Spool line
Loading ...
Loading ...
Loading ...