Loading ...
Loading ...
Loading ...

9
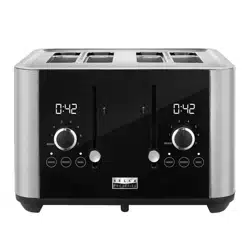
Toasting Cycles
TOAST / CANCEL Function
1. Make sure the sliding crumb tray is locked in position at the back of the Toaster and the
toasting lever is in the UP position.
2. Make sure no bread or other objects are inside the toasting slots. Place Toaster on a at,
level, heat resistant surface.
3. Plug the power cord into a 120V AC electrical outlet.
4. Position the browning control dial to desired setting. To test toasting times for browning,
it is best to use both toasting slots; position the browning control dial between (3) and (4)
medium; then adjust each subsequent toasting to your preference.
5. Remove all protective wrappings from toaster food before placing into the toasting slot(s).
IMPORTANT: Avoid toasting torn bread slices or small pieces of toaster food that may get
lodged in toasting slot(s).
6. ANTI-JAM Feature. If any toast or toaster food gets jammed, the Toaster will shut OFF
automatically. Unplug the Toaster immediately and allow Toaster to cool down. Following
the procedures outlined in the section entitled “Removing Lodged Foods,” clear the jam.
7. Insert bread or toaster food into the toasting slot(s). Lower the toasting lever until locked
into place. Automatic centering guides close to hold food upright for uniform side-to-side
toasting. When the bread is lowered into position, the light above the CANCEL function
will illuminate and toasting will begin as the remaining TIME appears on the digital
display.
NOTE: The toasting lever will not lock in position unless the Toaster is plugged into a 120V
AC electrical outlet.
NOTE: When toasting a single slice of bread or any toaster food, food may be placed in
any toasting slot.
NOTE: To prevent a re hazard, never place bread or toaster food over the top of the
toasting slots; always place bread into the slots.
NOTE: DO NOT change the browning control dial selection during the toasting cycle. First
press the light above the CANCEL function; then slide the browning control dial to adjust
the browning level. Lower the toasting lever and continue toasting.
90105-90123_BellaPro 4 Slice Toaster_IM_r1.indd 9 7/2/20 6:40 PM
10
8. When the toasting TIME displays 0:00, toast or toaster food will rise automatically. Use the
high-lift lever to make it easier to remove smaller toasted items. Push the toasting lever
manually UP to the top of the toasting slot and carefully remove toasted food. Use care as
both the food and the top of the Toaster will still be hot.
IMPORTANT: Never use a fork or sharp-edged utensil to remove toast, because that may
damage the heating element or cause injury.
9. Unplug cord from wall outlet when not in use.
CANCEL Function
1. When the toasting lever is lowered, the light above the CANCEL function will illuminate.
Toasting will begin as the remaining TIME appears on the digital display.
2. To stop or interrupt any toasting cycle, press the CANCEL function. Bread or toaster food
will automatically rise; the Toaster will turn OFF.
3. Unplug cord from wall outlet when not in use.
BAGEL Function
The BAGEL setting works great for English mufns, too!
1. Place one half in each toasting slot with the cut sides facing the center.
2. Slide the browning control dial to desired setting.
3. Press the toasting lever down. the light above CANCEL function will illuminate.
4. Press the BAGEL function. the light above the BAGEL function will illuminate. BAGEL
toasting will begin as the remaining TIME appears on the digital display.
5. When the toasting TIME displays 0:00, the toasted bagel will rise automatically. Use care
as the bagel and the top of the Toaster will still be hot.
6. To stop or interrupt the BAGEL cycle, press the light above the CANCEL function. The
toasted bagel will automatically rise; the Toaster will turn OFF.
7. Unplug cord from wall outlet when not in use.
90105-90123_BellaPro 4 Slice Toaster_IM_r1.indd 10 7/2/20 6:40 PM