Loading ...
Loading ...
Loading ...
24
EN
OPERATION - General
The grill is only intended for domestic use, not for professional use.
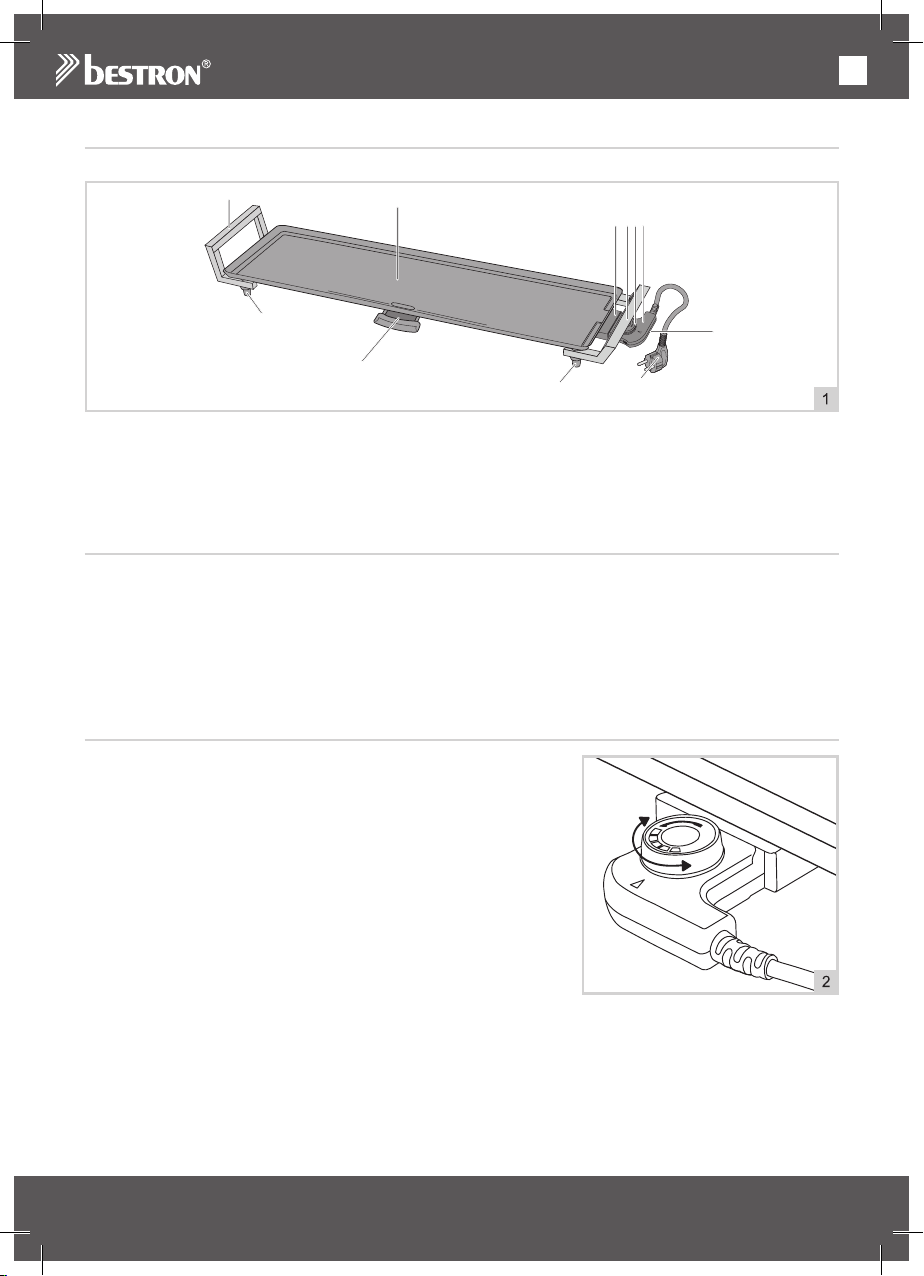
1. Handle
2. Grill plate
3. Socket
4. Thermostat dial
5. Indicator light, temperature
6. Removable thermostat
7. Power cord with plug
8. Collecting groove and drip tray
9. Non-slip feet
OPERATION - Before first use
1. Remove the grill from the packaging, and remove all packaging materials.
2. Clean the grill plate before using the appliance for the first time (see ‘Cleaning and maintenance’).
WARNING:
• The appliance may emit a little smoke and a characteristic smell when you switch it on for the first time.
This is normal and will stop on its own. Make sure the appliance has sufficient ventilation.
• Keep house birds away from the appliance when it is in use. Fumes released from the non-stick
coating are harmful to birds.
OPERATION - Preheating
1.
Put the appliance on a level and heat-resistant surface.
2. Insert the thermostat completely into the connection socket of
the grill plate. Only the supplied cord with thermostat may be
used.
3. Put the plug in the wall socket.
4. Adjust the thermostat dial to the required temperature (position 1
through 5). The indicator light on the thermostat will illuminate to
show that the heating element has been switched on.
Position Temperature (°C)
1 approx. 180°C
2 approx. 200°C
3 approx. 220°C
4 approx. 240°C
5 approx. 260°C
5. After waiting a few minutes check whether the indicator light is
extinguished.
6. Once the indicator light has extinguished the appliance has reached the required temperature, and is
ready for use. During use the heating element will switch on and off to keep the temperature of the grill
plate constant. Consequently the indicator light will also occasionally be illuminated.
1
2
3
4
5
0
T
h
e
r
m
o
s
t
a
t
8.
2.
3. 4.
5.
7.
9.
9.
1.
1.
6.
1
2
3
4
5
SELF
CONTROL
T
h
e
r
m
o
s
t
a
t
Loading ...
Loading ...
Loading ...