Loading ...
Loading ...
Loading ...
5
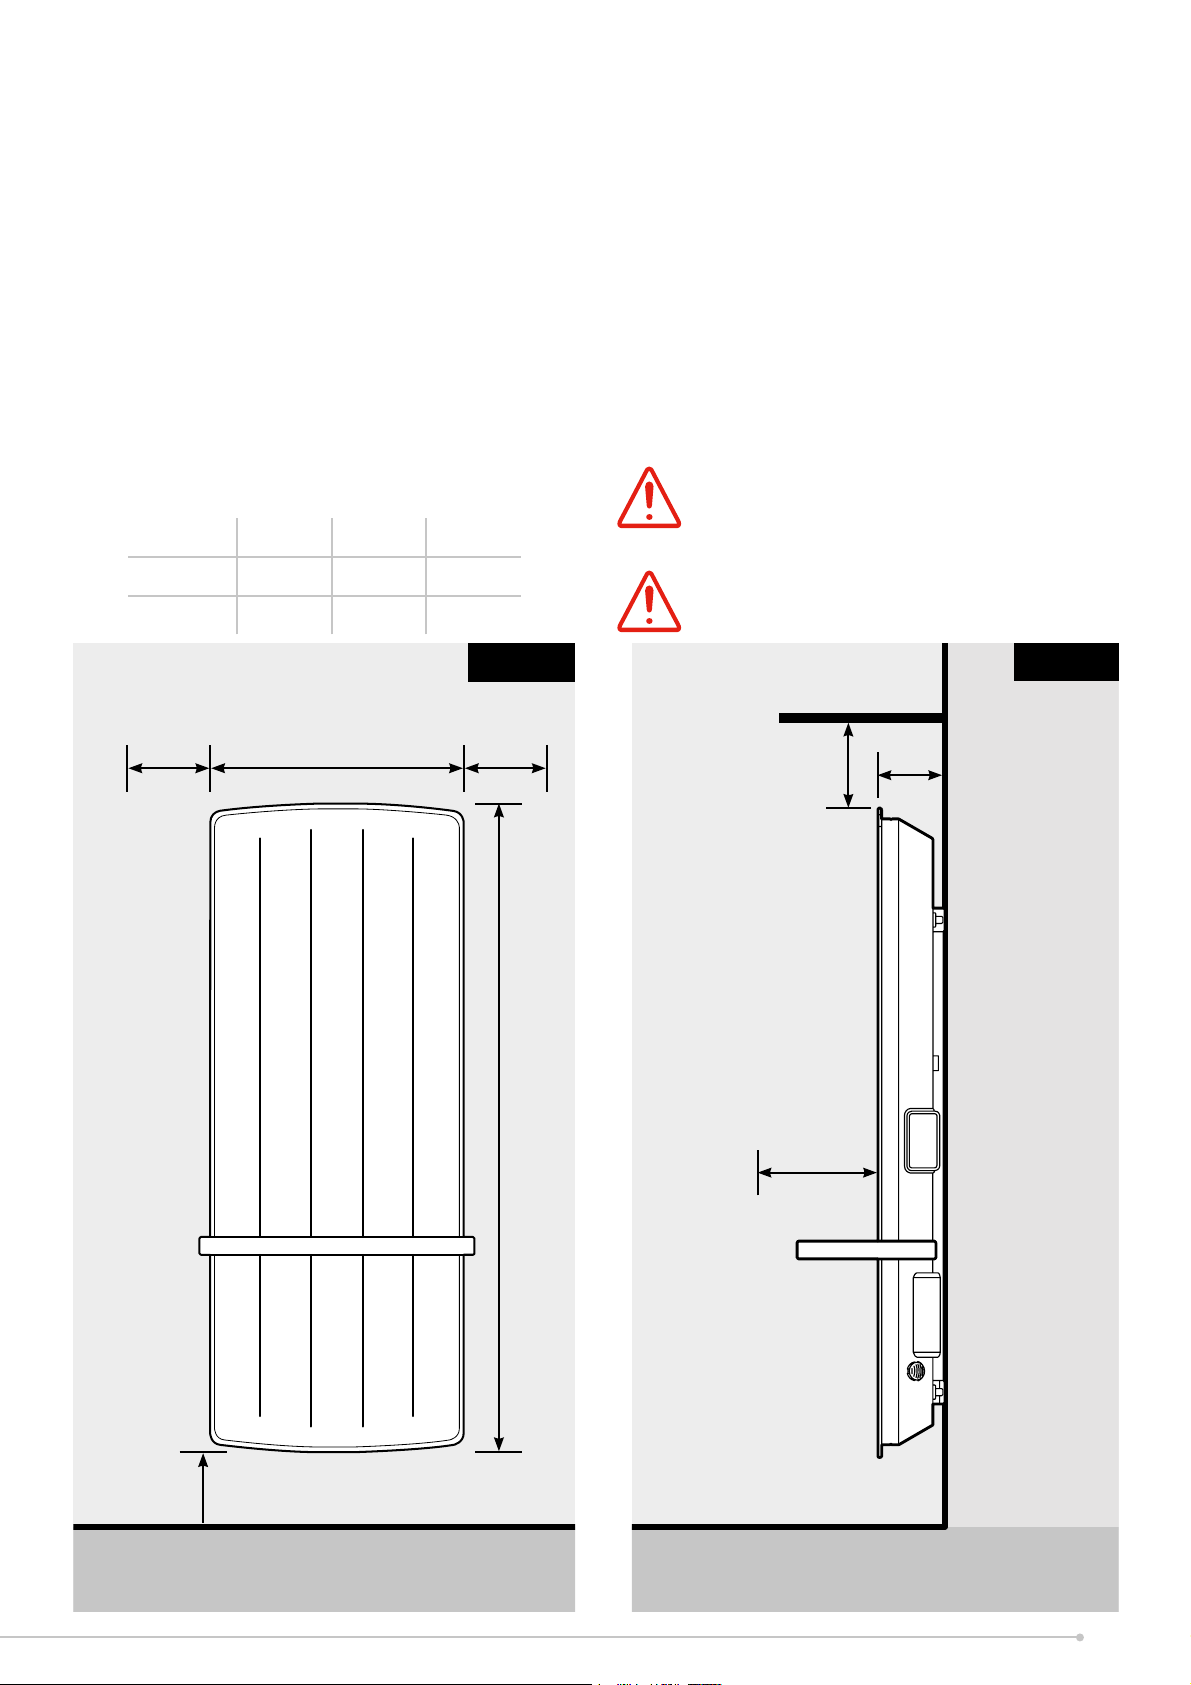
Fig.•3
Model A(mm) B(mm) C(mm)
BPH100M 418 1073 271
BPH100G 430 1100 265
C•(min)
A
150
mm•(min) 150mm•(min)
B
Fig.•4
300mm
300mm•(min)
114mm
Shelf•/•Ceiling•/•Obstruction
Minimum•front•clearance
To•mount•the•heater•to•the•wall:
1. Remove wall mounting bracket from the back
of the heater by depressing the spring latch
at the side of each bracket - see Fig.2.
2. Fix the wall bracket securely to the wall through
the four screw holes. Ensure suitable screw
! ttings are used for the particular wall type.
3. Present the heater to the wall bracket, and
engage left hand slots in the back with bracket
hooks.
4. Press heater into locked position and ensure
the clips on the right hand side are engaged.
NOTE:
Maximum hanging weight should not exceed
3kg per rail. The rail should not be used for
any other purpose e.g. mobility aid.
WARNING:
This product is heavy and care should be
taken in installation
Minimum•mounting•clearance
*Please•note•correct•product•orientation•is•
with•controller•facing•right•side•only
To•mount•the•towel•rail:
The heater is supplied with a towel rail. There are
4 possible towel rail mounting locations on the
heater indicated by screw holes and guides, as
shown in Fig.1. The towel rail should be ! tted
prior to mounting the heater on the wall, using
the 4 screws supplied.
1. Remove protective plastic sleeving from
the rail.
2. With the heater detached from the wall,
position the towel rail in the desired location
by sliding over the top or bottom of the heater.
3. Fix the rail in position using 4 screws provided.
Loading ...
Loading ...
Loading ...