Loading ...
Loading ...
Loading ...
7ninjakitchen.com6
ninjakitchen.com
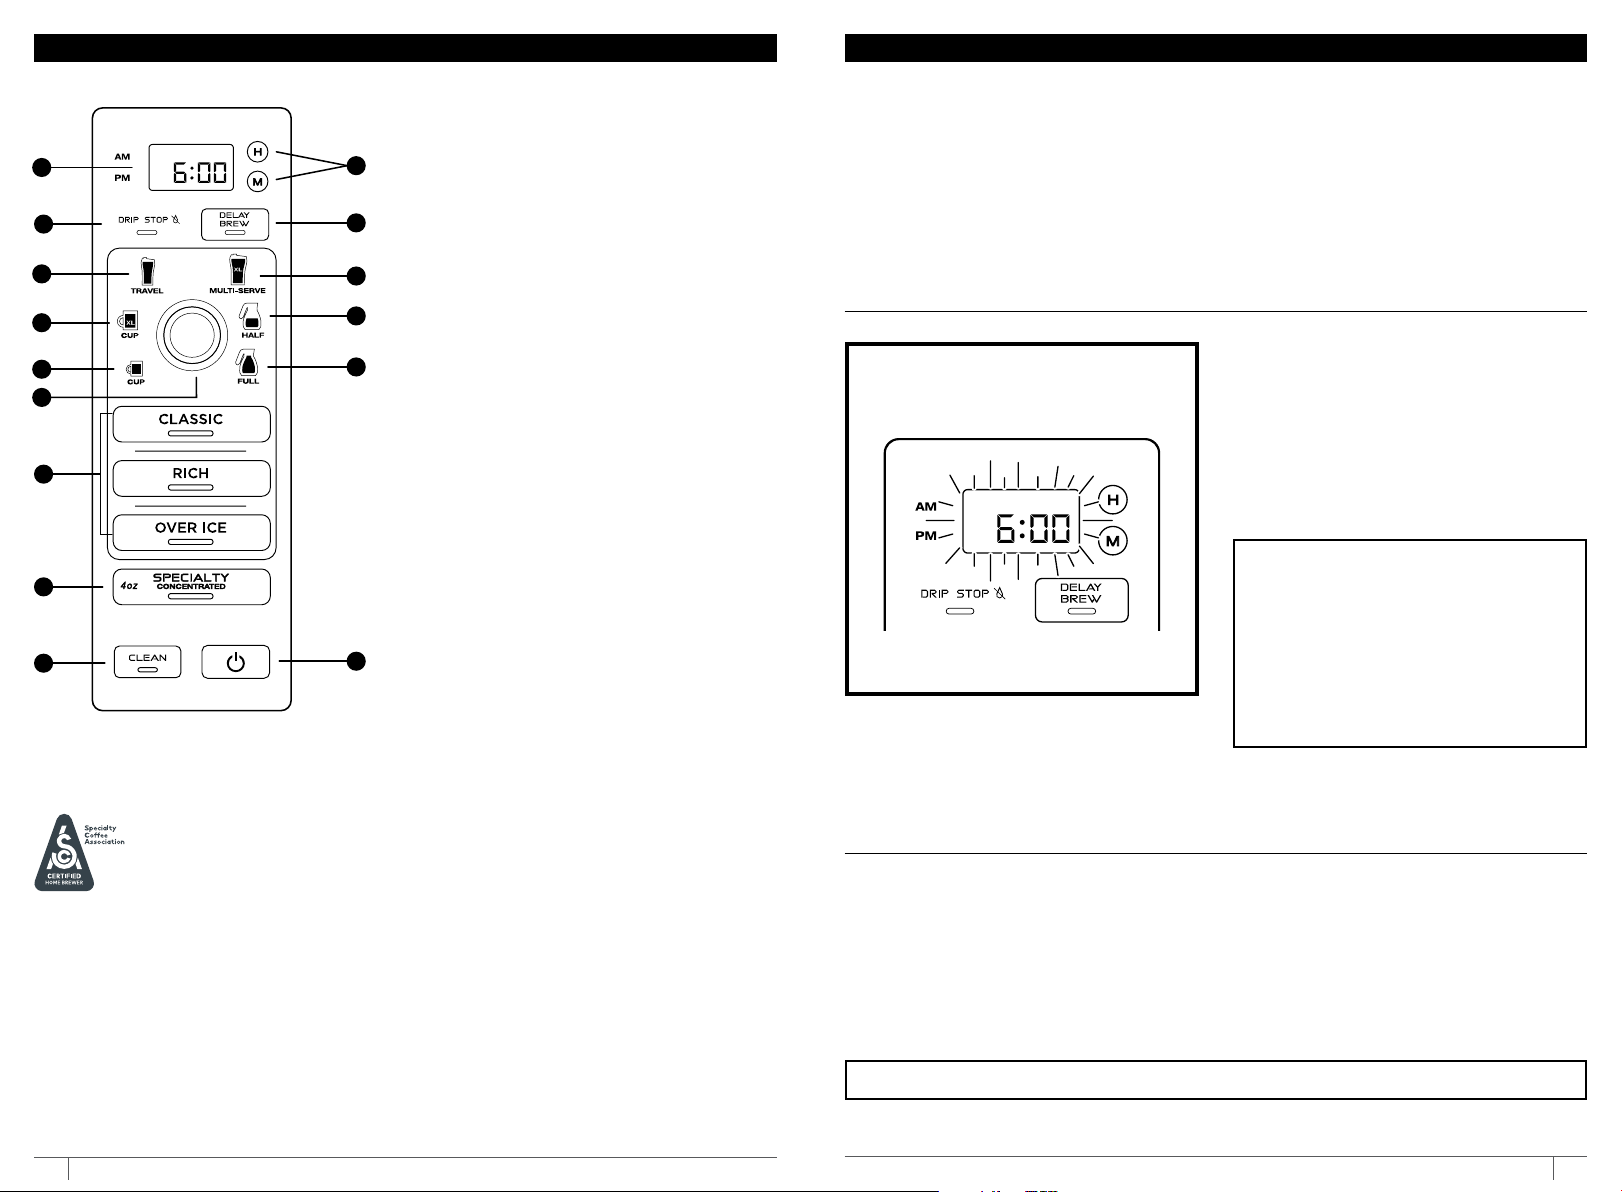
1 Programmable Digital Clock
2 Hour & Minute Buttons
3 Drip Stop Indicator
4 Delay Brew Button
5 Multi-Serve Dial
a Cup
b XL Cup
c Travel Mug
d XL Multi-Serve
e Half Carafe
f Full Carafe
6 Custom Brews
Classic Brew
Rich Brew
Over Ice Brew
7 Signature Brew
Specialty Brew
8 Intelligent Clean Cycle
Indicator/Button
9 Power Button
Remove all packaging material and stickers from the coee maker.
Wash the water reservoir, carafe, removable filter holder, and permanent filter in warm,
soapy water with a soft cloth. Rinse parts and dry thoroughly.
Before first use, prime the system by running two Full Carafe, Classic brew cycles with
water only. After each cycle is complete, discard the water. For detailed instructions,
refer to the Priming Your Ninja Specialty Coee Maker section.
PLEASE KEEP THIS IMPORTANT SAFEGUARD IN MIND WHEN USING THE APPLIANCE:
DO NOT run the appliance without water.
PREPARING YOUR NINJA® SPECIALTY COFFEE MAKER FOR USECONTROL PANEL
SETTING THE CLOCK
HIGH-ALTITUDE CALIBRATION BREW
1 When the unit is plugged in, the clock
will flash on the control panel to indicate
that the time has not been set.
2 Press the hour (H) or minute (M) button
until you reach the current time. The AM or
PM indicator will illuminate on the left side
of the display as you are setting the time.
3 After 5 seconds, the clock will stop
flashing and the clock will be set.
(OPTIONAL, BUT RECOMMENDED FOR USERS IN HIGH-ALTITUDE AREAS)
Because water boils at lower temperatures at higher altitudes, running a calibration
cycle before your first brew allows the unit to detect the boiling point of water at your
location. Running a calibration cycle will help deliver a consistent brew each time.
1 Fill the water reservoir up to, but not exceeding, the Max Fill line.
2 Place the empty filter holder into the brew basket, and an empty vessel in the machine.
3 Press and hold both CLASSIC and OVER ICE until clock displays CAL.
4 A calibration cycle will begin. When complete, the unit will beep and End will appear
on the clock display. Discard the water in the vessel.
NOTE: If the clock stops flashing and
does not display the correct time of day,
pressing the hour (H) or minute (M) button
at any time will cause the clock to flash
again. You can now reprogram the correct
time by following the previous steps.
NOTE: If you unplug the coee maker or
in the event of an extended power loss,
you will need to reset the clock the next
time the coee maker is plugged in.
NOTE: Pressing the CLASSIC, OVER ICE, or Power button will cancel the calibration cycle.
4
5d
5f
5e
9
1
3
7
8
5a
5b
2
6
5c
5
SCA CERTIFIED HOME BREWER
The Specialty Coee Association (SCA) recognizes home brewers that meet
their longstanding rigorous technical requirements. These requirements are
based on decades of industry knowledge and research by the Coee Brewing
Center. All SCA Certified Home Brewers have met these requirements,
which are based generally on proper water temperature, brewing time,
and ability to brew within the SCA Golden Cup recommendations
If a brewer passes all of the tests in the certification procedure, as conducted by the SCA,
that brewer will be eligible to be recognized as an exemplary home brewer and join the
short list of SCA Certified Home Brewers.
This coeemaker has been certified by the SCA to meet their Golden Cup Standard,
designed for optimal extraction and strength. SCA Certification testing was
performed using the Half Carafe and Full Carafe on Classic brew. Testing used the
following ground coee measurements: 55 grams for a Half Carafe and 77 grams
for a Full Carafe. When using the Ninja Smart Scoop™, this would be 4 heaping
big scoops for a Half Carafe and 6 heaping big scoops for a Full Carafe.
Loading ...
Loading ...
Loading ...