Loading ...
Loading ...
Loading ...
PREPARING THE WINDOW
ENGLISH
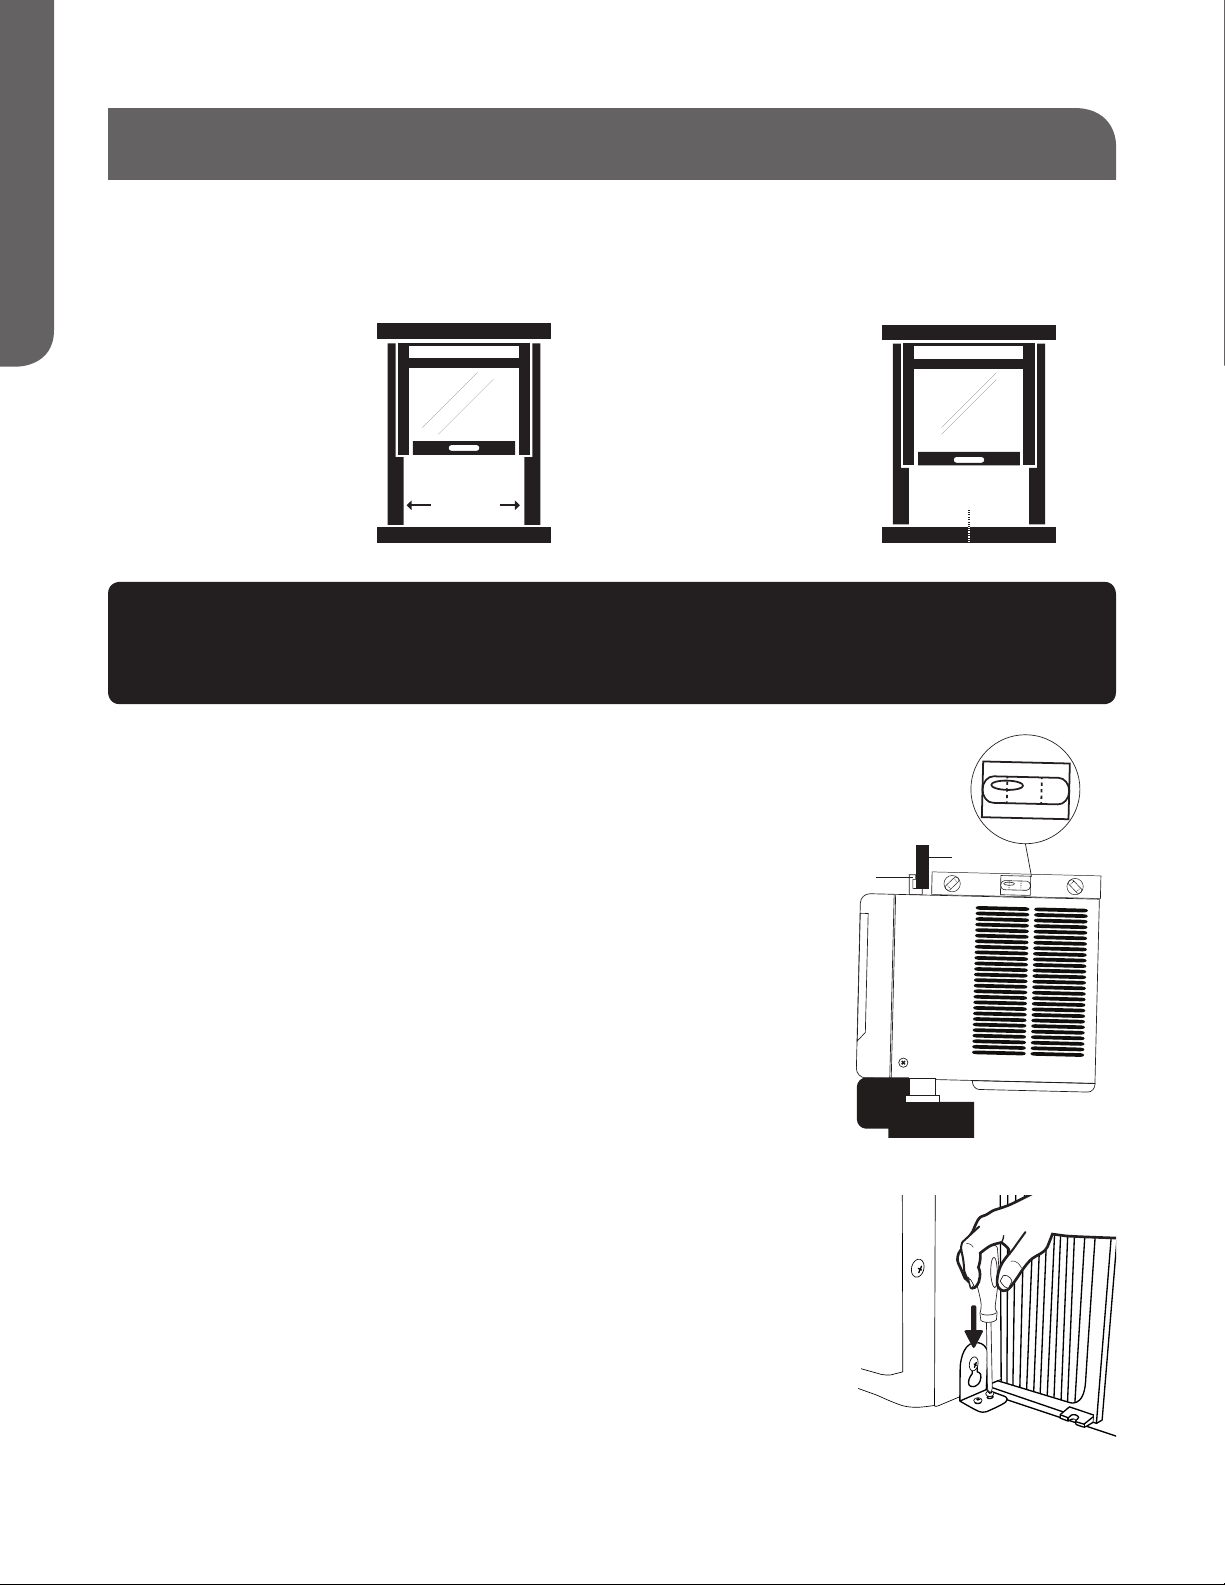
1. Measure the width of the window opening. (See Fig.13)
2. Mark the center line on the inside of the windowsill
with a pencil. (See Fig.14)
•
Do not block the air discharge or air intake areas on the front panel.
•
Do not block the louvers on the outside of the air conditioner.
3. Center the air conditioner in the window sill.
Make sure to place the unit so that it is resting on the windowsill
with a ¼" to ½" downward tilt towards the outside. Lower the
window sash behind the top channel to hold the unit in place.
(See Fig.15)
NOTE: The appearance of your model may differ from the one
shown.
4. Loosen the screw located on the lower-right hand corner of the
air conditioner.
5. Slide the side bracket over the screw. The side bracket should be
resting on the window sill. (See Fig.16)
6. Partially tighten the screw. Secure the unit before tightening completely.
7. Use 1/8" drill bit to drill a starter hole through the holes in the side
bracket.
8. Using two (2) 1" wood screws, attach the side bracket to the
window sill.
9. Repeat for side bracket installation on the left-hand side of the air
conditioner.
NOTES AND WARNINGS:
•
Be sure your air conditioner does not fall out of the window opening during installation
or removal.
PAGE 12 HOW TO INSTALL
Fig. 13
Fig. 14
Fig. 16
WIDTH
LENGTH
HEIGHT
WIDTH
WIDTH
CENTER
WIDTH OF
WINDOW OPENING
CENTER LINE
Top Channel
Lower Window Sash
Fig. 15
Loading ...
Loading ...
Loading ...