Loading ...
Loading ...
Loading ...
ENGLISH
5 6ninjakitchen.com
ninjakitchen.com
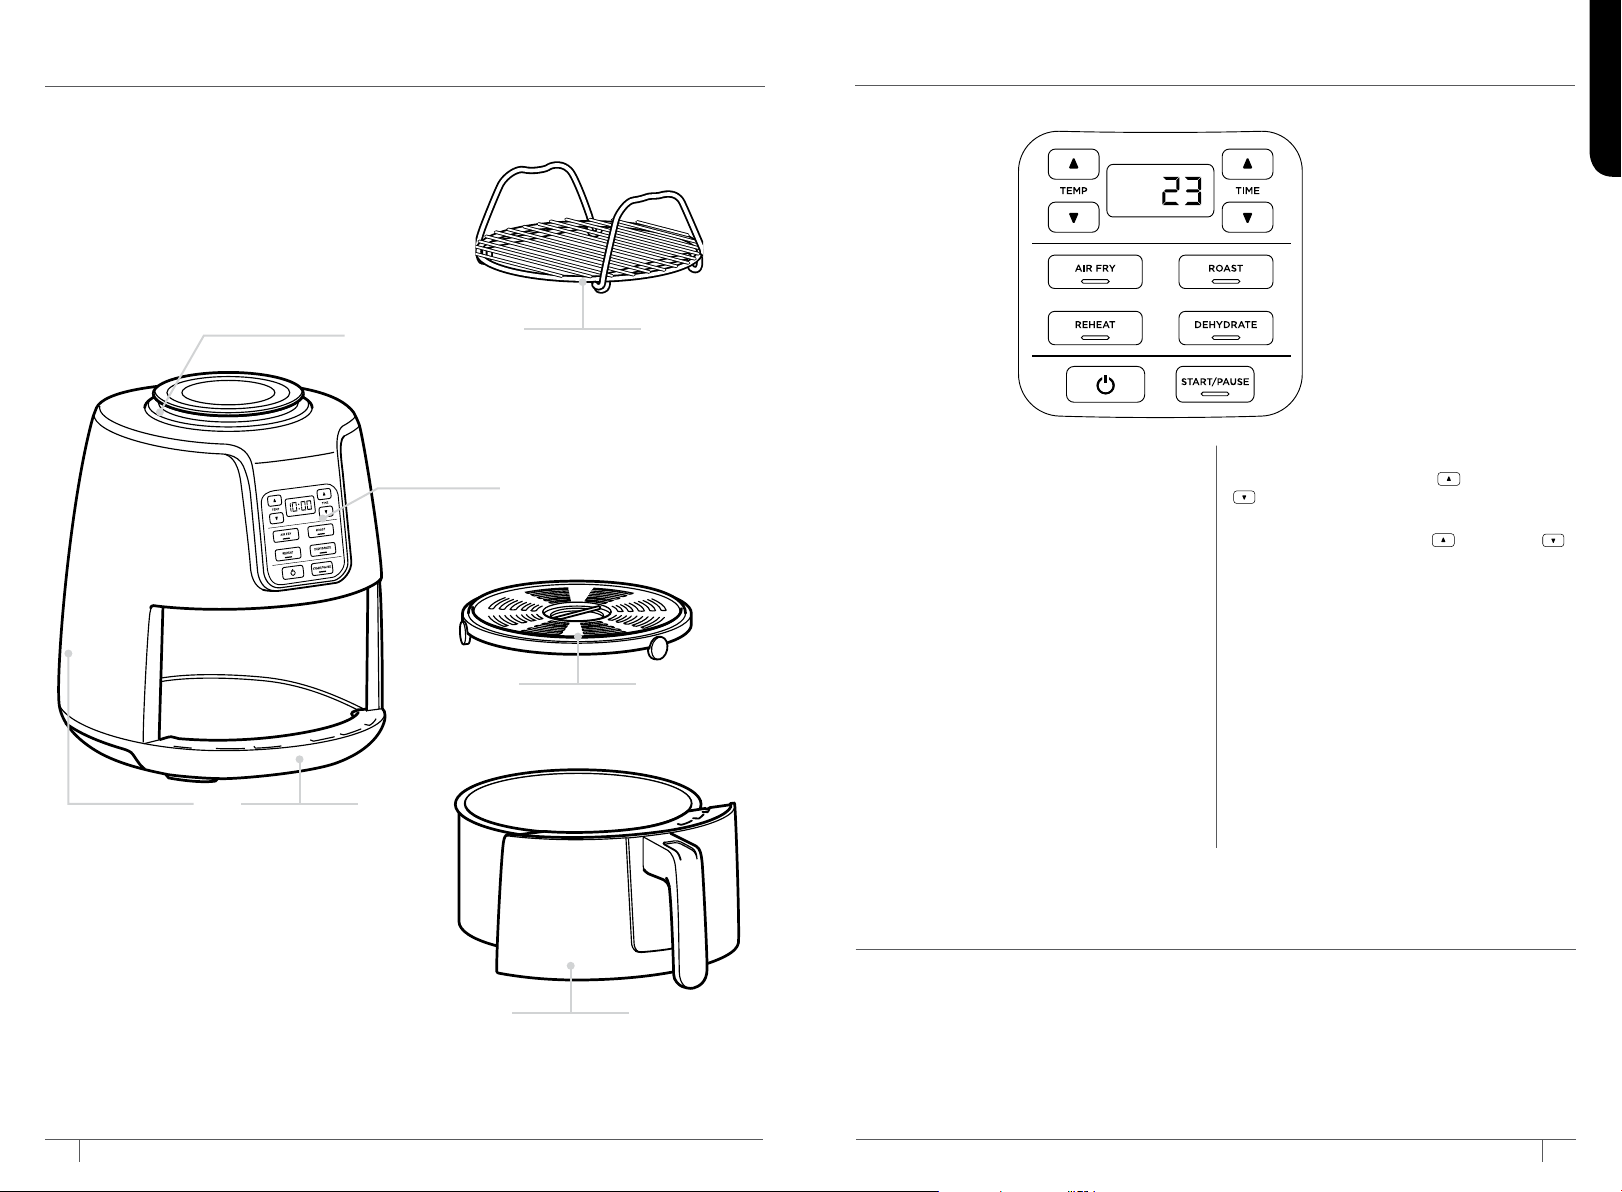
PARTS & ACCESSORIES
GETTING TO KNOW YOUR AIR FRYER
1 Remove and discard any packaging material, promotional labels, and tape from the unit.
2 Remove all accessories from the package and read this manual carefully. Please pay
particular attention to operational instructions, warnings, and important safeguards to
avoid any injury or property damage.
3 Wash the ceramic-coated basket and crisper plate in hot, soapy water, then rinse and
dry thoroughly. NEVER clean the main unit in the dishwasher.
BEFORE FIRST USE
Control Panel
Air Intake Vent
Air Outlet Unit
(located on back)
Ceramic-Coated
Crisper Plate
Ceramic-Coated
Basket
Main Unit
Stainless-Steel Multi-Layer Rack
(not included with all models)
FUNCTION BUTTONS
AIR FRY: Use this function to give your food
crispiness and crunch with little to no oil.
ROAST: Use the unit as a roaster oven for
tender meats, baked treats, and more.
DEHYDRATE: Dehydrate meats, fruits, and
vegetables for healthy snacks.
REHEAT: Revive leftovers by gently
warming them, leaving you with crispy
results.
OPERATING BUTTONS
TEMP arrows: Use the up and down
TEMP arrows to adjust the cook
temperature before or during cooking.
TIME arrows: Use the up and down
TIME arrows to adjust the cook time in any
function.
START/PAUSE button: After selecting the
time and temperature, start cooking by
pressing the START/PAUSE button. You
can stop cooking at any time by pressing
this button again.
Power button: The Power button shuts o
the unit and stops all cooking modes.
STANDBY MODE
After 10 minutes with no interaction
with the control panel, the unit will enter
standby mode. The Power button will be
dimly lit.
When setting time, the digital
display shows HH:MM. Display
currently reads 23 minutes.
Loading ...
Loading ...
Loading ...