
Loading ...
Loading ...
Loading ...
11
9. Set the lower glass door to the designated position. Then screw the left bottom hinge on the left
designated position and tighten them
10. Recheck and adjust the lower door alignment by loosening the screws (8) &(9) and moving the door
adapter (7) & (10). Tighten the screws (8) & (9) after the door is leveled.
11. Transfer the handles and plugs to the opposite positions.(See page 12, Handle Installation)
- Models SWC1102/SWC1926/SWC1966
7
1
3
2
6
5
1
2
3
9
4
8
1
2
3
5
4
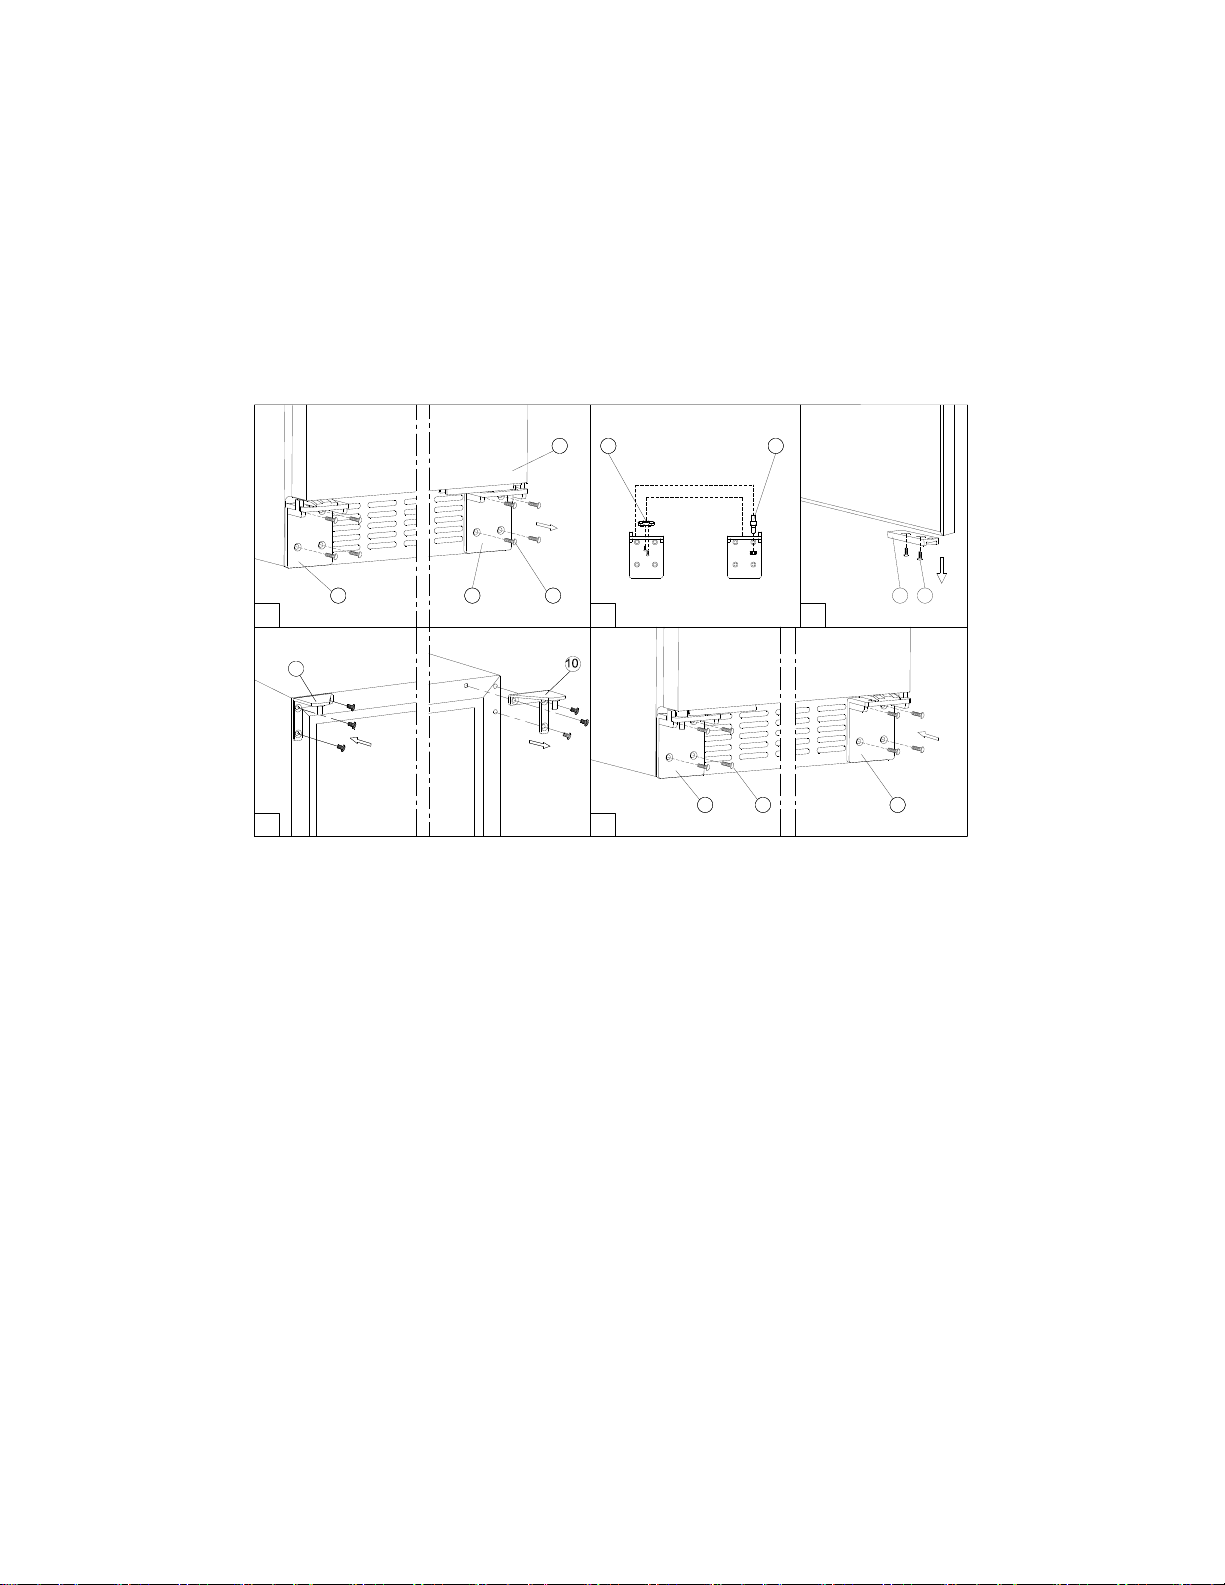
1. Remove the right bottom hinge (2) and left bottom hinge (1) by unscrewing the eight lock screws (3).
Be careful to hold the door (4) firmly after removing the screws. (Fig. 1)
2. Gently pull down to remove the door from the right top hinge and place it on a padded surface to avoid
the risk of damage. Then remove the right top hinge (10). (Fig. 4)
3. Pop out the cover caps on the left side of cabinet and use them to cover the screw holes on the right
hand side.
4. Screw the alternative left top hinge (11), included in the fittings, on the left hand side of cabinet. (Fig.
4)
5. Unscrew and transfer hinge pin (6) and door supporter (5) to the opposite bottom hinge. (Fig. 2)
6. Unscrew and transfer the door adapter (7) to the left designated positions of the door. (Fig. 3)
7. Relocate the door to the designated position. Then screw the bottom hinges on the designated
positions and tighten them. (Fig. 5)
8. Recheck and adjust the door alignment by loosening the screws (8) and moving the door adapter (7).
Tighten the screws (8) after the door is leveled. (Fig. 5)
9. Transfer the handles and plugs to the opposite positions. (See page 12, Handle Installation)
Loading ...
Loading ...
Loading ...