Loading ...
Loading ...
Loading ...
11
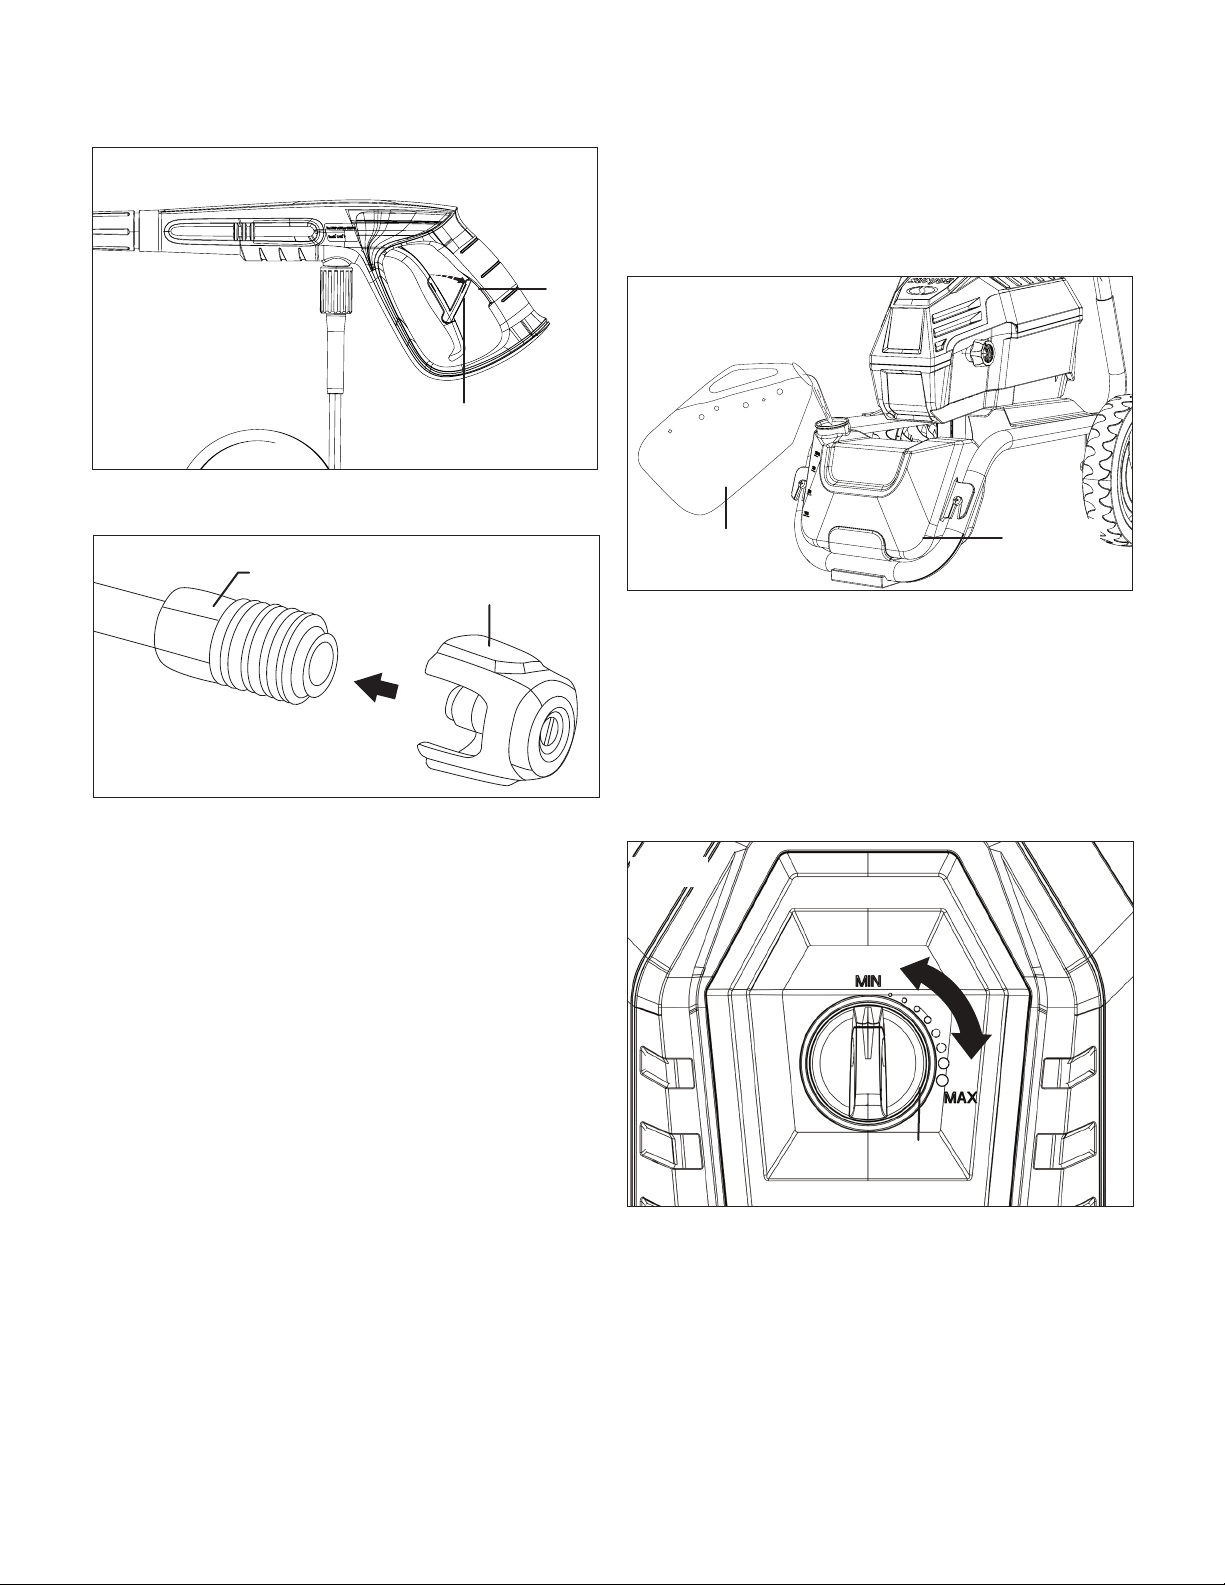
3. Snap the desired nozzle onto the Quick-Connect collar
until it clicks into place (Fig. 18).
To disconnect a nozzle from the spray wand once the cleaning
job is complete:
1. Turn o the pressure washer and shut o the water supply.
Pull the trigger to release water pressure.
2. Engage the safety lock on the trigger handle by pushing
up on the safety lock until it clicks into the slot (Fig. 17).
3. Remove the nozzle by placing your hand over the nozzle
while pulling back on the Quick-Connect collar.
mWARNING! Do not make changes to the nozzle while
the trigger is engaged. Doing so could result in damage to the
pressure washer or injury to the user.
Working with Detergents
When cleaning with the pressure washer, some cleaning tasks
can be solved with water alone, but for most tasks cleaning
with detergent allows for more eective dirt removal.
mWARNING! Use only detergents specically designed
for use with pressure washers, such as Sun Joe
®
HOUSE +
DECK WASH (SPX-HDC1G), Sun Joe
®
SNOW FOAM AUTO
WASH (SPX-FCS1G), or Sun Joe
®
HEAVY DUTY CLEANER
(SPX-APC1G). DO NOT USE household detergents, acids,
alkaline solutions, bleaches, solvents, ammable material, or
industrial grade solutions. These could damage the pressure
washer. Many detergents may require mixing prior to use.
Prepare the cleaning solution as instructed on the
solution bottle.
1. Remove the cap from the detergent tank and ll the tank
with detergent (Fig. 19).
NOTE: Many detergents may require mixing prior to
use. Prepare the cleaning solution as instructed on the
solution bottle.
2. Install the soap nozzle (black) on the spray wand (Fig. 18).
3. Turn on the pressure washer. Pull the trigger to operate
the unit. The liquid detergent will automatically mix with
water and be discharged through the nozzle.
mCAUTION! Always test the detergent in an
inconspicuous area before use.
4. Turn the detergent dial to adjust the suction volume of the
detergent solution (Fig. 20).
5. Apply detergent from the bottom to the top of the dry
surface to be cleaned.
NOTE: Wetting the surface rst is not recommended as it
dilutes the detergent and reduces its cleaning ability.
6. Allow the detergent to remain on the surface for a short
time before rinsing.
Do not allow the detergent to dry on the surface.
7. Upon completion of detergent application, detach the
detergent tank to clean by removing the two screws that
used to x the detergent tank (Fig. 21).
Fig. 17
Safety lock
Slot
Fig. 18
Nozzle
“Click”
Spray wand quick-
connect collar
Fig. 19
Detergent
tank
Pressure washer
detergent
Fig. 20
Detergent
dial
Loading ...
Loading ...
Loading ...