Loading ...
Loading ...
Loading ...
- 7 -
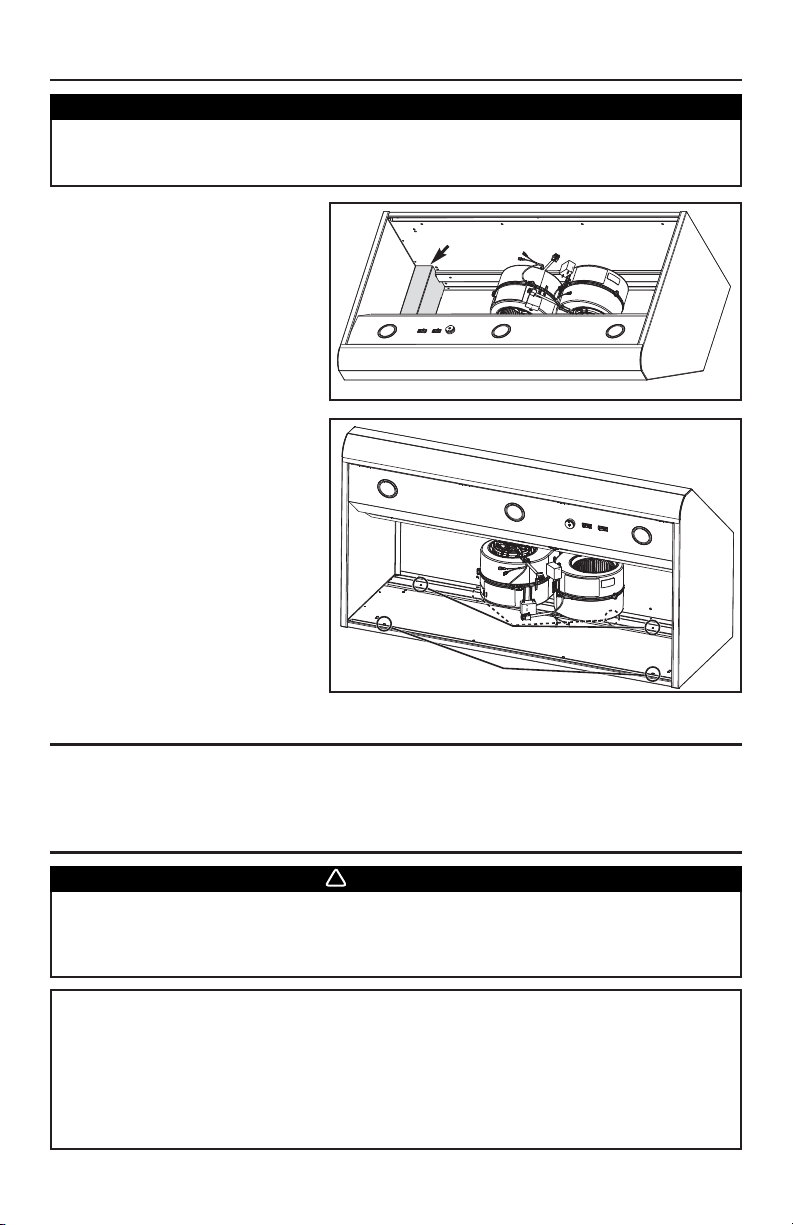
Remove the electrical compartment
cover. Insert the house wiring in the
hood and tighten the wire clamp to
secure the wiring.
9. INSTALL HOOD
HD0464
ELECTRICAL COMPARTMENT COVER
• Although not recommended, if blowers need to be removed, reinstall them
using 10-32 locknuts included in parts bag (maximum torque of 20 lb.).
• Hold the hood until it is completely secured to the wood mounting strip.
CAUTION
Rest the back cavity of the hood on
the wood mounting strip.
Attach 10” round duct to adapter.
Secure the hood to wood mounting
strip using 4 no. 10 x 2’’ hex head
screws (for 36’’ width hood) or 6 screws
(for 48’’ and 60’’ width hoods) at locations
shown at right. Drill two 3/16’’ diameter
holes into the wall for wall anchors
through the existing holes in the lower
back of the hood at locations shown at
right. Then, install both wall anchors
with both no. 8 x 5/8’’ screws and both
washers provided.
HD0463
MOUNTING SCREWS LOCATION
W
ALL ANCHORS LOCATION
11. CONNECT WIRING
Risk of electric shock. Electrical wiring must be done by qualified personnel in
accordance with all applicable codes and standards. Before connecting wires,
switch power off at service panel and lock service disconnecting means to
prevent power to be switched on accidentally.
WARNING
!
WATERPROOF WIRE CONNECTORS INSTRUCTIONS:
1. Strip wires 3/8’’.
2. Align frayed strands or conductors.
3. Do not pre-twist. Place stripped wires together with ends even, but lead smaller stranded wires
slightly ahead of larger solid or stranded wire.
4. Twist connector onto wires pushing firmly until hand-tight. DO NOT over torque.
5. When inserting wires into connectors, some sealant may leak out. Wipe off excess sealant in
and around conductors. DO NOT REUSE.
10. INSTALL DECORATIVE FLUE (OPTIONAL)
AEWPD Series
Refer to the instructions included with the optional decorative flue.
Loading ...
Loading ...
Loading ...