
Loading ...
Loading ...
3
Installation
1. Place the small bracket against the wall in the desired location and mark
placement of the two mounting holes. Remove bracket and carefully drill
your marked areas with a 3/16” drill bit.
2. If needed, gently tap supplied plastic anchors into the holes in the wall and
fasten the bracket to the wall using the two supplied screws.
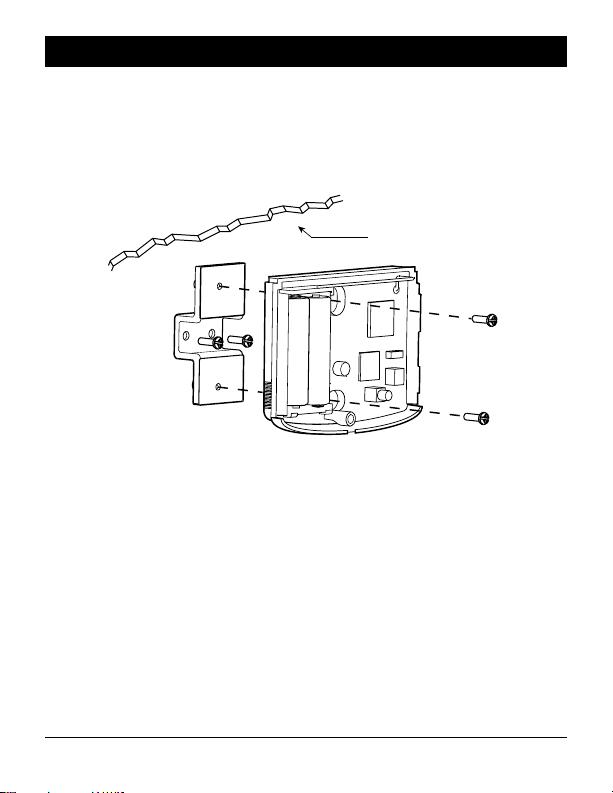
EXTERIOR
WALL
3. Remove the front cover of the remote sensor. Using a small phillips blade
screwdriver, loosen the screw located in the bottom center portion of the
sensor housing. Gently squeeze in the ribbed portion of the sides of the
housing and slide the cover up to remove.
4. Line up the 2 mounting holes on the remote sensor sub-base up with the 2
holes on the wall bracket. Using the remaining 2 screws, mount the sub-base
to the wall bracket.
5. Install the 2 supplied AA lithium batteries into the sensor housing. The blue
and red LED will each flash once to indicate the sensor has powered up
successfully. If the red LED blinks 3 times every 30 seconds the batteries need
to be replaced.
6. Attach cover of remote sensor to the sub-base by sliding the cover on from the
top down. Reinstall the small screw to secure the sensor housing.
3 Installer Guide
Loading ...
Loading ...
Loading ...