EN-1
Nokia Thermo
v2.0 | April 2018
Nokia Thermo
Smart Temporal Thermometer
Installation and Operating Instructions

EN-2
Nokia Thermo
v2.0 | April 2018
Table of Contents
Minimum requirements........................................................................4
Internet access ������������������������������������������������������������������������������������������������������������������� 4
Smartphone or device �������������������������������������������������������������������������������������������������������� 4
OS version ��������������������������������������������������������������������������������������������������������������������������� 4
Nokia Thermo description ...................................................................5
Overview ����������������������������������������������������������������������������������������������������������������������������� 5
Box contents ����������������������������������������������������������������������������������������������������������������������� 5
Product description ������������������������������������������������������������������������������������������������������������ 6
Setting up my Nokia Thermo ..............................................................7
Installing the Nokia Thermo app ���������������������������������������������������������������������������������������� 7
Installing my Nokia Thermo ����������������������������������������������������������������������������������������������� 7
Customizing the settings of the Nokia Thermo .............................16
Changing the conguration of your Nokia Thermo �������������������������������������������������������� 16
Changing the units ����������������������������������������������������������������������������������������������������������� 18
Changing the system authorizations ������������������������������������������������������������������������������� 19
Using my Nokia Thermo .....................................................................21
Before taking a measurement ����������������������������������������������������������������������������������������� 21
Taking a measurement ����������������������������������������������������������������������������������������������������� 21
Assigning a measurement ������������������������������������������������������������������������������������������������ 22
Understanding the fever status LED ������������������������������������������������������������������������������� 22
Viewing the history of my measurements ����������������������������������������������������������������������� 22
Using the Nokia Thermo app ............................................................23
Viewing the Timeline �������������������������������������������������������������������������������������������������������� 23
Adding Timeline items ������������������������������������������������������������������������������������������������������ 25
Assigning a measurement ������������������������������������������������������������������������������������������������ 34
Deleting data �������������������������������������������������������������������������������������������������������������������� 36
Setting a reminder ������������������������������������������������������������������������������������������������������������ 38
Sharing my data ���������������������������������������������������������������������������������������������������������������� 40
Getting personalized advice ..............................................................42
Getting Insights ���������������������������������������������������������������������������������������������������������������� 42

EN-3
Nokia Thermo
v2.0 | April 2018
Using Thermia (iOS only) �������������������������������������������������������������������������������������������������� 42
Dissociating my Nokia Thermo .........................................................43
Cleaning and maintenance ................................................................45
Cleaning my Nokia Thermo ���������������������������������������������������������������������������������������������� 45
Changing the batteries ����������������������������������������������������������������������������������������������������� 45
Updating my Nokia Thermo ��������������������������������������������������������������������������������������������� 45
User guide copyright ..........................................................................48
Legal notice .........................................................................................48
Medical device ������������������������������������������������������������������������������������������������������������������� 48
Personal data �������������������������������������������������������������������������������������������������������������������� 48
Safety instructions .............................................................................49
Use and storage ���������������������������������������������������������������������������������������������������������������� 49
Safety �������������������������������������������������������������������������������������������������������������������������������� 49
Service and maintenance ������������������������������������������������������������������������������������������������� 49
Specications ......................................................................................50
Document release overview ..............................................................51
Warranty ...............................................................................................52
Regulatory statements ......................................................................53
EN-4
Nokia Thermo
v2.0 | April 2018
Important Notice
By using your Nokia Thermo you expressly agree to the Nokia® Services Terms
and Conditions available on our website�
Minimum requirements
Internet access
A personal home Wi-Fi router connected to the Internet is required to set up your
Nokia Thermo if you set it up in Wi-Fi.
Your Wi-Fi router must be 802.11. b/g/n/ on a 2.4 GHz frequency. 5 GHz networks are not
supported. For more details about Wi-Fi router compatibility, refer to “Specications” on
page50.
Smartphone or device
An iOS or Android device (with operational Bluetooth and Wi-Fi or 3G/4G) is required to:
• Download the Nokia Thermo app
• Set up your Nokia Thermo
• Access your data
• Get personalized advice
For device compatibility information, refer to “Specications” on page50.
OS version
You need iOS 8 (or higher) or Android 5.0 (or higher) to install and run the Nokia Thermo
app.
EN-5
Nokia Thermo
v2.0 | April 2018
Nokia Thermo description
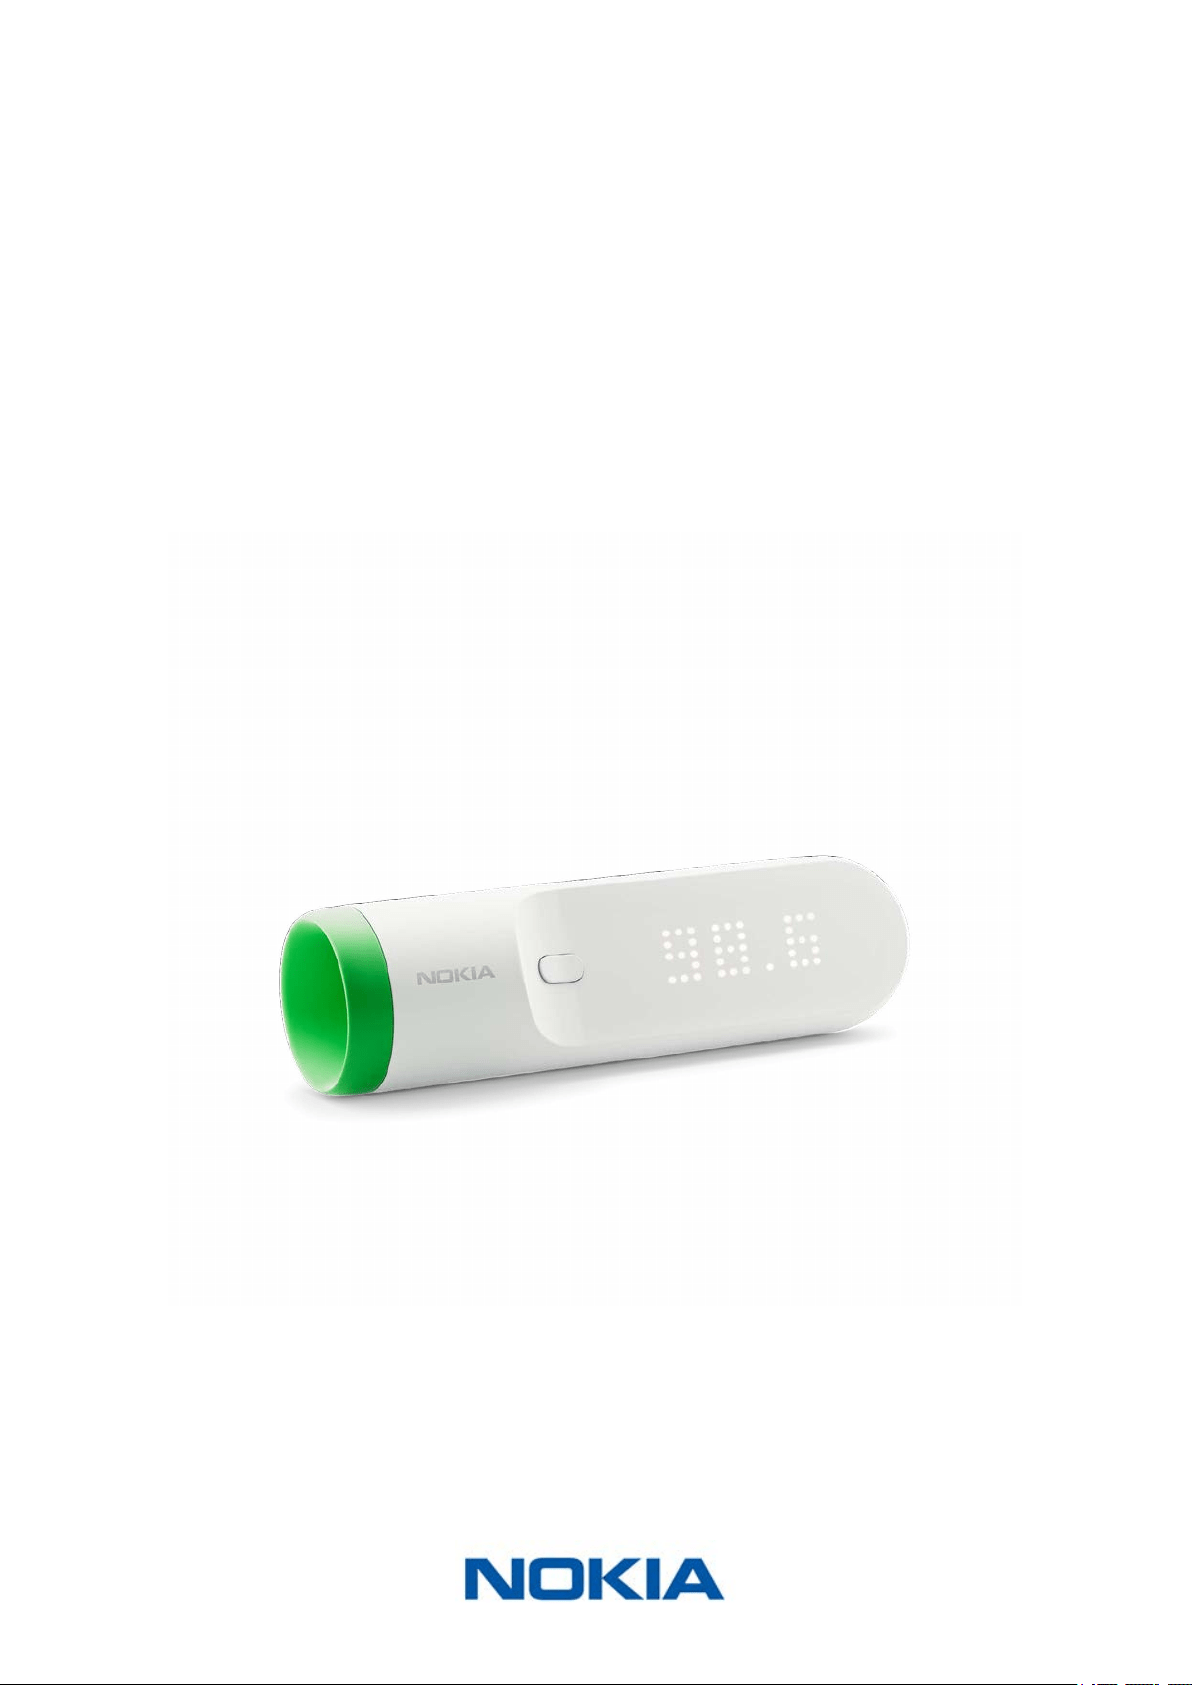
Overview
The Nokia Thermo is the most advanced temporal thermometer in the world. Not only
does it have a sleek design, it is also really easy to use, accurate and hygienic. Thanks
to the HotSpot Sensor™ technology, you simply have to press the button and run your
Nokia Thermo across your forehead. Its 16 infrared sensors will take 2,000 measurements
per second, and provide you with an accurate measurement.
Your measurements are sent to the Nokia Thermo app automatically, along with those of
your family members. You can also add additional information there such as symptoms
experienced or medicine you’re taking, and get insights as to what you should do.
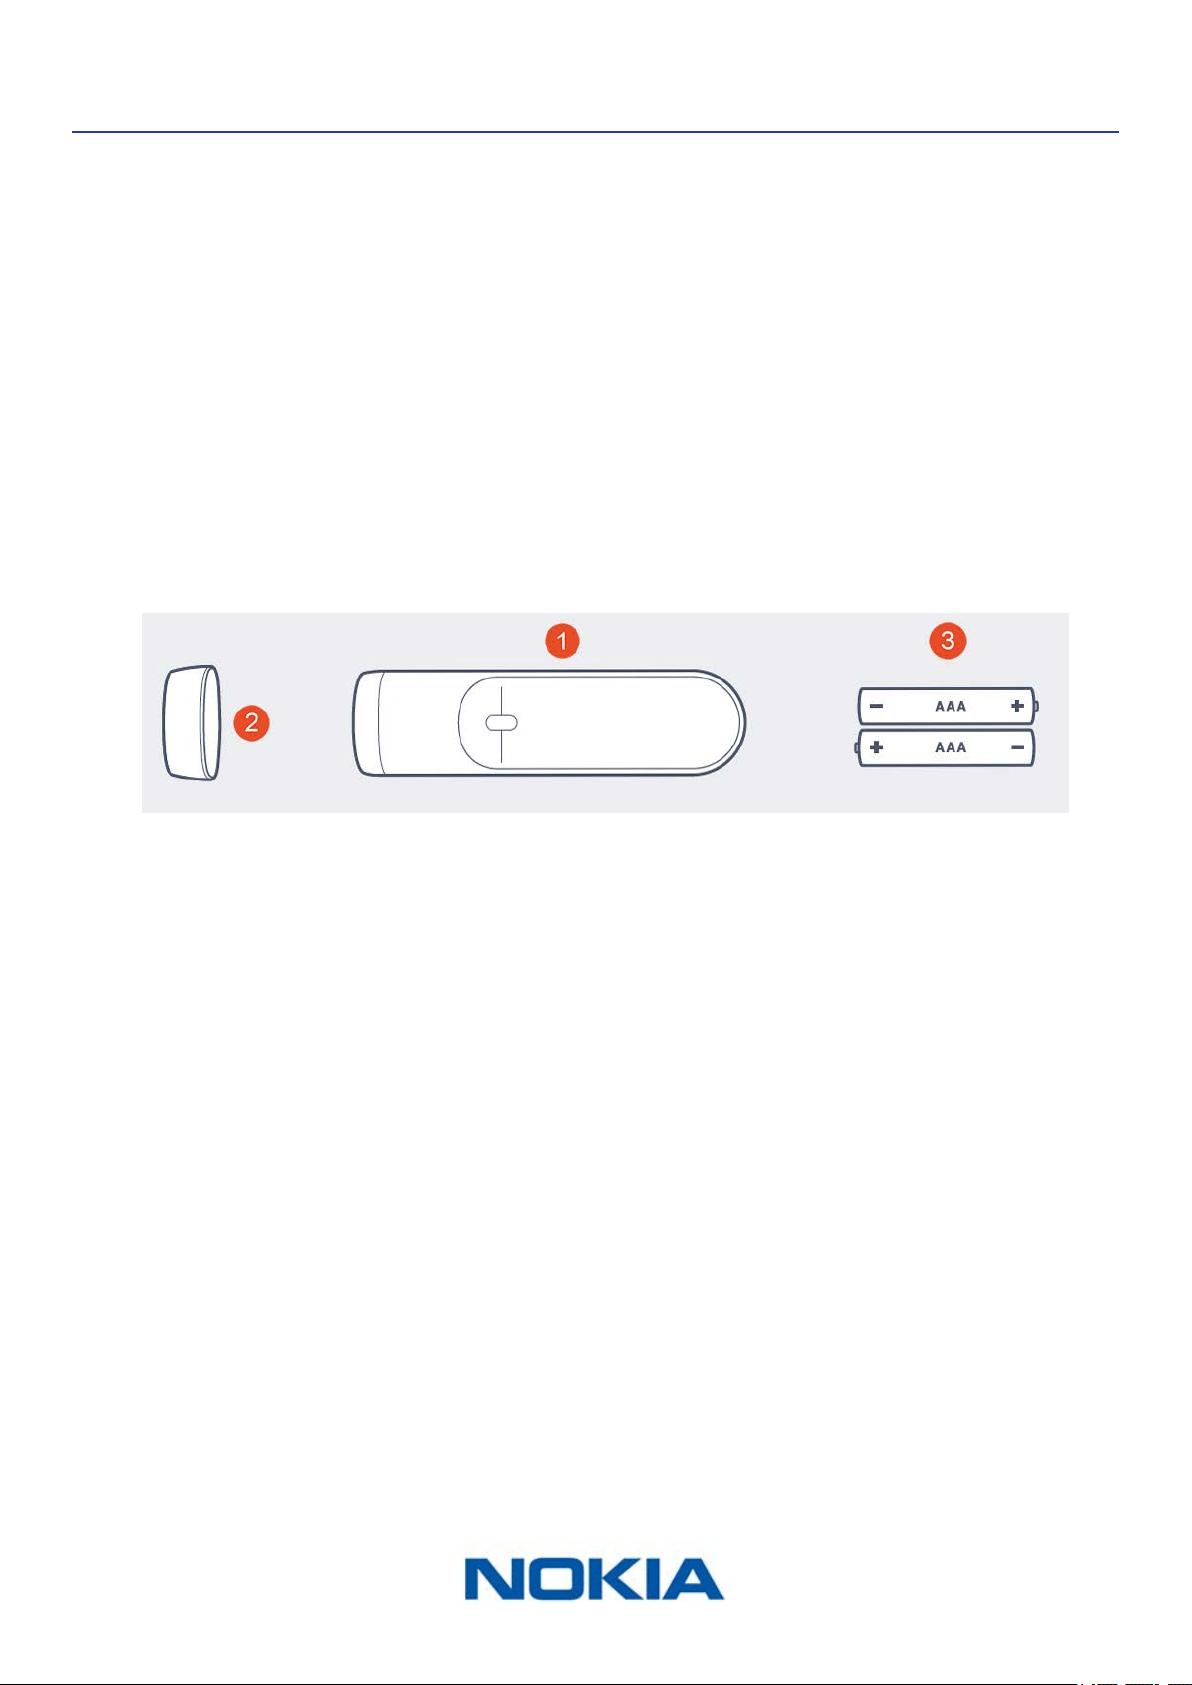
Box contents
(1)Nokia Thermo (2)Protective cap (3)AAA (LR03) batteries
(already inserted)
Note that a Quick Installation Guide is also included in the box.
EN-6
Nokia Thermo
v2.0 | April 2018
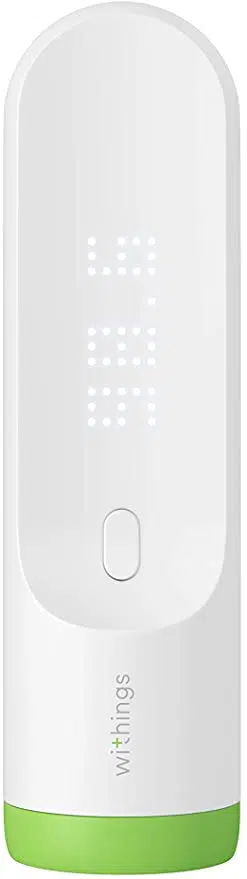
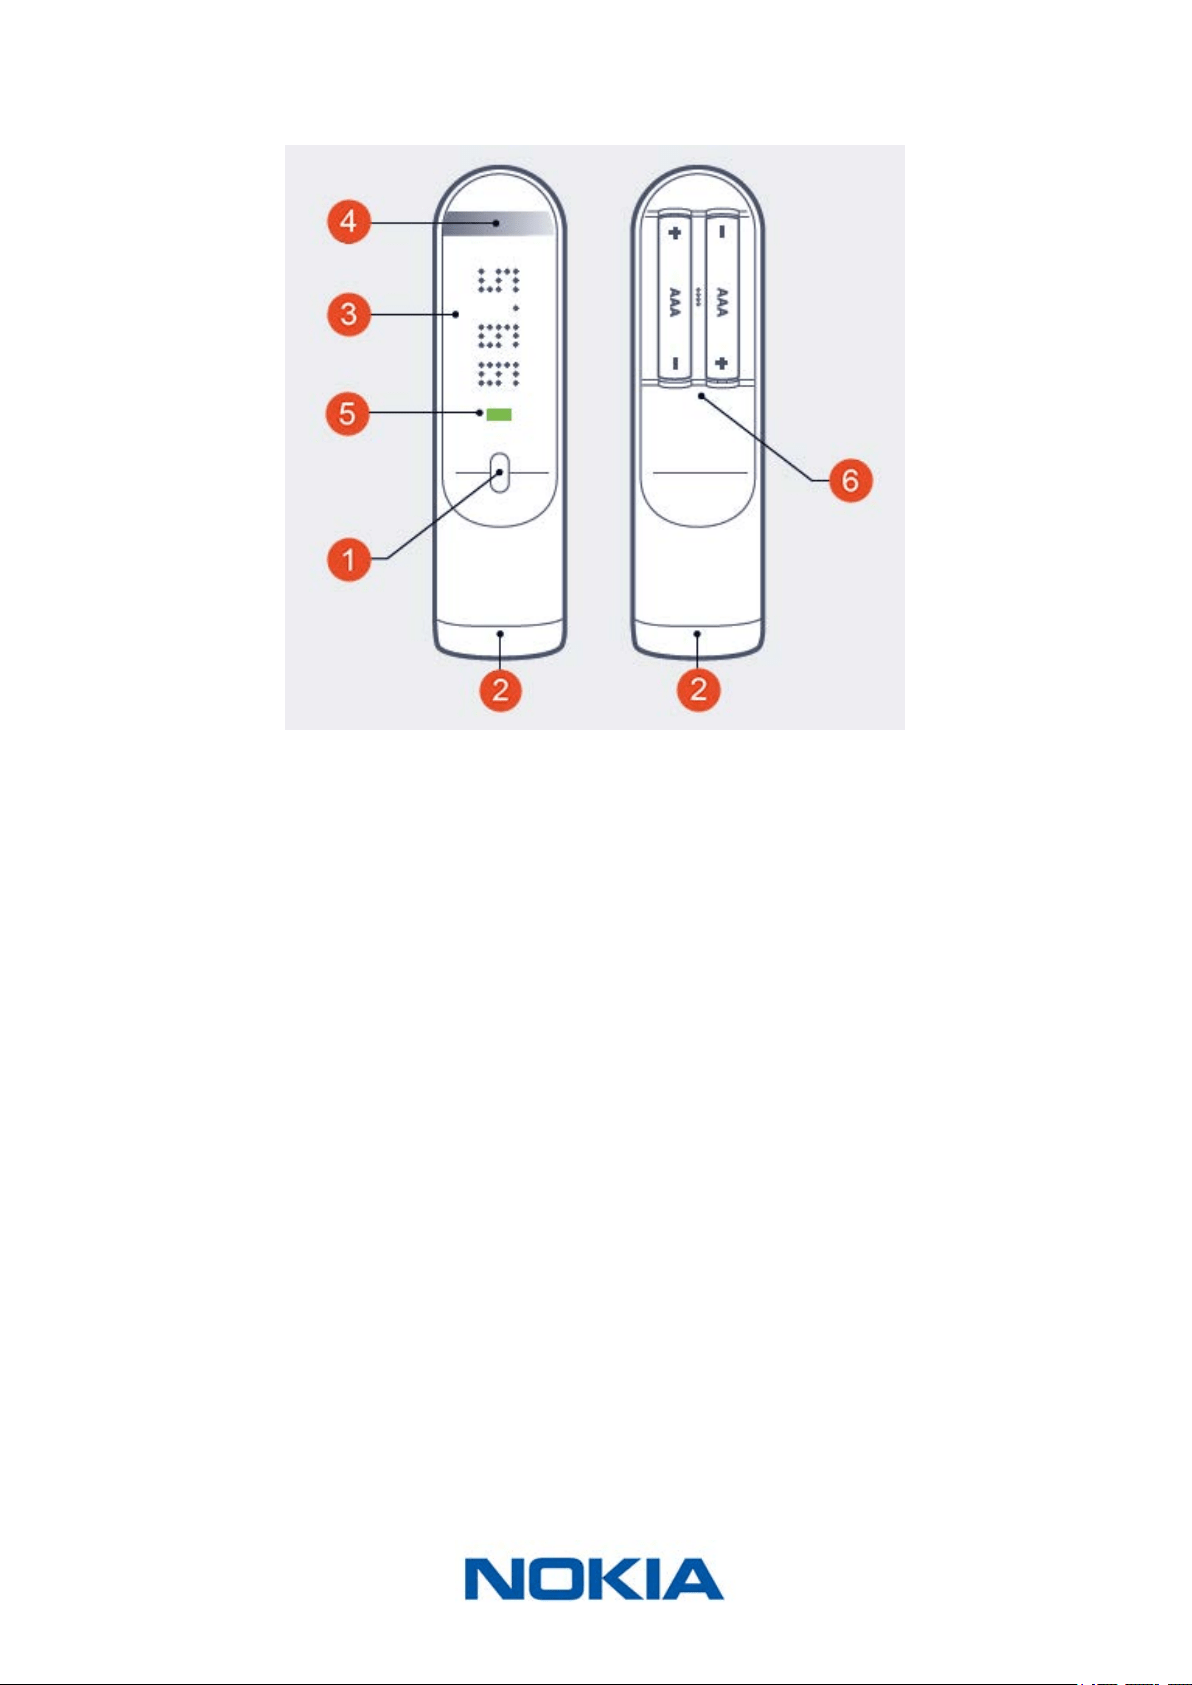
Product description
(1)Main button (2)Sensor (3)Screen
(4)Touch-sensitive area (5)Diagnostic LED (6)Battery cover
EN-7
Nokia Thermo
v2.0 | April 2018
Setting up my Nokia Thermo
Installing the Nokia Thermo app
If the Nokia Thermo app is not already installed on your device, perform the following
steps:
1. Type thermoapp.nokia.com in your device’s web browser.
2. Tap Download on the App Store or on Google Play.
3. Tap GET.
The installation process starts.
When a new version of the Nokia Thermo app is available, you will automatically be
prompted to update it.
Installing my Nokia Thermo
The Nokia Thermo can be installed on multiple accounts but it has a limitation of eight
users.
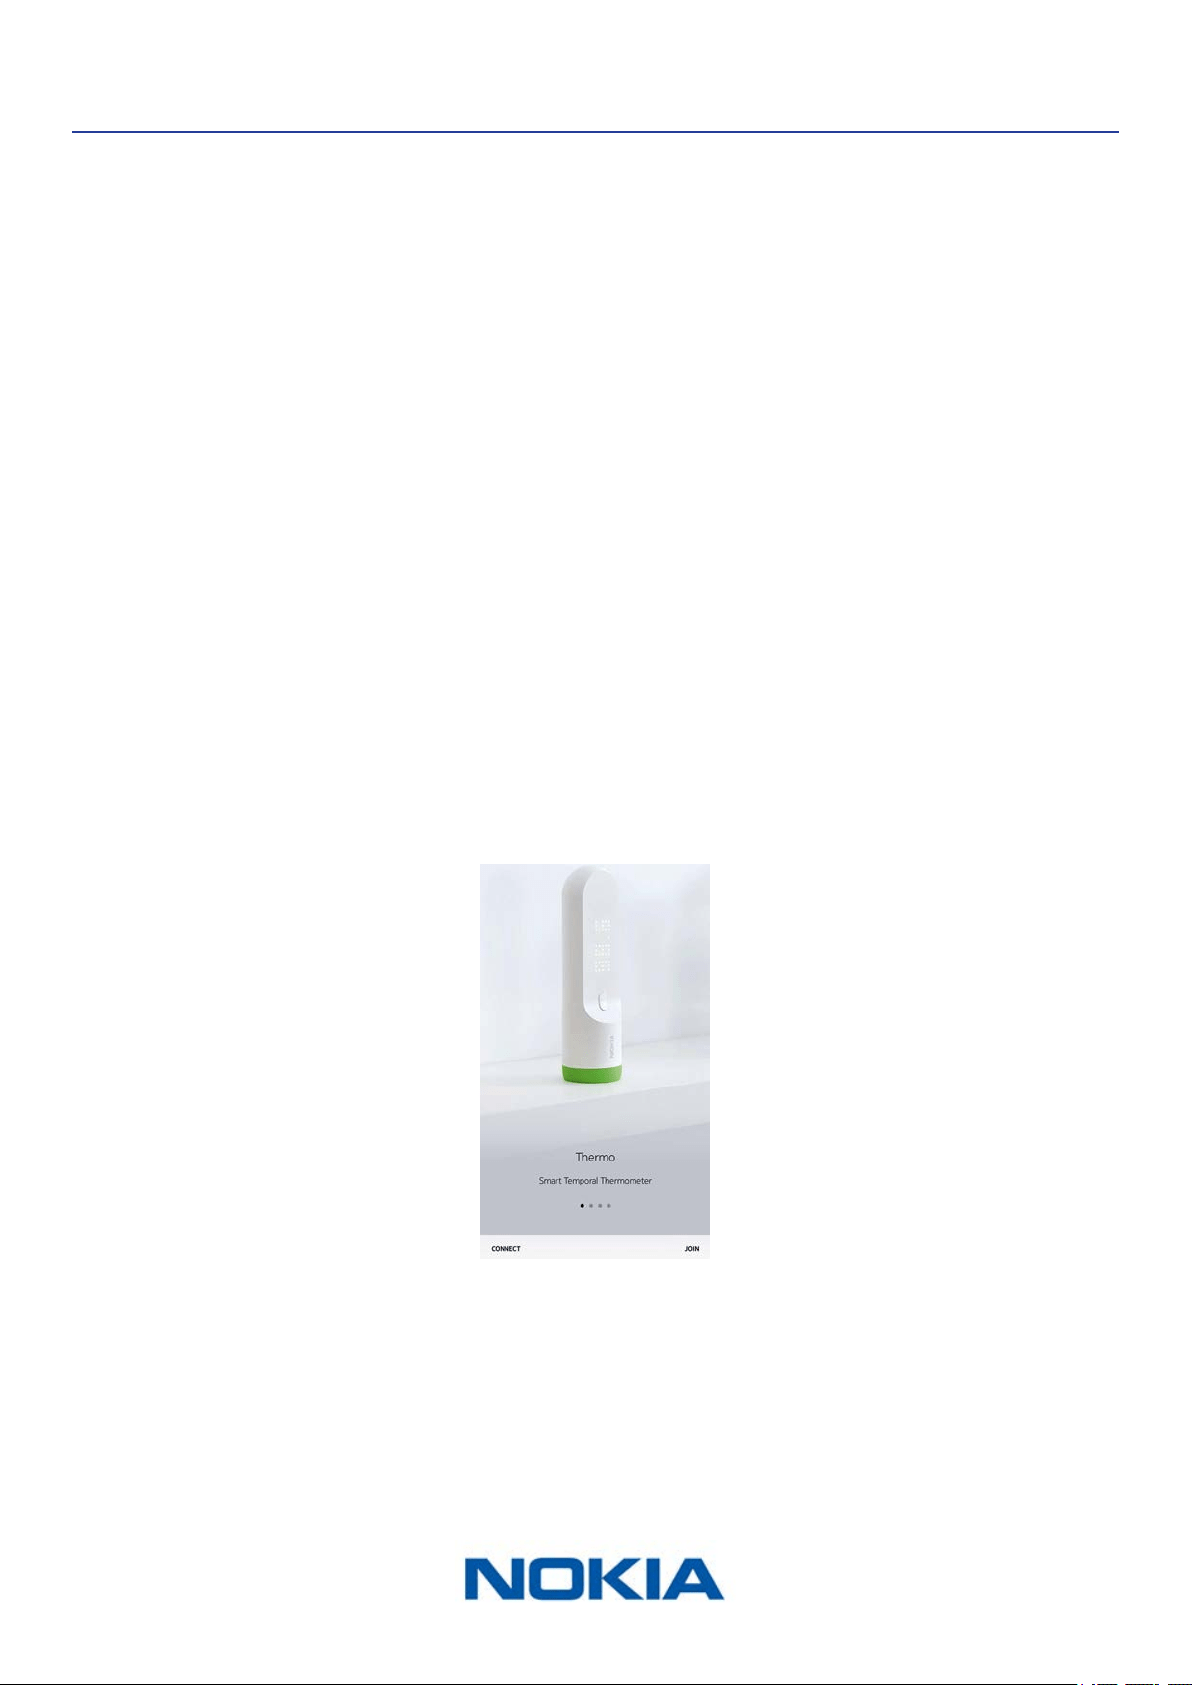
I’m new to Nokia®
If you don’t have a Nokia® account yet, perform the following steps:
1. Open the Nokia Thermo app.
2. Tap Join.
3. Enter your email address and the password you have chosen for your new Nokia®
account. Tap Create.
4. Enter your name, gender and date of birth, and tap Next.
5. Enter your height and weight, and tap Next.
EN-8
Nokia Thermo
v2.0 | April 2018
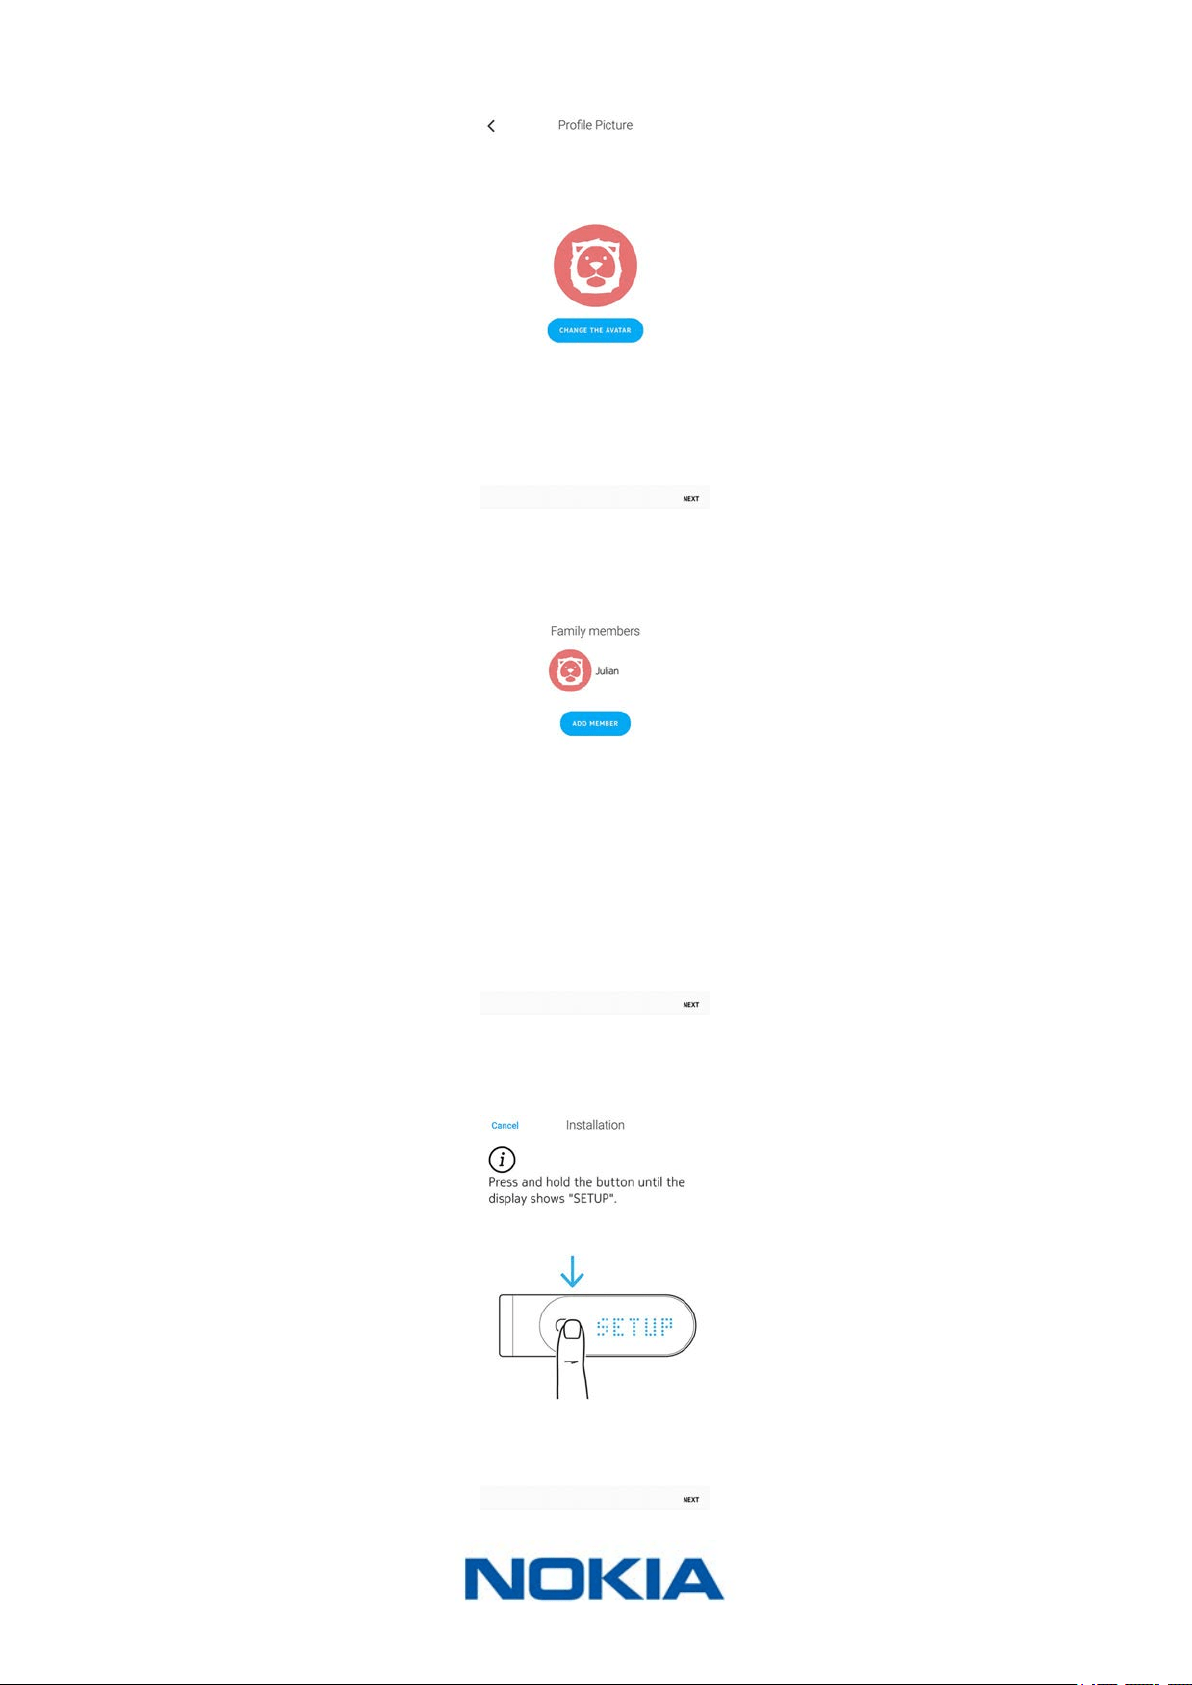
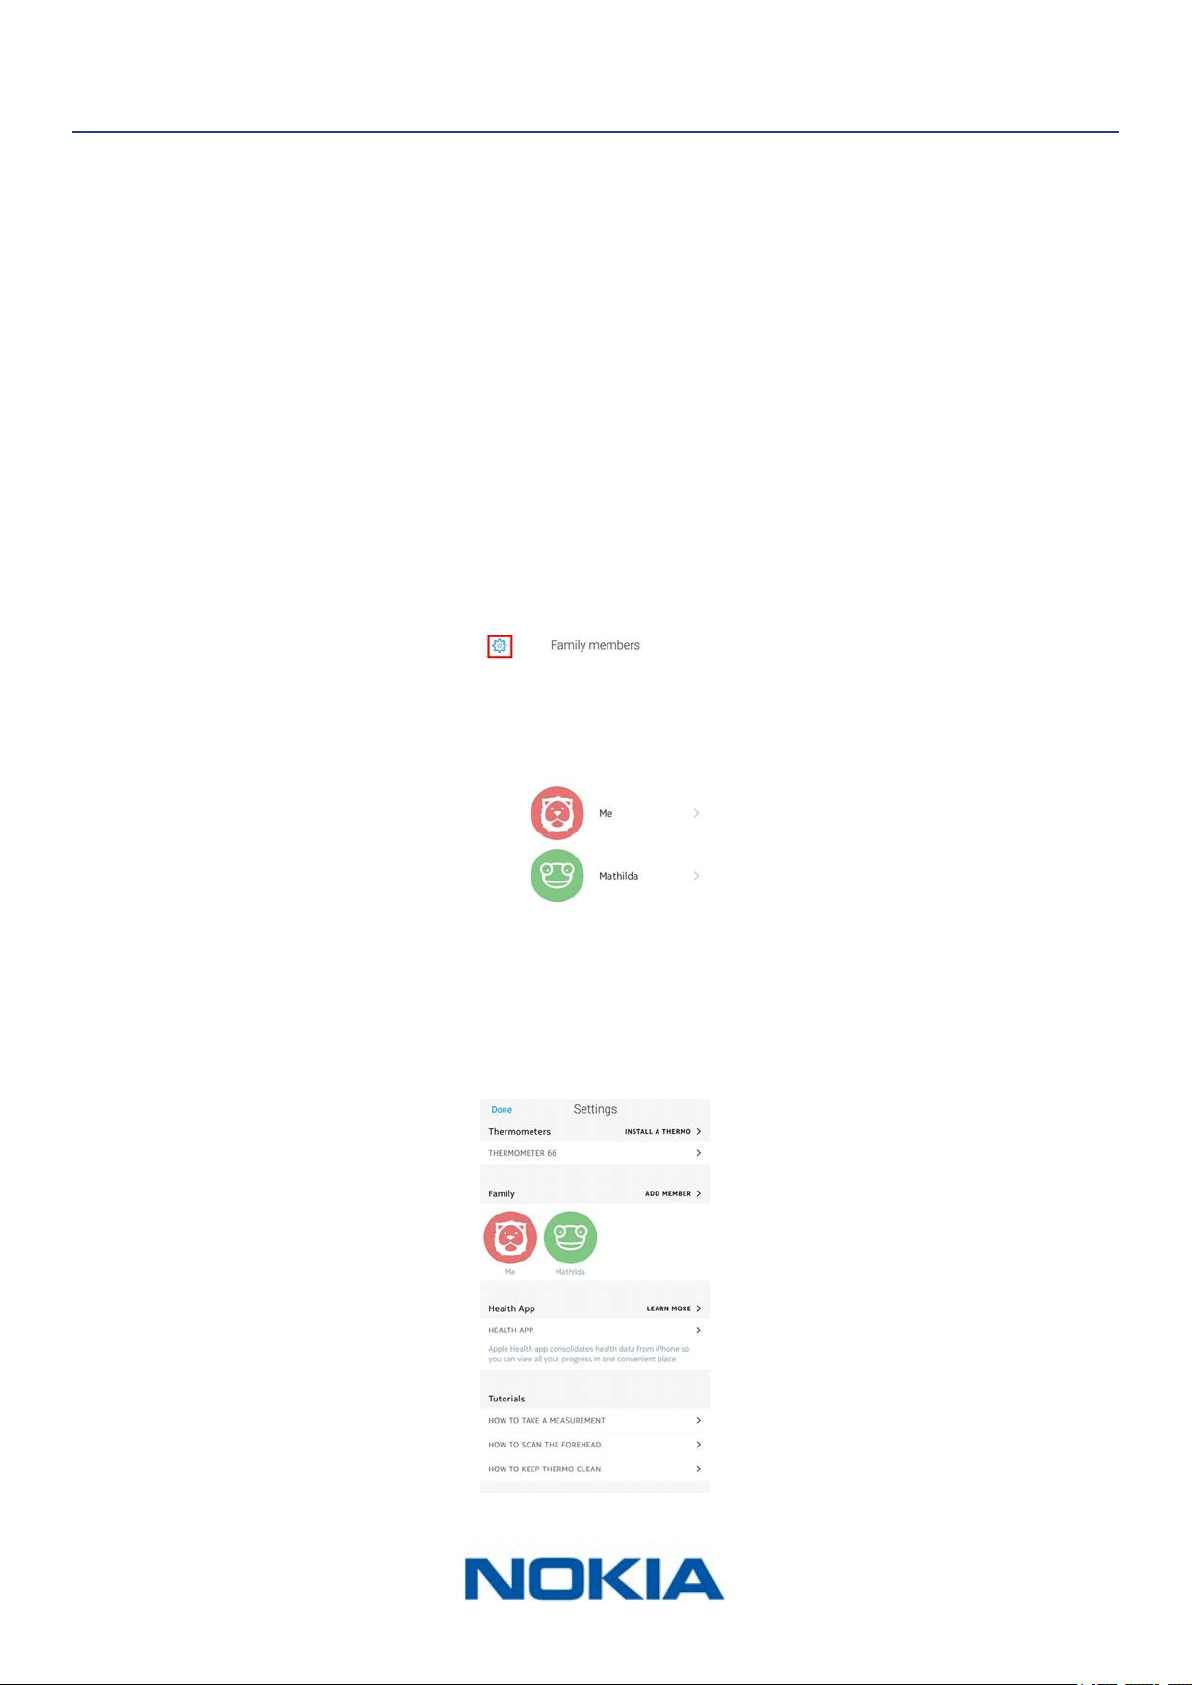
6. Select an avatar if you would like to, or tap Next.
7. Add extra family members if you would like to or tap Next.
You can add other family members later on if needed.
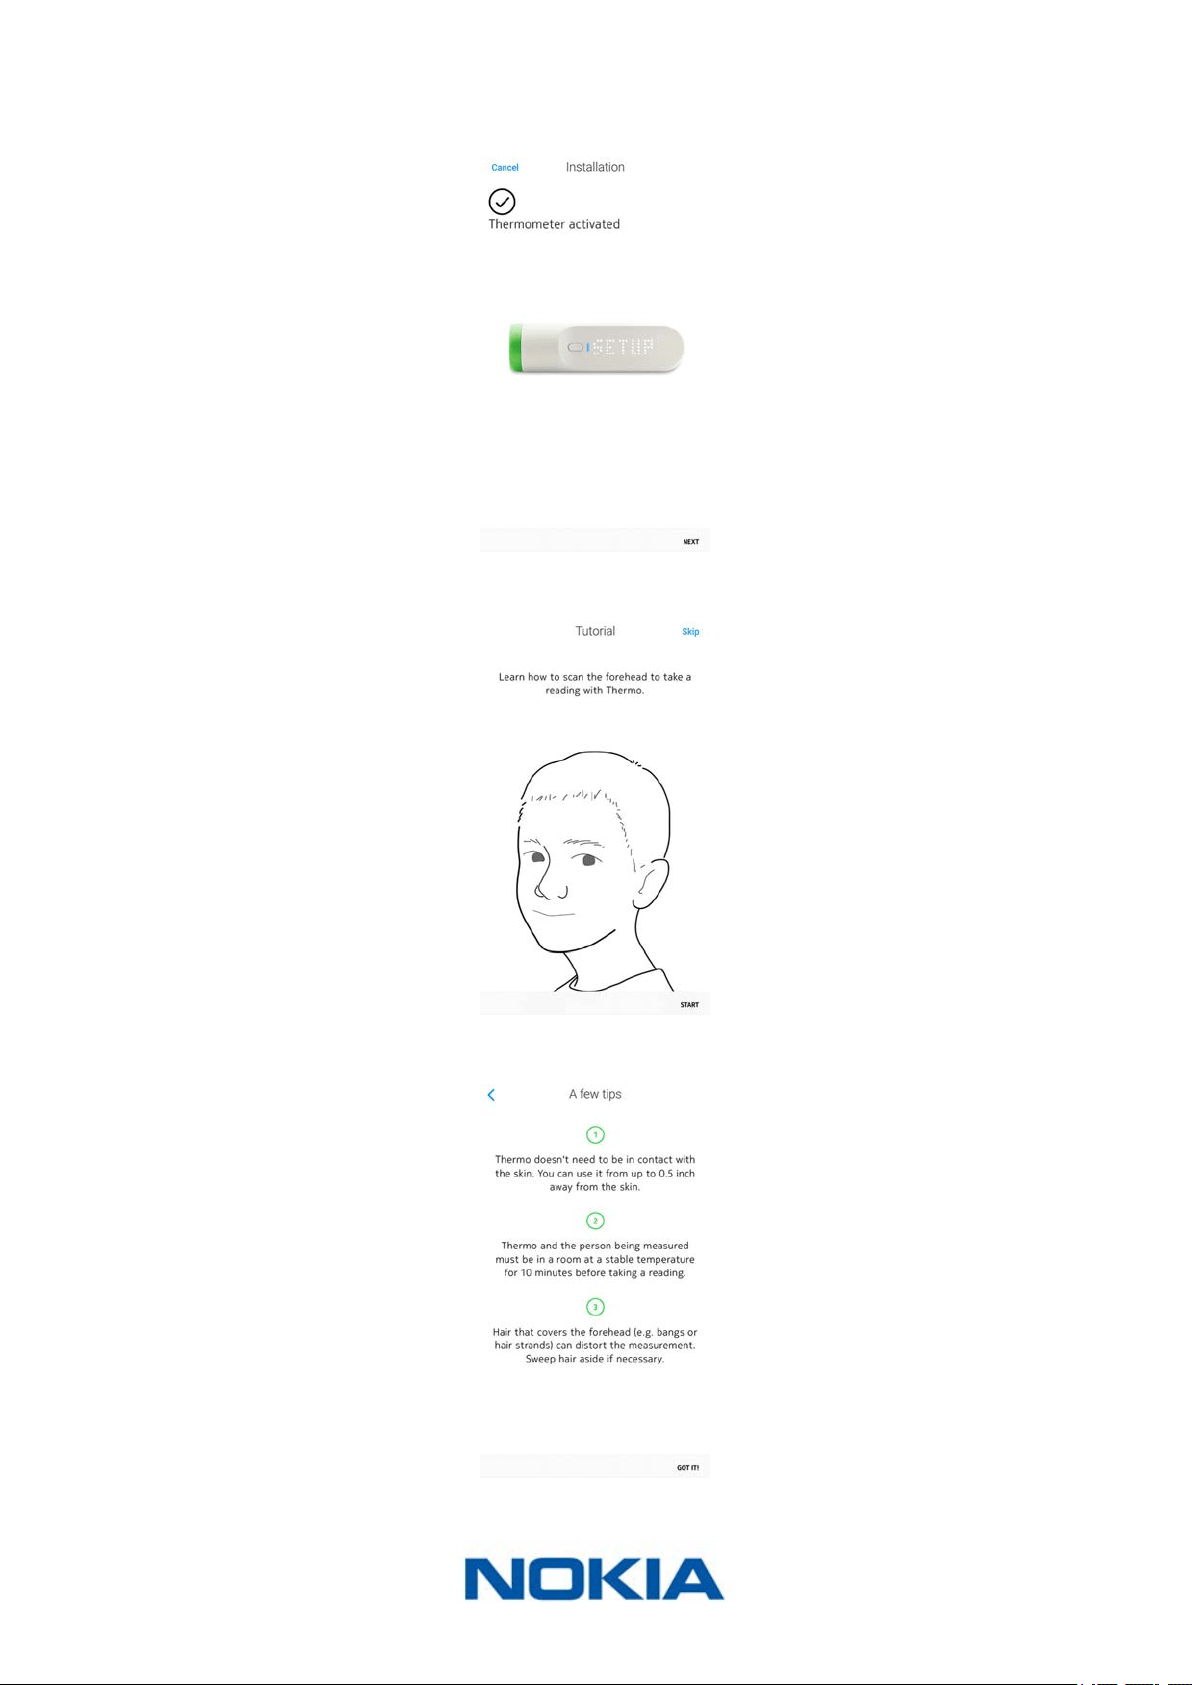
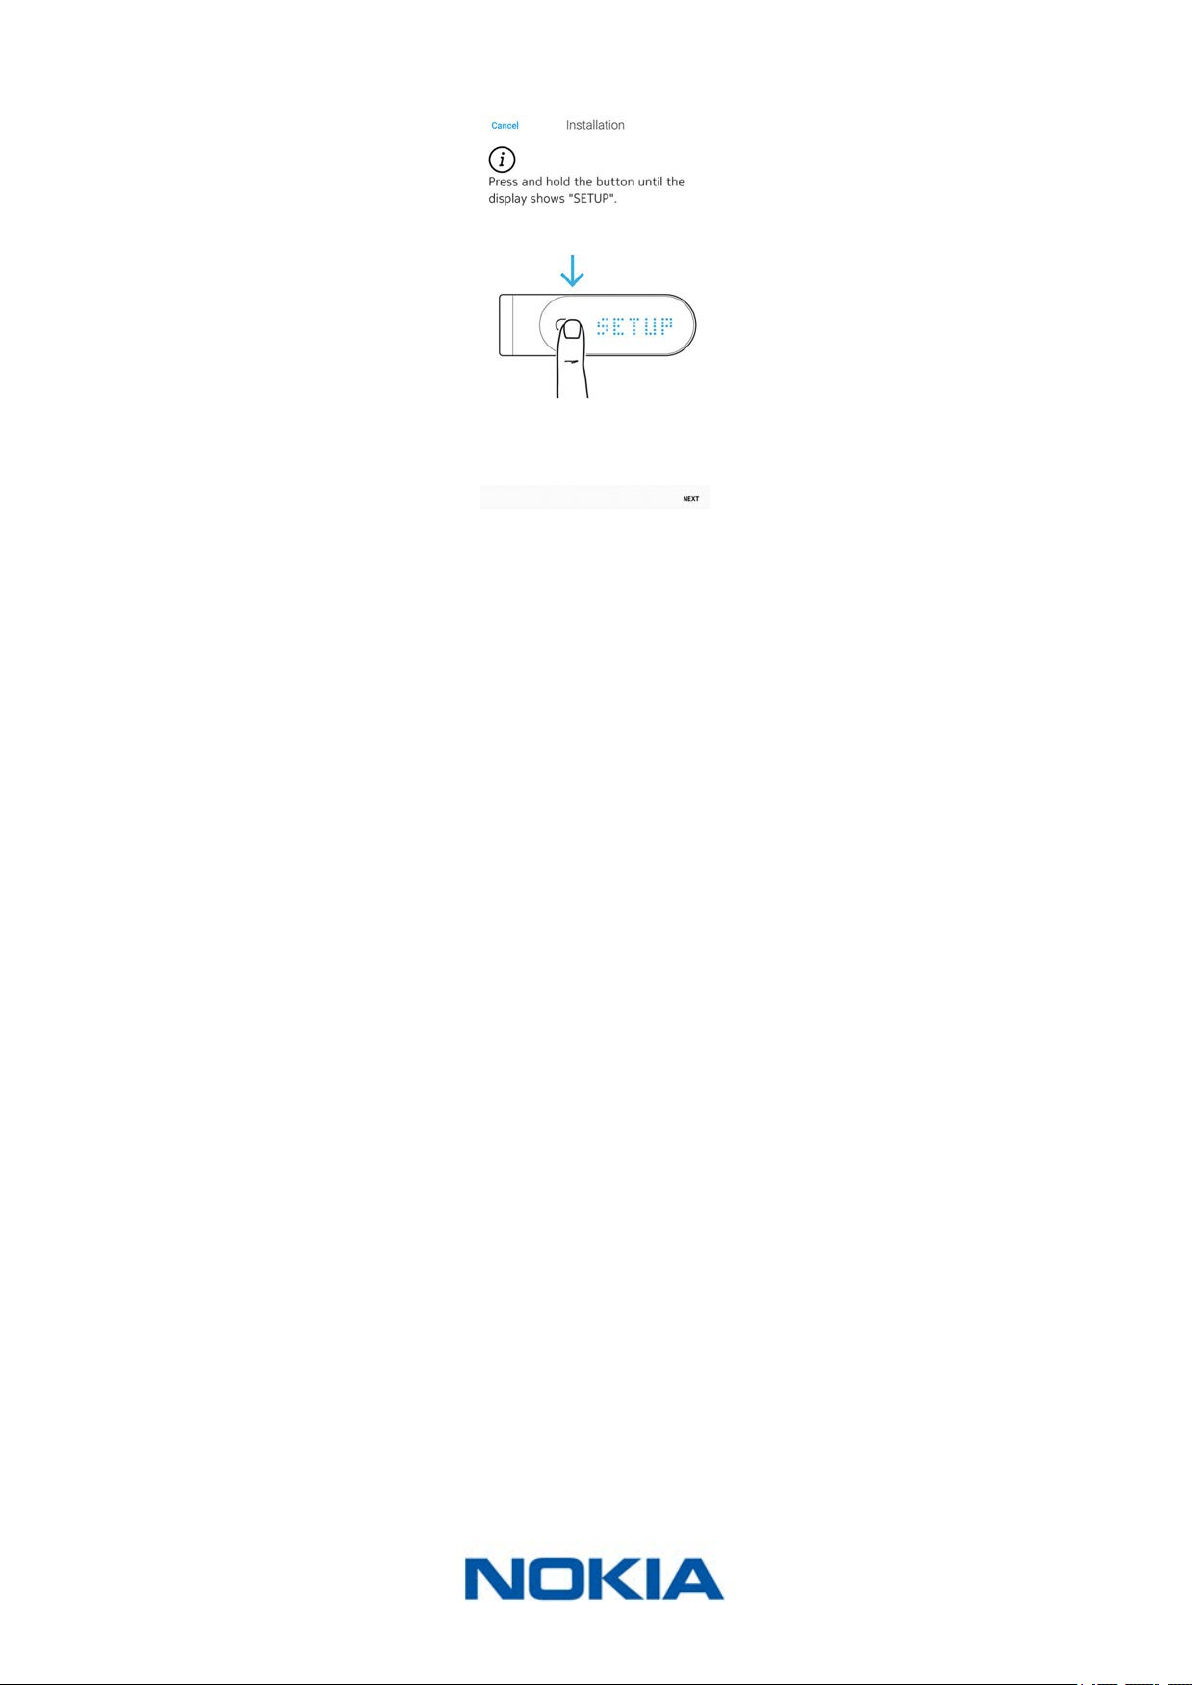
8. Tap Next.
9. Press and hold the button for 8 seconds until the display shows “SETUP”.
EN-9
Nokia Thermo
v2.0 | April 2018
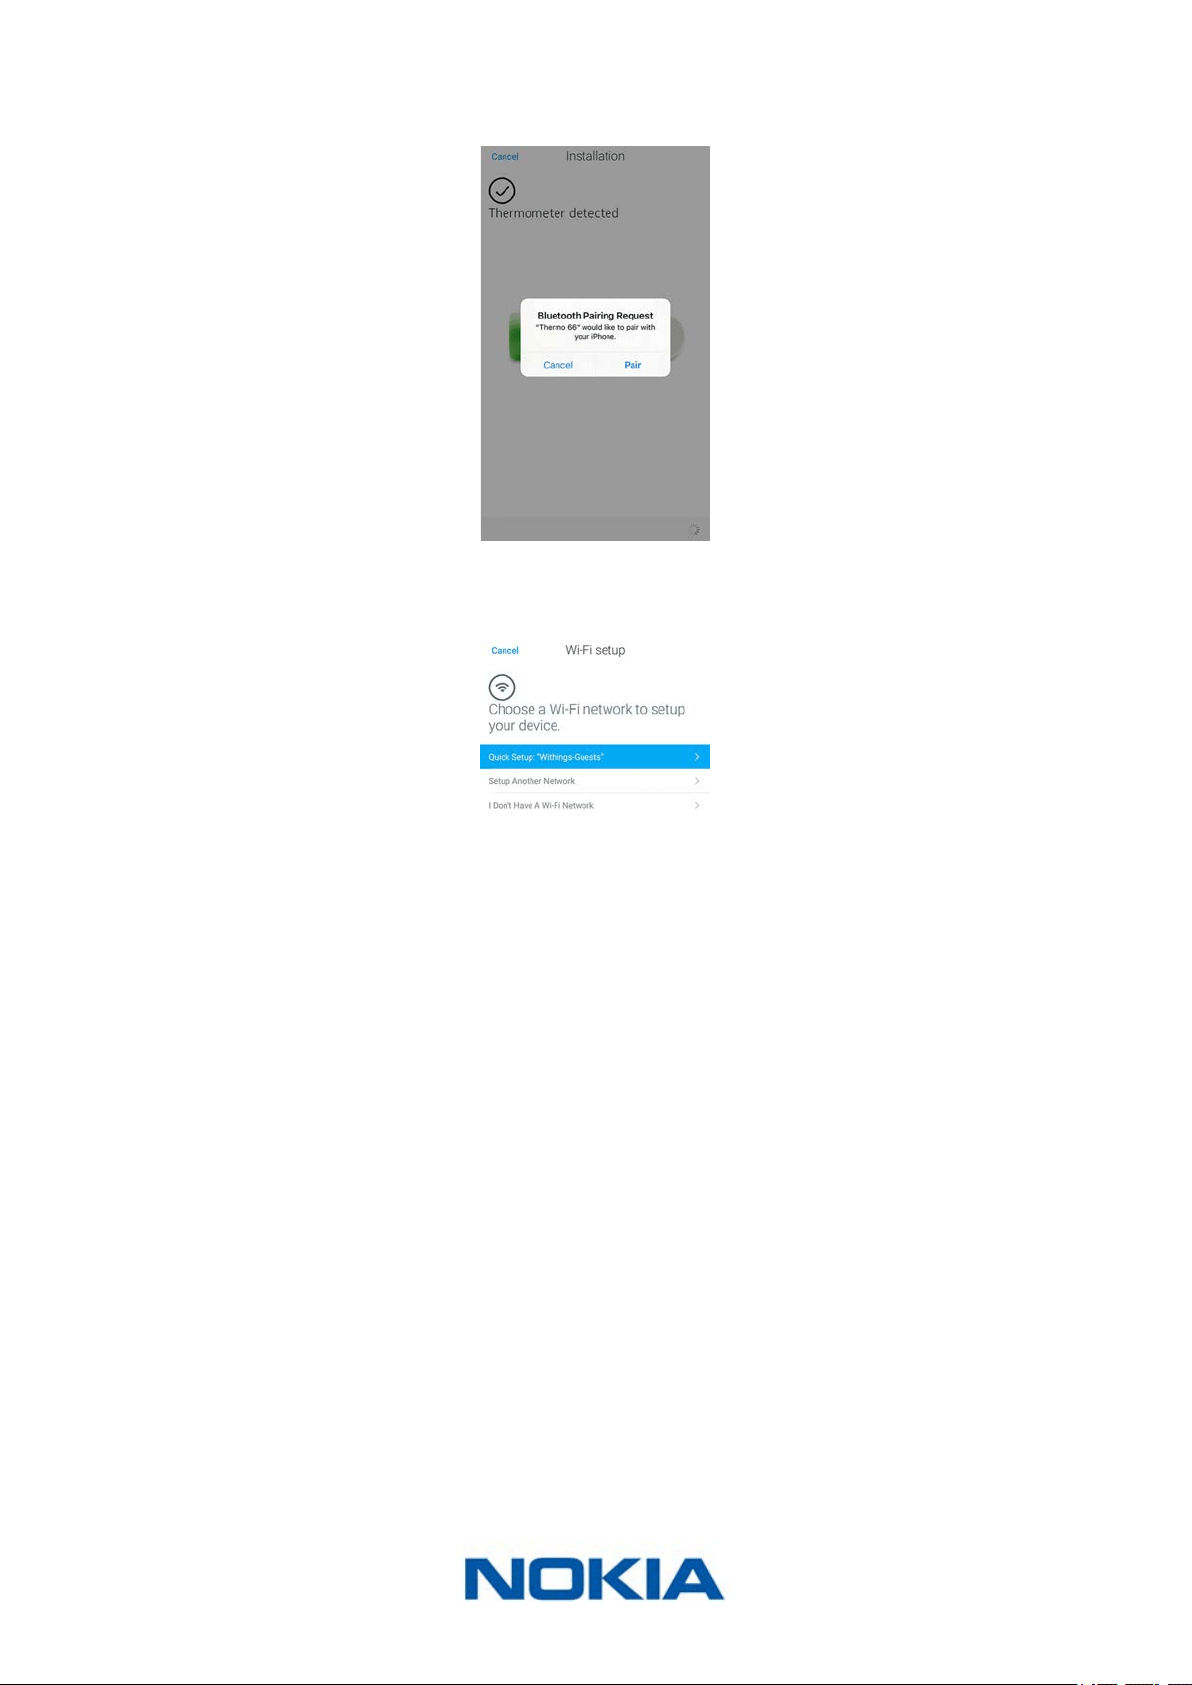
10. Tap Next.
11. Tap the Nokia Thermo you want to install from the popup window (iOS only).
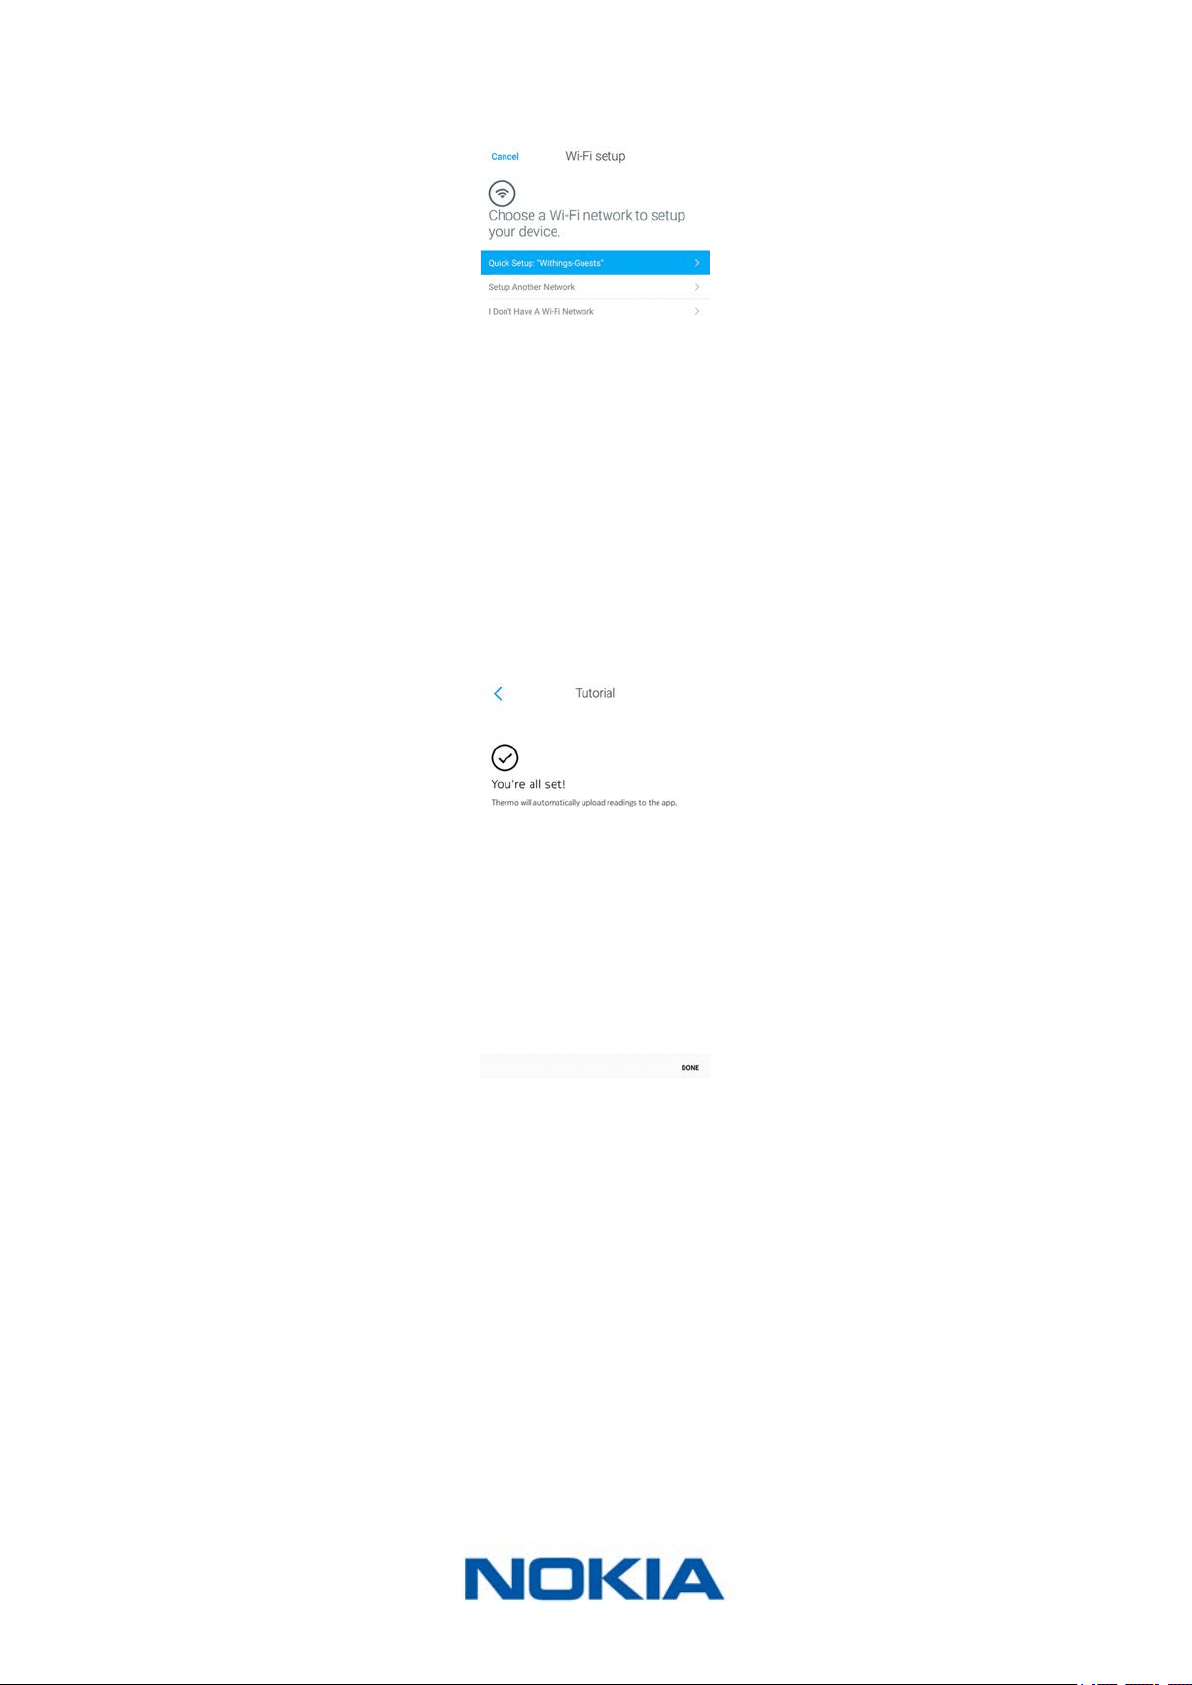
12. Tap Quick setup to use the Wi-Fi network already congured on your device or Setup
another network if you want to use another one.
For Bluetooth use, tap I don’t have a Wi-Fi network.

EN-10
Nokia Thermo
v2.0 | April 2018
13. Tap Next.
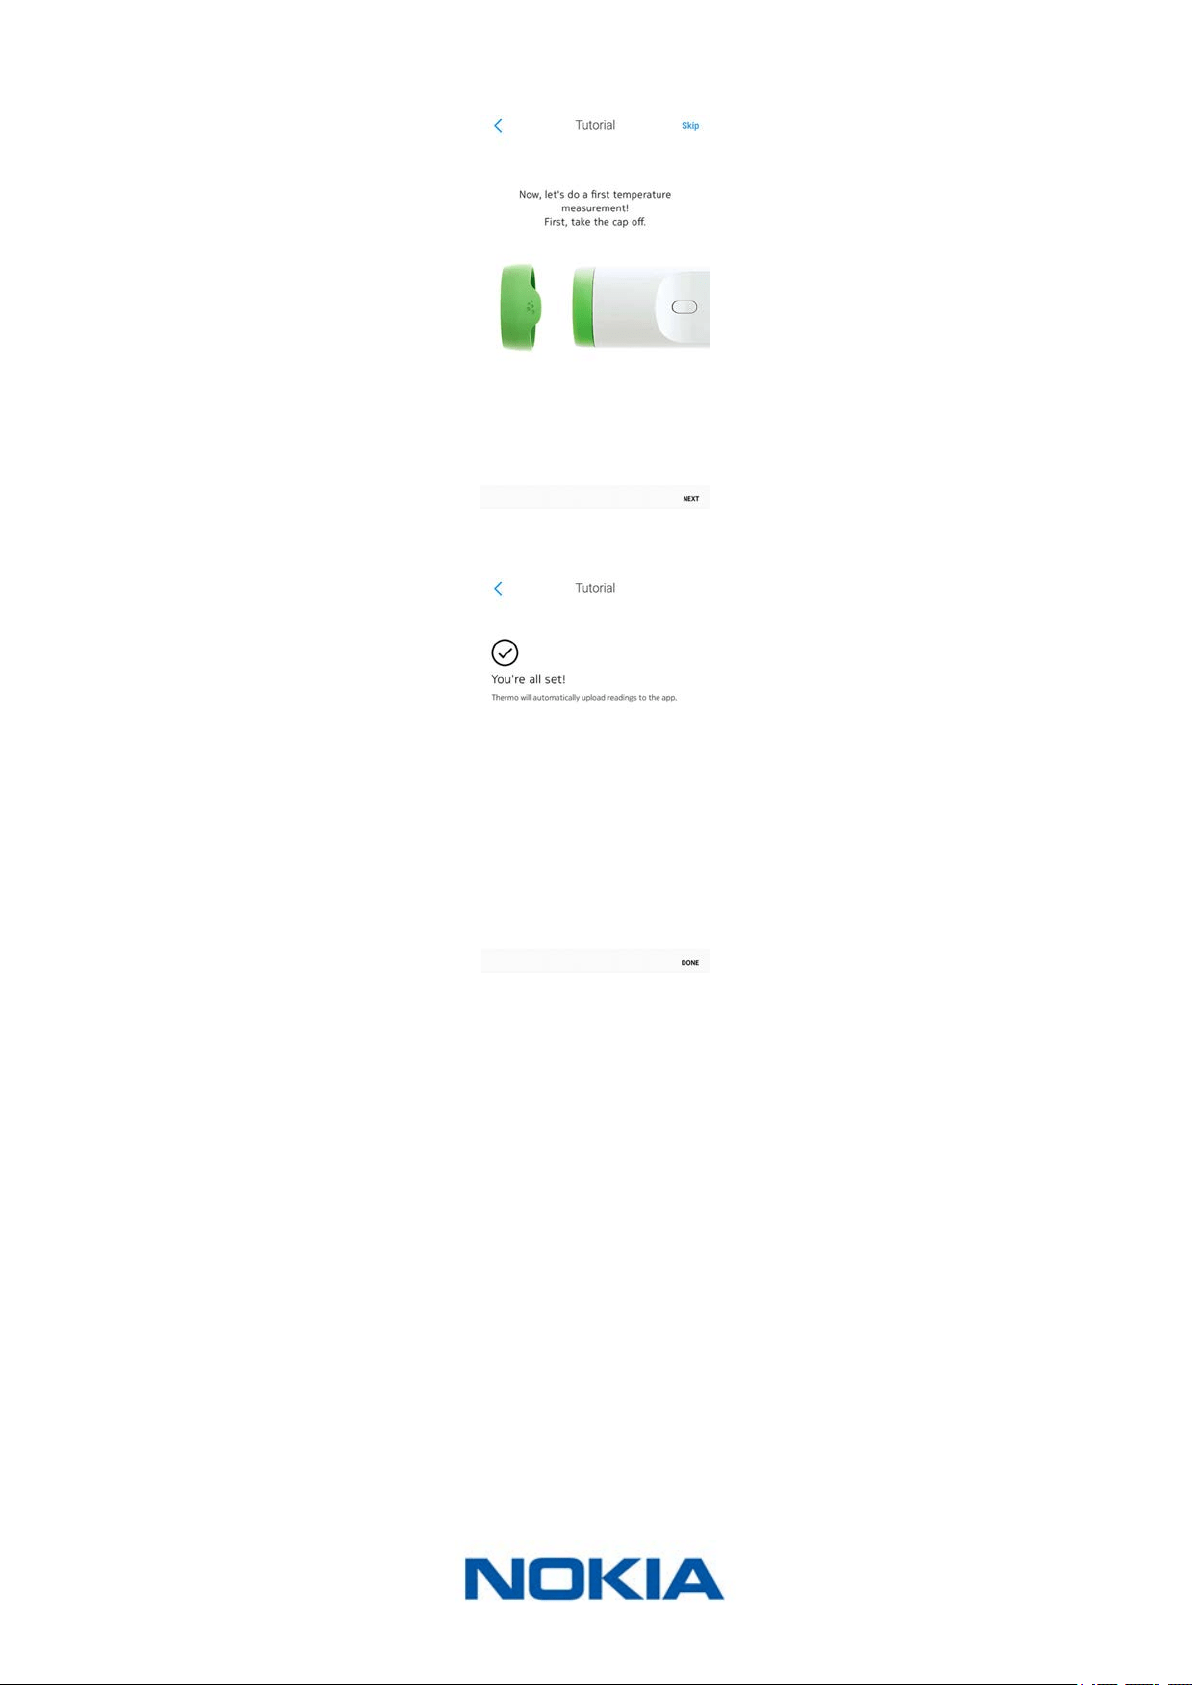
14. Tap Start to watch the tutorial or Skip to skip it.
15. Tap Got it!
EN-11
Nokia Thermo
v2.0 | April 2018
16. Tap Next to watch the tutorial or Skip to skip it.
17. Tap Done.
I already have a Nokia® account
If you already have a Nokia® account, perform the following steps:
1. Open the Nokia Thermo app.
2. Log in to your Nokia® account.
EN-12
Nokia Thermo
v2.0 | April 2018
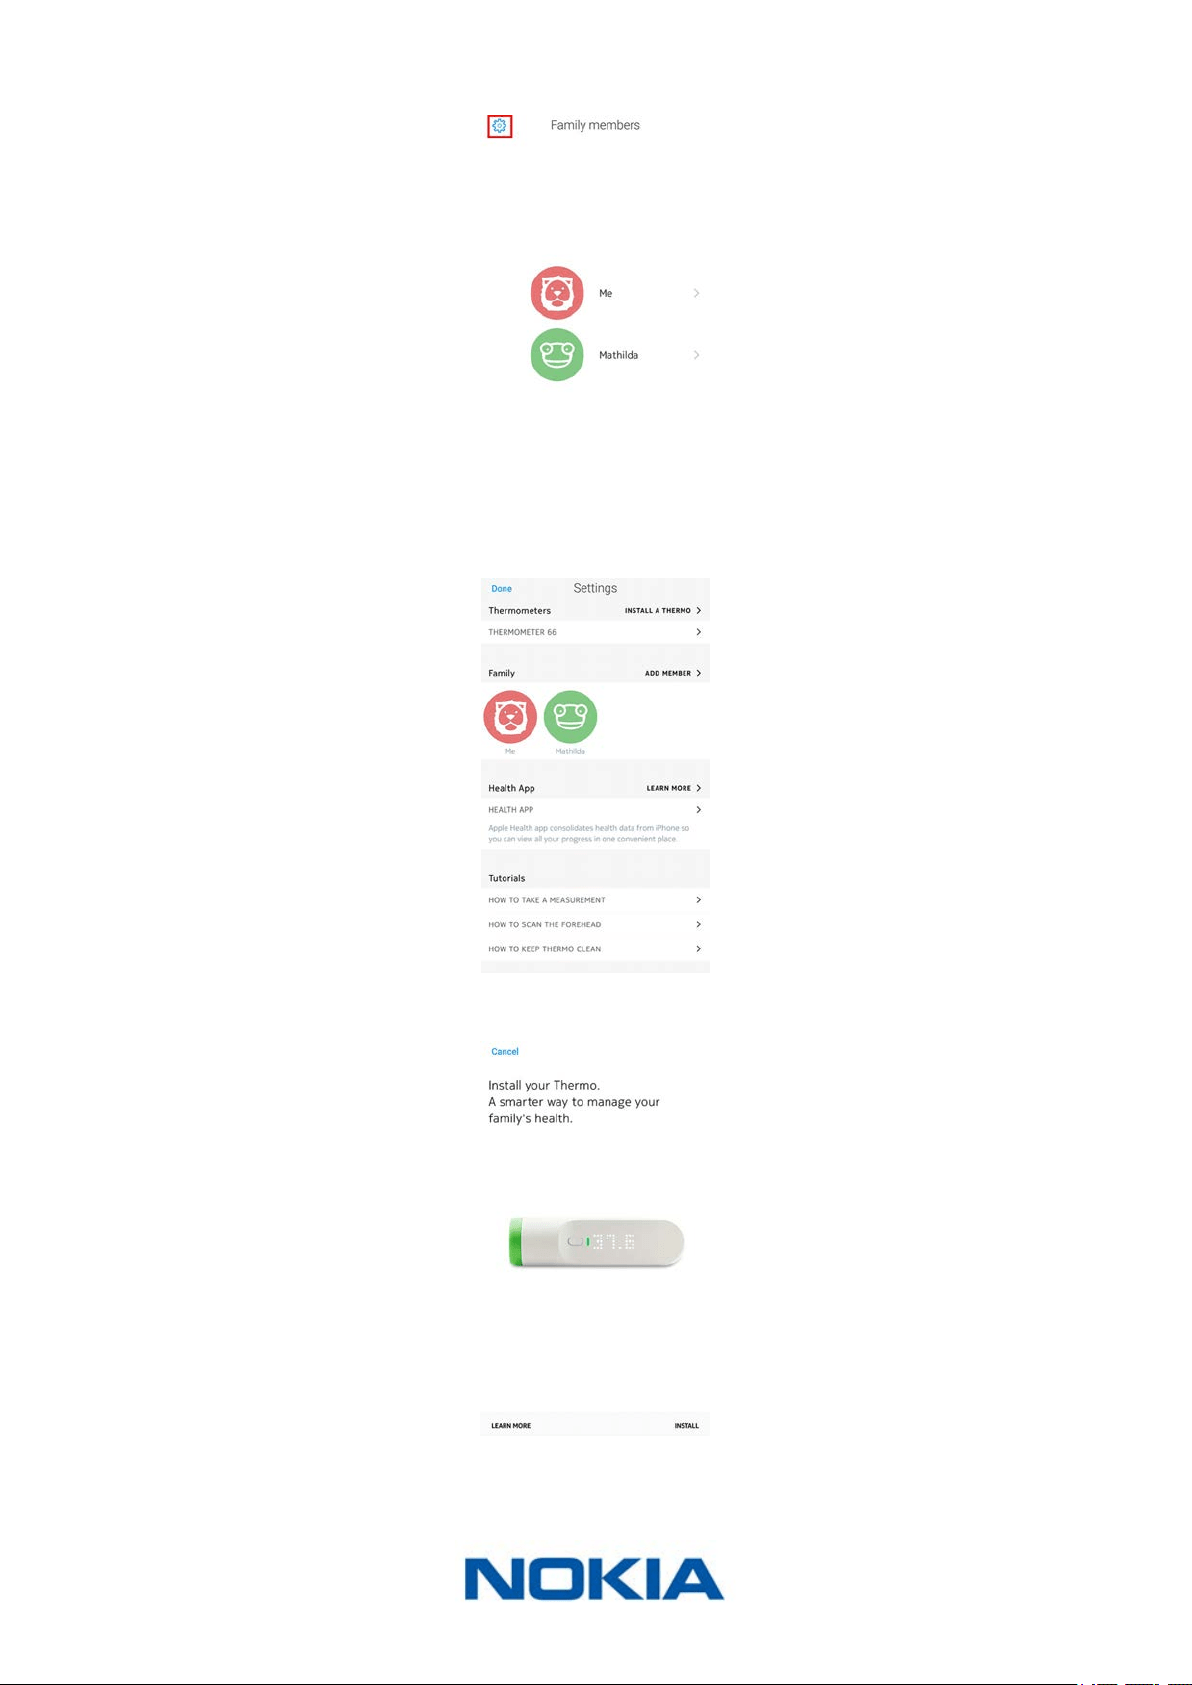
3. Tap Settings.
4. Tap Install a Thermo.
5. Tap Install.
EN-13
Nokia Thermo
v2.0 | April 2018
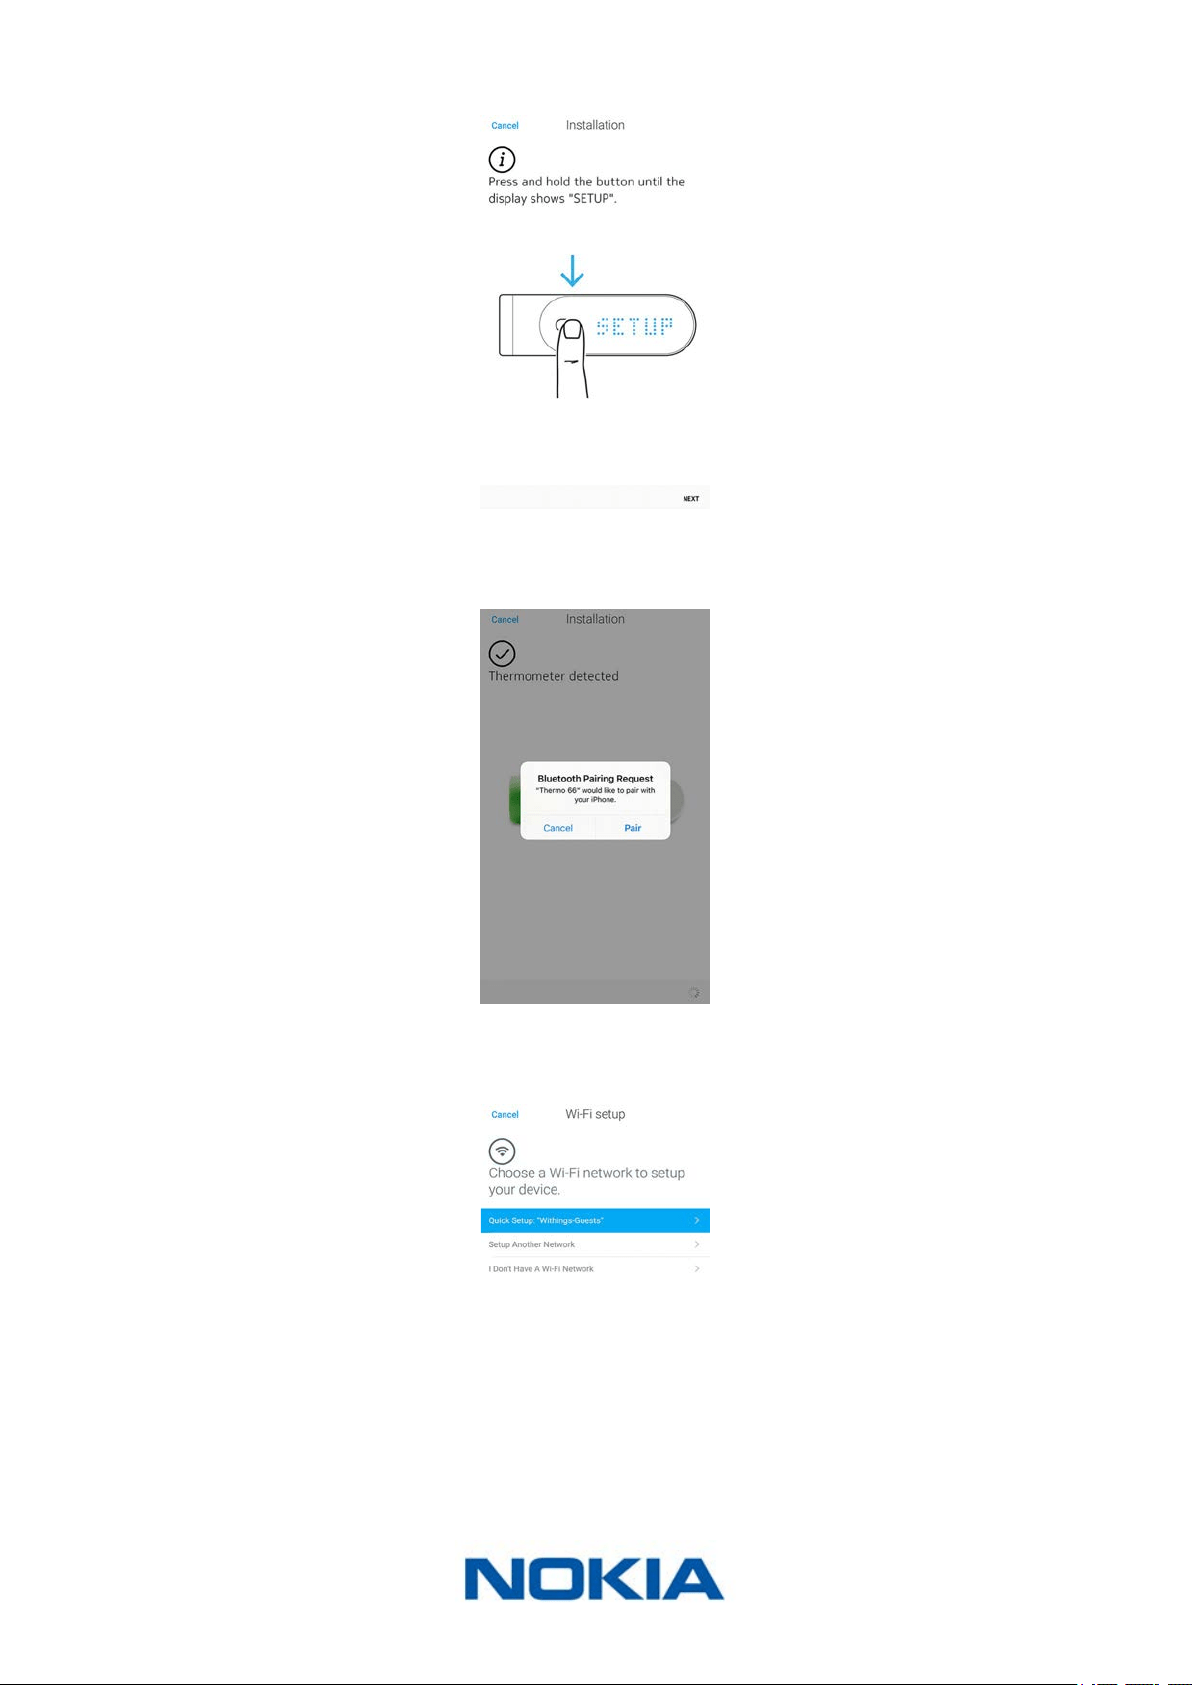
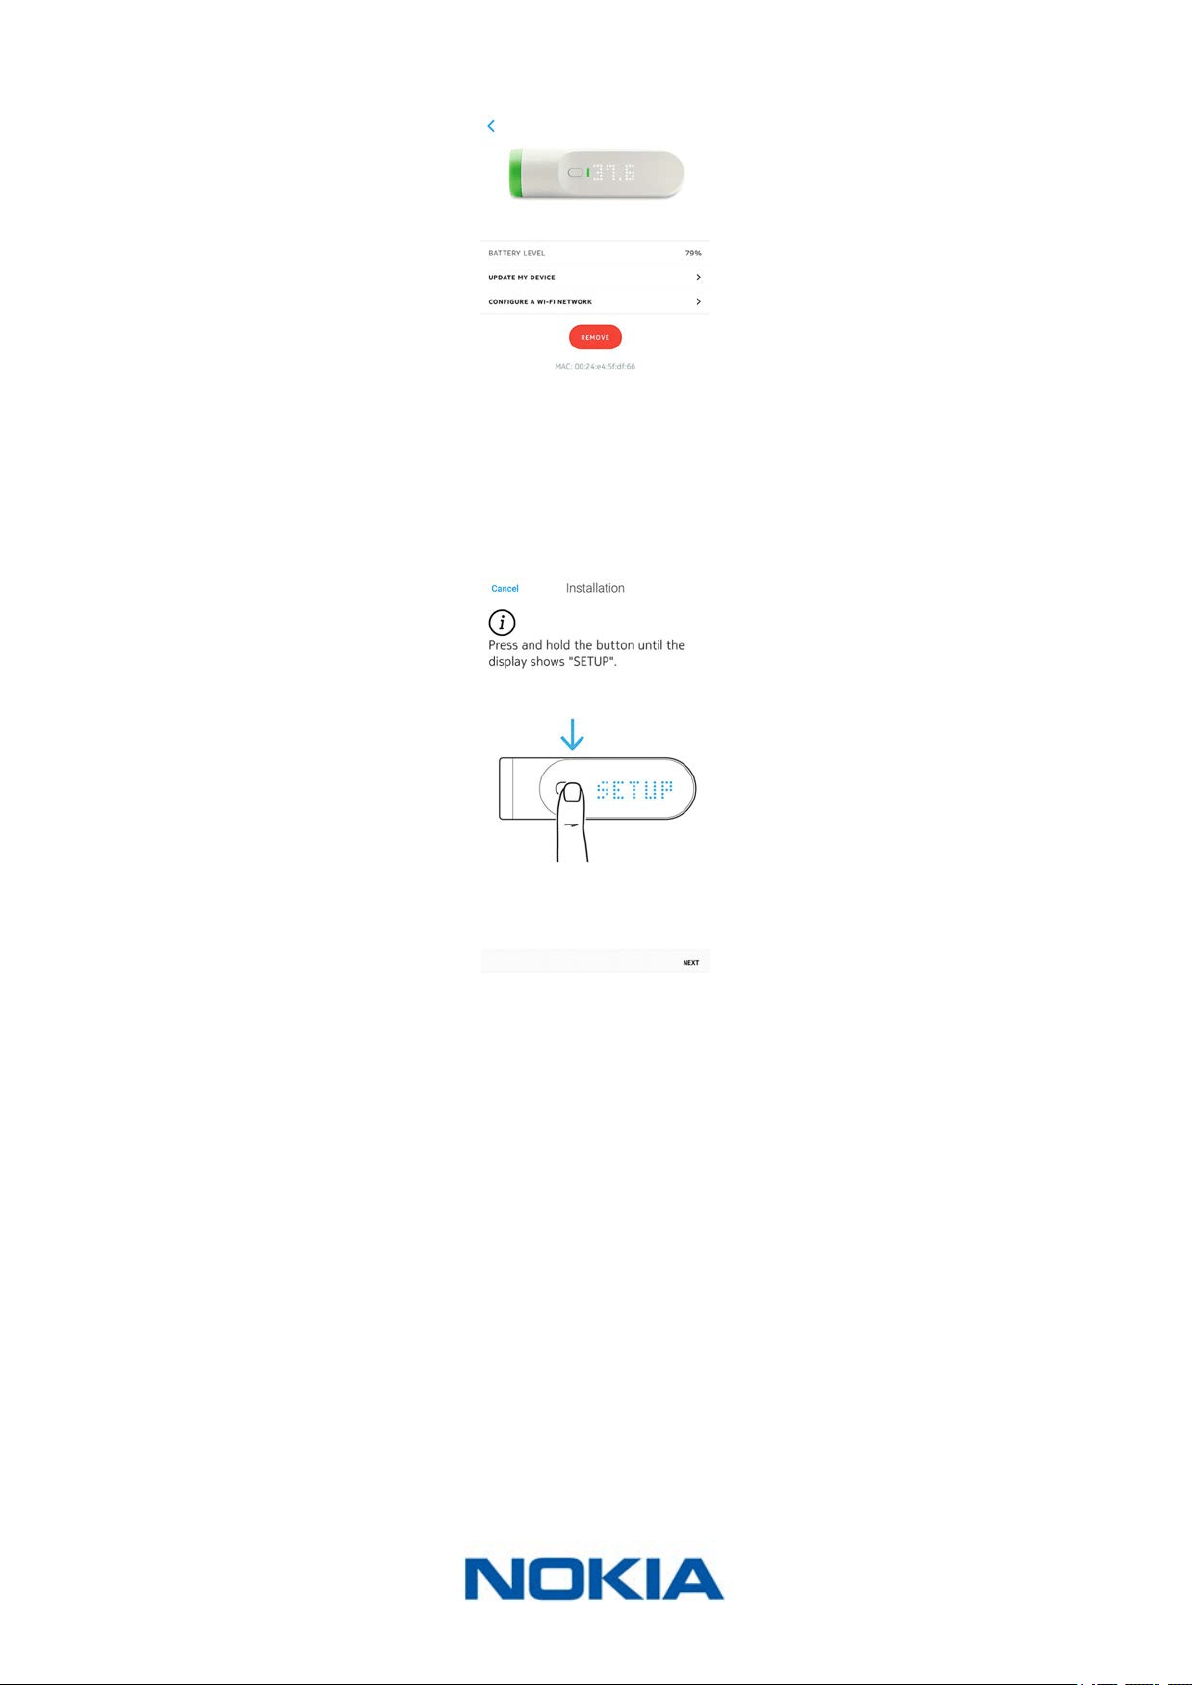
6. Press and hold the button for 8 seconds until the display shows “SETUP”.
7. Tap Next.
8. Tap the Nokia Thermo you want to install from the popup window (iOS only).
9. Tap Quick setup to use the Wi-Fi network congured on your device or Setup another
network if you want to use another one.
EN-14
Nokia Thermo
v2.0 | April 2018
For Bluetooth use, tap I don’t have a Wi-Fi network.
10. Tap Next.
11. Tap Start to watch the tutorial or Skip to skip it.
12. Tap Got it!

EN-15
Nokia Thermo
v2.0 | April 2018
13. Tap Next to watch the tutorial or Skip to skip it.
14. Tap Done.
EN-16
Nokia Thermo
v2.0 | April 2018
Customizing the settings of the Nokia Thermo
Changing the conguration of your Nokia Thermo
You may need to change the conguration of your Nokia Thermo:
• If you want to use a dierent Wi-Fi network,
• If you’ve changed the name or password of the Wi-Fi network you use,
• If you want to switch from a Bluetooth conguration to a Wi-Fi conguration.
If you want to switch from a Wi-Fi conguration to a Bluetooth conguration, you’ll need
to dissociate your Nokia Thermo and install it again from scratch. Refer to “Dissociating my
Nokia Thermo” on page43 for more information.
To change your conguration, perform the following steps:
1. Open the Nokia Thermo app.
2. Tap Settings.
3. Tap the name of your Nokia Thermo.
EN-17
Nokia Thermo
v2.0 | April 2018
4. Tap Congure a Wi-Fi network.
5. Press and hold the button for 8 seconds until the display shows “SETUP”.
6. Tap Next.
7. Tap the Nokia Thermo you want to install.
EN-18
Nokia Thermo
v2.0 | April 2018
8. Tap Quick setup to use the Wi-Fi network congured on your device or Setup another
network if you want to use another one.
If you want to set up your Nokia Thermo in Bluetooth, tap I don’t have a Wi-Fi network.
9. Tap Allow.
10. Tap Done.
Changing the units
To select the temperature unit (Celsius or Fahrenheit), perform the following steps:
1. Open the Nokia Thermo app.
EN-19
Nokia Thermo
v2.0 | April 2018
2. Tap Settings.
3. Tap the unit set you want to change.
4. Tap the unit you want to use.
5. Tap the unit set again to validate.
The Nokia Thermo and the Nokia Thermo app have to communicate once before the
temperature unit change is reected on the display of your Nokia Thermo.
Note that if your Nokia Thermo is linked to several accounts, you’ll have to change the
temperature unit on both accounts for the change to be reected on the display of your
Nokia Thermo.
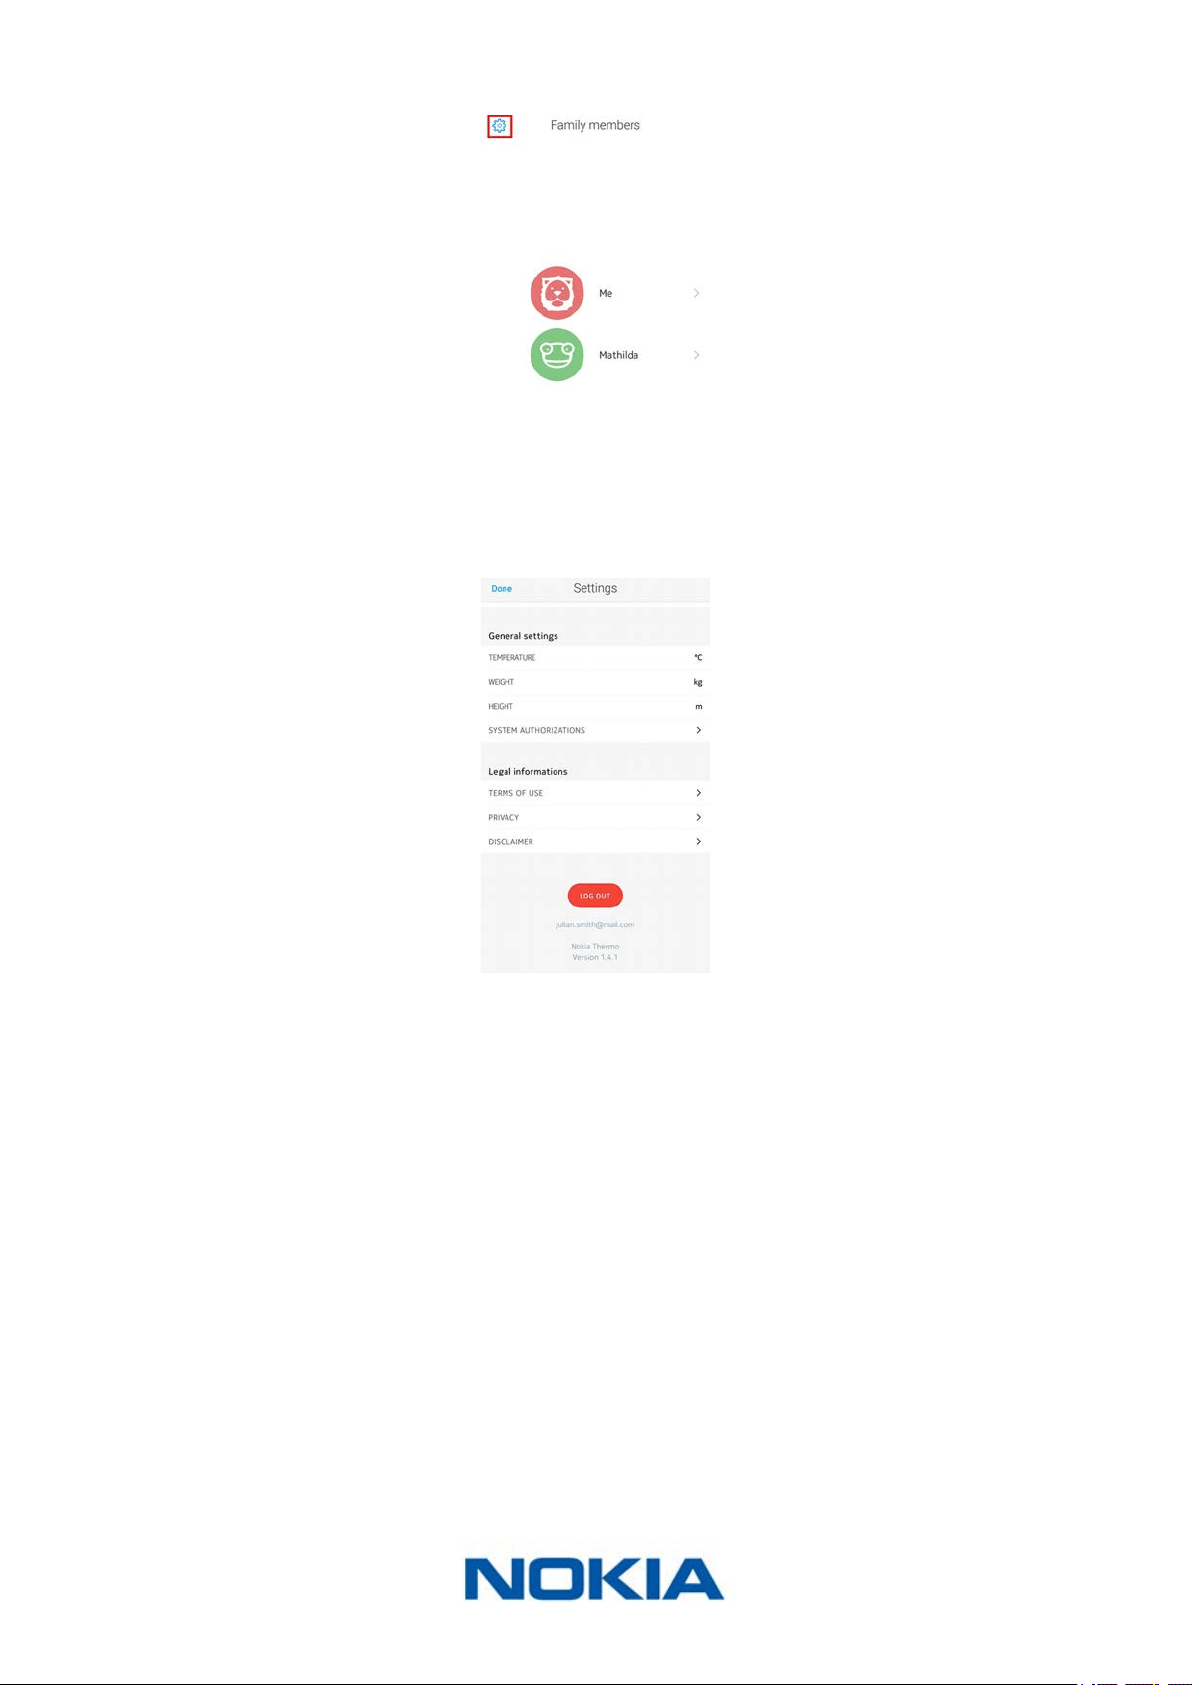
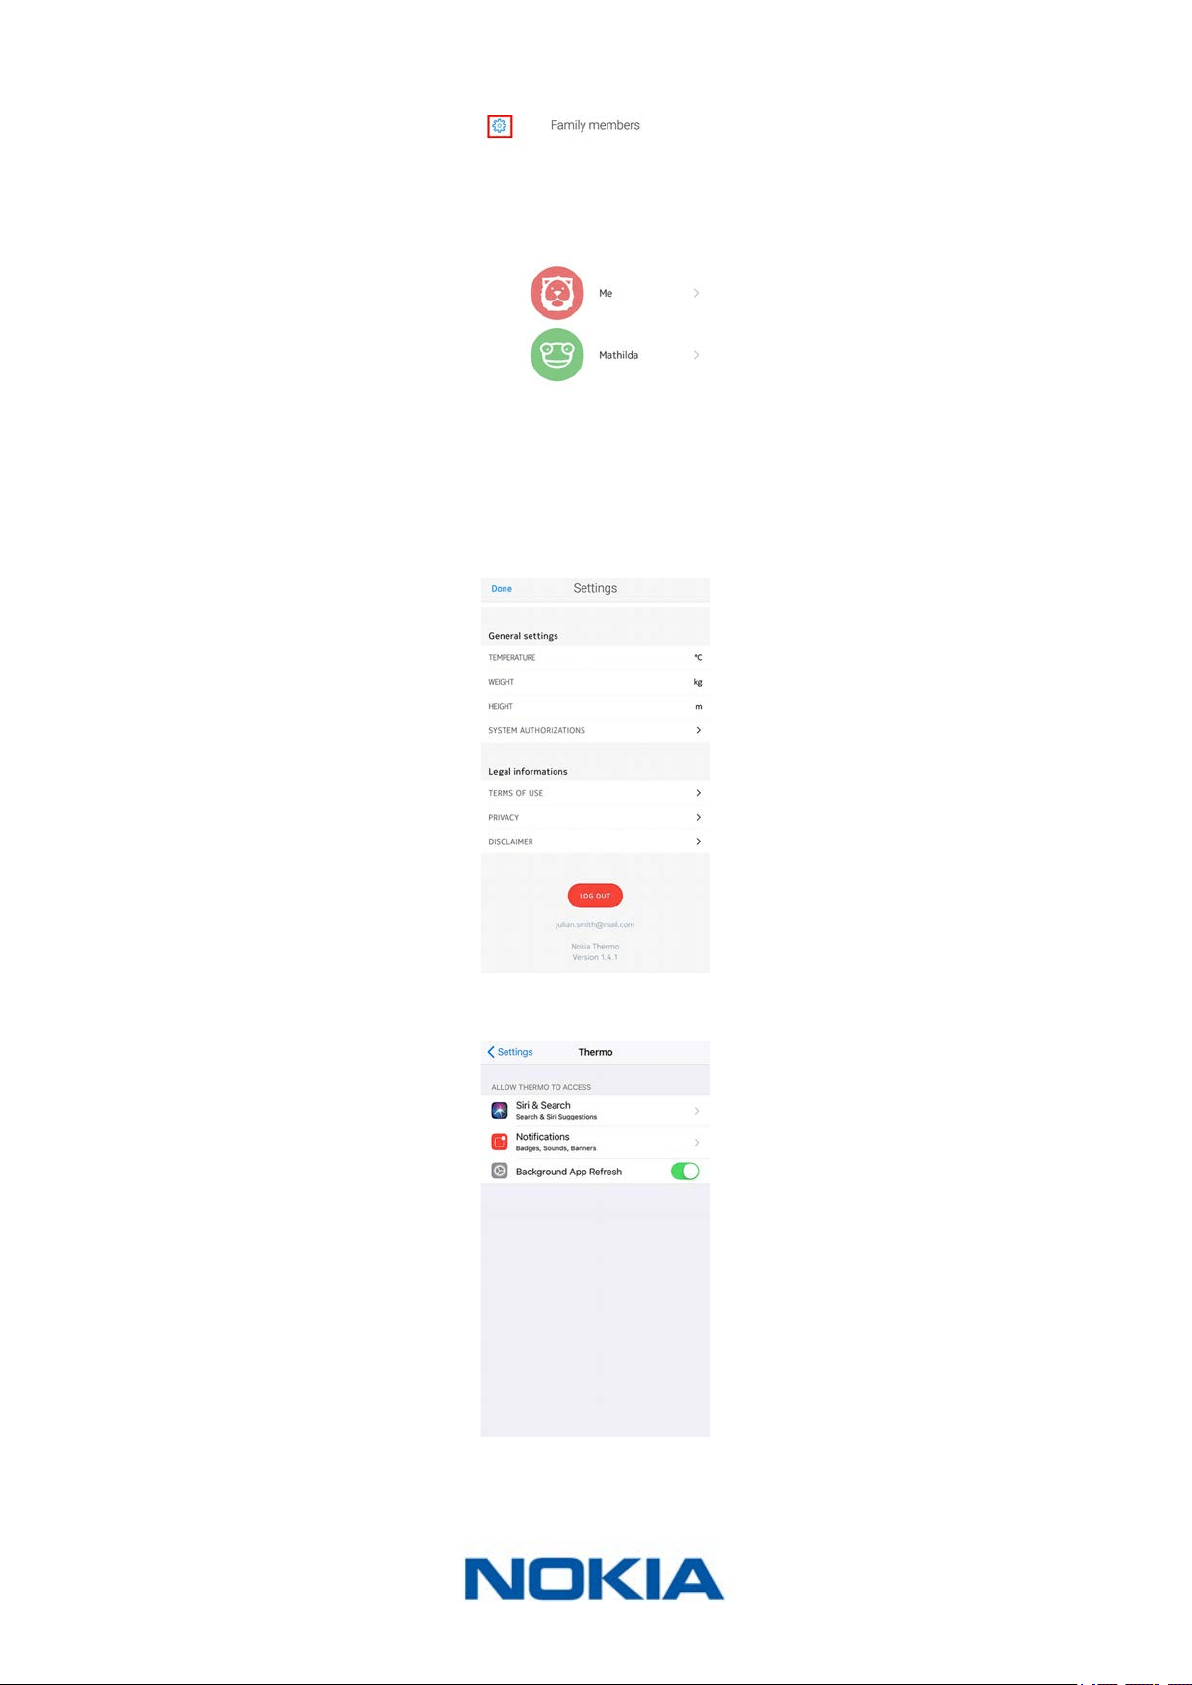
Changing the system authorizations (iOS only)
You can change system authorizations at any point, for example if you need to disable
access to mobile data on your mobile device before going away in a foreign country.
To do so, perform the following steps:
1. Open the Nokia Thermo app.
EN-20
Nokia Thermo
v2.0 | April 2018
2. Tap Settings.
3. Tap System authorizations.
4. Disable or enable the authorizations you want.
EN-21
Nokia Thermo
v2.0 | April 2018
Using my Nokia Thermo
Before taking a measurement
Make sure you follow these guidelines before taking a measurement:
• The user and the Nokia Thermo have to remain in the same ambient temperature for
ten minutes before taking a measurement.
• The measurement has to be taken on dry skin. Sweaty skin could impact the results.
• Wait at least fteen minutes after a workout before taking your measurement.
• If you’re taking the temperature of a baby, make sure you wait at least fteen minutes
after nursing him/her before taking a measurement.
• Do not take a measurement on a premature baby.
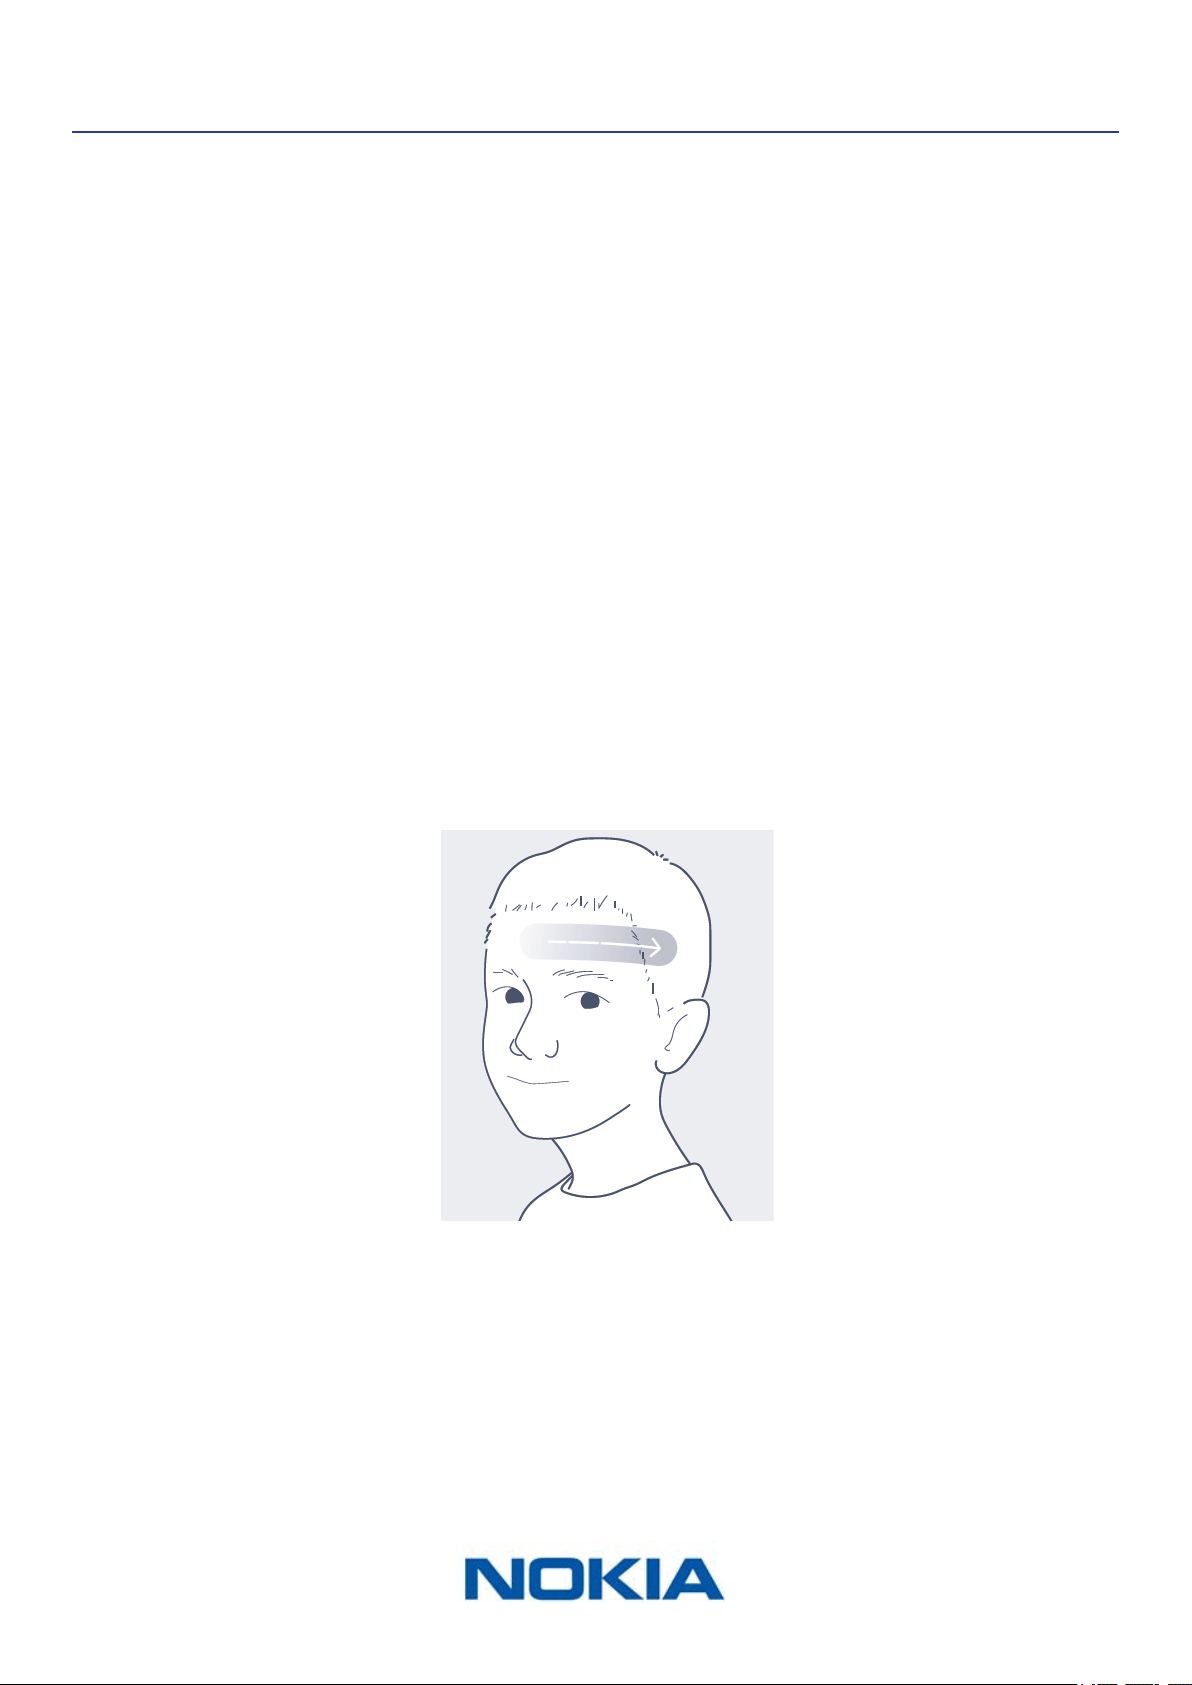
Taking a measurement
To take a measurement, perform the following steps:
1. Remove the protective cap.
2. Press the button of your Nokia Thermo.
3. Scan across the forehead in a straight line, starting from the center of the forehead.
Direct contact with the skin is not necessary. The Nokia Thermo can be up to 1 cm (0.5
in.) away from your skin.
The Nokia Thermo vibrates at the end of the measurement and the result comes up on the
display. You can then assign the result, either from the device or from the app.
EN-22
Nokia Thermo
v2.0 | April 2018
Assigning a measurement
To assign a measurement from your Nokia Thermo, perform the following steps:
1. As soon as the temperature comes up, slide your nger up or down on the touch
sensitive area of the display to select the correct user.
2. Press the button to conrm your choice.
The fever status LED turns on. Your Nokia Thermo will power o after a few seconds.
Your measurement is sent to the app after your Nokia Thermo turns o.
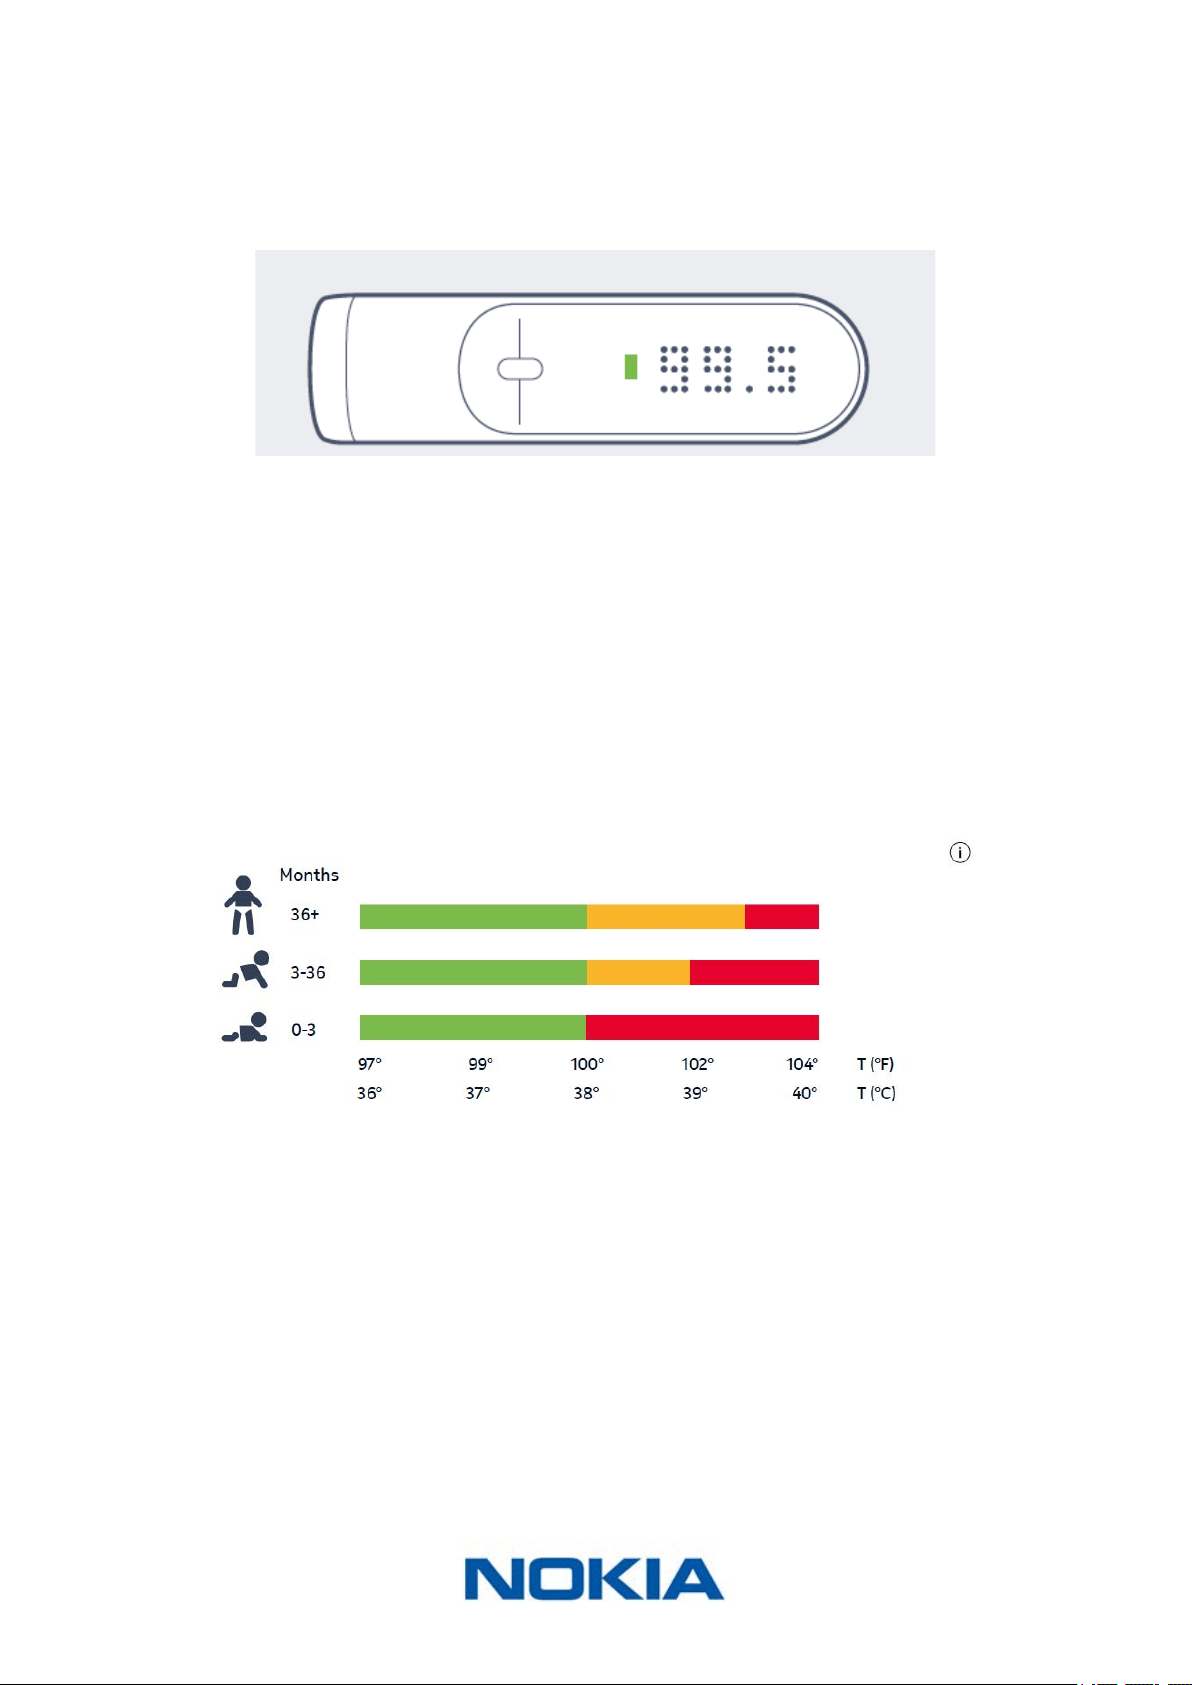
Understanding the fever status LED
The color of the LED indicates at a glance whether or not the person has a fever. This is
based on the temperature and the user’s age range. The severity of the fever is also clearly
visible based on the color shown.
You’ll nd below the fever status for each age range:
Viewing the history of my measurements
Once you’ve assigned a measurement from your Nokia Thermo, you can check the
history of measurements for the user. To do so, slide the touch sensitive area of your
Nokia Thermo from bottom to top to go back in time.
You can see the last ve measurements taken in the past 72 hours.

EN-23
Nokia Thermo
v2.0 | April 2018
Using the Nokia Thermo app
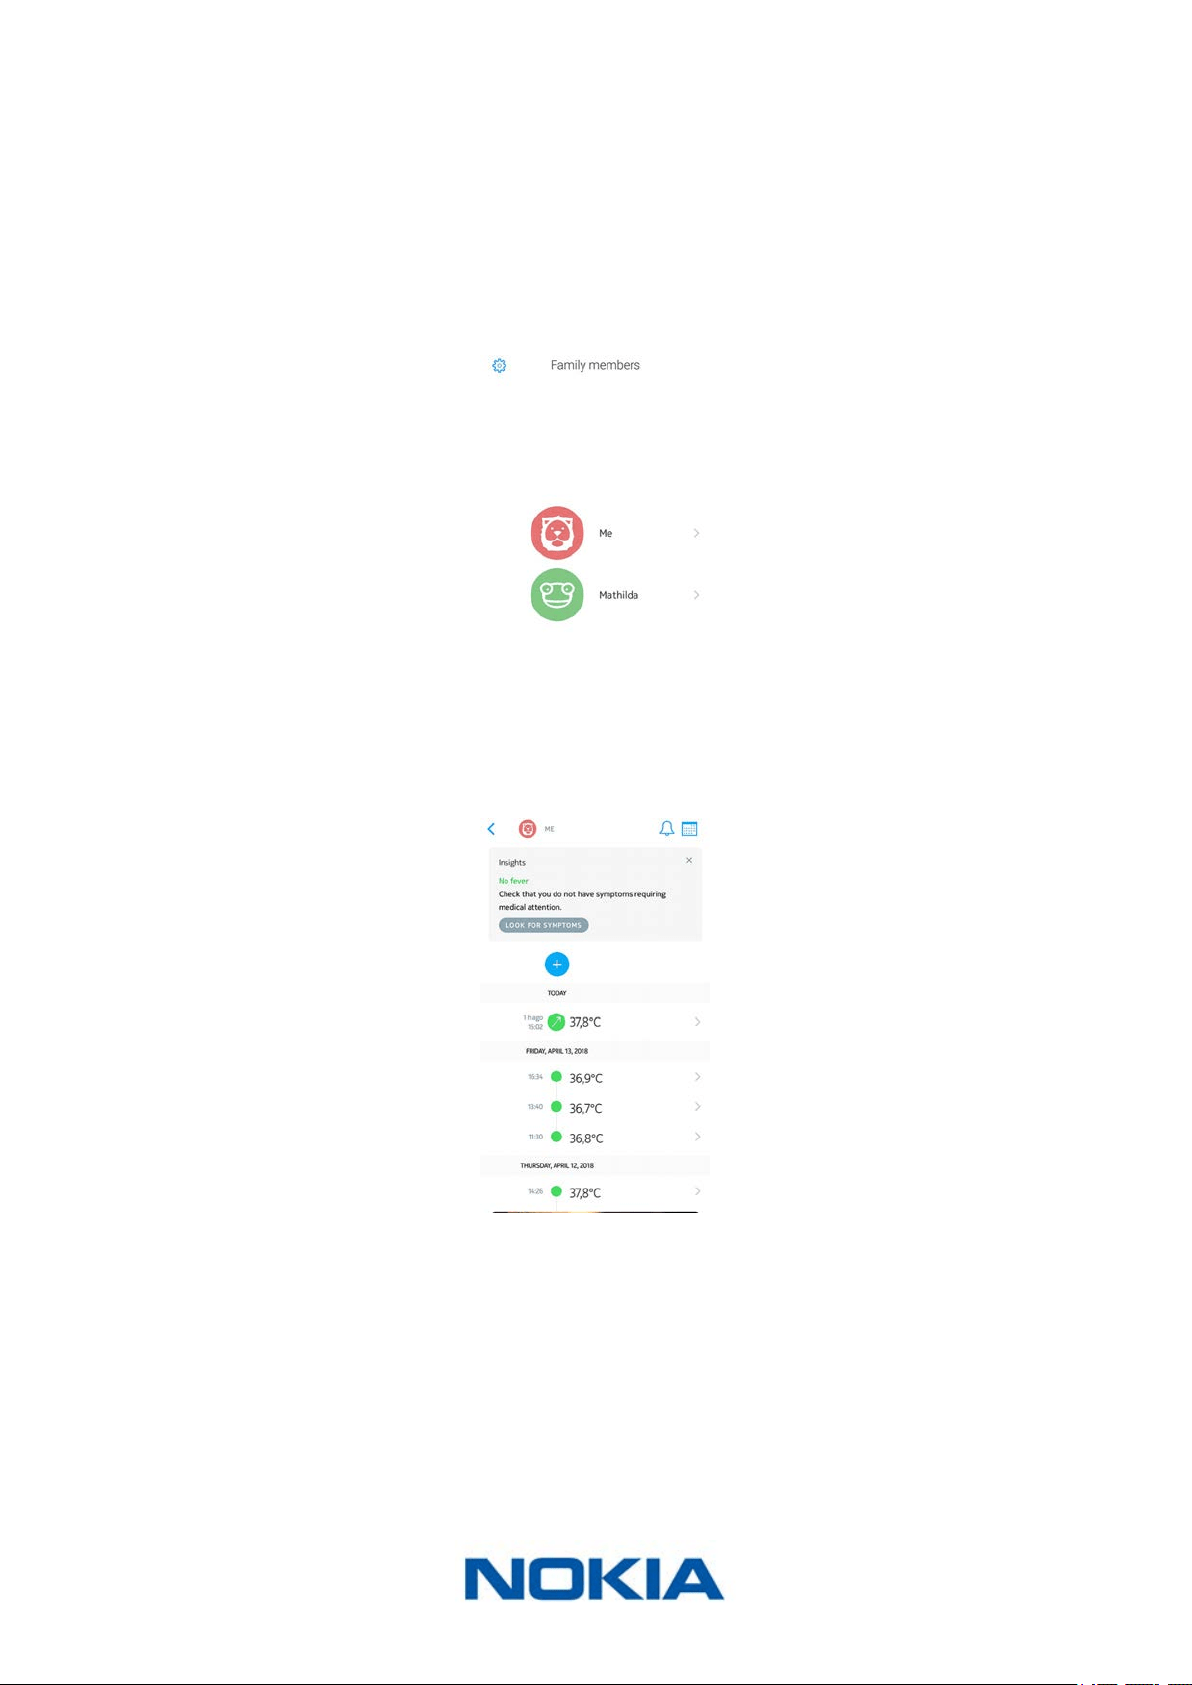
Viewing the Timeline
Timeline overview
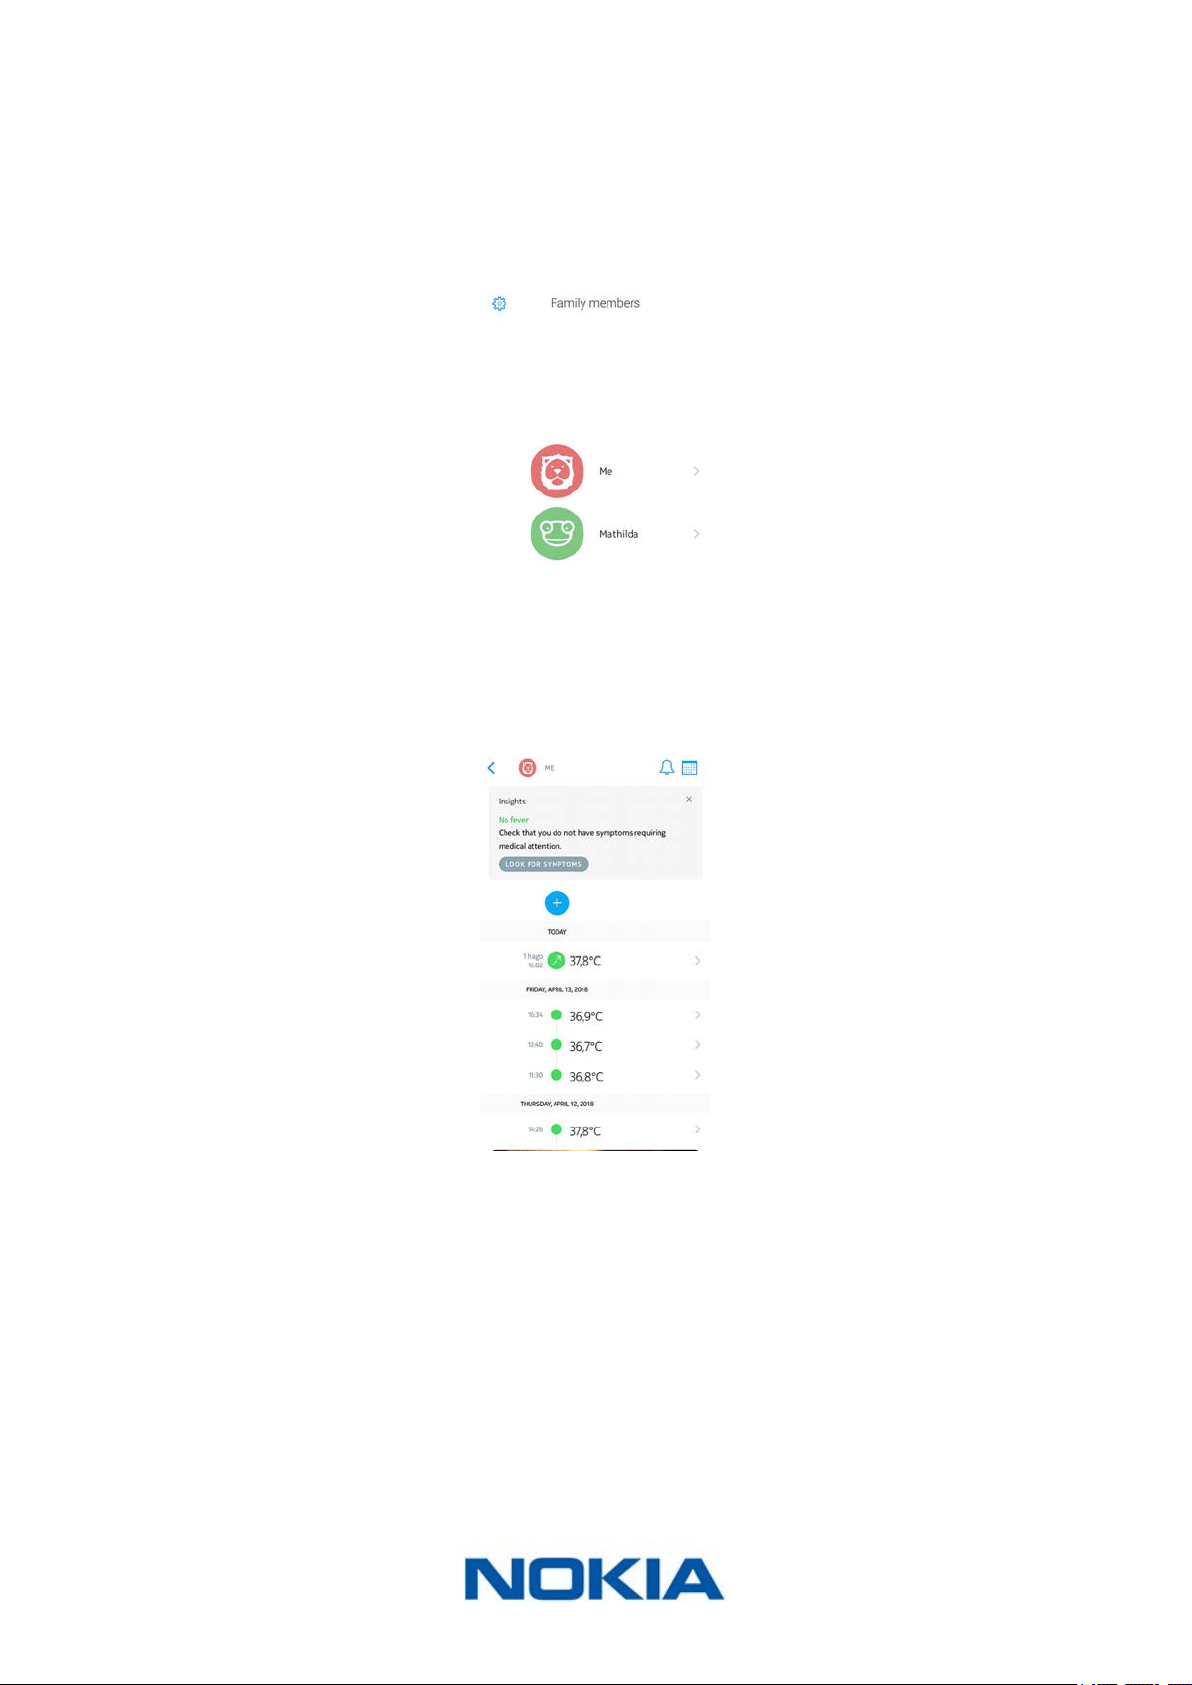
All users of the Nokia Thermo app have a Timeline of their own. The purpose of the
Timeline is to keep track of one’s temperature throughout the weeks and to record various
information about one’s health (symptoms experienced, medicine taken, pictures and
notes).
To view a Timeline, you simply have to log in to the Nokia Thermo app and tap the name of
the person whose Timeline you want to check.
Viewing the Timeline
The Timeline contains a list of various items, sorted by date and time. Here’s the list
of items you might see in your Timeline:
Icon Item type Description
Fever status Indicates a temperature measurement in the normal range
Fever status
Indicates a temperature measurement corresponding to a mild
fever
Fever status
Indicates a temperature measurement corresponding to a high
fever
Notes
Indicates that you’ve added a note, medicine you’re taking,
symptoms you’re experiencing, or a picture
EN-24
Nokia Thermo
v2.0 | April 2018
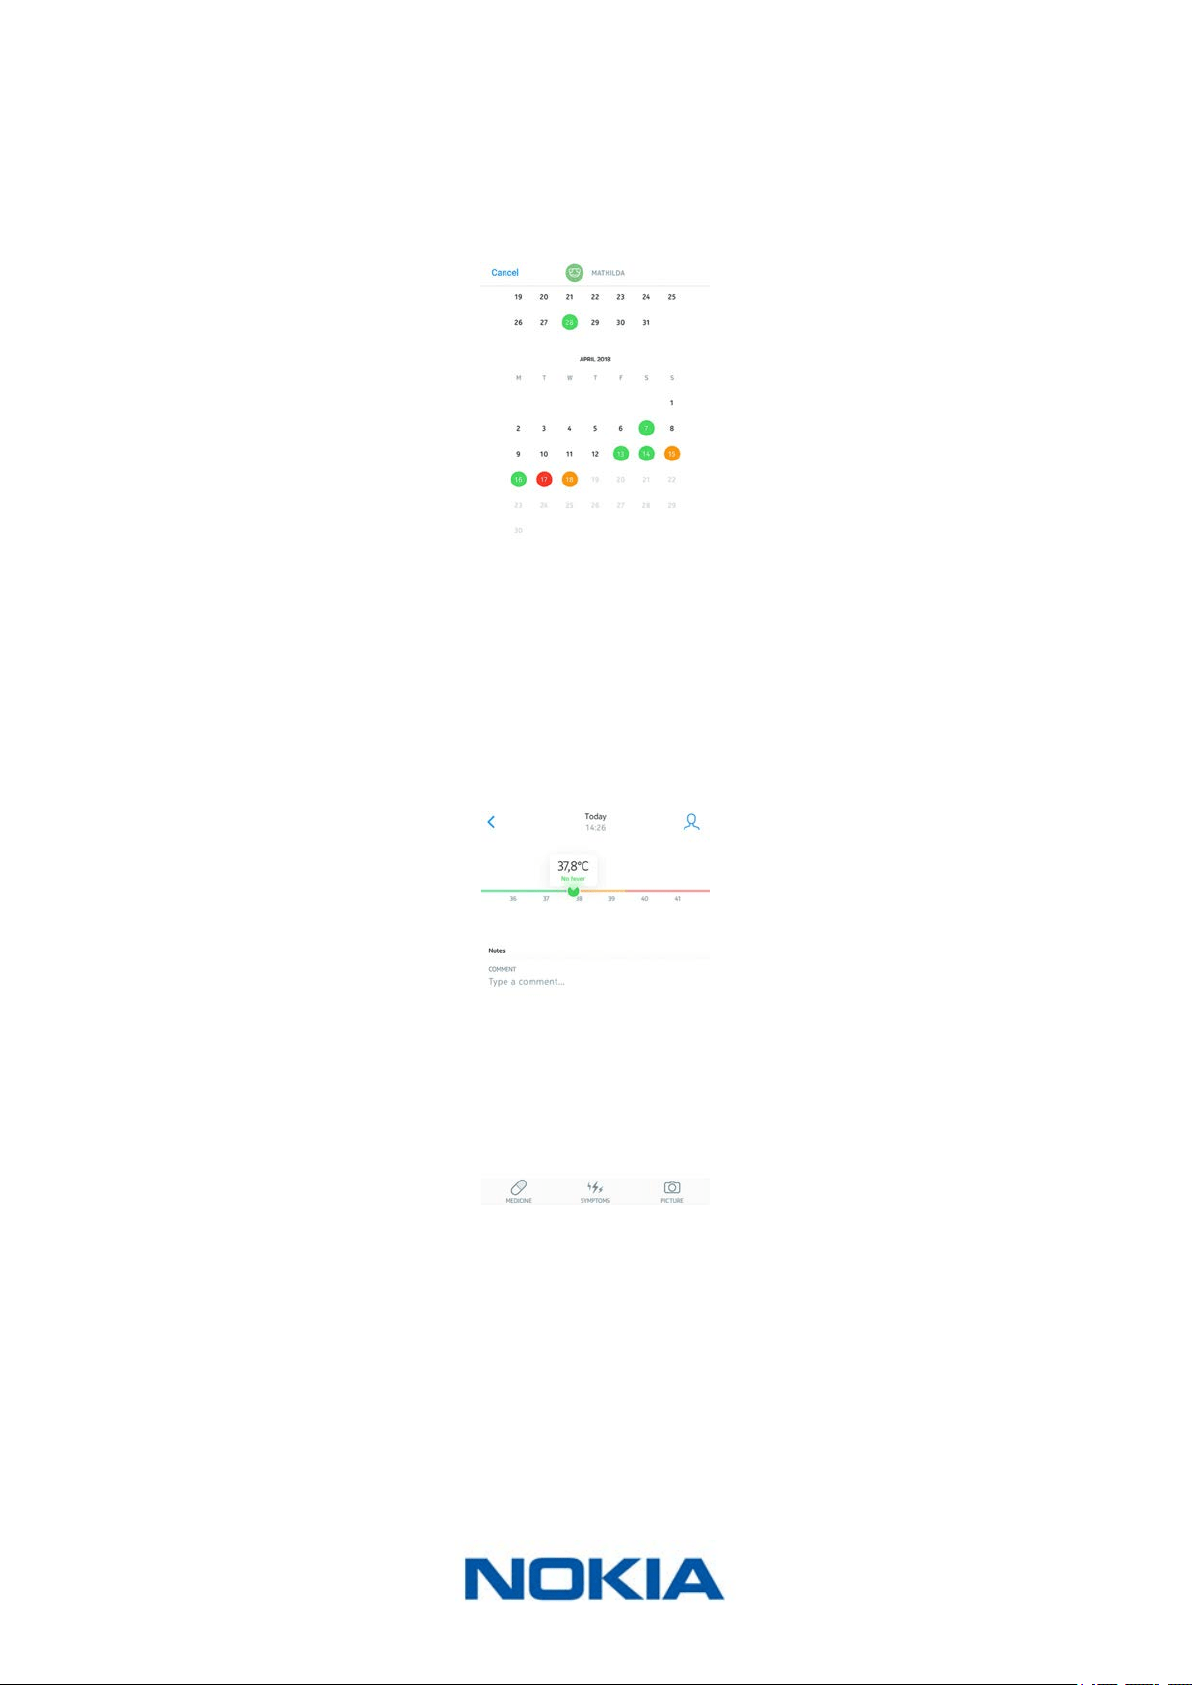
Viewing the Calendar view
Tapping the calendar icon allows you to display the calendar view of your Timeline.
This view doesn’t oer as much detail as the Timeline but is a great way to know how often
you have a fever. This is particularly helpful with younger children as it is important
to keep track of fever episodes.
Viewing the detailed view of a measurement
You can see additional information about a temperature measurement by tapping it from
the Timeline.
When you do, you will see:
• The date and time of the temperature measurement
• A button allowing you to reassign the measurement, if necessary
• The temperature itself with a diagram indicating the fever status
• A eld allowing you to add a comment
• Buttons allowing you to attach extra information to the measurement, such as
medicine, symptoms, and/or pictures
EN-25
Nokia Thermo
v2.0 | April 2018
Adding Timeline items
Adding manual temperature measurements
While any temperature measurement taken with the Nokia Thermo is automatically sent
to the appropriate user’s Timeline, you also have the option to add manual temperature
measurements. To do so, perform the following steps:
1. Open the Nokia Thermo app.
2. Tap the name of the person whose temperature you want to add.
3. Tap +.
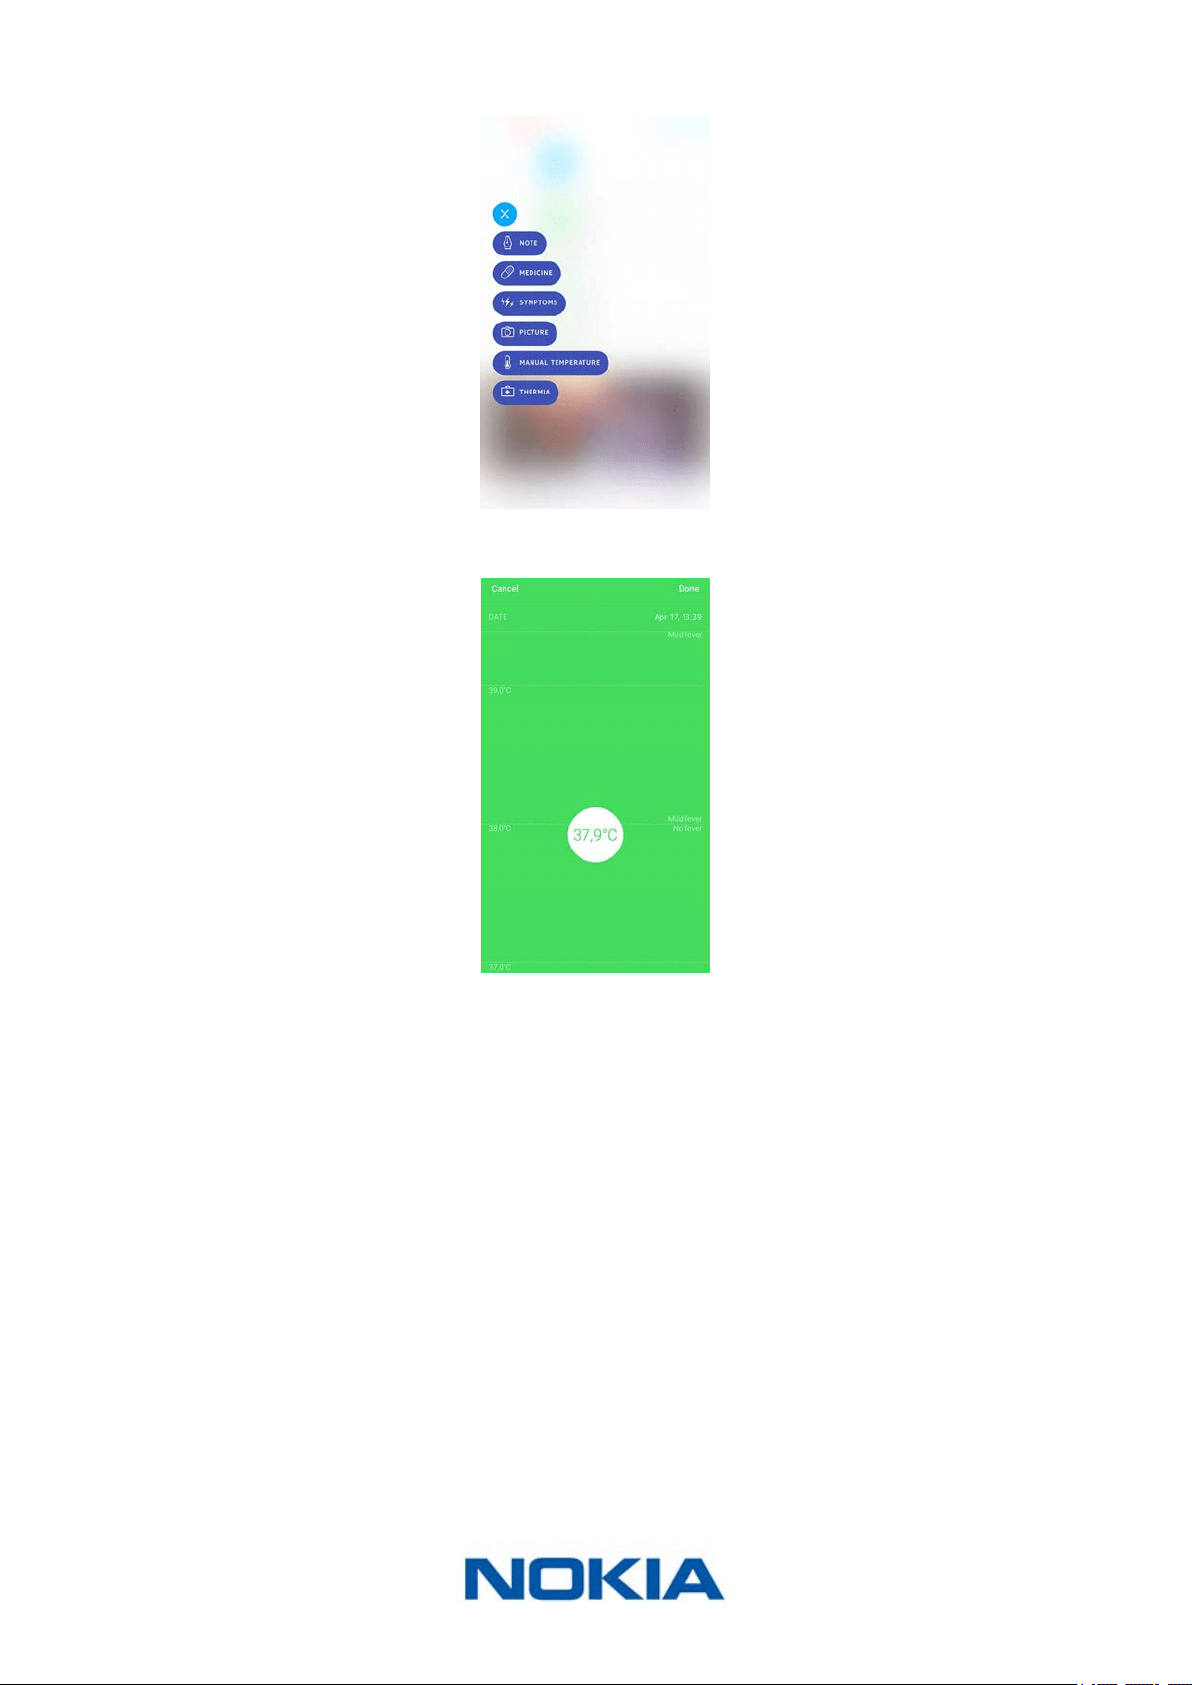
EN-26
Nokia Thermo
v2.0 | April 2018
4. Tap Manual temperature.
5. Touch and drag the bubble to select the correct temperature and tap Done.
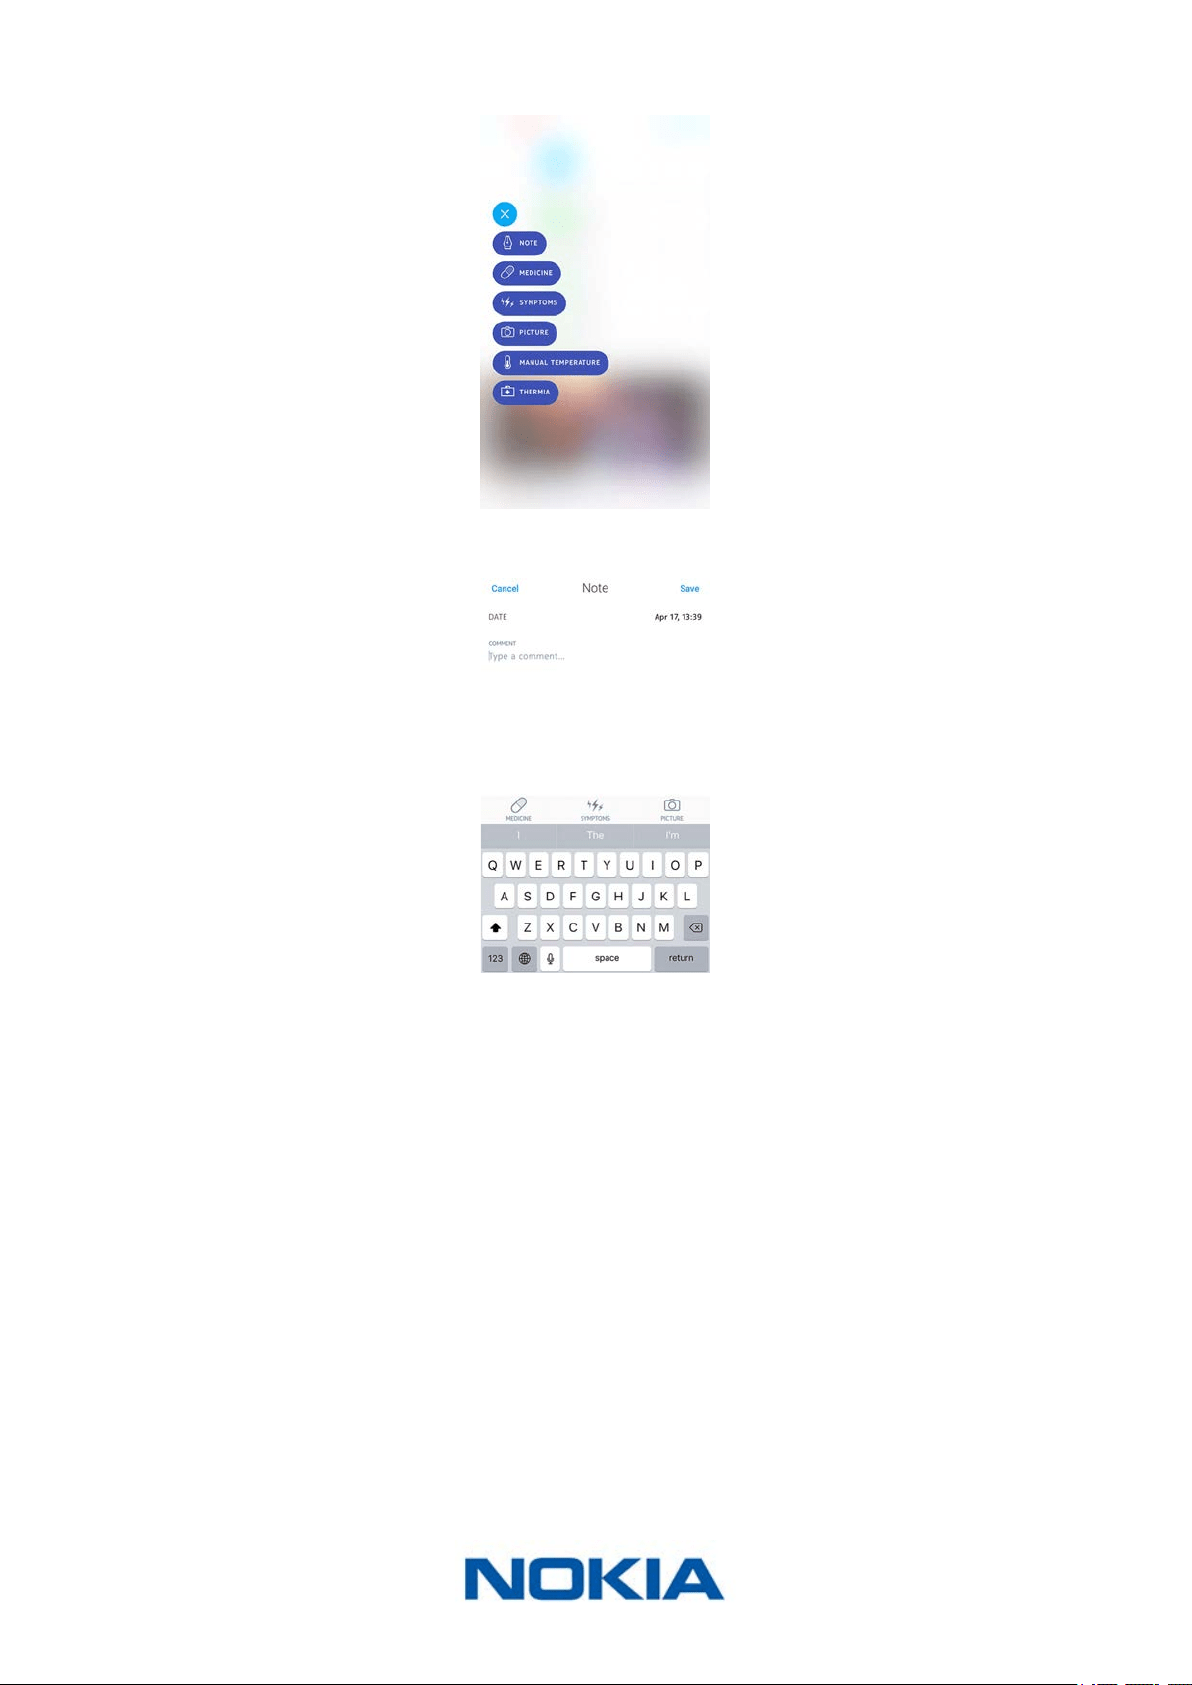
Adding a note
You can add notes to your Timeline, if you want to keep track of how your symptoms are
evolving, for example. To do so, perform the following steps:
1. Open the Nokia Thermo app.

EN-27
Nokia Thermo
v2.0 | April 2018
2. Tap the name of the person whose Timeline you want to update.
3. Tap +.
4. Tap Note.
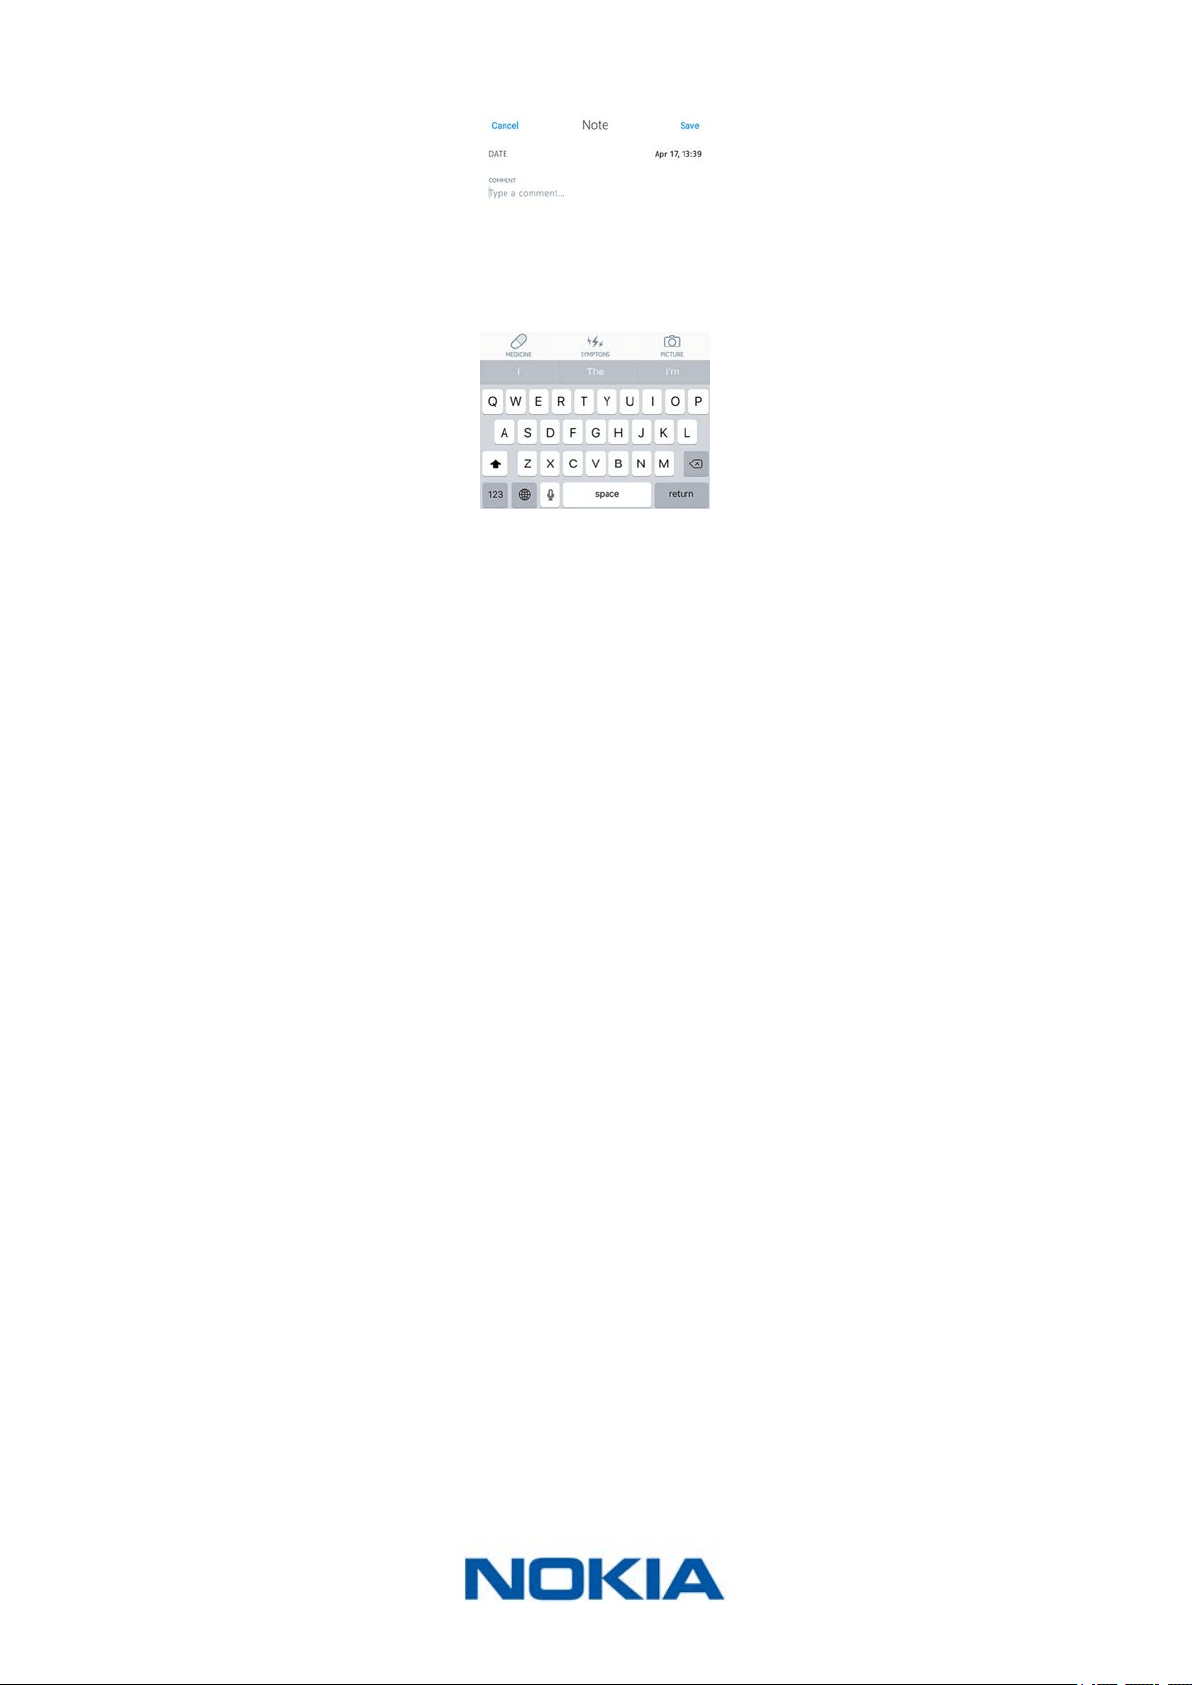
EN-28
Nokia Thermo
v2.0 | April 2018
5. Enter your note and tap Save.
EN-29
Nokia Thermo
v2.0 | April 2018
Adding medicine
If you want to keep track of the medicine you’re taking, be it to treat your fever or to treat
any kind of condition, you can add it to your Timeline. To do so, perform the following
steps:
1. Open the Nokia Thermo app.
2. Tap the name of the person whose Timeline you want to update.
3. Tap +.
EN-30
Nokia Thermo
v2.0 | April 2018
4. Tap Medicine.
5. Enter the name of your medicine and tap Save.
Once you’ve entered a type of medicine once, you’ll be able to select it later without
having to type it all over again.
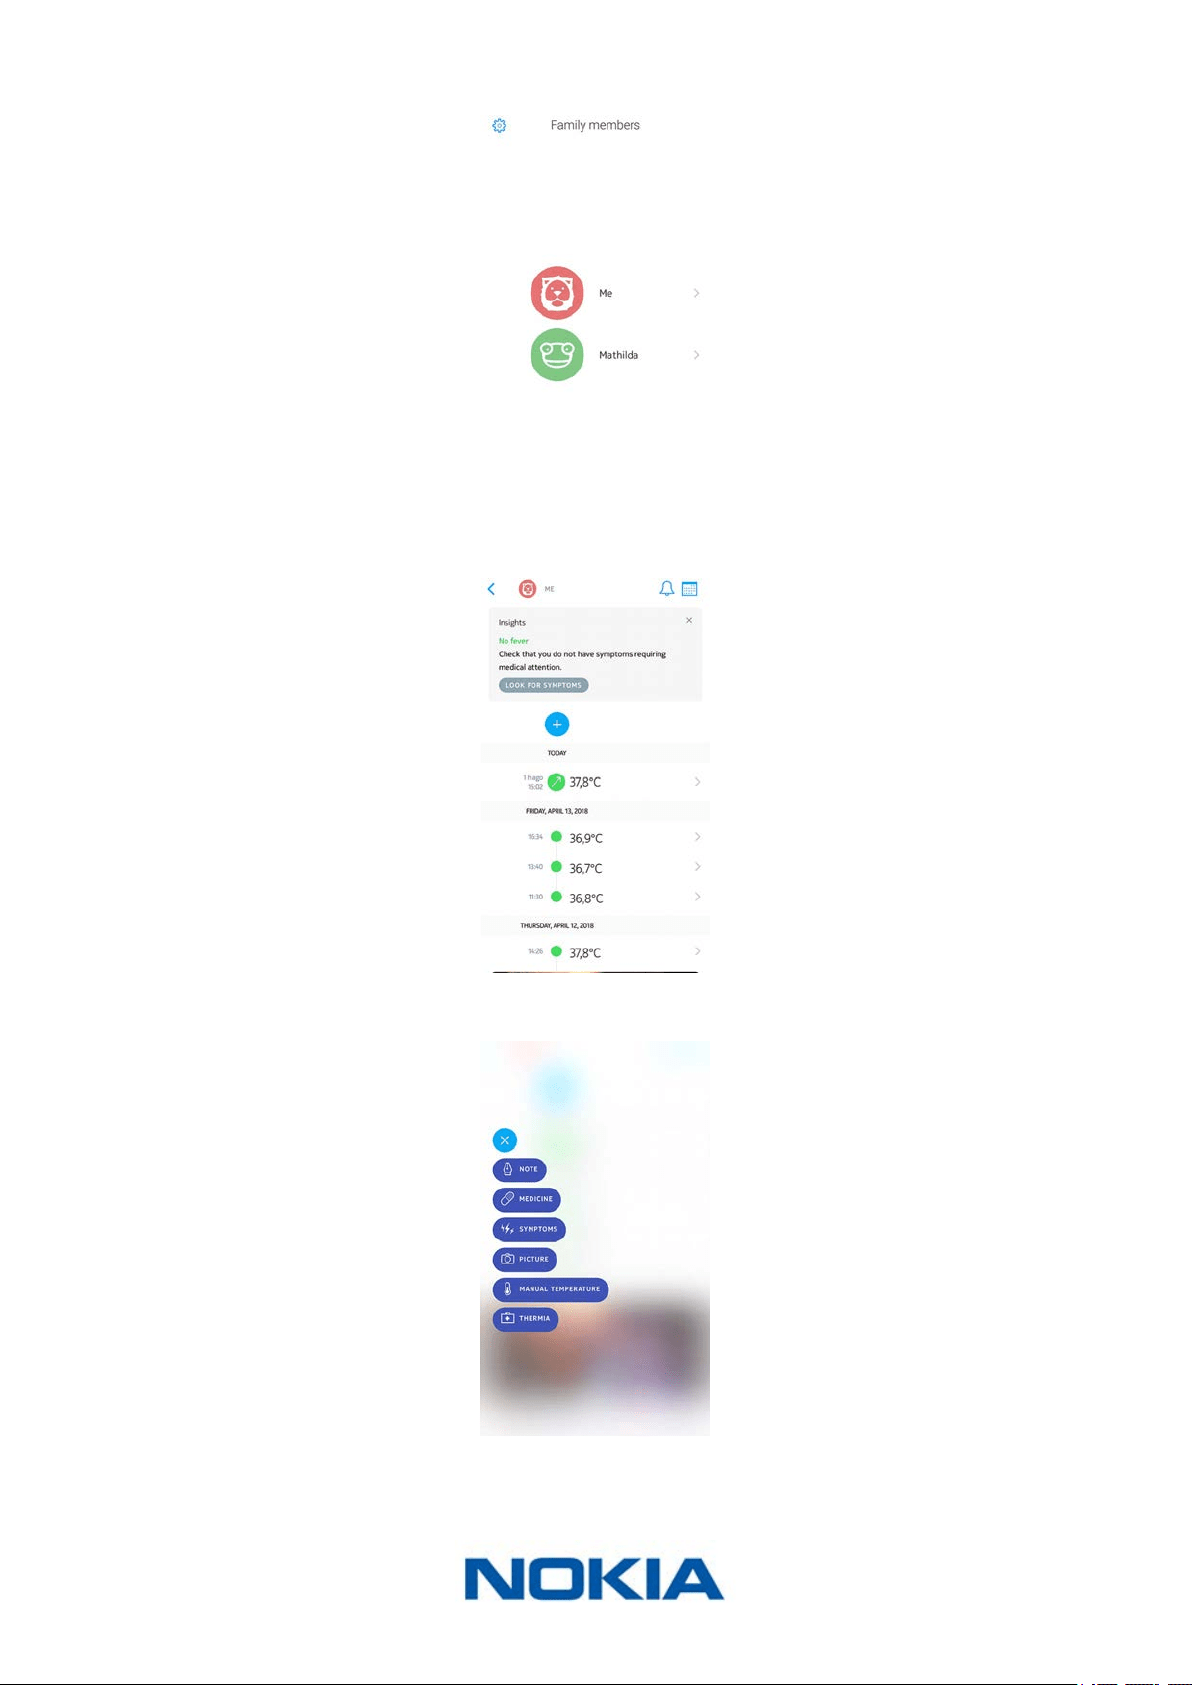
Adding symptoms
If you want to keep track of any symptoms you might experience, you can add them to
your Timeline. To do so, perform the following steps:
1. Open the Nokia Thermo app.
EN-31
Nokia Thermo
v2.0 | April 2018
2. Tap the name of the person whose Timeline you want to update.
3. Tap +.
4. Tap Symptoms.
EN-32
Nokia Thermo
v2.0 | April 2018
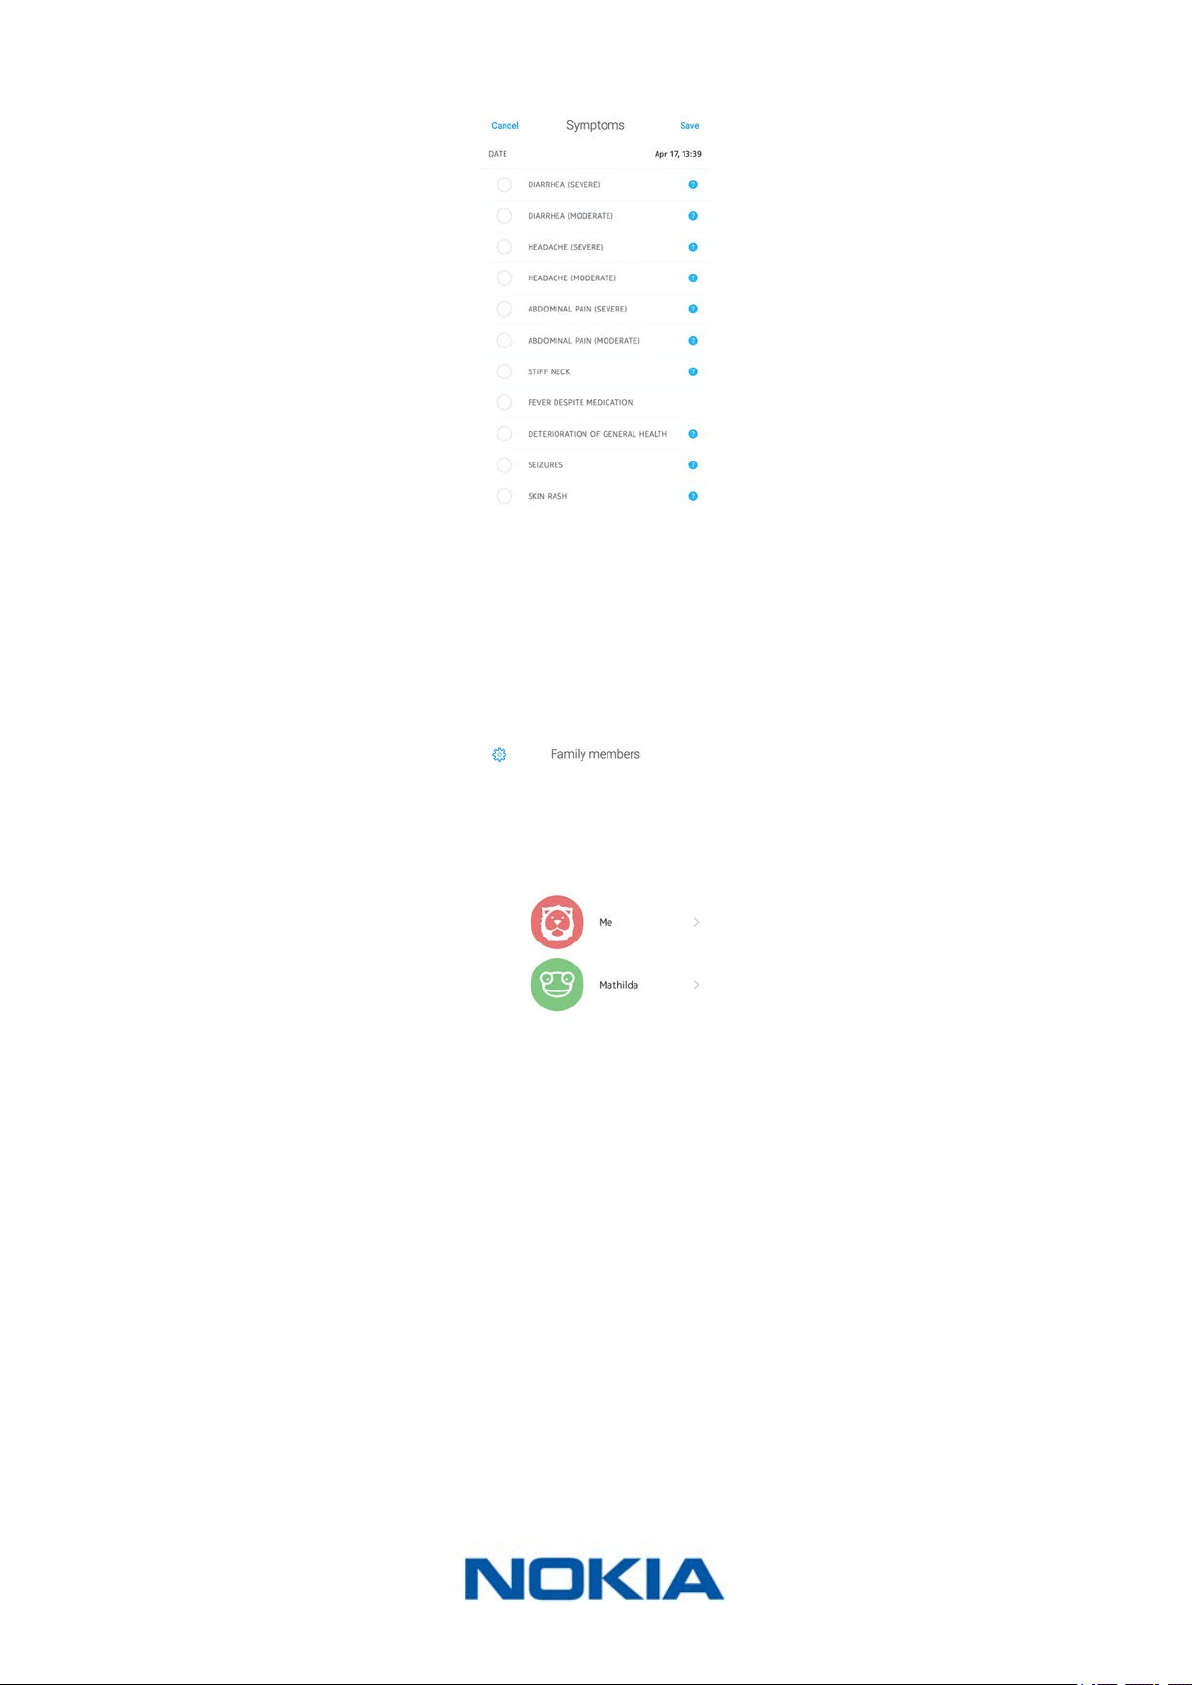
5. Select each symptom that applies to how you’re feeling and tap Save.
Adding a picture
You can add a picture to your Timeline if you want to. To do so, perform the following
steps:
1. Open the Nokia Thermo app.
2. Tap the name of the person whose Timeline you want to update.

EN-33
Nokia Thermo
v2.0 | April 2018
3. Tap +.
4. Tap Picture.
5. Tap Select picture to use an existing photo or Take picture to take one.
6. If you’ve chosen to take a picture, tap Use Photo to conrm.
EN-34
Nokia Thermo
v2.0 | April 2018
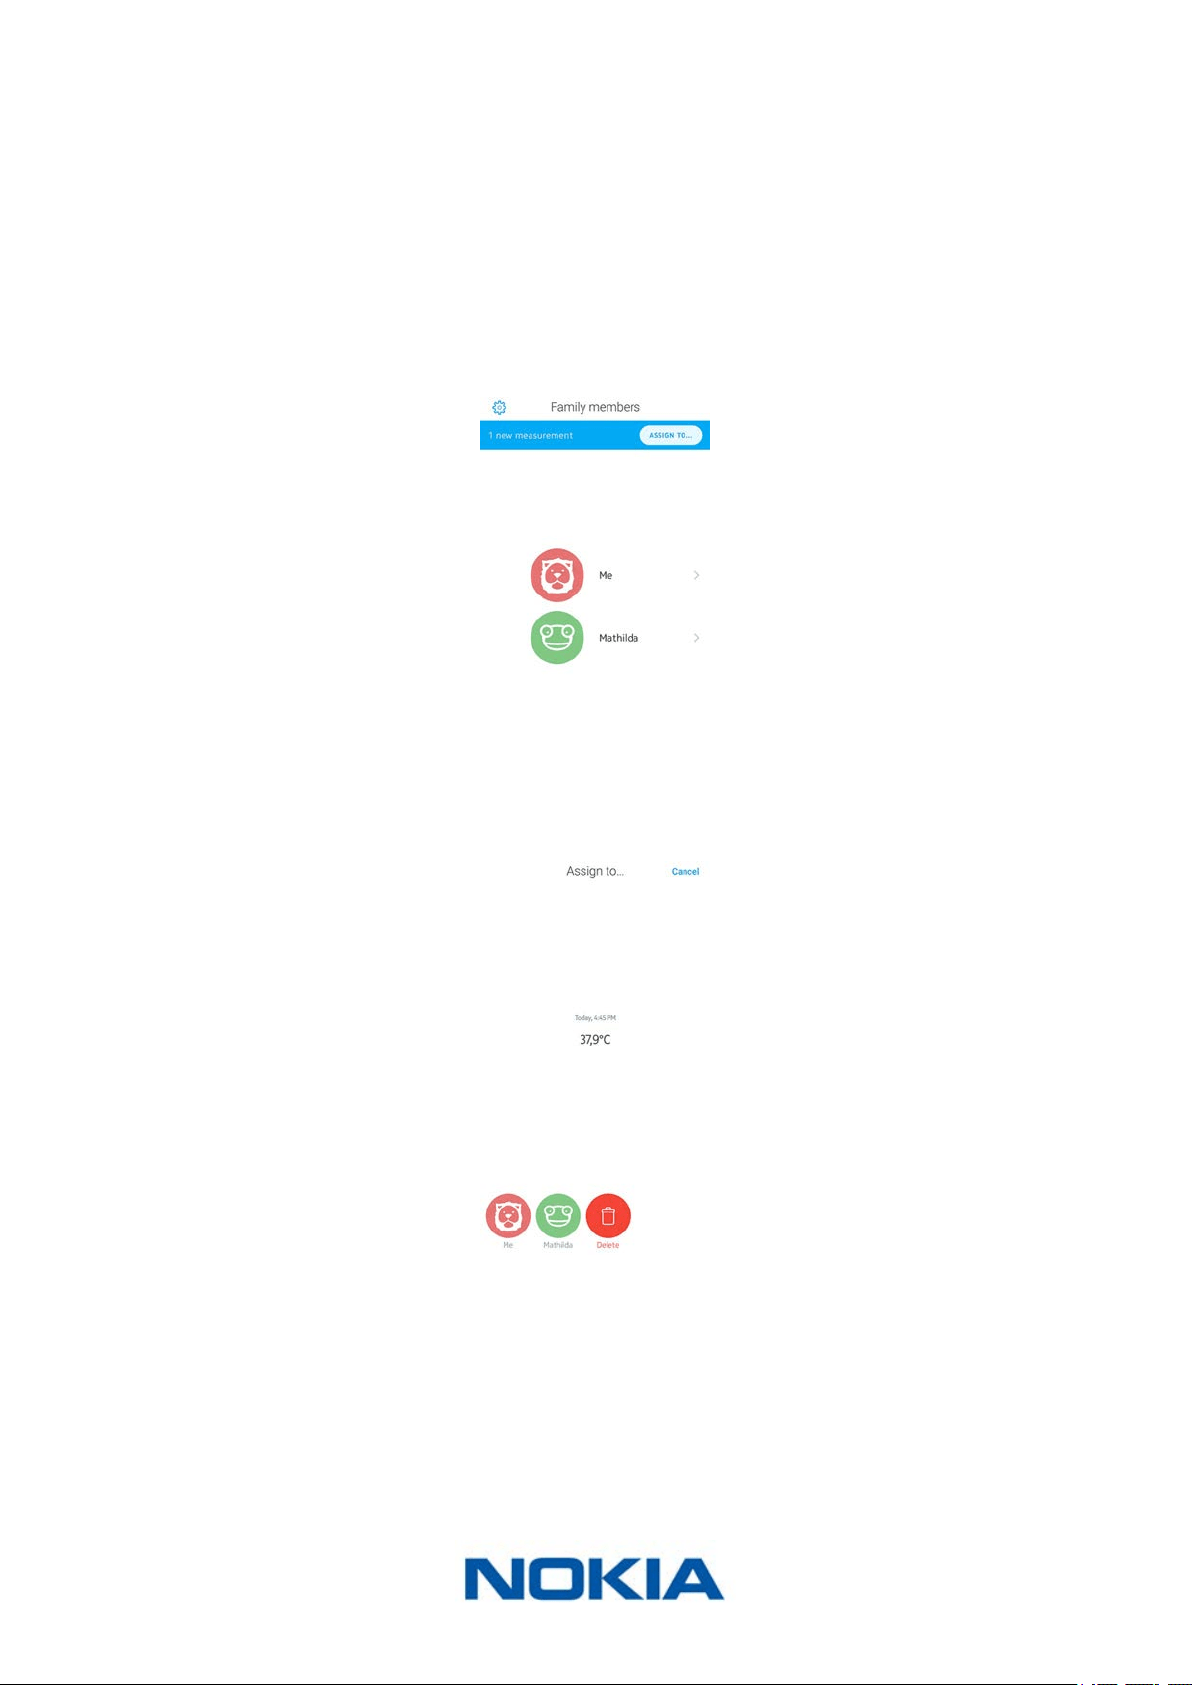
Assigning a measurement
Assigning an unassigned measurement
If you’ve taken a measurement using your Nokia Thermo but didn’t assign it right away,
you can do so from the Nokia Thermo app. To do so, perform the following steps:
1. Open the Nokia Thermo app.
2. Tap Assign to��� in the top banner.
It may take a few seconds for this banner to appear in the app as the app needs to
sync with your Nokia Thermo rst.
3. Select the measurement and tap the user prole you want to assign it to.
Reassigning a measurement
If you’ve accidentally assigned a temperature measurement to the wrong user prole, you
can correct this anytime you want. To do so, perform the following steps:
1. Open the Nokia Thermo app.
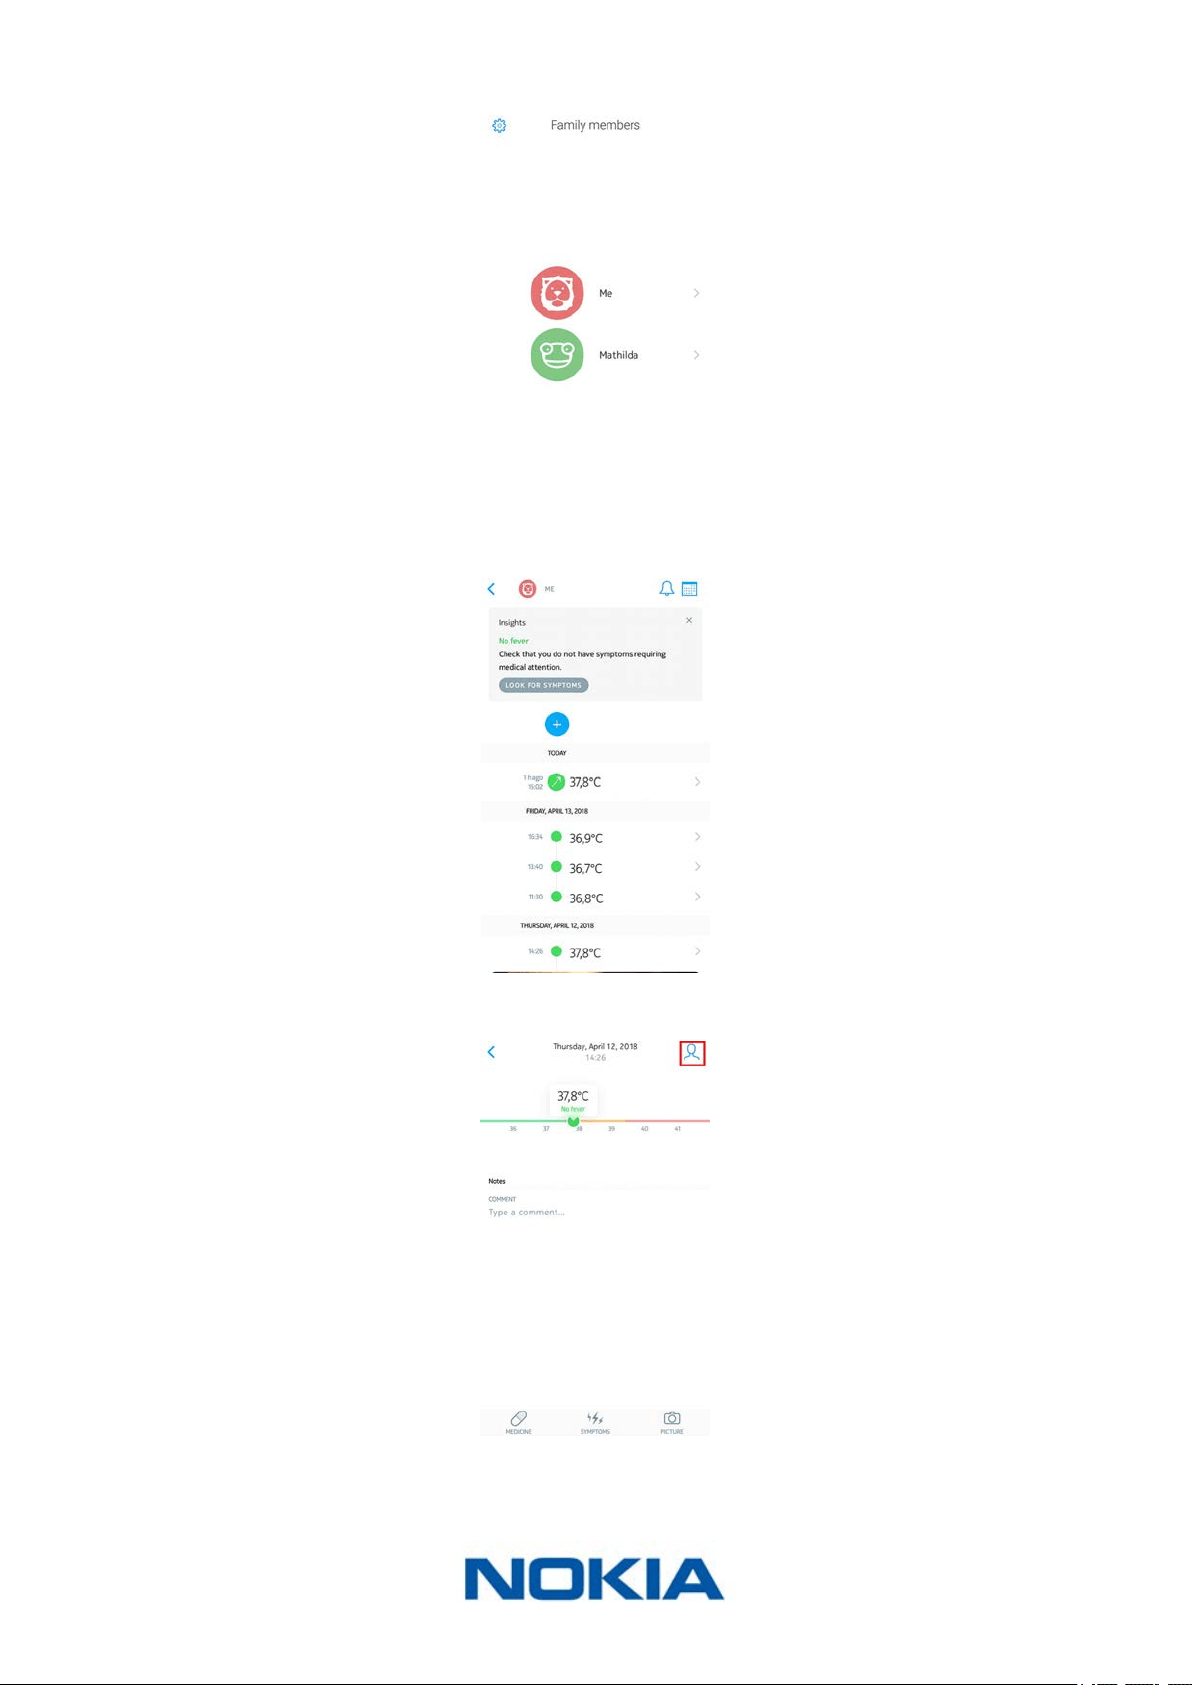
EN-35
Nokia Thermo
v2.0 | April 2018
2. Tap the name of the person you’ve wrongly assigned the measurement to.
3. Tap the measurement you’ve wrongly assigned.
4. Tap the assignment icon in the top right corner.
EN-36
Nokia Thermo
v2.0 | April 2018
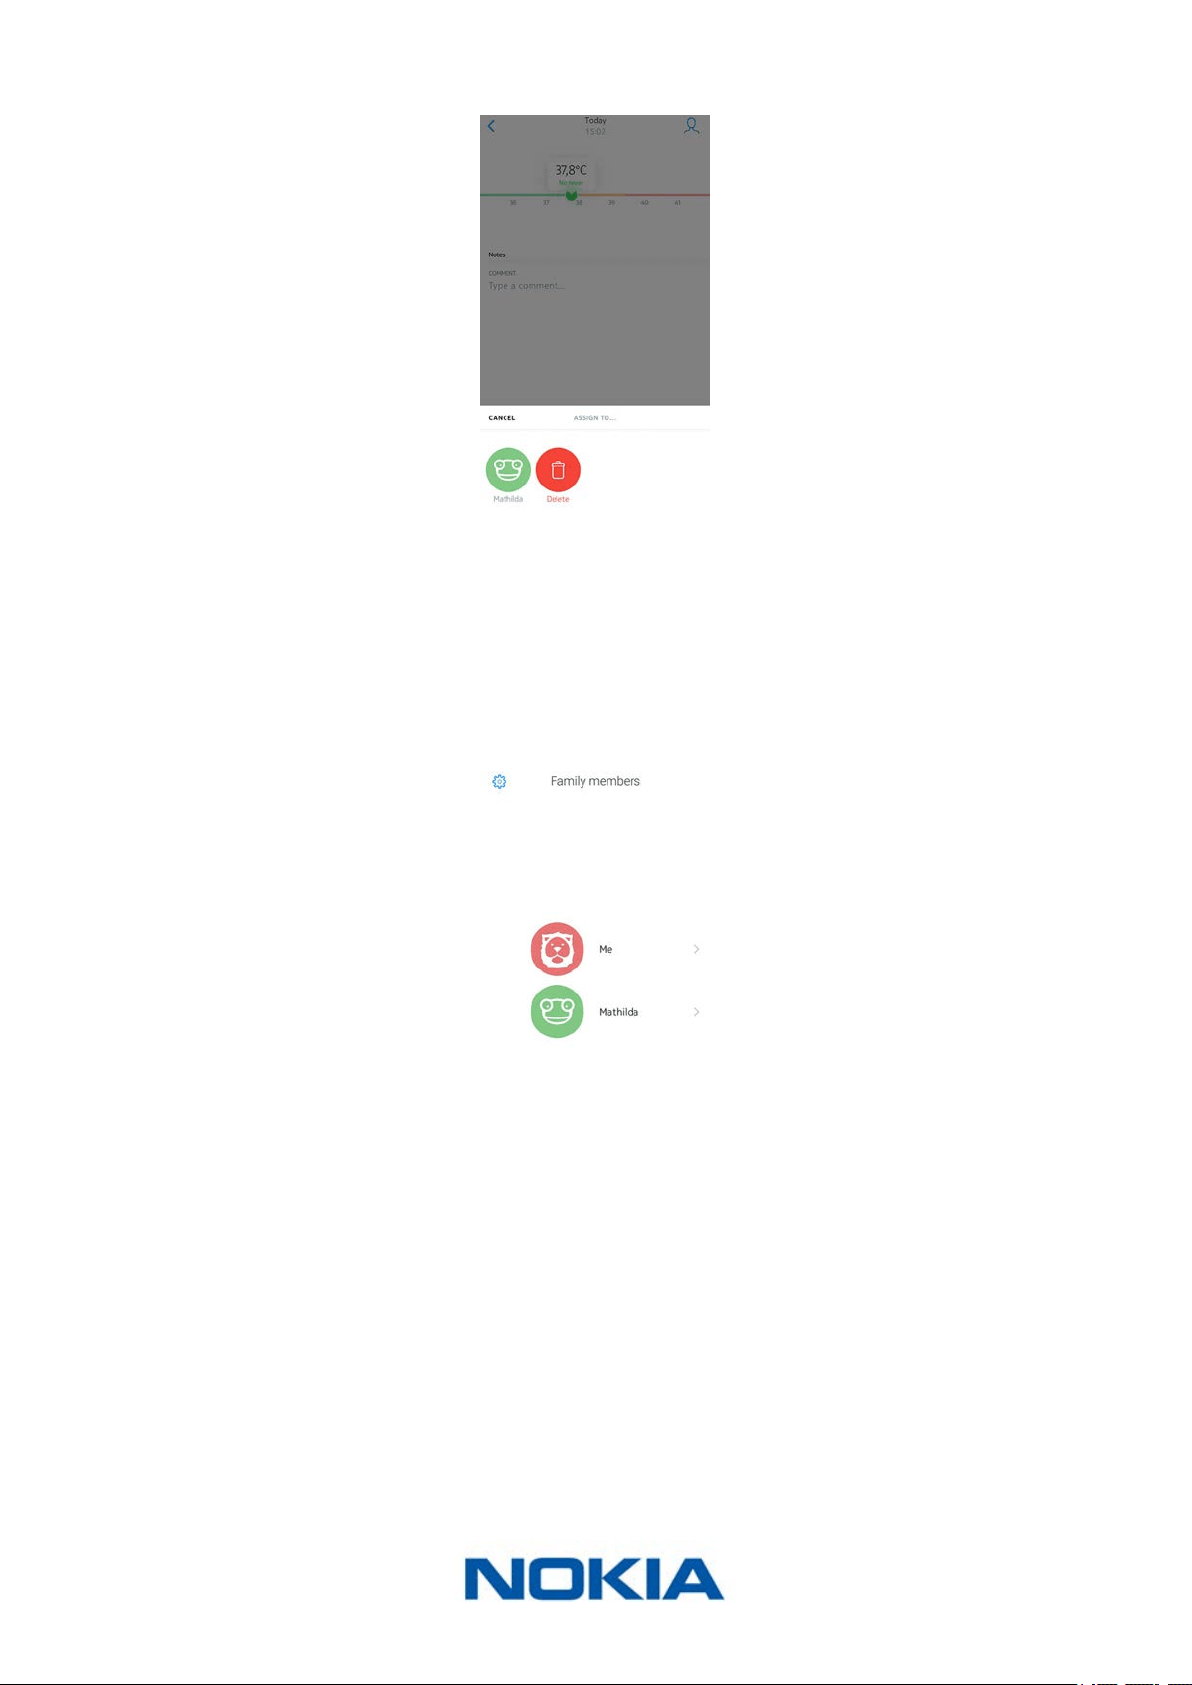
5. Tap the user prole you want to assign the measurement to.
Deleting data
You can delete any Timeline item (be it temperature measurements, symptoms, medicine,
pictures or comments) if you choose to. To do so, perform the following steps:
1. Open the Nokia Thermo app.
2. Tap the name of the person whose Timeline you want to update.
EN-37
Nokia Thermo
v2.0 | April 2018
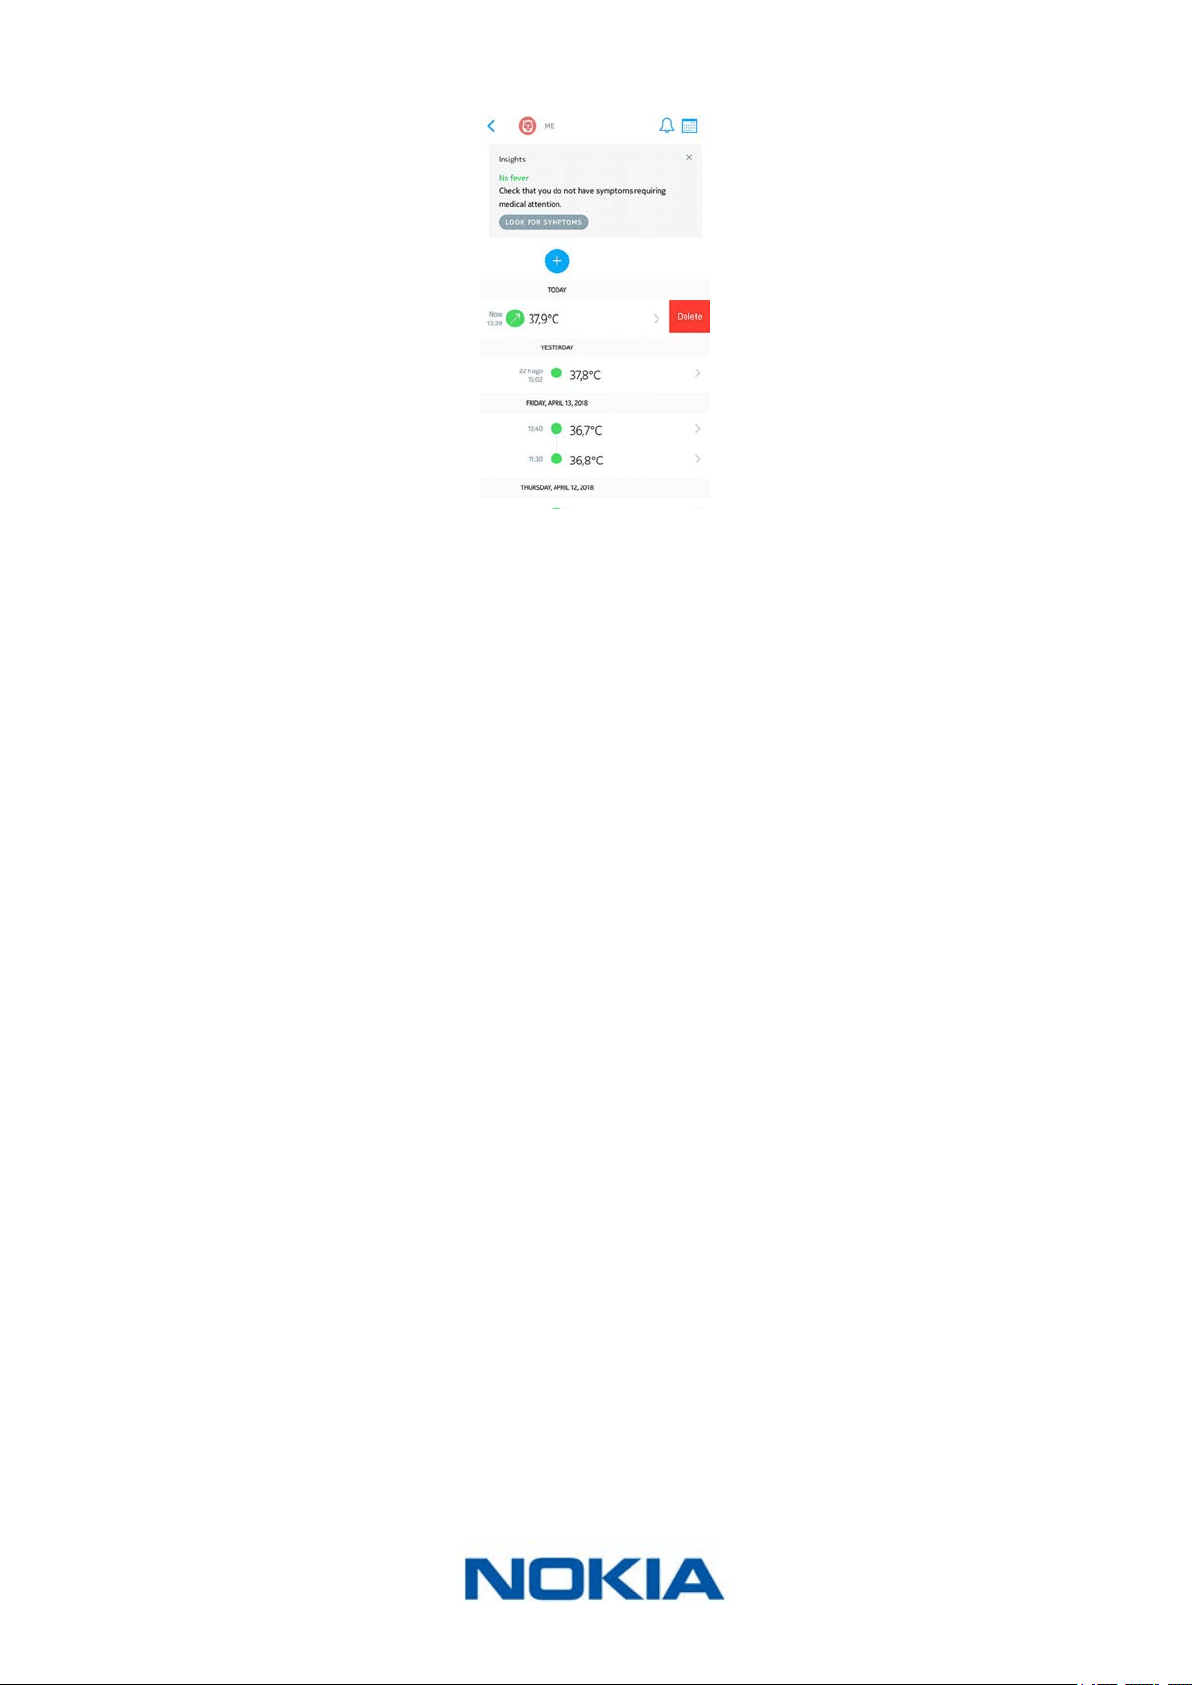
3. Swipe left on the item you want to delete and tap Delete.
Note that you won’t be able to retrieve your data after this.
EN-38
Nokia Thermo
v2.0 | April 2018
Setting a reminder
If your latest temperature measurement indicated a high fever, or if you’ve entered
symptoms that may be worrying, the Nokia Thermo app oers the possibility of setting a
reminder to make sure you monitor the situation regularly.
You can also set a reminder manually. To do so, perform the following steps:
1. Open the Nokia Thermo app.
2. Tap the name of the person for whom you want to set a reminder.

EN-39
Nokia Thermo
v2.0 | April 2018
3. Tap +.
4. Tap Reminder.
5. Select the frequency and time range of the reminders.
You can cancel the reminder at any time by editing it and tapping Stop reminders.
EN-40
Nokia Thermo
v2.0 | April 2018
Please note that reminders are set locally on your smartphone and that they are not sent
to our servers. As such, they will be lost if you log out from the app and then log back in.
Sharing my data
At this point, it is not possible to share your data with anyone from the Nokia Thermo app.
This option will be available at a future date.
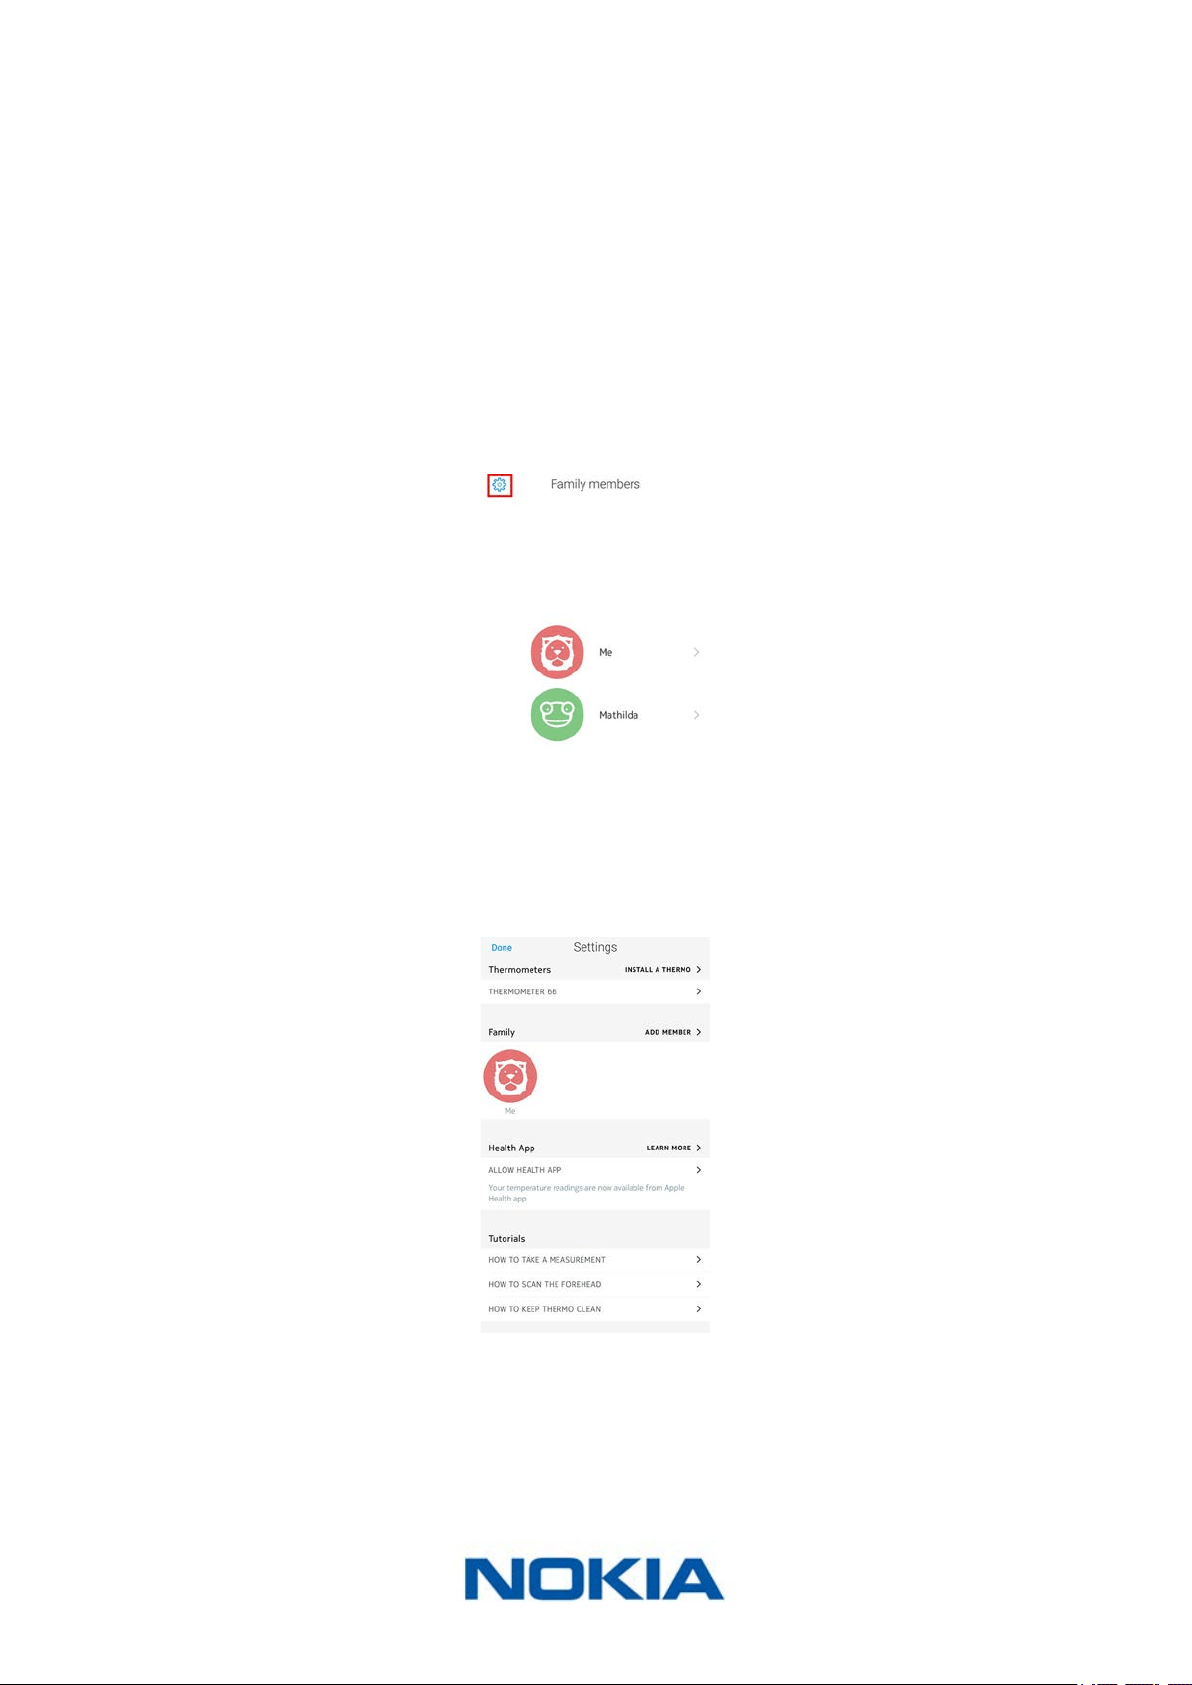
However, you can link the app with Apple Health where your data will be sent. To do so,
perform the following steps:
1. Open the Nokia Thermo app.
2. Tap Settings.
3. Tap Allow Health App.
EN-41
Nokia Thermo
v2.0 | April 2018
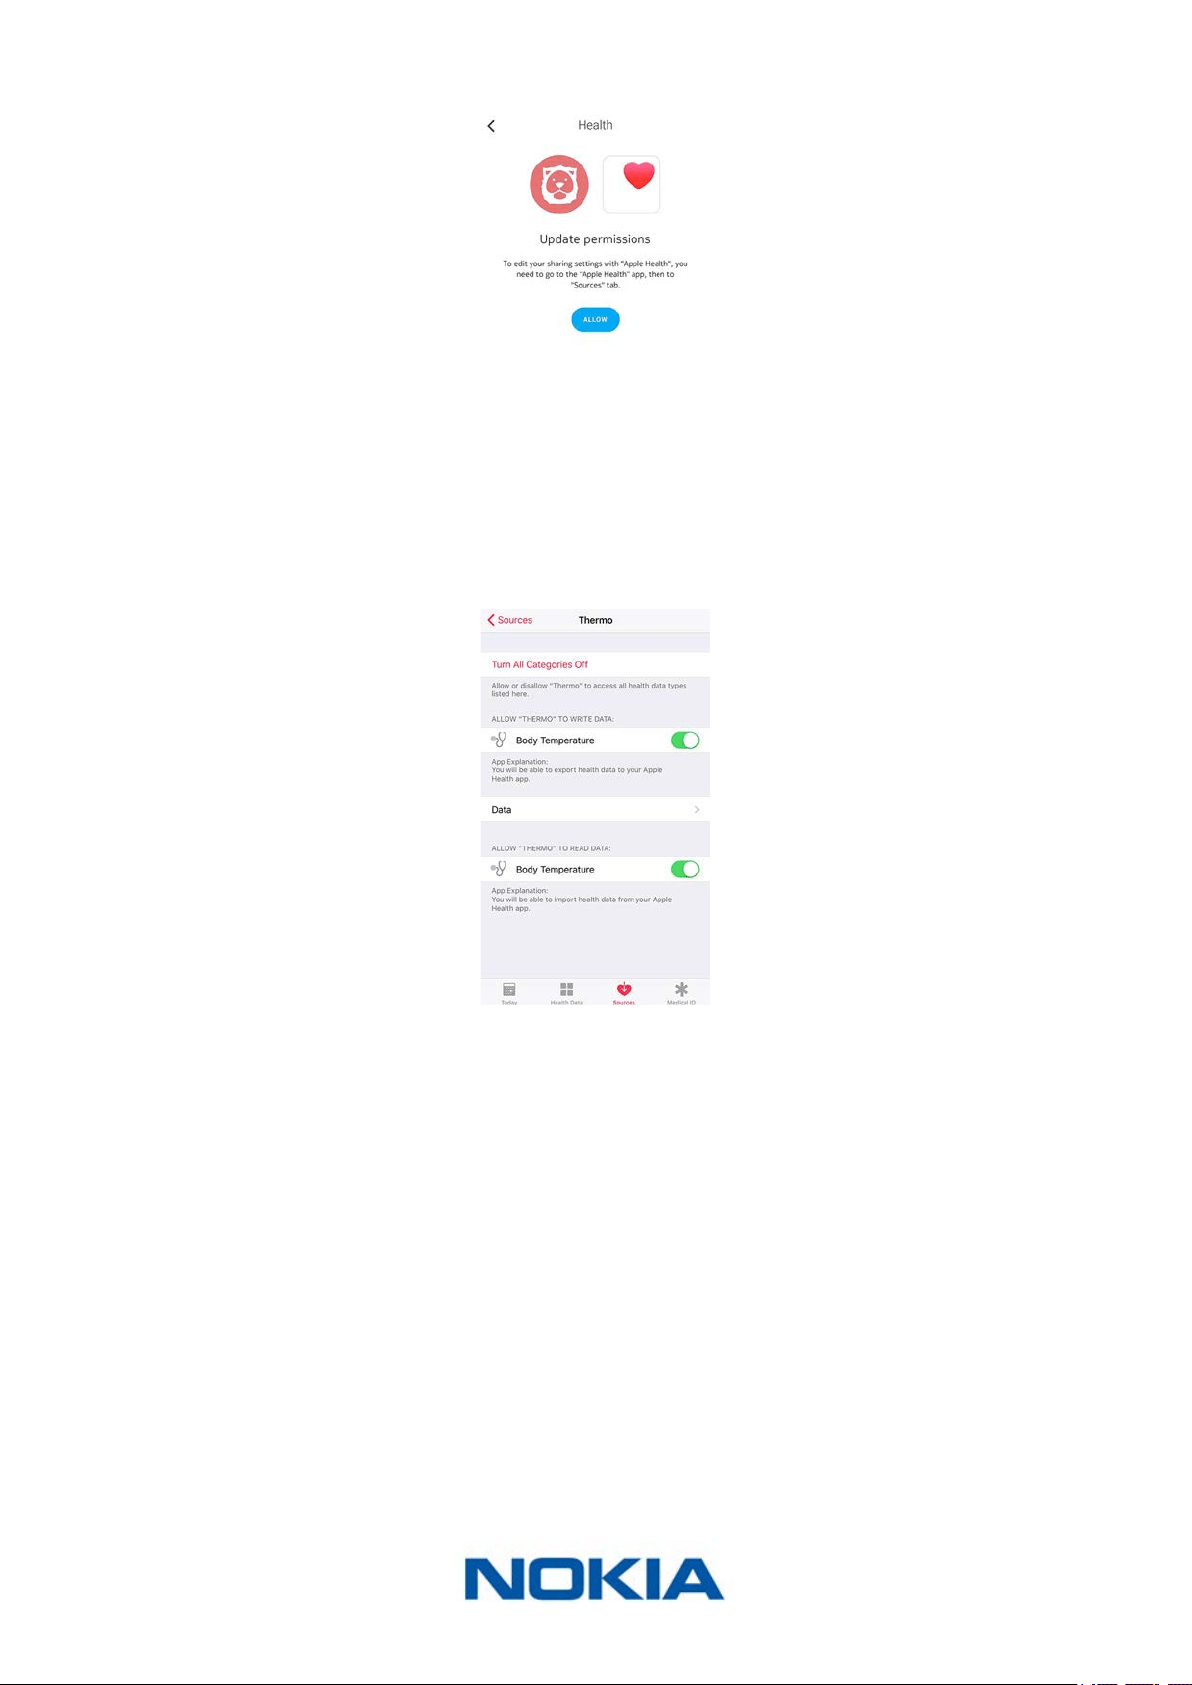
4. Tap Allow.
5. Go to Apple Health > Sources > Thermo.
6. Select the data you want to share with Apple Health.
EN-42
Nokia Thermo
v2.0 | April 2018
Getting personalized advice
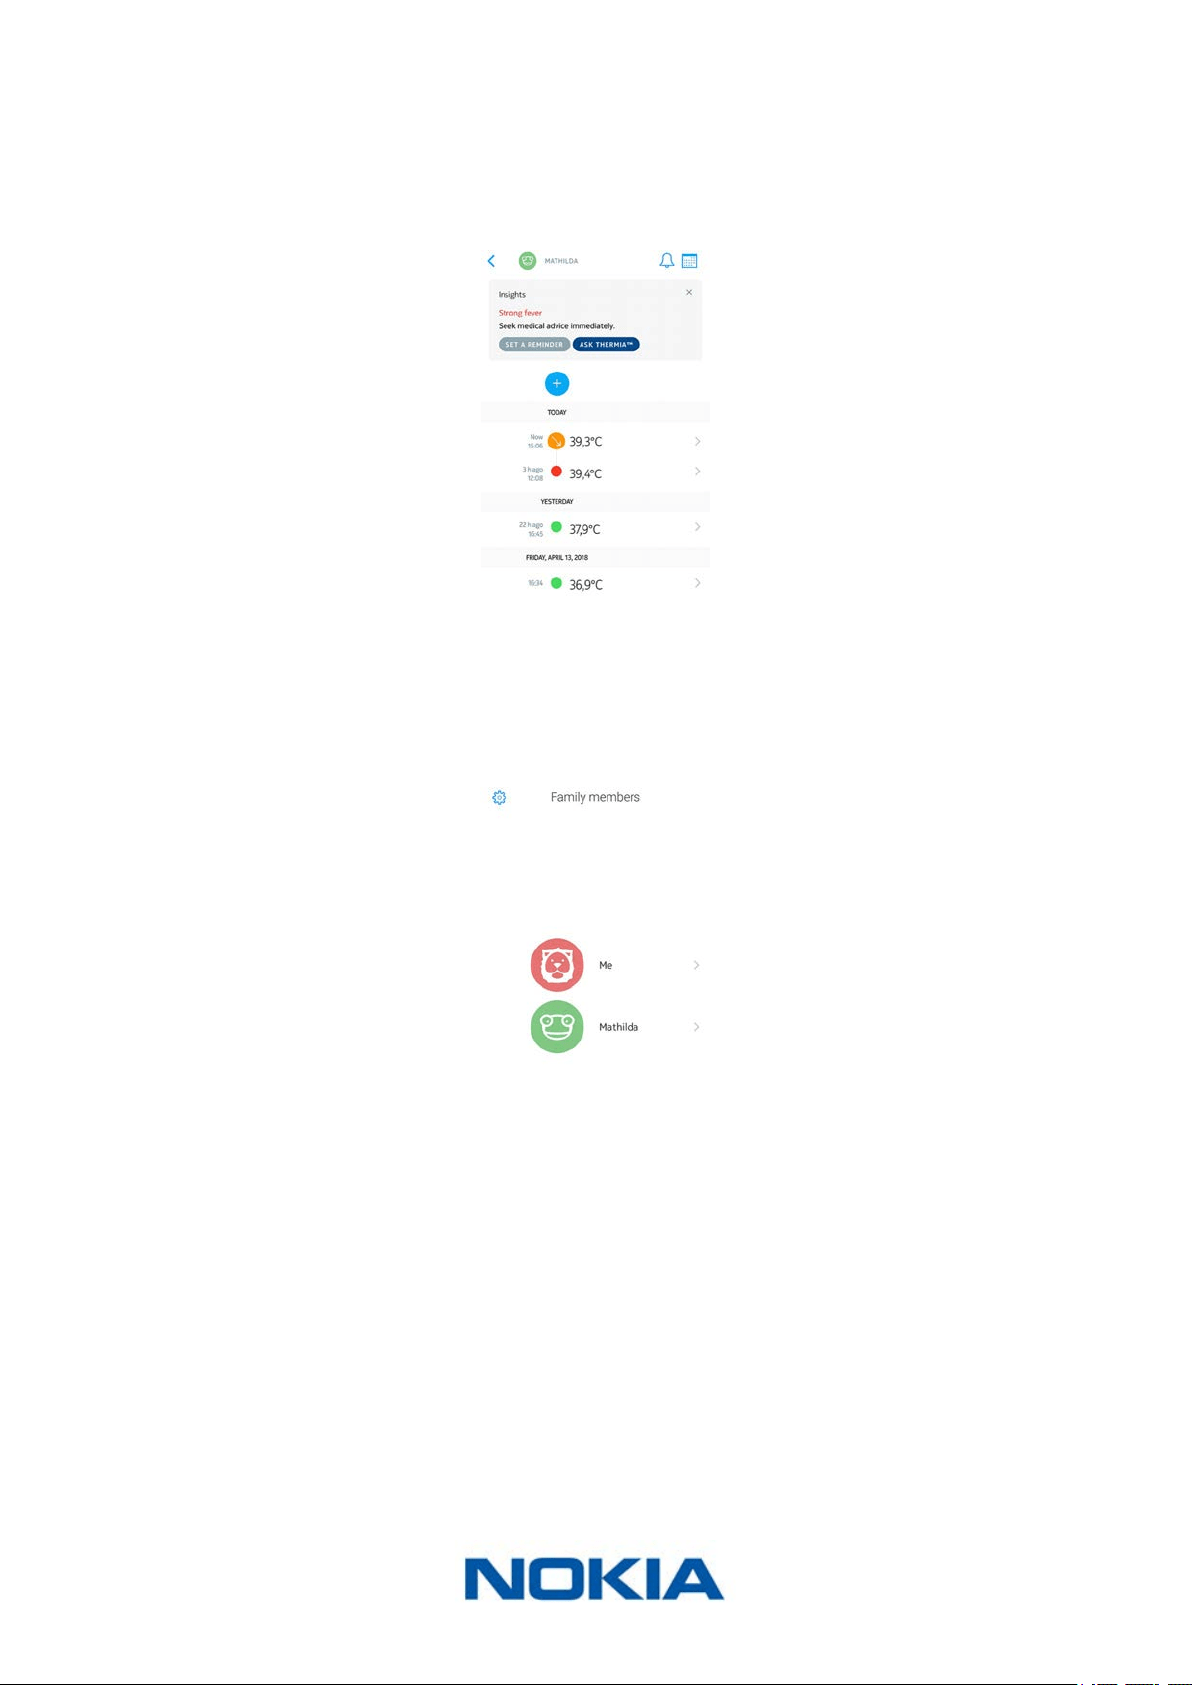
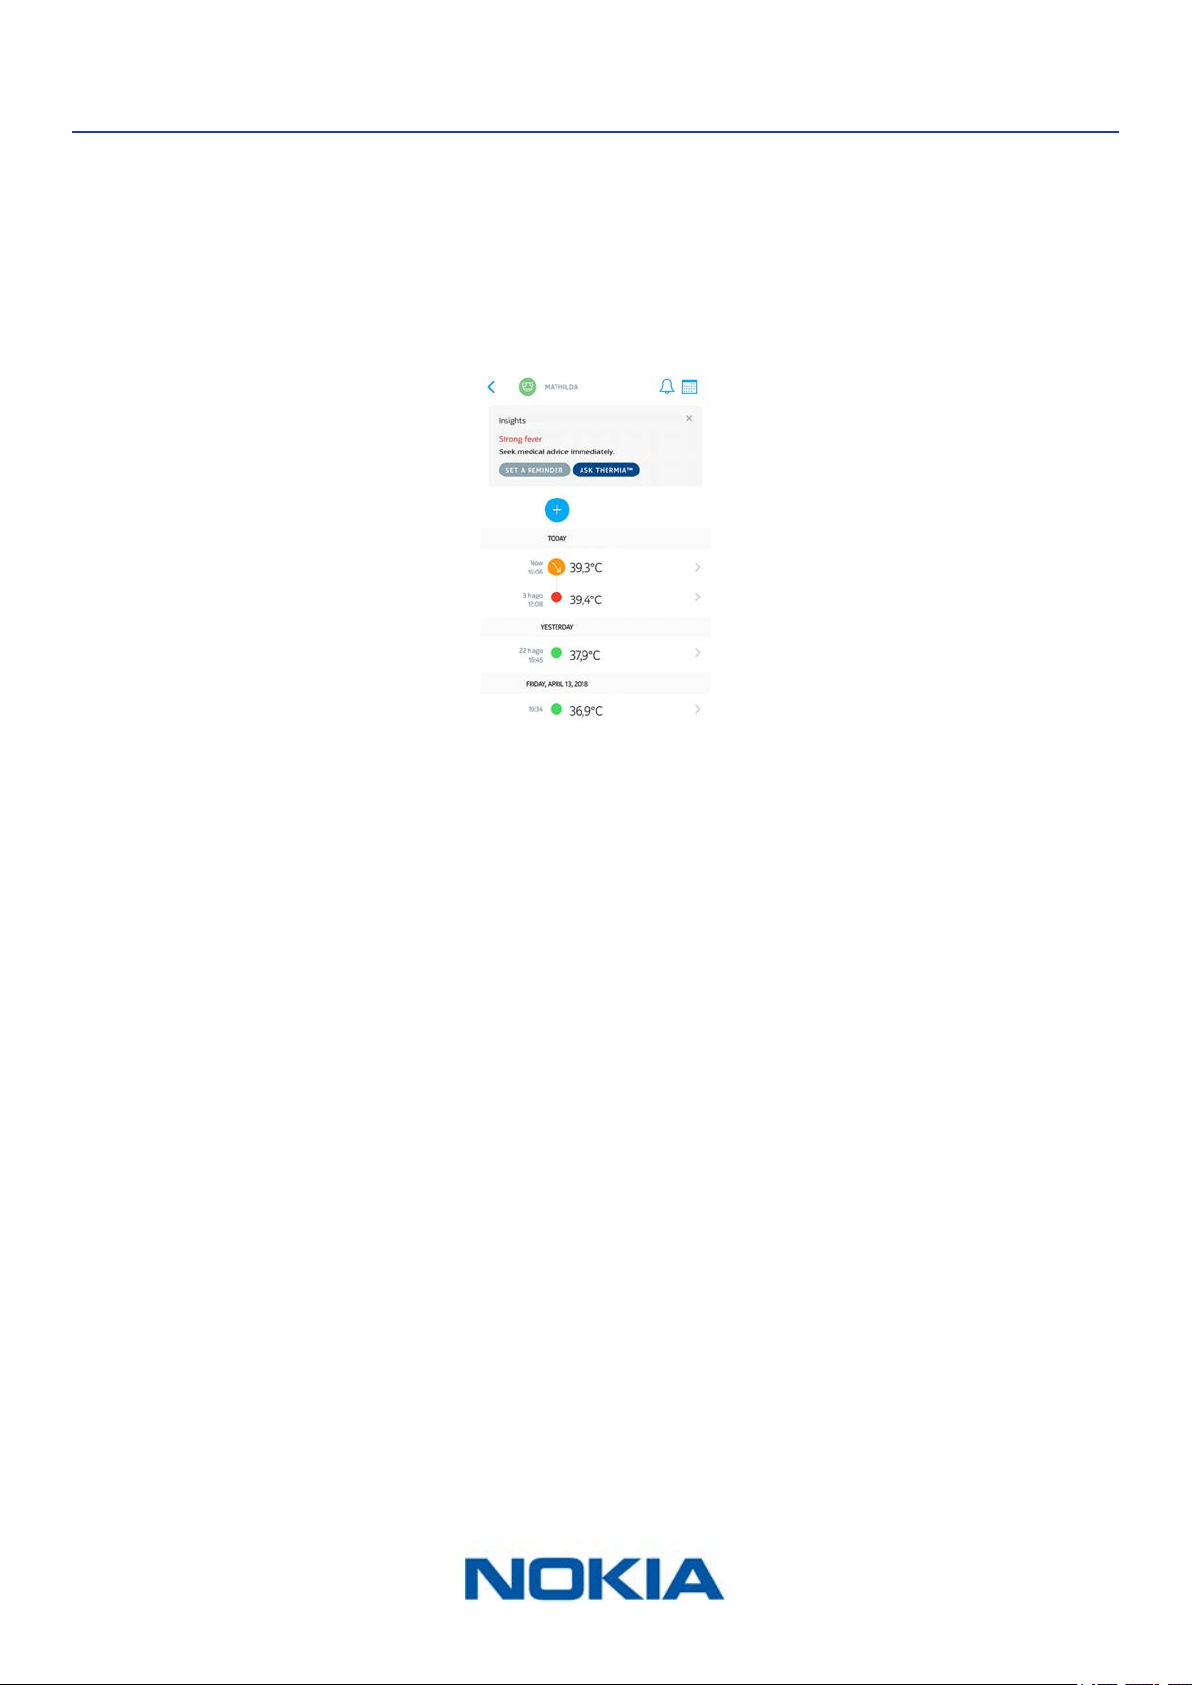
Getting Insights
Whenever you add a temperature, be it manually in the Nokia Thermo app or using your
Nokia Thermo, the Nokia Thermo app displays Insights at the top of your Timeline. Insights
are also displayed whenever you add symptoms or medicine to your Timeline.
These Insights let you know when it is recommended to get in touch with a doctor, based
on your temperature and symptoms. In some cases, the Nokia Thermo app may ask you
for additional information to provide you with relevant advice.
The Insights may encourage you to use Thermia in some cases (iOS only). Refer to “Using
Thermia (iOS only)” on page42 for more information.
Using Thermia (iOS only)
Thermia is a service oered by the Boston Children’s Hospital that helps you nd out
more about your state based on your temperature and symptoms. You can nd more
information on Thermia at http://thermia.io/.
From the Insights displayed at the top of your Timeline, you have the possibility to access
Thermia if your temperature or symptoms are worrying.
Simply tap Ask Thermia™ and answer the questions to get useful information.
EN-43
Nokia Thermo
v2.0 | April 2018
Dissociating my Nokia Thermo
If you want to stop using your Nokia Thermo and clear all user data from the device, you
have to dissociate it from your account rst. This can be useful if you want to give it
to someone else. To do so, perform the following steps:
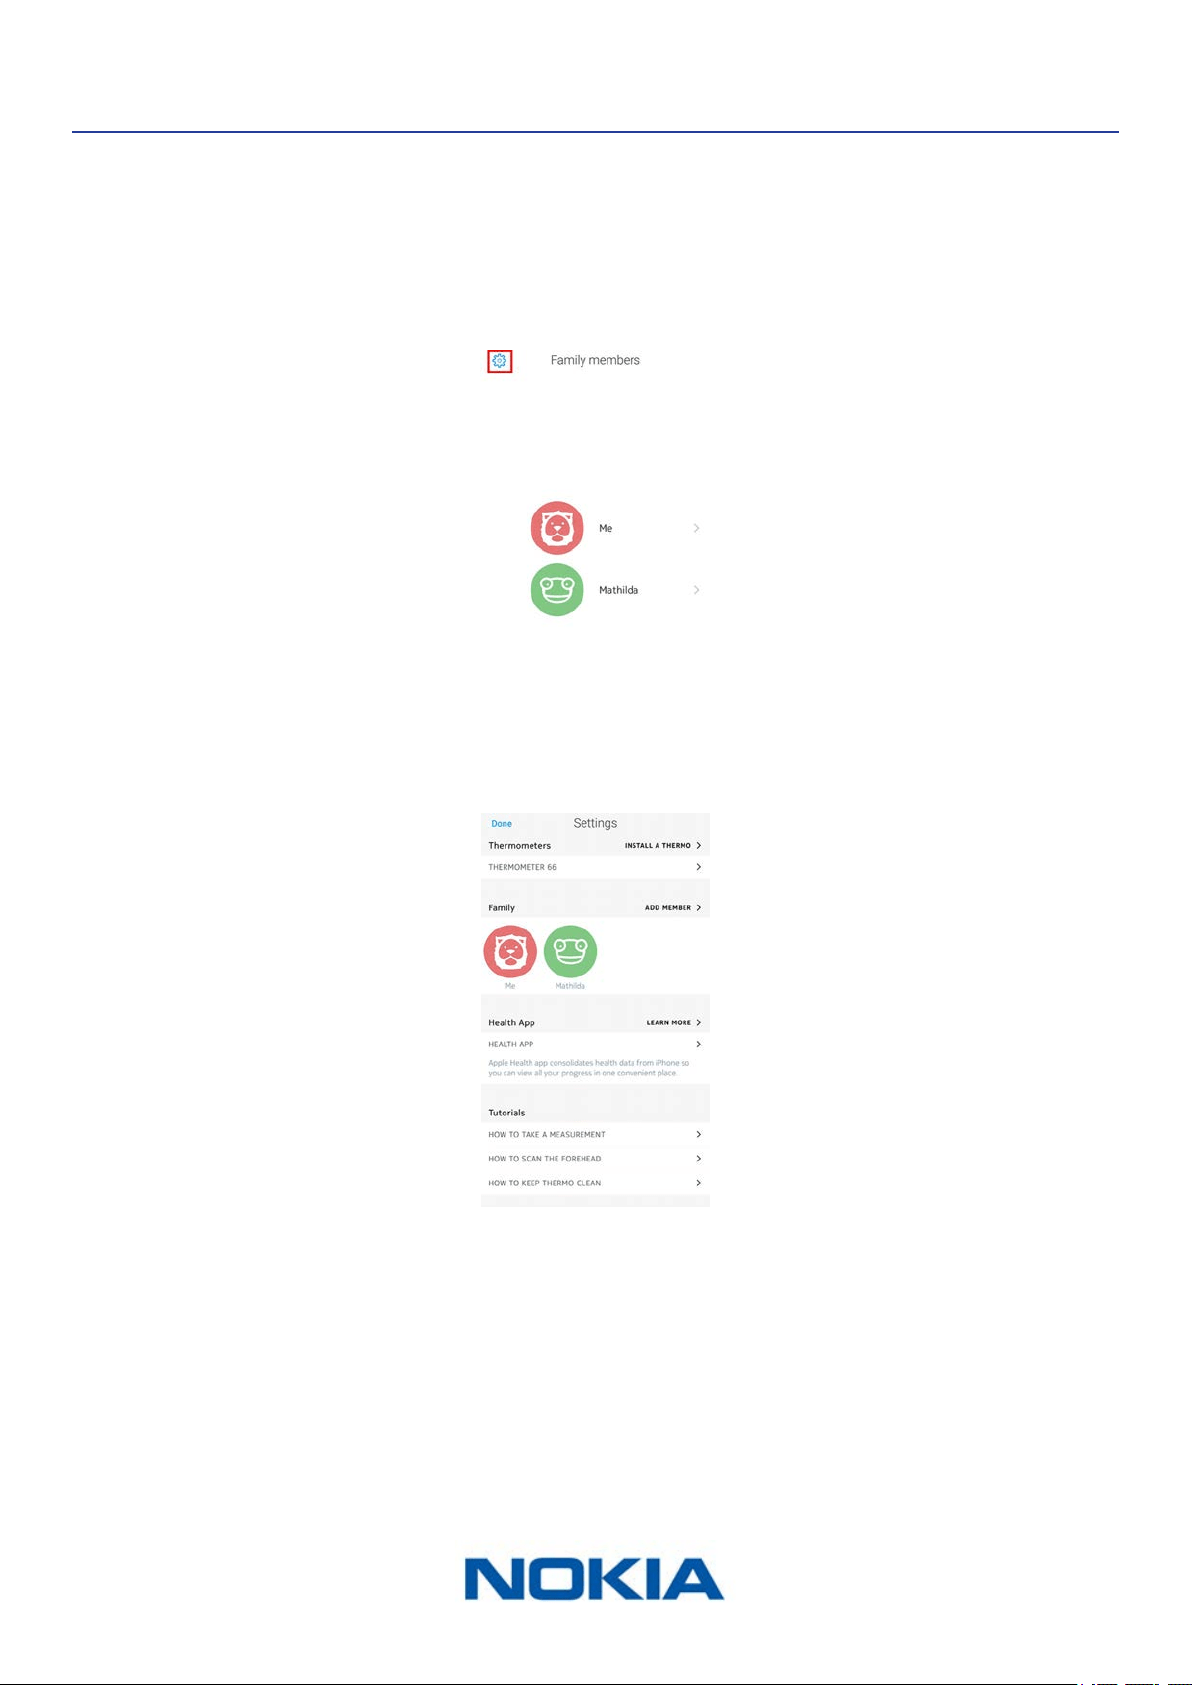
1. Open the Nokia Thermo app.
2. Tap Settings.
3. Tap your Nokia Thermo.
EN-44
Nokia Thermo
v2.0 | April 2018
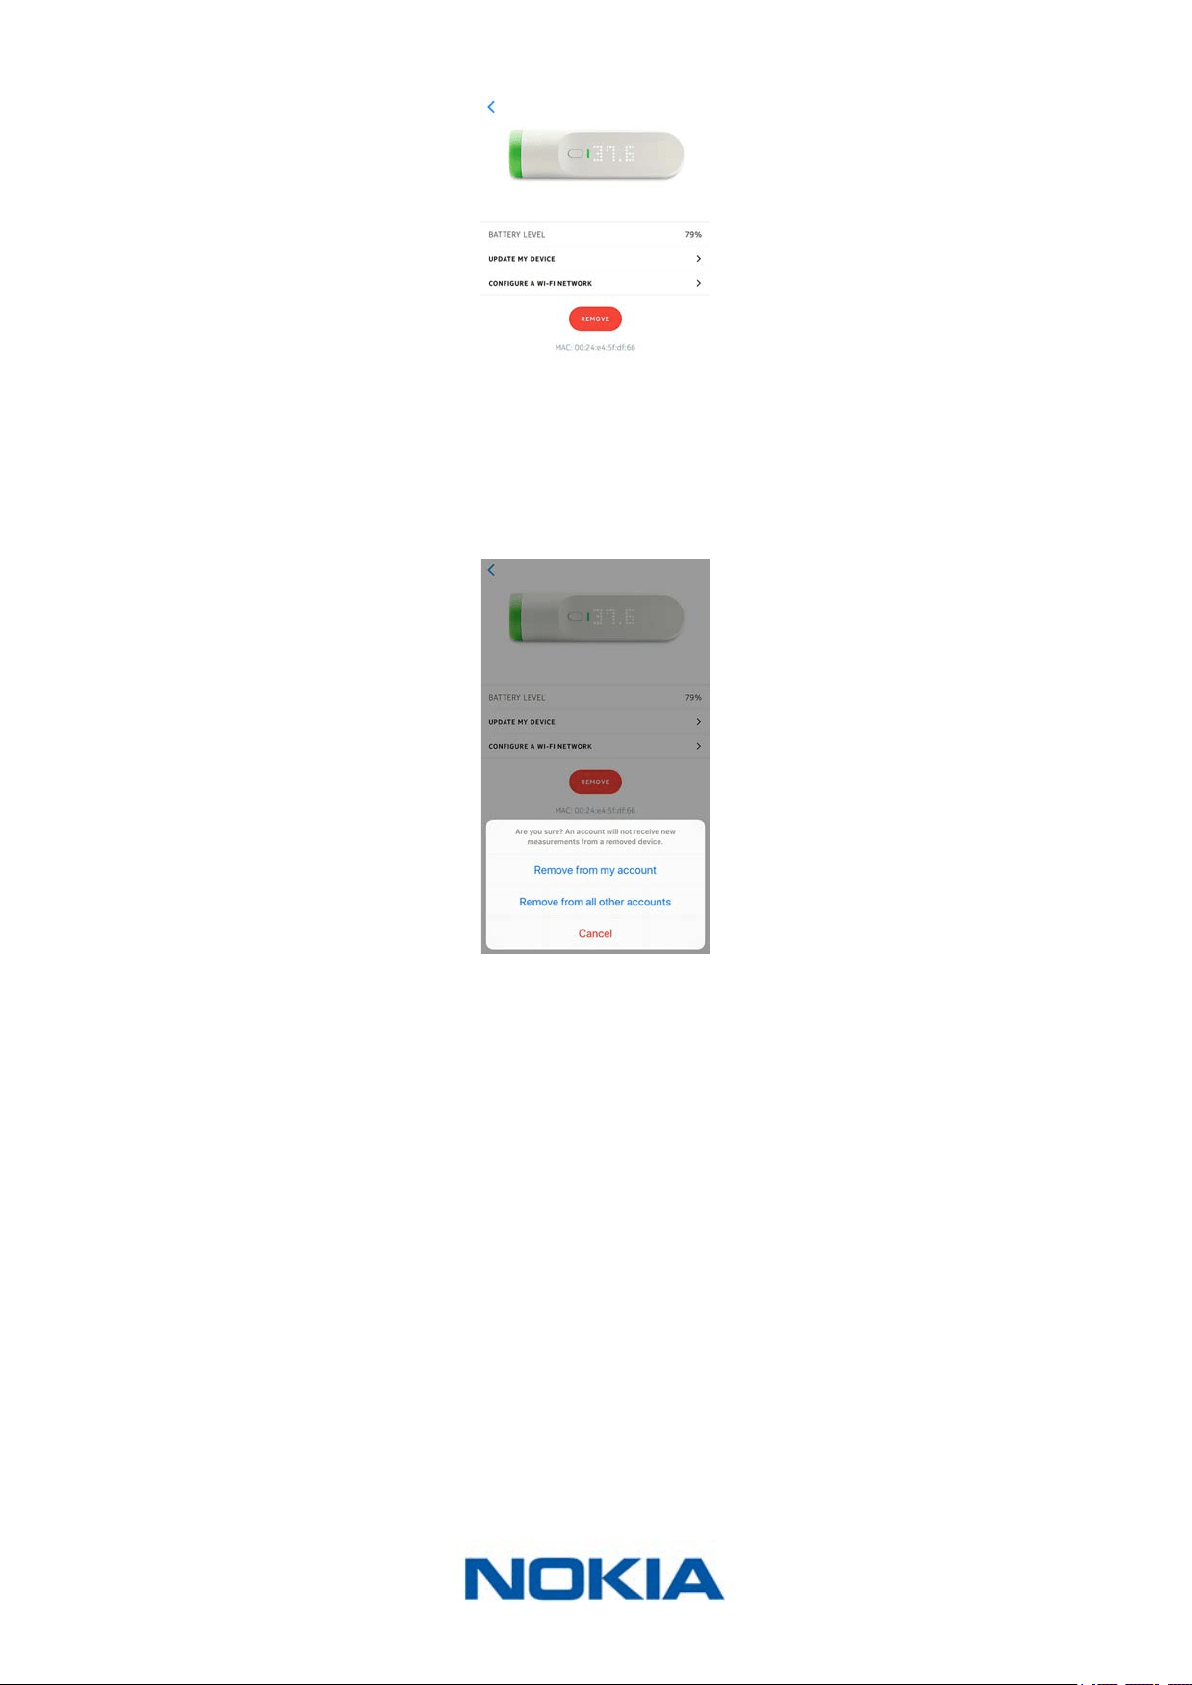
4. Tap Remove.
5. Tap Remove from my account.
Note that dissociating your Nokia Thermo, won’t delete any of your data from the
Nokia Thermo app.
EN-45
Nokia Thermo
v2.0 | April 2018
Cleaning and maintenance
Cleaning my Nokia Thermo
To clean your Nokia Thermo, perform the following steps:
1. Wipe the surface of your Nokia Thermo with a soft, dry cloth.
2. Use a cotton swab moistened with warm water to clean the lens.
3. Dry the lens with a clean, dry cotton swab.
Do not, under any circumstance, use any solvent to clean your Nokia Thermo.
Changing the batteries
When the battery level is getting low, it is time to change the batteries. To do so, perform
the following steps:
1. Lift the magnetic cover of the battery compartment of your Nokia Thermo to open it.
2. Remove the old batteries and dispose of them in accordance with local regulations.
3. Place two new AAA (LR03) batteries in the compartment.
Make sure you follow the polarity markings when placing the batteries.
4. Place the battery cover back.
Updating my Nokia Thermo
We regularly oer updates so that you can benet from the latest features we add to our
products. When new internal software is available, it is automatically installed without any
prompt from the Nokia Thermo app if your Nokia Thermo is installed in Wi-Fi.
However, you can check if updates are available and force their installation whenever
you want. To do so, perform the following steps:
1. Open the Nokia Thermo app.
EN-46
Nokia Thermo
v2.0 | April 2018
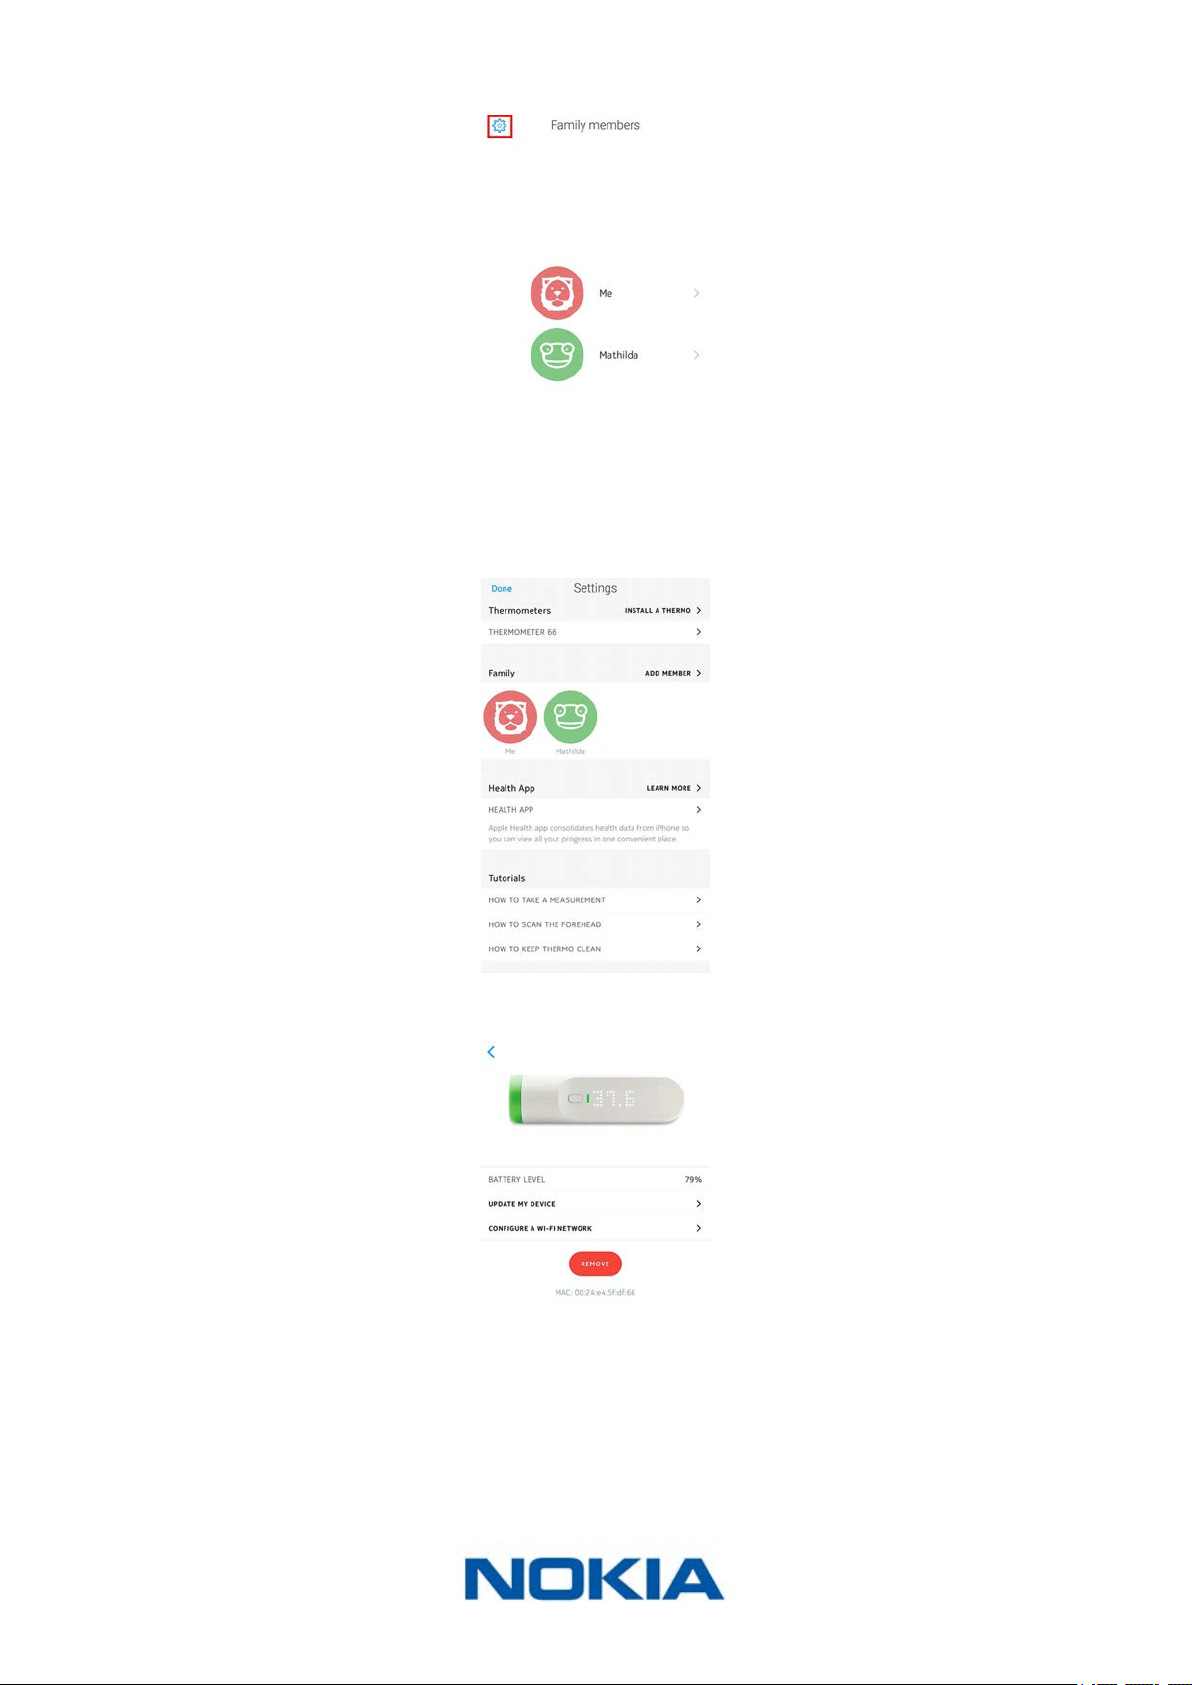
2. Tap Settings.
3. Tap your Nokia Thermo.
4. Tap Update my device.
EN-47
Nokia Thermo
v2.0 | April 2018
5. Press and hold the button for 8 seconds until the display shows “SETUP”.
6. Tap Next.
7. Tap the Nokia Thermo you want to install.
8. Tap Upgrade.
9. Tap Close when the upgrade is complete.

EN-48
Nokia Thermo
v2.0 | April 2018
User guide copyright
This User guide is protected by Intellectual Property laws and copyright. Any reproduction,
modication, representation, and/or publication without Nokia® prior approval is strictly
prohibited. You may print this User Guide for your personal use exclusively.
For any questions, please contact Nokia® at: http://nokia.ly/HealthSupport.
Legal notice
By using your Nokia Thermo you expressly agree to the Nokia® Services Terms
and Conditions available on our website�
Medical device
• The Nokia Thermo is a medical device and has been validated by competent
authorities.
• The Nokia Thermo app is not a medical device. Any advice or insight given by the app
cannot replace medical attention.
Personal data
• Make sure you have read our privacy policy, which you can nd on our website.
• Make sure your Nokia® account password is secure enough to restrict access to
your account. It should be at least eight-character long, have mixed case, and use a
combination of alphanumeric and special characters.

EN-49
Nokia Thermo
v2.0 | April 2018
Safety instructions
Use and storage
• Use the product at temperatures between 10°C and 40°C (50°F and 104°F).
• Product may be stored in a clean, dry location between -25°C and 55°C (-13°F and
131°F) when not in use.
• Remove the batteries if you do not plan to use your Nokia Thermo for an extended
period of time.
• The Nokia Thermo is only meant to monitor body temperature, exclusively by running it
on your forehead. Any other use is prohibited.
• The Nokia Thermo is not intended for use on premature babies.
Safety
• Make sure you consult a doctor should the fever and/or symptoms be persistent or
worrying in any way.
• Do not allow your Nokia Thermo to come in contact with liquids. If it gets wet, make
sure you let it dry before trying to use it.
• Do not touch the lens as you might damage it.
• Do not leave your Nokia Thermo exposed to dust or sunlight for too long as it might
damage the lens.
• Keep your Nokia Thermo and its accessories out of reach from children, as it contains
small parts and may present a choking hazard.
Service and maintenance
• Do not attempt to repair or modify your Nokia Thermo on your own.
• If you have any issue, feel free to contact our Customer Service at: http://nokia.ly/
HealthSupport.

EN-50
Nokia Thermo
v2.0 | April 2018
Specications
Nokia Thermo
• Length: 116 mm (4.57 in.)
• Diameter: 33.2 mm (1.31 in.)
• Weight: 75 g (0.165 lbs), batteries included
• Made of ABS and thermoplastic elastomer
Connectivity
• Wi-Fi 2.4 GHz 802.11 b/g/n
• Bluetooth Smart Ready
• MFI compatibility
• Apple Wireless Accessory Conguration Support (WAC)
Technology
• 16 infrared temperature sensors
• 2,000 temperature measurements per second
• Numeric LED temperature display
Metrics
• Temperature in °C or °F
• Fever status
• 0.2°C (0.4°F) accuracy for the 35.5°C - 42°C (95.9°F - 107.6°F) range
• 0.3°C (0.5°F) accuracy outside the 35.5°C - 42°C (95.9°F - 107.6°F) range
Battery life
• Two years with two AAA (LR03) batteries
Compatible devices
• Android 5.0 devices (and above)
• iPhone (4S or higher)
• iPod touch (5
th
generation)
Compatible OS
• Android 5.0 and above
• iOS 8.0 and above
App
• Nokia Thermo App
EN-51
Nokia Thermo
v2.0 | April 2018
Document release overview
Release date Modications
July 2016 v1.0 First release
April 2018 v2.0 Nokia update
The screenshots in this manual are used for explanatory purposes. Your actual
screens may dier from the screenshots in this manual.
EN-52
Nokia Thermo
v2.0 | April 2018
Warranty
Nokia® One (1) Year Limited Warranty - Nokia Thermo
Nokia® warrants the Nokia® branded hardware product (“Nokia Thermo”) against defects
in materials and workmanship when used normally in accordance with Nokia®’s published
guidelines for a period of ONE (1) YEAR from the date of original retail purchase by the
end-user purchaser (“Warranty Period”). Nokia®’s published guidelines include but are not
limited to information contained in technical specications, safety instructions or quick
start guide. Withings does not warrant that the operation of the Nokia Thermo will be
uninterrupted or error-free. Nokia® is not responsible for damage arising from failure to
follow instructions relating to the Nokia Thermo’s use.

EN-53
Nokia Thermo
v2.0 | April 2018
Regulatory statements
Federal Communications Commission (FCC) Statement
FCC ID: XNASCT01
This device complies with Part 15 of the FCC Rules and with Industry Canada licence-
exempt RSS standard(s).
Operation is subject to the following two conditions:
(1) This device may not cause harmful interference, and
(2) This device must accept any interference received, including interference that may
cause undesired operation. This device complies with the R&TTE Directive.
A copy of the EU Declaration of Conformity is available online at: https://health.nokia.com/
fr/en/compliance.