Loading ...
Loading ...
Loading ...
12
Using Nozzles
Before beginning any cleaning task, determine the best nozzle
for the job. Each of the nozzles has a dierent spray pattern.
The nozzle patterns are 40˚ (for gentle cleaning), 15˚ (for tough
jobs), and 0˚ (for spot cleaning or hard-to-reach areas).
mCAUTION! NEVER change nozzles without locking the
safety lock on the trigger handle.
mWARNING! High-pressure jets can be dangerous if
subject to misuse. The jet must not be directed at persons,
pets, live electrical equipment, or the appliance itself.
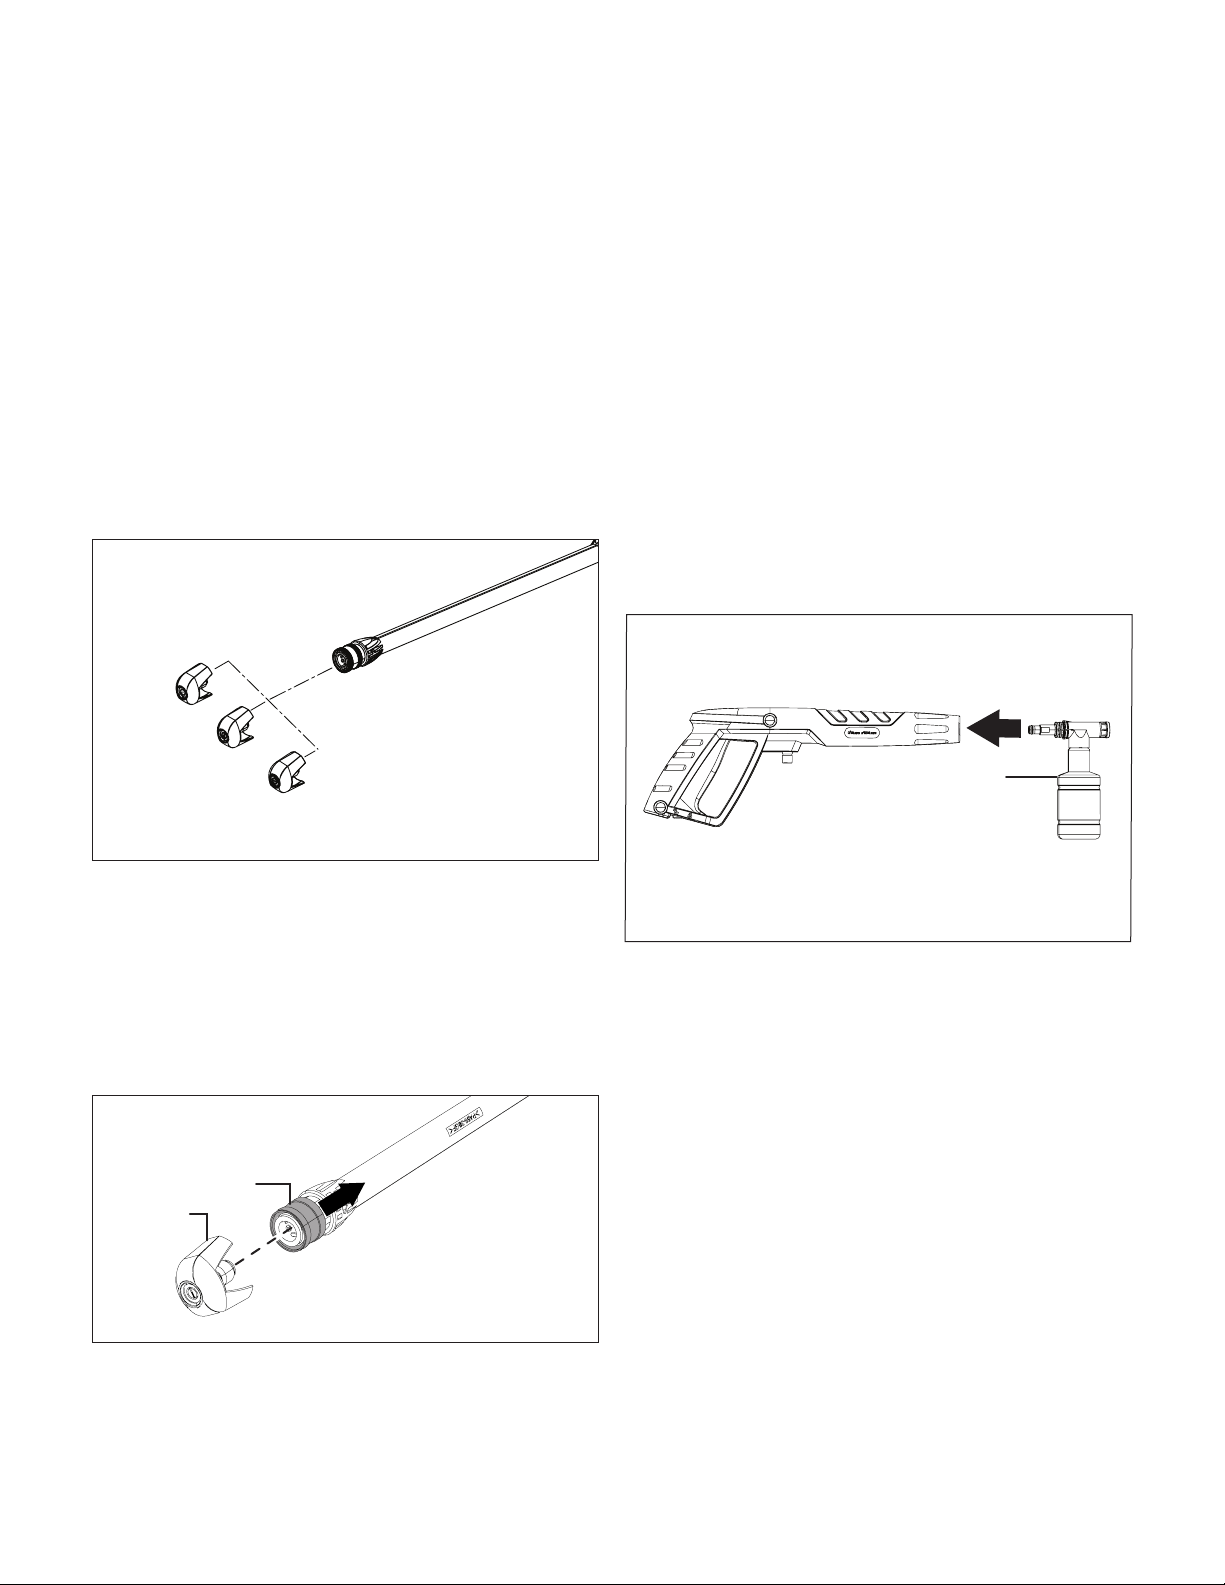
This electric pressure washer is equipped with three (3)
Quick-Connect nozzles that easily snap onto the
Quick-Connect collar of the spray wand (Fig. 16).
To connect a nozzle to the spray wand:
1. Turn o the pressure washer and shut o the water supply.
Pull the trigger to release water pressure.
2. Engage the safety lock on the trigger handle.
3. Pull back the brass Quick-Connect collar and insert the
desired nozzle into the collar. Release the collar and the
nozzle will click into place (Fig. 17).
To disconnect a nozzle from the spray wand once the cleaning
job is complete:
1. Turn o the pressure washer and shut o the water supply.
Pull the trigger to release water pressure.
2. Engage the safety lock on the trigger handle.
3. Remove the nozzle by disconnecting it while pulling back
the brass Quick-Connect collar.
mWARNING! Do not make changes to the nozzle while
the trigger is engaged. Doing so could result in damage to the
pressure washer or injury to the user.
Working with Detergents
Recommended cleaning procedure
1. For additional cleaning power, use the included detergent
bottle.
mCAUTION! Only use detergents specically
recommended for use with pressure washers.
2. Load the bottle with a suitable, non-corrosive detergent.
To attach the bottle, insert the tip of the locking collar on
the detergent bottle into the gun and twist clockwise to
lock into place. (Fig. 18).
3. Apply detergent from the bottom to the top of the dry
surface to be cleaned. Applying detergent in this manner
will dissolve dirt most eectively.
NOTE: Wetting the surface rst is not recommended as it
dilutes the detergent and reduces its cleaning ability.
4. Allow the detergent to remain on the surface for a short
time before rinsing with the pressure washer. Do not allow
the detergent to dry on the surface.
Shutting down
1. Turn the switch to the OFF (0) position and unplug the
power cord from the outlet.
2. Turn o the water source.
3. Hold the trigger to release water pressure.
4. Disconnect the garden hose from the water inlet on
the unit.
5. Disconnect the high-pressure hose connection on the
trigger gun handle.
6. Release the trigger and engage the gun safety lock.
Fig. 16
Fig. 17
Spray wand quick-
connect collar
Nozzle
Pull back
Fig. 18
Detergent bottle
Loading ...
Loading ...
Loading ...