Loading ...
Loading ...
Loading ...
LCD Operation
GETTING READY
Basic operations B-13
B
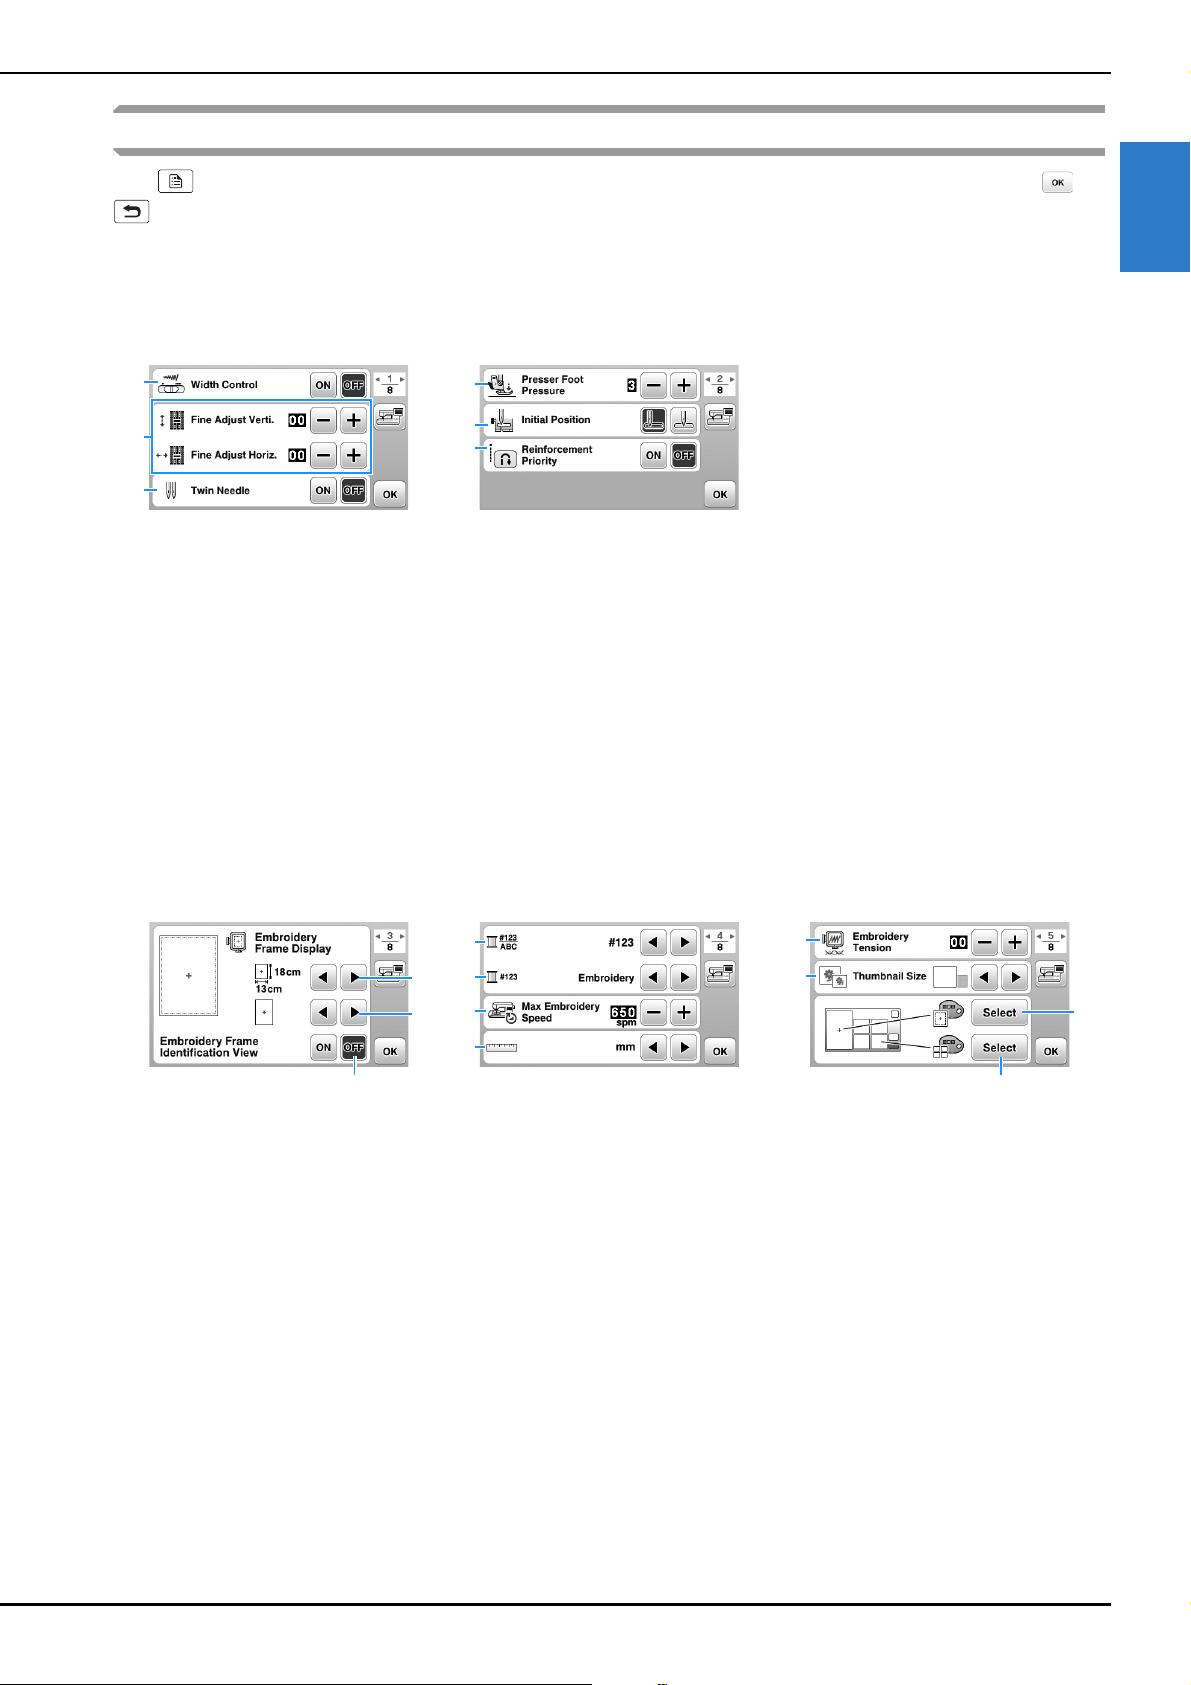
Using the settings key
Press to change the default machine settings (needle stop position, embroidery speed, opening display, etc.). Press or
, after you changed necessary settings.
■ Sewing settings
1 Select whether to use the sewing speed controller to determine the zigzag width. For details, refer to “Satin stitching using the
sewing speed controller” in the “Sewing” section.
2 Make adjustments to character or decorative stitch patterns. For details, refer to “Making adjustments” in the “Decorative
sewing” section.
3 Set to “ON” when using twin needle. (page B-27)
4 Adjust the presser foot pressure. (The higher the number, the greater the pressure will be. Set the pressure at “3” for normal
sewing.) (page B-45)
5 Select either “1-01 Straight stitch (Left)” or “1-03 Straight stitch (Middle)” as the utility stitch that is automatically selected when
the machine is turned on.
6 When set “ON”, reinforcement stitches are sewn at the beginning and/or end of sewing for a reinforcement stitch pattern, even
when the reverse button is pressed.
■ Embroidery settings
7 Select the embroidery frame to be used. For details, refer to “Changing the “Embroidery Frame Display”” in the “Embroidering”
section.
8 Select the center mark and grid lines that are displayed. For details, refer to “Changing the “Embroidery Frame Display”” in the
“Embroidering” section.
9 When set to “ON”, the embroidery pattern can be selected according to the embroidery frame size that you have selected in
number
7. For details, refer to “Selecting/displaying patterns according to the embroidery frame size” in the “Embroidering”
section.
0 Change the thread color display on the “Embroidery” screen; thread number, color name. (page B-67).
A When the thread number “#123” is selected, select from six thread brands. (page B-67).
B Adjust the maximum embroidery speed setting. For details, refer to “Adjusting the embroidery speed” in the “Embroidering”
section.
C Change the display units (mm/inch).
D Adjust the upper thread tension for embroidering. For details, refer to “Adjusting thread tension” in the “Embroidering” section.
E Press to specify the size of pattern thumbnails. For details, refer to “Specifying the size of pattern thumbnails” in the
“Embroidering” section.
F Change the color of the background for the embroidery display area. For details, refer to “Changing the background colors of the
embroidery patterns” in the “Embroidering” section.
G Change the color of the background for the thumbnail area. For details, refer to “Changing the background colors of the
embroidery patterns” in the “Embroidering” section.
Page 1 Page 2
Page 3 Page 4 Page 5
1
2
3
4
5
6
9
8
7
0
A
B
C
D
E
G
F
Loading ...
Loading ...
Loading ...