Loading ...
Loading ...
Loading ...

6
ON
OFF
ON
OFF
0I
1
•
3
•
5
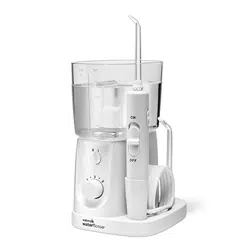
Inserting and Removing Tips
Insert tip into the center of the Water Flosser handle, pressing down rmly until the tip clicks into place. The colored ring will be ush
with the top of the handle if the tip is correctly locked into place. To remove tip from the handle push the tip eject button on the handle.
Powering the Unit
Plug the cord into an electrical outlet. If the outlet is controlled by a wall switch, be sure it is turned ON.
Preparing the Reservoir
Remove the reservoir and ll with lukewarm water. Replace the reservoir over the base and press down rmly.
Prime Unit (First Time Use Only)
Set pressure control dial on base to high (pressure setting No.5), point the handle and tip into sink.
Turn power on until water ows from the tip. Turn unit OFF.
Adjusting the Pressure Setting
Turn the pressure control dial on the base of the unit to the lowest setting (pressure setting No. 1) for rst-time use.
Gradually increase pressure over time to the setting you prefer – or as instructed by your dental professional.
Using the Water Flosser
Always place the tip in your mouth before turning the unit ON. Lean over sink and slightly close lips enough to prevent splashing while
still allowing water to ow from mouth into the sink. Turn power switch ON. When nished, turn power switch OFF.
Recommended Technique
For best results, start with back teeth and work toward the front teeth. Direct the stream at a 90-degree angle to your gumline with
tip in mouth. Glide tip along gumline and pause briey between teeth. Continue until you have cleaned the inside and outside of both the
upper and lower teeth.
When Finished
Turn the unit OFF (O). Empty any liquid le in the reservoir. Unplug the unit.
NOTE: If you used a mouthwash or other solution besides water, see “Using Mouthwash or Other Solutions” section.
ON
FF
0I
1
•
3
•
5
0I
1
•
3
•
5
ON
OFF
ON
OFF
GETTING STARTED
Remove
ON
ON
ON
High
Low
Fill
Eject
Insert
Loading ...
Loading ...
Loading ...