Loading ...
Loading ...
Loading ...
7
Assembly
Getting Started
1. Remove the snow thrower and all other items from
the box.
2. Determine the left and right hand side of the snow thrower
by standing in the normal operating position.
3. Check all items for shipping damage. If damage is found
or suspected or if any of the parts are missing, do not
assemble. Instead, promptly inform the dealer where you
bought the snow thrower or contact the Snow Joe
®
+
Sun Joe
®
customer service center at 1-866-SNOWJOE
(1-866-766-9563) for assistance.
4. Check to make sure the upper chute crank is included.
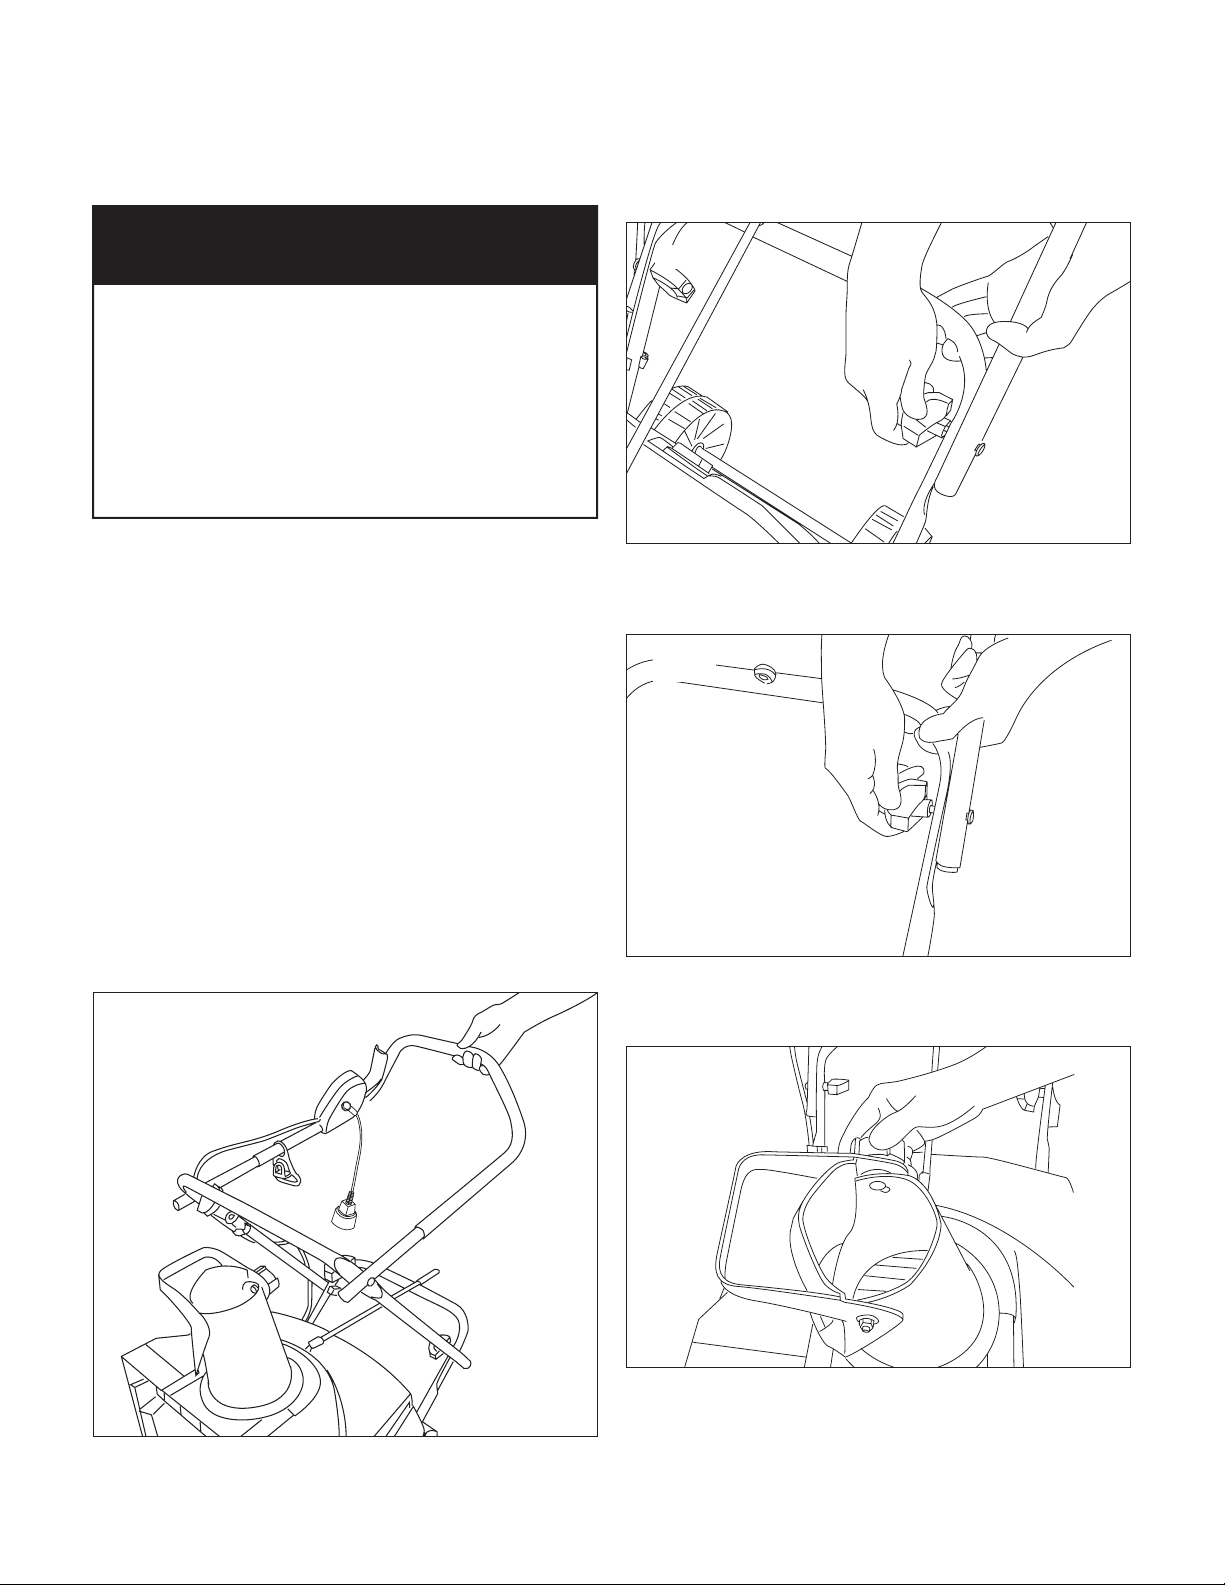
Upper, Middle + Lower Frame Assembly
1. For easy assembly, the unit comes complete with
most parts already connected. To complete the handle
assembly, simply pull the middle frame back and pull the
upper frame up (Fig. 2).
2. Secure the connection of the lower frame to the middle
frame by fastening the rst set of joint xing T-bolts and
knobs on each side (Fig. 3).
3. Secure the connection of the middle frame to the upper
frame by fastening the second set of joint xing T-bolts
and knobs on each side (Fig. 4).
Discharge Chute Assembly
1. Loosen the knob to lift the chute deector (Fig. 5).
2. Lift the chute deector and lock it securely onto the
discharge chute (Fig. 6).
m CAUTION m
Inspect wiring, which, if damaged during shipping,
may cause serious bodily injury during equipment use.
If any damage is seen or suspected, do not assemble.
Instead, contact the Snow Joe
®
+ Sun Joe
®
customer
service center at 1-866-SNOWJOE (1-866-766-9563)
for assistance.
Handle with care during assembly so that electrical
wiring does not become damaged.
Fig. 2
Fig. 3
Fig. 4
Fig. 5
Loading ...
Loading ...
Loading ...