
Loading ...
Loading ...
Loading ...
6
Unpacking
Carton Contents
• Edger + trencher motor housing
with lower shaft bolt and nut
• Telescopic shaft adjustment knob and bolt
• Auxiliary handle
• Auxiliary handle knob + bolt
• Wrench
• Spanner
• Manual with registration card
1. Carefully remove the electric edger + trencher and check
to see that all of the above items are supplied.
2. Inspect the product carefully to make sure no breakage or
damage occurred during shipping. If you nd damaged or
missing parts, DO NOT return the unit to the store. Please
call the Snow Joe
®
+ Sun Joe
®
customer service center at
1-866-SNOWJOE (1-866-766-9563).
NOTE: Do not discard the shipping carton and packaging
material until you are ready to use the electric edger +
trencher. The packaging is made of recyclable materials.
Properly dispose of these materials in accordance with
local regulations or save the packaging for long-term
product storage.
IMPORTANT! The equipment and packaging material are not
toys. Do not let children play with plastic bags, foils, or small
parts. These items can be swallowed and pose a suocation
risk!
Assembly
Assembling the Handle
1. Slide the lower shaft down into the motor housing and
align the screw holes (Fig.1).
2. Secure the telescoping shaft with the bolt and nut (Fig. 2).
NOTE: When you rst insert the bolt it may be necessary
to wiggle it carefully to get it past the jacketed wire inside
the tube.
mCAUTION! NEVER use a sharp object to move jacketed
wires out of the way.
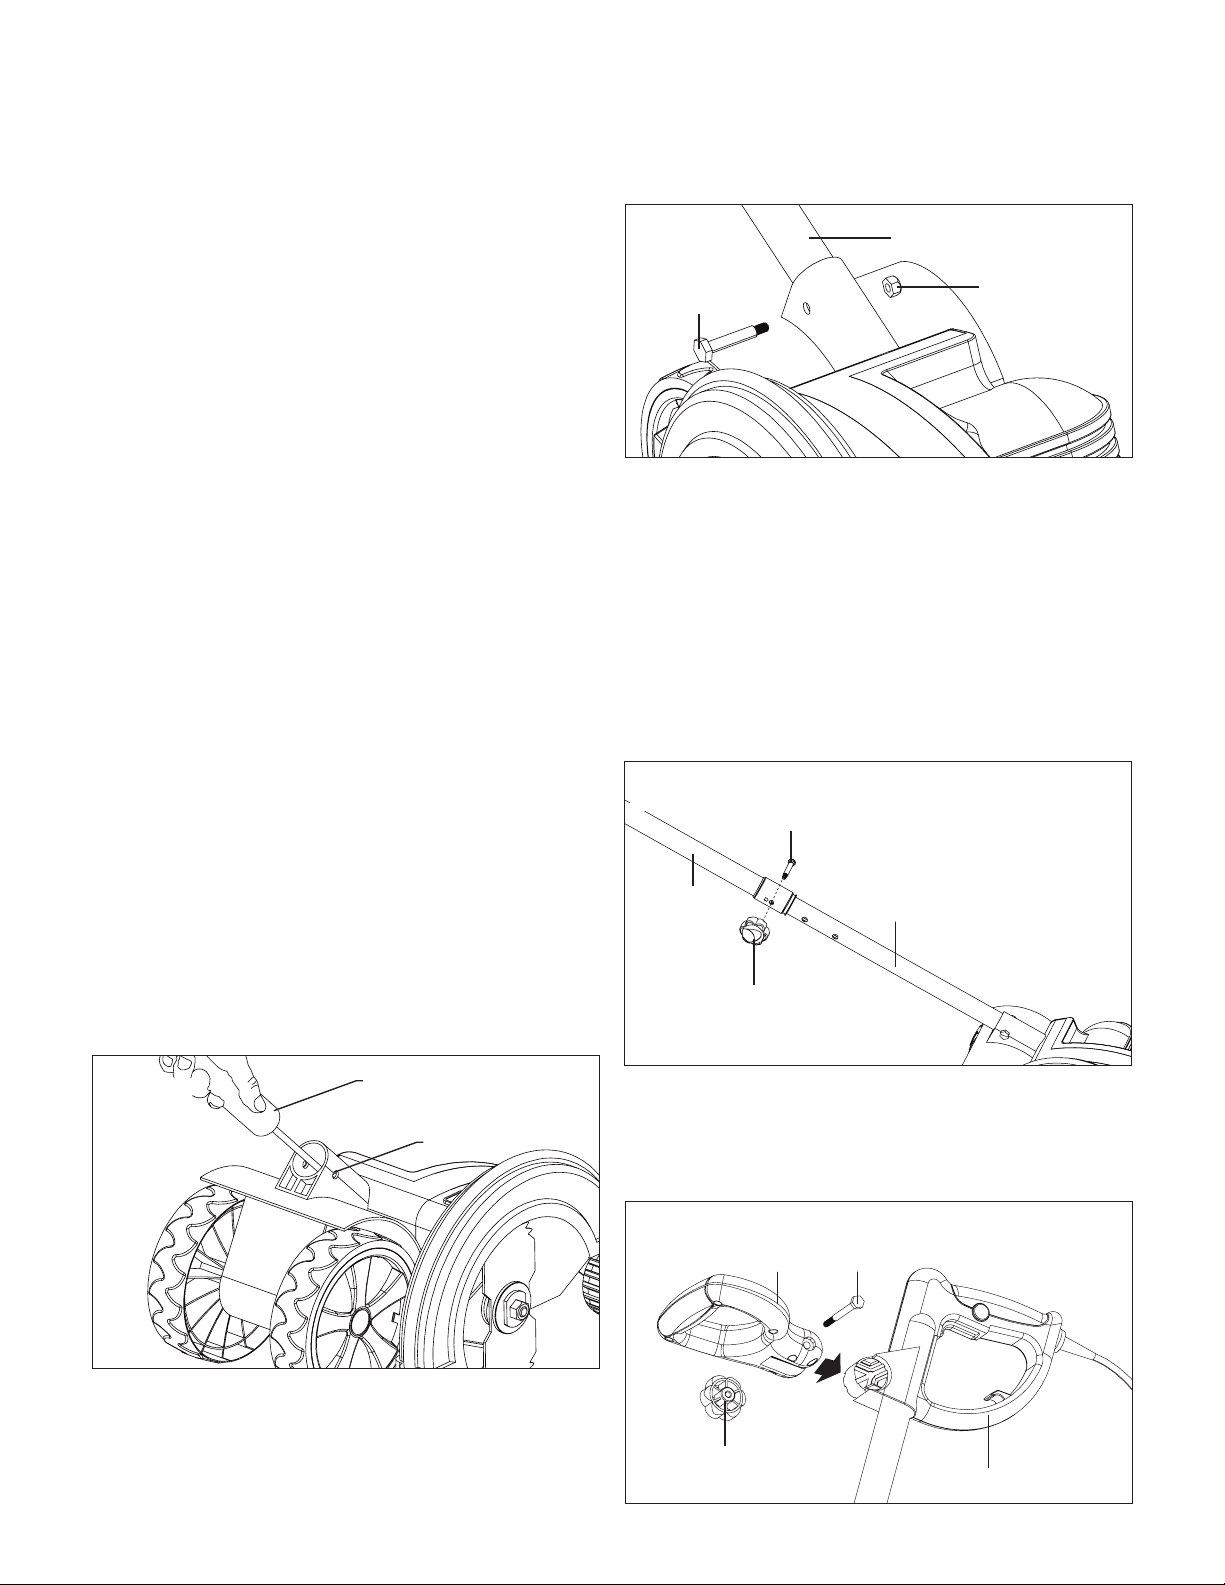
Adjusting the Telescopic Shaft
The telescopic shaft can be set at three dierent heights.
1. To set the height for your comfort, slide the telescopic
shaft up to the level required using one of the three holes
provided.
2. Insert the bolt through the hole and tighten the knob fully
locking the two shafts in place (Fig. 3).
NOTE: When rst assembling the shaft to the trencher
+ edger, the shafts should be pulled fully up to allow the
cord to sit correctly in the tubes and motor housing.
Assembling Auxiliary Handle
1. Assemble the auxiliary handle onto the main handle by
inserting the bolt into the auxiliary handle and tightening
the handle with the auxiliary handle knob provided (Fig. 4).
Fig. 1
Lower shaft
Motor housing
Fig. 2
Bolt
Nut
Telescoping shaft
Fig. 3
Telescopic shaft
adjustment knob
Bolt
Upper
shaft
Lower
shaft
Fig. 4
Auxiliary handle knob
Handle
Bolt
Auxiliary
handle
Loading ...
Loading ...
Loading ...