
English
1 Important
Read this user manual carefully before you use the Rice cooker and
save it for future reference.
Danger
• The appliance must not be
immersed.
Warning
• This appliance is not intended for
use by persons (including children)
with reduced physical sensory
or mental capabilities, or lack of
experience and knowledge, unless
they have been given supervision
or instruction concerning use of the
appliance by a person responsible
for their safety.
• Children should be supervised to
ensure that they do not play with
the appliance.
• This appliance should be
positioned in a stable situation with
the handles (if any) positioned to
avoid spillage of the hot liquids.
• This appliance is intended to be
used in household and similar
applications such as:
• Sta kitchen areas in shops,
oces and other working
environments;
• Farm houses;
• By clients in hotels, motels
and other residential type
environments;
• Bed and breakfast type
environments.
• If the power cord set is damaged,
it must be replaced by a cord set
available from the manufacturer.
• The appliance is not intended to be
operated by means of an external
timer or a separate remote-control
system.
• Check if the voltage indicated on
the appliance corresponds to the
local power voltage before you
connect it.
• Only connect the appliance to a
grounded power outlet. Always
make sure that the plug is inserted
rmly into the power outlet.
• Do not use the appliance if the
plug, the power cord, the inner pot,
the sealing ring, or the main body is
damaged.
• Do not let the power cord hang over
the edge of the table or worktop on
which the appliance stands.
• Make sure the heating element, the
temperature sensor, and the outside
of the inner pot are clean and dry
before you put the plug in the power
outlet.
• Do not plug in the appliance or
press any of the buttons on the
control panel with wet hands.
• WARNING: Make sure to avoid
spillage on the power connector to
avoid a potential hazard.
• WARNING: Always follow the
instructions and use the appliance
properly to avoid potential injury.
• According to the instructions
prescribed in this user manual,
use a soft damp cloth to clean the
surfaces in contact with food and
make sure to remove all the food
residues stuck to the appliance.
• Don’t place the power cord under
the appliance when in use.
• When placing the steaming basket,
avoid touching the side wall of
the inner pot, otherwise it may
cause deformation due to high
temperature.
Caution
• CAUTION: Surface of the heating
element is subject to residual heat
after use.
• According to the installation
prescribed in this user manual,
use a soft damp cloth to clean the
surfaces in contact with food and
make sure to remove all the food
residues stuck to the appliance.
• Never use any accessories or
parts from other manufacturers or
that Philips does not specically
recommend. If you use such
accessories or parts, your guarantee
becomes invalid.
• Do not expose the appliance to
high temperatures, nor place it on a
working or still hot stove or cooker.
• Do not expose the appliance to
direct sunlight.
• Place the appliance on a stable,
horizontal, and level surface.
• Always put the inner pot in the
appliance before you put the plug
in the power outlet and switch it on.
• Do not place the inner pot directly
over an open re to cook rice.
• Do not use the inner pot if it is
deformed.
• The accessible surfaces may
become hot when the appliance is
operating. Take extra caution when
touching the appliance.
• Beware of hot steam coming out of
the steam vent during cooking or
out of the appliance when you open
the lid. Keep hands and face away
from the appliance to avoid the
steam.
• Do not lift and move the appliance
while it is operating.
• Do not exceed the maximum water
level indicated in the inner pot to
prevent overow which might cause
potential hazard.
• Do not place the cooking utensils
inside the pot while cooking,
keeping warm or reheating rice.
• Only use the cooking utensils
provided. Avoid using sharp
utensils.
• To avoid scratches, it is not
recommended to cook ingredients
with crustaceans and shellsh.
Remove the hard shells before
cooking.
• Do not insert metallic objects or
alien substances into the steam
vent.
• Do not place a magnetic substance
on the lid. Do not use the appliance
near a magnetic substance.
• Always let the appliance cool down
before you clean or move it.
1 2 3
User manual
http://www.philips.com/welcome
Register your product and get support at
http://www.philips.com/welcome
Warranty
Register your product and get support at
a
b
c
d
e
f
k
g
h
i
j
l
m
n
o
p
q
r
s
t
u
1
2
5
6
7
4
8
17 18 19
16
14
15
10
9
12
13
11
PHILIPS and the Philips Shield Emblem are
registered trademarks of Koninklijke Philips N.V.
and are used under license.
This product has been manufactured by and is sold
under the responsibility of Versuni Holding B.V., and
Versuni Holding B.V. is the warrantor in relation to
this product.
2023 © Versuni Holding B.V.
6608.000.0785.7 (11/07/2023)
EN User manual ID Buku Petunjuk Pengguna
• Always clean the appliance after
use. Do not clean the appliance in a
dishwasher.
• Always unplug the appliance if not
used for a longer period.
• If the appliance is used
improperly or for professional or
semiprofessional purposes, or
if it is not used according to the
instructions in this user manual,
the guarantee becomes invalid
and Philips refuses liability for any
damage caused.
Electromagnetic elds (EMF)
This appliance complies with the applicable standards and
regulations regarding exposure to electromagnetic elds.
2 Your Rice cooker
Congratulations on your purchase, and welcome to Philips!
To fully benet from the support that Philips oers, register your
product at www.philips.com/welcome.
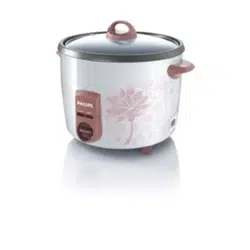
3 What’s in the box (fig. 1)
Rice cooker main unit Measuring cup
Rice and soup 2 in 1 spoon Power cord
Steaming basket User manual
Warranty card
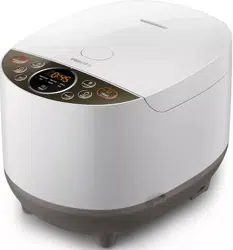
4 Overview (fig. 2)
a
Steam vent
g
Detachable inner lid
b
Lid release button
h
Inner pot
c
Control panel
i
Water level indications
d
Heating element
j
Power socket
e
Main body
k
Cooker base
f
Steam vent cap
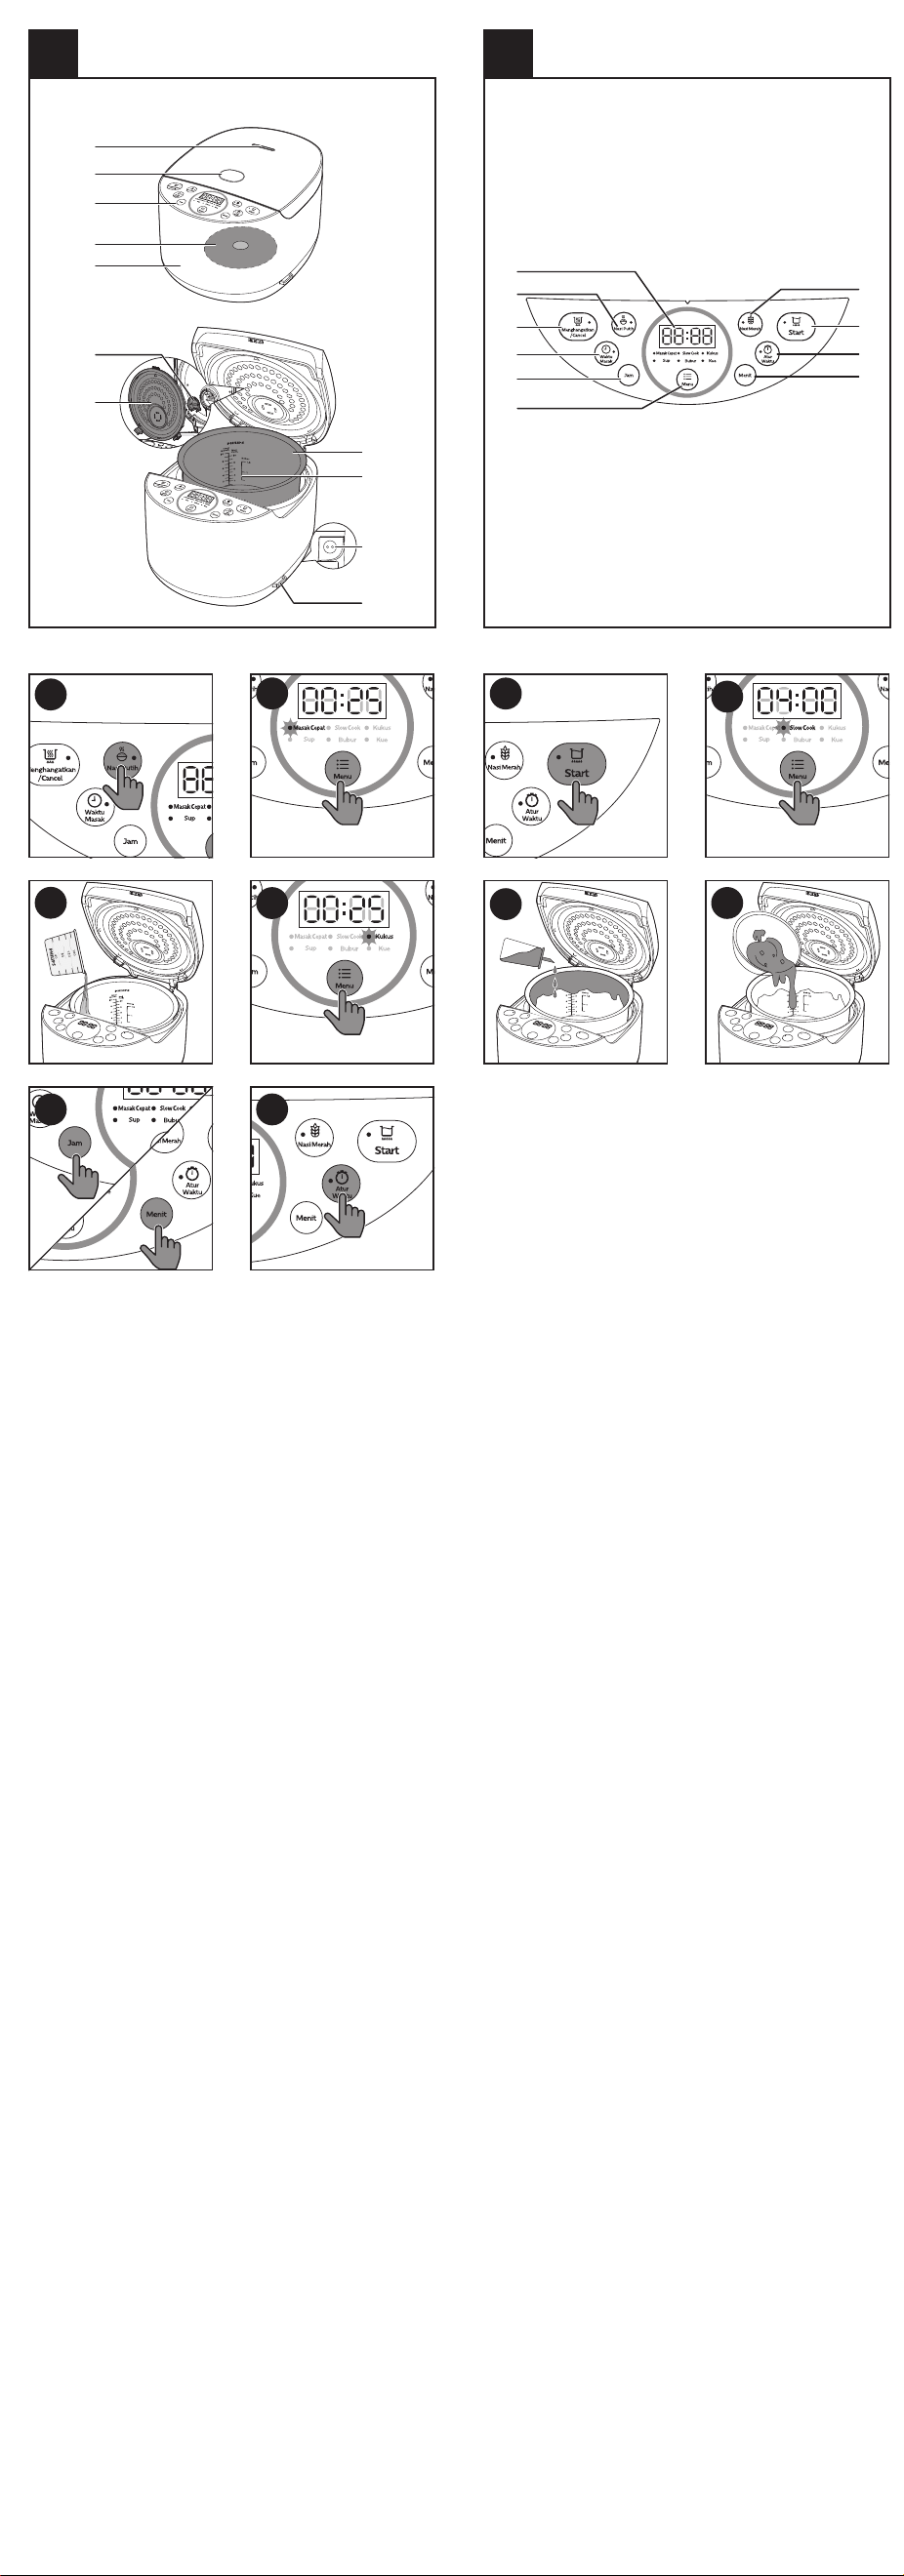
Controls overview (g. 3)
l
Display screen
q
Menu button
m
White button
r
Minute button
n
Keep-warm/Cancel button
s
Preset time button
o
Cooking time button
t
Start button
p
Hour button
u
Brown rice button
5 Using the Rice cooker
Before rst use
1 Take out all the accessories from the inner pot. Remove the
packaging material of the inner pot.
2 Before rst use, boil water and clean the Rice cooker.
3 Clean the parts of the Rice cooker thoroughly before using it for
the rst time (see chapter “Cleaning and Maintenance”).
Note
• Make sure all parts are completely dry before you start using
the Rice cooker.
Cooking rice
Cooking function
Estimated
cooking time
Time
regulation
Preset time
White(Nasi
Putih)
1 hour / 1-24 hours
Brown
(Nasi Merah)
2 hours / 1-24 hours
Fast cook
(Masak Cepat)
25 minutes / 1-24 hours
You can cook rice using the White, Brown or fast cook function.
1 Measure rice using the measuring cup provided.
2 Rinse rice, and put the washed rice in the inner pot.
3 Add water to the level indicated on the scale inside the inner
pot that corresponds to the number of cups of rice used. Then
smooth the rice surface.
» For instance, if you cook 4 cups of rice, add water up to the
4-cup level indicated on the scale.
Note
• The level marked inside the inner pot is just an indication.
You can always adjust the water level for dierent types of
grains and your own preference.
• Besides following the water level indications, you may also add
rice and water at 1:1-1.2 ratio for rice cooking.
• Do not exceed the volume indicated or exceed the maximum
water level, as this may cause the appliance to overow.
• For the fast cooking with a large amount of rice, it's
recommended to open the lid after 10-15 minutes to make
sure the optimal taste and cooking result.
4 Wipe o water outside of the inner pot and put it into the
appliance.
Note
• Make sure that the outside of the inner pot is dry and clean,
and that there is no foreign residue on the inside of the
appliance.
5 Close the lid (g. 4), and put the plug in the power socket
(g. 5), and switch on the appliance.
6 Press the White(Nasi Putih) or Brown(Nasi Merah) button
(g. 6), or select the Fast cook(Masak Cepat)function by
pressing the menu button (Menu) (g. 7).
7 Press the start button (Start) to start cooking (g. 8).
8 When the cooking is nished, you will hear 4 beeps and the
selected cooking function light will be o.
9 The Rice cooker will be in keep-warm mode automatically.
» The keep-warm indicator lights up.
Note
• If the voltage is unstable at the area you live, it is possible
that the Rice cooker overows.
• After the cooking is nished, stir the rice and loosen it
immediately to release excessive moisture for uy rice.
• Depending on the cooking conditions, the bottom portion of
the rice may become slightly browned.
• Please stir rice after cooking, and you are recommended to
consume it right after cooking for best nutrition and best taste.
If you would like to keep rice for long hours and for many meals,
it is best to keep rice in sealed plastic containers and keep them
in the refrigerator and reheat it to avoid nutrient loss.
• If you want / need to change selection, you rst need to press
the “Keep warm/ Cancel” (Menghangatkan/Cancel) button.
Cooking porridge/Slow cook
Cooking
function
Estimated
cooking time
Time
regulation
Preset time
Porridge
(Bubur)
2 hours 1-4 hours 1-24 hours
Slow cook 4 hours 3-10 hours 1-24 hours
1 Put ingredients and water into the inner pot.
2 Follow steps 4 to 5 in “Cooking rice”.
Note
• Do not exceed the maximum water level indicated in the
inner pot, as this may cause the Rice cooker to overow.
3 Select the porridge(Bubur) or slow cook function by pressing
the menu button (Menu) (g. 9) (g. 10).
4 Press the start button (Start) to start cooking (g. 8).
5 When the cooking is nished, you will hear 4 beeps and the
selected cooking function light will be o. The Rice cooker will
be in keep warm mode automatically.
» The keep-warm indicator lights up.
Note
• You can use the porridge function to steam food.
• You can use the slow cook function to stew food.
Soup
Cooking
function
Estimated
cooking time
Time
regulation
Preset time
Soup(Sup) 2 hours 1-4 hours 1-24 hours
1 Put beans and water into the inner pot.
2 Follow steps 4 to 5 in “Cooking rice”.
Note
• Do not exceed the maximum water level indicated in the
inner pot, as this may cause the Rice cooker to overow.
3 Select the Soup(Sup) function by pressing the menu button
(Menu) (g. 11).
4 Press the start button (Start) to start cooking (g. 8).
5 When the cooking is nished, you will hear 4 beeps and the
selected cooking function light will be o. The Rice cooker will
be in keep warm mode automatically.
» The keep-warm indicator lights up.
Steaming food
Cooking
function
Estimated
cooking time
Time
regulation
Preset time
Steam
(Kukus)
25 minutes 5-59 minutes /
1 Measure a few cups of water with the measuring cup.
Note
• To avoid boil-dry, add 2 scales of water at least into the inner
pot.
2 Pour the water into the inner pot (g. 12).
3 Put the steam basket into the inner pot.
4 Put the food into the steam basket.
5 Follow steps 4 to 5 in “Cooking rice”.
Note
• Do not exceed the maximum water level indicated in the
inner pot, as this may cause the Rice cooker to overow.
• Add 5 cups of water at least to the inner pot when using the
Steam function.
6 Select the Steam(Kukus) function by pressing the menu button
(Menu) (g. 13).
7 Press the start button (Start) to start cooking (g. 8).
8 When the cooking is nished, you will hear 4 beeps and the
selected cooking function light will be o. The Rice cooker will
be in keep warm mode automatically.
» The keep-warm indicator lights up.
Cake
Cooking
function
Estimated
cooking time
Time
regulation
Preset time
Cake(Kue) 45 minutes / /
1 Whisk the ingredients for cake well.
2 Coat the inner pot with some butter or cooking oil (g. 14), and
then pour the cake mixture into it (g. 15).
3 Follow steps 5 and 6 in “Cooking rice”.
4 Select the Cake function (Kue) by pressing the menu button
(Menu) (g. 16).
5 Press the start button (Start) to start cooking (g. 8).
6 When the cooking is nished, you will hear 4 beeps and the
selected cooking function light will be o. The Rice cooker will
be in keep warm mode automatically.
» The keep-warm indicator lights up.
7 Open the lid and carefully take out the inner pot to cool down.
8 After the inner pot is cool down, put a plate or cake rack on top
of the pot, and then ip over to take the cake out.
Note
• Use a kitchen glove or a cloth, as the plate will be very hot.
• You can cook rice while steaming food. Do not exceed the
volume indicated, as this may cause the Rice cooker to
overow.
• You can adjust the water level as needed.
How to cook cakes
1 Preparation of raw material:
Small quantity: 3 eggs, 100g white sugar (about 2/3 cup), 100g
cake powder (about 1 cup), 50g butter (about 1/3 cup), 18g milk
(about 1/10 cup)
Large quantity: 5 eggs, 180g white sugar (about 1 cup), 180g
cake powder (about 2 cups), 80g butter (about 2/3 cup), 36g
milk (about 1/5 cup)
Note
• The user may adjust the raw material proportion as per
personal tastes.
• Do not put in too much raw material, or the quality will be
aected and even underdone.
2 Mix round white sugar with egg, till the bubbles appear.
Note
• If the temperature of egg is too low, the user may use
insulated water of 40°C to warm it. The cake made will be
soft, loose and elastic.
• Whisk the egg, till the egg material ows down the egg whisk
as silk.
• The vessel and egg whisk must be clean, if they have oil, the
bubbles will be dicult to appear.
• Do not whisk the egg in the inner pot, to avoid scratching the
nonstick coating.
3 Add cake powder, and averagely mix them round by a wooden
spoon.
Note
• Whisk the wooden spoon so as to fully mix the material
round.
4 Add milk and melted butter, quickly mix them round.
Note
• Melt the butter into liquid by insulated warm water.
Adjusting the cooking time
You can set the cooking time for some menus. Refer to the cooking
time table in each chapter for the detailed regulating range.
1 Choose the function you need.
2 To set a dierent cooking time, press the cooking time button
(Waktu Masak) (g. 17), and the default cooking time starts
ashing on the display.
3 Press the hour button (Jam) to set the hour unit (g. 18).
4 After the hour unit is set, wait for a few seconds before the
hour unit is conrmed, and the minute unit starts ashing on
the display.
5 Press the minute button (Menit) to set the minute unit (g. 18).
6 Press the start button to conrm the cooking time and start the
cooking process.
Note
• You can adjust the cooking time only in the Porridge(Bubur),
Soup(Sup) and Steam(Kukus) and function.
Preset time for delayed cooking
You can preset the delayed cooking time for some menus. The preset
timer is available from 1 hour up to 24 hours.
Note
• The preset timer is not available in the Cake(Kue) function.
• The cooking process will be nished by the time the preset
time has elapsed. If the preset time you set is shorten than
the cooking time, the appliance will start the cooking process
immediately.
1 Choose the function you need.
2 To preset time for delayed cooking, press the preset time
button (Atur Waktu), and the default preset time starts ashing
on the display (g. 19).
3 Press the hour button (Jam) to set the hour unit (g. 18).
4 After the hour unit is set, wait for a few seconds before the
hour unit is conrmed, and the minute unit starts ashing on
the display.
5 Press the minute button (Menit) to set the minute unit (g. 18).
6 Press the start button to conrm the preset timer and start the
cooking process.
6 Cleaning and Maintenance
Note
• Unplug the Rice cooker before starting to clean it.
• Wait until the Rice cooker has cooled down suciently before
cleaning it.
Interior
Inside of the top lid and the main body:
• Wipe with a damp cloth.
• Make sure to remove all the food residues stuck to the Rice
cooker.
Heating element:
• Wipe with a damp cloth.
• Remove food residues with a damp cloth.
PHILIPS
PENANAK NASI
HD4515
Daya memasak: 400W
220V 50-60Hz
Negara Pembuat: Cina
Diimpor oleh:
PT Versuni HomeLife Indonesia
Gedung Cibis Nine, lantai 10, Jl. TB Simatupang No. 2,
RT 001/RW 005 Kelurahan Cilandak Timur, Kec. Pasar
Minggu, Kota Adm. Jakarta Selatan, - DKI Jakarta, 12560
- INDONESIA
Negara Pembuat: Cina
No. Reg.: IMKG.1236.07.2023
HD4515
English
1 Important
Read this user manual carefully before you use the Rice cooker and
save it for future reference.
Danger
• The appliance must not be
immersed.
Warning
• This appliance is not intended for
use by persons (including children)
with reduced physical sensory
or mental capabilities, or lack of
experience and knowledge, unless
they have been given supervision
or instruction concerning use of the
appliance by a person responsible
for their safety.
• Children should be supervised to
ensure that they do not play with
the appliance.
• This appliance should be
positioned in a stable situation with
the handles (if any) positioned to
avoid spillage of the hot liquids.
• This appliance is intended to be
used in household and similar
applications such as:
• Sta kitchen areas in shops,
oces and other working
environments;
• Farm houses;
• By clients in hotels, motels
and other residential type
environments;
• Bed and breakfast type
environments.
• If the power cord set is damaged,
it must be replaced by a cord set
available from the manufacturer.
• The appliance is not intended to be
operated by means of an external
timer or a separate remote-control
system.
• Check if the voltage indicated on
the appliance corresponds to the
local power voltage before you
connect it.
• Only connect the appliance to a
grounded power outlet. Always
make sure that the plug is inserted
rmly into the power outlet.
• Do not use the appliance if the
plug, the power cord, the inner pot,
the sealing ring, or the main body is
damaged.
• Do not let the power cord hang over
the edge of the table or worktop on
which the appliance stands.
• Make sure the heating element, the
temperature sensor, and the outside
of the inner pot are clean and dry
before you put the plug in the power
outlet.
• Do not plug in the appliance or
press any of the buttons on the
control panel with wet hands.
• WARNING: Make sure to avoid
spillage on the power connector to
avoid a potential hazard.
• WARNING: Always follow the
instructions and use the appliance
properly to avoid potential injury.
• According to the instructions
prescribed in this user manual,
use a soft damp cloth to clean the
surfaces in contact with food and
make sure to remove all the food
residues stuck to the appliance.
• Don’t place the power cord under
the appliance when in use.
• When placing the steaming basket,
avoid touching the side wall of
the inner pot, otherwise it may
cause deformation due to high
temperature.
Caution
• CAUTION: Surface of the heating
element is subject to residual heat
after use.
• According to the installation
prescribed in this user manual,
use a soft damp cloth to clean the
surfaces in contact with food and
make sure to remove all the food
residues stuck to the appliance.
• Never use any accessories or
parts from other manufacturers or
that Philips does not specically
recommend. If you use such
accessories or parts, your guarantee
becomes invalid.
• Do not expose the appliance to
high temperatures, nor place it on a
working or still hot stove or cooker.
• Do not expose the appliance to
direct sunlight.
• Place the appliance on a stable,
horizontal, and level surface.
• Always put the inner pot in the
appliance before you put the plug
in the power outlet and switch it on.
• Do not place the inner pot directly
over an open re to cook rice.
• Do not use the inner pot if it is
deformed.
• The accessible surfaces may
become hot when the appliance is
operating. Take extra caution when
touching the appliance.
• Beware of hot steam coming out of
the steam vent during cooking or
out of the appliance when you open
the lid. Keep hands and face away
from the appliance to avoid the
steam.
• Do not lift and move the appliance
while it is operating.
• Do not exceed the maximum water
level indicated in the inner pot to
prevent overow which might cause
potential hazard.
• Do not place the cooking utensils
inside the pot while cooking,
keeping warm or reheating rice.
• Only use the cooking utensils
provided. Avoid using sharp
utensils.
• To avoid scratches, it is not
recommended to cook ingredients
with crustaceans and shellsh.
Remove the hard shells before
cooking.
• Do not insert metallic objects or
alien substances into the steam
vent.
• Do not place a magnetic substance
on the lid. Do not use the appliance
near a magnetic substance.
• Always let the appliance cool down
before you clean or move it.
1 2 3
User manual
http://www.philips.com/welcome
Register your product and get support at
http://www.philips.com/welcome
Warranty
Register your product and get support at
a
b
c
d
e
f
k
g
h
i
j
l
m
n
o
p
q
r
s
t
u
1
2
5
6
7
4
8
17 18 19
16
14
15
10
9
12
13
11
PHILIPS and the Philips Shield Emblem are
registered trademarks of Koninklijke Philips N.V.
and are used under license.
This product has been manufactured by and is sold
under the responsibility of Versuni Holding B.V., and
Versuni Holding B.V. is the warrantor in relation to
this product.
2023 © Versuni Holding B.V.
6608.000.0785.7 (11/07/2023)
EN User manual ID Buku Petunjuk Pengguna
• Always clean the appliance after
use. Do not clean the appliance in a
dishwasher.
• Always unplug the appliance if not
used for a longer period.
• If the appliance is used
improperly or for professional or
semiprofessional purposes, or
if it is not used according to the
instructions in this user manual,
the guarantee becomes invalid
and Philips refuses liability for any
damage caused.
Electromagnetic elds (EMF)
This appliance complies with the applicable standards and
regulations regarding exposure to electromagnetic elds.
2 Your Rice cooker
Congratulations on your purchase, and welcome to Philips!
To fully benet from the support that Philips oers, register your
product at www.philips.com/welcome.
3 What’s in the box (fig. 1)
Rice cooker main unit Measuring cup
Rice and soup 2 in 1 spoon Power cord
Steaming basket User manual
Warranty card
4 Overview (fig. 2)
a
Steam vent
g
Detachable inner lid
b
Lid release button
h
Inner pot
c
Control panel
i
Water level indications
d
Heating element
j
Power socket
e
Main body
k
Cooker base
f
Steam vent cap
Controls overview (g. 3)
l
Display screen
q
Menu button
m
White button
r
Minute button
n
Keep-warm/Cancel button
s
Preset time button
o
Cooking time button
t
Start button
p
Hour button
u
Brown rice button
5 Using the Rice cooker
Before rst use
1 Take out all the accessories from the inner pot. Remove the
packaging material of the inner pot.
2 Before rst use, boil water and clean the Rice cooker.
3 Clean the parts of the Rice cooker thoroughly before using it for
the rst time (see chapter “Cleaning and Maintenance”).
Note
• Make sure all parts are completely dry before you start using
the Rice cooker.
Cooking rice
Cooking function
Estimated
cooking time
Time
regulation
Preset time
White(Nasi
Putih)
1 hour / 1-24 hours
Brown
(Nasi Merah)
2 hours / 1-24 hours
Fast cook
(Masak Cepat)
25 minutes / 1-24 hours
You can cook rice using the White, Brown or fast cook function.
1 Measure rice using the measuring cup provided.
2 Rinse rice, and put the washed rice in the inner pot.
3 Add water to the level indicated on the scale inside the inner
pot that corresponds to the number of cups of rice used. Then
smooth the rice surface.
» For instance, if you cook 4 cups of rice, add water up to the
4-cup level indicated on the scale.
Note
• The level marked inside the inner pot is just an indication.
You can always adjust the water level for dierent types of
grains and your own preference.
• Besides following the water level indications, you may also add
rice and water at 1:1-1.2 ratio for rice cooking.
• Do not exceed the volume indicated or exceed the maximum
water level, as this may cause the appliance to overow.
• For the fast cooking with a large amount of rice, it's
recommended to open the lid after 10-15 minutes to make
sure the optimal taste and cooking result.
4 Wipe o water outside of the inner pot and put it into the
appliance.
Note
• Make sure that the outside of the inner pot is dry and clean,
and that there is no foreign residue on the inside of the
appliance.
5 Close the lid (g. 4), and put the plug in the power socket
(g. 5), and switch on the appliance.
6 Press the White(Nasi Putih) or Brown(Nasi Merah) button
(g. 6), or select the Fast cook(Masak Cepat)function by
pressing the menu button (Menu) (g. 7).
7 Press the start button (Start) to start cooking (g. 8).
8 When the cooking is nished, you will hear 4 beeps and the
selected cooking function light will be o.
9 The Rice cooker will be in keep-warm mode automatically.
» The keep-warm indicator lights up.
Note
• If the voltage is unstable at the area you live, it is possible
that the Rice cooker overows.
• After the cooking is nished, stir the rice and loosen it
immediately to release excessive moisture for uy rice.
• Depending on the cooking conditions, the bottom portion of
the rice may become slightly browned.
• Please stir rice after cooking, and you are recommended to
consume it right after cooking for best nutrition and best taste.
If you would like to keep rice for long hours and for many meals,
it is best to keep rice in sealed plastic containers and keep them
in the refrigerator and reheat it to avoid nutrient loss.
• If you want / need to change selection, you rst need to press
the “Keep warm/ Cancel” (Menghangatkan/Cancel) button.
Cooking porridge/Slow cook
Cooking
function
Estimated
cooking time
Time
regulation
Preset time
Porridge
(Bubur)
2 hours 1-4 hours 1-24 hours
Slow cook 4 hours 3-10 hours 1-24 hours
1 Put ingredients and water into the inner pot.
2 Follow steps 4 to 5 in “Cooking rice”.
Note
• Do not exceed the maximum water level indicated in the
inner pot, as this may cause the Rice cooker to overow.
3 Select the porridge(Bubur) or slow cook function by pressing
the menu button (Menu) (g. 9) (g. 10).
4 Press the start button (Start) to start cooking (g. 8).
5 When the cooking is nished, you will hear 4 beeps and the
selected cooking function light will be o. The Rice cooker will
be in keep warm mode automatically.
» The keep-warm indicator lights up.
Note
• You can use the porridge function to steam food.
• You can use the slow cook function to stew food.
Soup
Cooking
function
Estimated
cooking time
Time
regulation
Preset time
Soup(Sup) 2 hours 1-4 hours 1-24 hours
1 Put beans and water into the inner pot.
2 Follow steps 4 to 5 in “Cooking rice”.
Note
• Do not exceed the maximum water level indicated in the
inner pot, as this may cause the Rice cooker to overow.
3 Select the Soup(Sup) function by pressing the menu button
(Menu) (g. 11).
4 Press the start button (Start) to start cooking (g. 8).
5 When the cooking is nished, you will hear 4 beeps and the
selected cooking function light will be o. The Rice cooker will
be in keep warm mode automatically.
» The keep-warm indicator lights up.
Steaming food
Cooking
function
Estimated
cooking time
Time
regulation
Preset time
Steam
(Kukus)
25 minutes 5-59 minutes /
1 Measure a few cups of water with the measuring cup.
Note
• To avoid boil-dry, add 2 scales of water at least into the inner
pot.
2 Pour the water into the inner pot (g. 12).
3 Put the steam basket into the inner pot.
4 Put the food into the steam basket.
5 Follow steps 4 to 5 in “Cooking rice”.
Note
• Do not exceed the maximum water level indicated in the
inner pot, as this may cause the Rice cooker to overow.
• Add 5 cups of water at least to the inner pot when using the
Steam function.
6 Select the Steam(Kukus) function by pressing the menu button
(Menu) (g. 13).
7 Press the start button (Start) to start cooking (g. 8).
8 When the cooking is nished, you will hear 4 beeps and the
selected cooking function light will be o. The Rice cooker will
be in keep warm mode automatically.
» The keep-warm indicator lights up.
Cake
Cooking
function
Estimated
cooking time
Time
regulation
Preset time
Cake(Kue) 45 minutes / /
1 Whisk the ingredients for cake well.
2 Coat the inner pot with some butter or cooking oil (g. 14), and
then pour the cake mixture into it (g. 15).
3 Follow steps 5 and 6 in “Cooking rice”.
4 Select the Cake function (Kue) by pressing the menu button
(Menu) (g. 16).
5 Press the start button (Start) to start cooking (g. 8).
6 When the cooking is nished, you will hear 4 beeps and the
selected cooking function light will be o. The Rice cooker will
be in keep warm mode automatically.
» The keep-warm indicator lights up.
7 Open the lid and carefully take out the inner pot to cool down.
8 After the inner pot is cool down, put a plate or cake rack on top
of the pot, and then ip over to take the cake out.
Note
• Use a kitchen glove or a cloth, as the plate will be very hot.
• You can cook rice while steaming food. Do not exceed the
volume indicated, as this may cause the Rice cooker to
overow.
• You can adjust the water level as needed.
How to cook cakes
1 Preparation of raw material:
Small quantity: 3 eggs, 100g white sugar (about 2/3 cup), 100g
cake powder (about 1 cup), 50g butter (about 1/3 cup), 18g milk
(about 1/10 cup)
Large quantity: 5 eggs, 180g white sugar (about 1 cup), 180g
cake powder (about 2 cups), 80g butter (about 2/3 cup), 36g
milk (about 1/5 cup)
Note
• The user may adjust the raw material proportion as per
personal tastes.
• Do not put in too much raw material, or the quality will be
aected and even underdone.
2 Mix round white sugar with egg, till the bubbles appear.
Note
• If the temperature of egg is too low, the user may use
insulated water of 40°C to warm it. The cake made will be
soft, loose and elastic.
• Whisk the egg, till the egg material ows down the egg whisk
as silk.
• The vessel and egg whisk must be clean, if they have oil, the
bubbles will be dicult to appear.
• Do not whisk the egg in the inner pot, to avoid scratching the
nonstick coating.
3 Add cake powder, and averagely mix them round by a wooden
spoon.
Note
• Whisk the wooden spoon so as to fully mix the material
round.
4 Add milk and melted butter, quickly mix them round.
Note
• Melt the butter into liquid by insulated warm water.
Adjusting the cooking time
You can set the cooking time for some menus. Refer to the cooking
time table in each chapter for the detailed regulating range.
1 Choose the function you need.
2 To set a dierent cooking time, press the cooking time button
(Waktu Masak) (g. 17), and the default cooking time starts
ashing on the display.
3 Press the hour button (Jam) to set the hour unit (g. 18).
4 After the hour unit is set, wait for a few seconds before the
hour unit is conrmed, and the minute unit starts ashing on
the display.
5 Press the minute button (Menit) to set the minute unit (g. 18).
6 Press the start button to conrm the cooking time and start the
cooking process.
Note
• You can adjust the cooking time only in the Porridge(Bubur),
Soup(Sup) and Steam(Kukus) and function.
Preset time for delayed cooking
You can preset the delayed cooking time for some menus. The preset
timer is available from 1 hour up to 24 hours.
Note
• The preset timer is not available in the Cake(Kue) function.
• The cooking process will be nished by the time the preset
time has elapsed. If the preset time you set is shorten than
the cooking time, the appliance will start the cooking process
immediately.
1 Choose the function you need.
2 To preset time for delayed cooking, press the preset time
button (Atur Waktu), and the default preset time starts ashing
on the display (g. 19).
3 Press the hour button (Jam) to set the hour unit (g. 18).
4 After the hour unit is set, wait for a few seconds before the
hour unit is conrmed, and the minute unit starts ashing on
the display.
5 Press the minute button (Menit) to set the minute unit (g. 18).
6 Press the start button to conrm the preset timer and start the
cooking process.
6 Cleaning and Maintenance
Note
• Unplug the Rice cooker before starting to clean it.
• Wait until the Rice cooker has cooled down suciently before
cleaning it.
Interior
Inside of the top lid and the main body:
• Wipe with a damp cloth.
• Make sure to remove all the food residues stuck to the Rice
cooker.
Heating element:
• Wipe with a damp cloth.
• Remove food residues with a damp cloth.
PHILIPS
PENANAK NASI
HD4515
Daya memasak: 400W
220V 50-60Hz
Negara Pembuat: Cina
Diimpor oleh:
PT Versuni HomeLife Indonesia
Gedung Cibis Nine, lantai 10, Jl. TB Simatupang No. 2,
RT 001/RW 005 Kelurahan Cilandak Timur, Kec. Pasar
Minggu, Kota Adm. Jakarta Selatan, - DKI Jakarta, 12560
- INDONESIA
Negara Pembuat: Cina
No. Reg.: IMKG.1236.07.2023
HD4515

Exterior
Surface of the top lid and outside of the main body:
• Wipe with a cloth damped with soap water.
• Only use soft and dry cloth to wipe the control panel.
• Make sure to remove all the food residues around the
control panel.
Accessories
Spatula, inner pot, and steam vent cap:
• Soak in hot water and clean with sponge.
7 Recycling
Do not throw away the product with the normal household waste
at the end of its life, but hand it in at an ocial collection point for
recycling. By doing this, you help to preserve the environment.
Follow your country’s rules for the separate collection of electrical
and electronic products. Correct disposal helps prevent negative
consequences for the environment and human health.
8 Warranty and support
Versuni oers a two-year warranty after purchase on this product.
This warranty is not valid if a defect is due to incorrect use or poor
maintenance. Our warranty does not aect your rights under law
as a consumer. For more information or for invoking the warranty,
please visit our website www.philips.com/support.
9 Specifications
Model Number HD4515
Cooking power input 400W
Rated capacity 5.0L
Rice capacity 1.8L
10 Troubleshooting
If you encounter problems when using this Rice cooker, check the
following points before requesting service. If you cannot solve the
problem, contact the Philips Consumer Care Center in your country.
Problem Solution
The light on the
button does not
go on.
There is a connection problem. Check if the
power cord is connected to the Rice cooker
properly and if the plug is inserted rmly into
the power outlet.
The light is defective. Take the appliance
to your Philips dealer or a service center
authorized by Philips.
The rice is not
cooked.
There is not enough water. Add water according
to the scale on the inside of the inner pot.
Make sure that there is no foreign residue on
the heating element and the outside of the
inner pot before switching the Rice cooker on.
The heating element is damaged, or the inner
pot is deformed. Take the Rice cooker to your
Philips dealer or a service center authorized
by Philips.
The rice is too
dry and not well
cooked.
Add more water to the rice, and cook for a bit
longer.
The Rice cooker
does not switch
to the keep-
warm mode
automatically.
You might have pressed the keep-warm button
before pressing the start button. In this case
the Rice cooker will be in standby mode after
the cooking is nished.
The temperature control is defective. Take the
appliance to your Philips dealer or a service
center authorized by Philips.
The rice is
scorched.
You have not rinse the rice properly. Rinse the
rice until the water runs clear.
Water spills
out of the Rice
cooker during
cooking.
Make sure that you add water to the level
indicated on the scale inside the inner pot that
corresponds to the number of cups of rice used.
Rice smells bad
after cooking.
Clean the inner pot with some washing
detergent and warm water.
After cooking, make sure the steam vent cap,
inner lid and inner pot is cleaned thoroughly.
Indonesia
1 Penting
Bacalah petunjuk penggunaan ini dengan saksama sebelum
menggunakan Penanak nasi dan simpan sebagai referensi di masa
mendatang.
Bahaya
• Jangan merendam alat dalam air.
Peringatan
• Alat ini tidak dimaksudkan untuk
digunakan oleh orang (termasuk
anak-anak) dengan cacat sik,
indera atau kecakapan mental
yang kurang, atau kurang
pengalaman dan pengetahuan,
kecuali jika mereka diberikan
pengawasan atau petunjuk
mengenai penggunaan alat oleh
orang yang bertanggungjawab bagi
keselamatan mereka.
• Anak kecil harus diawasi untuk
memastikan mereka tidak bermain-
main dengan alat ini.
• Alat ini sebaiknya diletakkan
di tempat yang stabil dan
pegangannya (bila ada) diposisikan
sedemikian rupa agar cairan panas
di dalamnya tidak tumpah.
• Alat ini dimaksudkan untuk
digunakan di rumah tangga dan
pemakaian yang serupa seperti:
• Area dapur staf di toko, kantor,
dan lingkungan kerja lainnya;
• Rumah ladang;
• Oleh klien di hotel, motel, dan
lingkungan berjenis tempat
tinggal lainnya;
• Lingkungan yang menyediakan
tempat tidur dan sarapan.
• Jika set kabel daya rusak, maka
harus diganti dengan set kabel yang
disediakan oleh produsen.
• Alat ini tidak ditujukan untuk
dioperasikan dengan menggunakan
timer eksternal atau sistem remote-
control yang terpisah.
• Periksa apakah voltase pada
alat sesuai dengan voltase
listrik di rumah Anda sebelum
menghubungkan alat.
• Hanya hubungkan alat ke
stopkontak yang telah dihubungkan
ke arde. Selalu pastikan steker
dipasang dengan benar pada
stopkontak listrik.
• Jangan menggunakan alat ini jika
steker, kabel listrik, panci bagian
dalam, gelang penyegel, atau badan
utama rusak.
• Jangan biarkan kabel listrik
menggantung di tepi meja atau di
tempat alat berada.
• Pastikan elemen pemanas, sensor
suhu, dan sisi luar dari panci bagian
dalam, bersih dan kering sebelum
memasang steker ke stopkontak
listrik.
• Jangan menghubungkan steker
pada alat atau menekan tombol apa
pun pada panel kontrol saat tangan
basah.
• PERINGATAN: Pastikan tidak ada
tumpahan yang mengenai konektor
daya untuk mencegah kemungkinan
bahaya.
• PERINGATAN: Selalu ikuti petunjuk
dan gunakan alat dengan benar
untuk mencegah kemungkinan
bahaya.
• Sesuai dengan instruksi yang
tercantum dalam petunjuk
pengguna ini, gunakan kain lembap
yang lembut untuk membersihkan
permukaan yang bersentuhan
dengan makanan dan pastikan
untuk membersihkan semua sisa
makanan yang menempel pada
alat.
• Jangan meletakkan kabel daya di
bawah alat saat digunakan.
• Saat memasang keranjang
kukusan, hindari menyentuh
dinding samping panci bagian
dalam, karena bisa menyebabkan
perubahan bentuk akibat suhu
tinggi.
Perhatian
• PERHATIAN: Permukaan elemen
pemanas akan tetap panas setelah
digunakan.
• Sesuai dengan instalasi yang
ditentukan dalam petunjuk
pengguna ini, gunakan kain lembap
yang lembut untuk membersihkan
permukaan yang bersentuhan
dengan makanan dan pastikan
untuk membersihkan semua sisa
makanan yang menempel pada
alat.
• Jangan sekali-kali menggunakan
aksesori atau komponen apa
pun dari produsen lain atau
yang tidak secara khusus
direkomendasikan oleh Philips. Jika
Anda menggunakan aksesori atau
komponen tersebut, garansi Anda
menjadi batal.
• Jangan biarkan alat ini terkena suhu
yang tinggi atau menempatkannya
di atas kompor atau alat memasak
lainnya yang sedang bekerja atau
masih panas.
• Jangan biarkan alat terkena sinar
matahari langsung.
• Letakkan alat pada permukaan yang
stabil, datar dan rata.
• Selalu masukkan panci bagian
dalam pada alat sebelum Anda
menghubungkan ke stopkontak
listrik dan menghidupkannya.
• Jangan menempatkan panci bagian
dalam secara langsung di atas nyala
api untuk memasak nasi.
• Jangan menggunakan panci bagian
dalam jika sudah berubah bentuk.
• Permukaan alat akan menjadi
panas pada saat dioperasikan. Beri
perhatian ekstra saat menyentuh
alat.
• Berhati-hatilah terhadap uap
panas yang keluar dari lubang uap
sewaktu memasak atau yang keluar
dari alat sewaktu tutupnya dibuka.
Jauhkan tangan dan wajah Anda
dari alat untuk menghindari uap.
• Jangan mengangkat dan
memindahkan alat selagi
dioperasikan.
• Jangan masukkan air melebihi
ukuran maksimum yang ditunjukkan
pada panci bagian dalam guna
mencegah luapan cairan berlebih
yang dapat menimbulkan bahaya.
• Jangan menaruh perabot masak
di panci bagian dalam selagi
memasak, menghangatkan atau
memanaskan nasi.
• Gunakan hanya perabot memasak
yang disediakan. Hindari
menggunakan perabot yang tajam.
• Untuk mencegah tergores, tidak
disarankan memasak bahan yang
bercampur dengan krustasea
(udang-udangan) dan kerang.
Singkirkan kulit yang keras sebelum
memasak.
• Jangan memasukkan barang logam
atau benda asing ke dalam lubang
uap.
• Jangan meletakkan benda
bermagnet pada penutup. Jangan
menggunakan alat di dekat benda
bermagnet.
• Selalu biarkan alat menjadi
dingin terlebih dahulu
sebelum membersihkan atau
memindahkannya.
• Selalu bersihkan setiap kali
selesai menggunakan alat. Jangan
membersihkan alat dengan mesin
cuci piring.
• Selalu cabut steker dari alat apabila
tidak digunakan dalam waktu yang
lama.
• Jika alat digunakan dengan cara
yang tidak semestinya atau untuk
tujuan profesional atau semi-
profesional, atau tidak digunakan
sesuai instruksi dalam petunjuk
penggunaan ini, garansi akan
dianggap tidak berlaku dan Philips
tidak bertanggung jawab atas
kerusakan yang ditimbulkan.
Medan elektromagnet (EMF)
Alat ini telah memenuhi standar dan peraturan yang berlaku terkait
paparan medan elektromagnet.
2 Penanak nasi Anda
Selamat atas pembelian Anda dan selamat datang di Philips!
Untuk memanfaatkan sepenuhnya dukungan yang ditawarkan
Philips, daftarkan produk Anda di www.philips.com/welcome.
3 Yang terdapat dalam kotak (gbr. 1)
Unit utama penanak nasi Gelas ukur
Sendok nasi dan sup 2-in-1 Kabel listrik
Keranjang kukusan Panduan Pengguna
Kartu garansi
4 Gambaran umum (gbr. 2)
a
Lubang uap
g
Tutup bagian dalam lepas-
pasang
b
Tombol pembuka tutup
h
Panci bagian dalam
c
Panel kontrol
i
Indikator ukuran air
d
Elemen pemanas
j
Soket daya
e
Kabel alat
k
Alas penanak
f
Ventilasi uap
Keterangan kontrol (gbr. 3)
l
Layar tampilan
q
Tombol Menu
m
Tombol putih
r
Tombol menit
n
Tombol Tetap hangat/Batal
s
Tombol waktu preset
o
Tombol waktu memasak
t
Tombol mulai
p
Tombol jam
u
Tombol beras merah
5 Menggunakan Penanak nasi
Sebelum penggunaan pertama kali
1 Lepaskan semua aksesori dari panci bagian dalam. Lepaskan
bahan kemasan panci bagian dalam.
2 Sebelum penggunaan pertama kali, rebus air dan bersihkan
Penanak nasi.
3 Bersihkan bagian-bagian Penanak nasi dengan saksama
sebelum menggunakannya untuk pertama kali (lihat bab
“Membersihkan dan Memelihara”).
Catatan
• Pastikan semua bagian benar-benar kering sebelum Anda
mulai menggunakan Penanak nasi.
Menanak nasi
Fungsi memasak
Perkiraan
waktu
memasak
Pengaturan
waktu
Waktu
preset
Putih(Nasi Putih) 1 jam / 1-24 jam
Merah(Nasi Merah) 2 jam / 1-24 jam
Fast cook
(Masak Cepat)
25 menit / 1-24 jam
Anda dapat menggunakan fungsi Putih, Merah, atau Masak Cepat
untuk menanak nasi.
1 Takar beras menggunakan gelas ukur yang disediakan.
2 Bilas beras, dan masukkan beras yang sudah dicuci ke panci
bagian dalam.
3 Tambahkan air sampai ukuran yang ditunjukkan pada skala
di bagian dalam panci sesuai jumlah gelas takar beras yang
digunakan. Lalu ratakan permukaan beras.
» Misalnya, untuk 4 cangkir beras, tambahkan air hingga
seukuran 4 cangkir yang ditunjukkan pada skala.
Catatan
• Ukuran yang ditunjukkan di panci bagian dalam hanya
sebagai indikasi saja. Anda selalu dapat menyesuaikan
ketinggian air untuk jenis beras yang berbeda dan preferensi
Anda.
• Selain mengikuti indikasi batas air, Anda juga dapat
menambahkan beras dan air dengan rasio 1:1-1,2 untuk
memasak nasi.
• Jangan melampaui volume yang ditunjukkan atau melebihi
level air maksimum, karena hal ini dapat menyebabkan alat
meluap.
• Untuk memasak cepat dengan jumlah beras yang banyak,
Anda disarankan membuka tutupnya setelah 10-15 menit
untuk memastikan rasa dan hasil memasak optimal.
4 Seka air pada sisi luar panci bagian dalam, kemudian masukkan
panci ke dalam alat.
Catatan
• Pastikan sisi luar panci bagian dalam sudah kering dan
bersih, dan tidak ada benda asing apa pun pada sisi dalam
alat.
5 Pasang tutupnya (gbr. 4), hubungkan steker ke stopkontak
(gbr. 5), dan hidupkan alat.
6 Tekan tombol Putih (Nasi Putih) atau Merah (Nasi Merah)
(gbr. 6), atau pilih fungsi Fast Cook (Masak Cepat) dengan
menekan tombol menu (Menu) (gbr. 7).
7 Tekan tombol mulai (Start) untuk mulai memasak (gbr. 8).
8 Setelah proses memasak selesai, Anda akan mendengar 4
bunyi bip dan lampu fungsi memasak yang dipilih akan mati.
9 Penanak nasi akan secara otomatis masuk ke mode tetap-
hangat.
» Indikator tetap-hangat menyala.
Catatan
• Jika tegangan listrik tidak stabil di daerah tempat Anda
tinggal, ada kemungkinan Penanak nasi akan meluap.
• Setelah selesai memasak, aduk-aduk dan urai nasi dengan
segera untuk mengeluarkan uap lembap berlebih agar nasi
lebih pulen.
• Tergantung dari kondisi memasak, bagian bawah nasi
mungkin menjadi sedikit kecokelatan.
• Aduk nasi setelah memasak dan Anda disarankan untuk
menyantapnya segera setelah dimasak untuk nutrisi dan cita
rasa terbaik. Jika Anda ingin menyimpan nasi selama berjam-
jam dan untuk beberapa kali makan, sebaiknya simpan nasi
dalam wadah plastik kedap udara dan masukkan ke dalam
kulkas, lalu panaskan ulang, untuk mencegah hilangnya
nutrisi.
• Jika Anda ingin/perlu mengubah pilihan, pertama-tama Anda
harus menekan tombol “Keep warm/Cancel” (Tetap hangat/
Batal).
Memasak bubur/Slow cook
Fungsi
memasak
Perkiraan waktu
memasak
Pengaturan
waktu
Waktu
preset
Porridge
(Bubur)
2 jam 1-4 jam 1-24 jam
Slow cook 4 jam 3-10 jam 1-24 jam
1 Masukkan bahan-bahan dan air ke panci bagian dalam.
2 Ikuti langkah 4 sampai 5 dalam “Memasak nasi”.
Catatan
• Jangan melebihi tanda batas air maksimum yang tertera
pada panci bagian dalam, karena ini dapat menyebabkan
Penanak nasi meluap.
3 Pilih fungsi Porridge (Bubur) atau Slow cook dengan menekan
tombol menu (Menu) (gbr. 9) (gbr. 10).
4 Tekan tombol mulai (Start) untuk mulai memasak (gbr. 8).
5 Setelah proses memasak selesai, Anda akan mendengar 4
bunyi bip dan lampu fungsi memasak yang dipilih akan mati.
Penanak nasi akan otomatis beralih ke mode tetap-hangat.
» Indikator tetap-hangat menyala.
Catatan
• Anda dapat menggunakan fungsi bubur untuk mengukus
makanan.
• Gunakan fungsi Slow cook untuk membuat makanan rebusan
(stew).
Soup
Fungsi
memasak
Perkiraan waktu
memasak
Pengaturan
waktu
Waktu
preset
Soup(Sup) 2 jam 1-4 jam 1-24 jam
1 Masukkan kacang dan air ke panci bagian dalam.
2 Ikuti langkah 4 sampai 5 dalam “Memasak nasi”.
Catatan
• Jangan melebihi tanda batas air maksimum yang tertera
pada panci bagian dalam, karena ini dapat menyebabkan
Penanak nasi meluap.
3 Pilih fungsi Soup (Sup) dengan menekan tombol menu (Menu)
(gbr. 11).
4 Tekan tombol mulai (Start) untuk mulai memasak (gbr. 8).
5 Setelah proses memasak selesai, Anda akan mendengar 4
bunyi bip dan lampu fungsi memasak yang dipilih akan mati.
Penanak nasi akan otomatis beralih ke mode tetap-hangat.
» Indikator tetap-hangat menyala.
Mengukus makanan
Fungsi
memasak
Perkiraan waktu
memasak
Pengaturan
waktu
Waktu
preset
Steam(Kukus) 25 menit 5-59 menit /
1 Takar beberapa gelas air menggunakan gelas ukur.
Catatan
• Agar tidak kehabisan air saat direbus, tambahkan minimal 2
takar air ke panci bagian dalam.
2 Tuangkan air ke dalam panci (gbr. 12).
3 Taruh keranjang kukus di panci bagian dalam.
4 Taruh makanan ke dalam keranjang kukus.
5 Ikuti langkah 4 sampai 5 dalam “Memasak nasi”.
Catatan
• Jangan melebihi tanda batas air maksimum yang tertera
pada panci bagian dalam, karena ini dapat menyebabkan
Penanak nasi meluap.
• Tambahkan paling sedikit 5 cangkir air ke panci bagian dalam
bila menggunakan fungsi Kukus.
6 Pilih fungsi Steam (Kukus) dengan menekan tombol menu
(Menu) (gbr. 13).
7 Tekan tombol mulai (Start) untuk mulai memasak (gbr. 8).
8 Setelah proses memasak selesai, Anda akan mendengar 4
bunyi bip dan lampu fungsi memasak yang dipilih akan mati.
Penanak nasi akan otomatis beralih ke mode tetap-hangat.
» Indikator tetap-hangat menyala.
Kue
Fungsi
memasak
Perkiraan waktu
memasak
Pengaturan
waktu
Waktu
preset
Cake (Kue) 45 menit / /
1 Kocok bahan-bahan untuk membuat kue.
2 Oleskan mentega atau minyak goreng pada panci bagian
dalam (gbr. 14), kemudian tuangkan adonan kue ke dalamnya
(gbr. 15).
3 Ikuti langkah 5 dan 6 dalam “Memasak nasi”.
4 Pilih fungsi Cake (Kue) dengan menekan tombol menu (Menu)
(gbr. 16).
5 Tekan tombol mulai (Start) untuk mulai memasak (gbr. 8).
6 Setelah proses memasak selesai, Anda akan mendengar 4
bunyi bip dan lampu fungsi memasak yang dipilih akan mati.
Penanak nasi akan otomatis beralih ke mode tetap-hangat.
» Indikator tetap-hangat menyala.
7 Buka penutupnya dan keluarkan panci bagian dalam dengan
hati-hati untuk mendinginkannya.
8 Setelah panci bagian dalam mendingin, letakkan piring atau
rak kue di atas panci, lalu balikkan panci untuk mengeluarkan
kue.
Catatan
• Gunakan sarung tangan dapur atau kain, karena piring akan
menjadi sangat panas.
• Anda dapat memasak nasi sambil mengukus makanan.
Jangan melebihi volume yang tertera, karena dapat
mengakibatkan Penanak nasi meluap.
• Anda dapat menyesuaikan ketinggian air sesuai kebutuhan.
Cara memasak kue
1 Penyiapan bahan mentah:
Jumlah kecil: 3 butir telur, 100 g gula putih (sekitar 2/3 cangkir),
100 g tepung kue (sekitar 1 cangkir), 50 g mentega (sekitar 1/3
cangkir), 18 g susu (sekitar 1/10 cangkir)
Jumlah besar: 5 butir telur, 180 g gula pasir (sekitar 1 cangkir),
180 g tepung kue (sekitar 2 cangkir), 80 g mentega (sekitar 2/3
cangkir), 36 g susu (sekitar 1/5 cangkir)
Catatan
• Pengguna dapat menyesuaikan proporsi bahan mentah
sesuai selera pribadi.
• Jangan masukkan terlalu banyak bahan mentah, atau
kualitas kue akan terpengaruh dan bahkan kurang matang.
2 Aduk gula putih dengan telur, hingga bergelembung.
Catatan
• Jika suhu telur terlalu rendah, pengguna bisa menggunakan
air termos bersuhu 40°C untuk menghangatkannya. Kue yang
dibuat akan lembut, empuk, dan elastis.
• Kocok telur sampai hasil kocokan yang menetes dari
pengocok tampak mulus bagai sutra.
• Mangkuk dan pengocok telur harus bersih, jika berminyak,
gelembung akan sulit muncul.
• Jangan mengocok telur menggunakan panci bagian dalam, agar
tidak menggores lapisan anti-lengketnya.
3 Tambahkan tepung kue, dan aduk rata dengan sendok kayu.
Catatan
• Aduk adonan menggunakan sendok kayu sampai betul-betul
rata.
4 Tambahkan susu dan mentega yang sudah dilelehkan, lalu
aduk cepat hingga rata.
Catatan
• Cairkan mentega dengan air hangat dari termos.
Menyesuaikan waktu memasak
Anda dapat menyetel waktu memasak untuk beberapa menu. Lihat
tabel waktu memasak pada masing-masing bab untuk rentang
pengaturan yang terperinci.
1 Pilih fungsi yang Anda perlukan.
2 Untuk menyetel waktu memasak yang berbeda, tekan tombol
waktu masak (Waktu Masak) (gbr. 17), dan waktu memasak
default akan mulai berkedip pada layar.
3 Tekan tombol jam (Jam) untuk mengatur unit jam (gbr. 18).
4 Setelah unit jam diatur, tunggu beberapa detik sebelum unit
jam dikonrmasi, dan unit menit mulai berkedip pada layar.
5 Tekan tombol menit (Menit) untuk menyetel unit menit (gbr. 18).
6 Tekan tombol start untuk mengonrmasi waktu memasak dan
memulai proses memasak.
Catatan
• Anda dapat menyesuaikan waktu memasak hanya dalam
fungsi Porridge(Bubur), Soup(Sup), dan Steam(Kukus).
Waktu preset untuk memasak yang ditunda
Anda dapat mengatur waktu preset yang ditunda untuk beberapa
menu. Pengatur waktu preset tersedia mulai 1 hingga 24 jam.
Catatan
• Pengatur waktu preset tidak tersedia untuk fungsi Cake (Kue).
• Proses memasak akan selesai ketika waktu preset lewat.
Jika waktu preset yang Anda atur lebih singkat dari waktu
memasak, alat akan langsung memulai proses memasak.
1 Pilih fungsi yang Anda perlukan.
2 Untuk mengatur waktu untuk menunda proses memasak, tekan
tombol waktu preset (Atur Waktu), dan waktu preset default
akan mulai berkedip pada layar (gbr. 19).
3 Tekan tombol jam (Jam) untuk mengatur unit jam (gbr. 18).
4 Setelah unit jam diatur, tunggu beberapa detik sebelum unit
jam dikonrmasi, dan unit menit mulai berkedip pada layar.
5 Tekan tombol menit (Menit) untuk menyetel unit menit (gbr. 18).
6 Tekan tombol mulai untuk mengonrmasi pengatur waktu
preset dan memulai proses memasak.
6 Membersihkan dan Memelihara
Catatan
• Cabut steker Penanak nasi sebelum membersihkannya.
• Tunggu sampai Penanak nasi cukup dingin sebelum
membersihkannya.
Bagian dalam
Bagian dalam tutup atas dan badan utama:
• Seka dengan kain lembap.
• Pastikan untuk membersihkan semua sisa makanan yang
menempel pada Penanak nasi.
Elemen pemanas:
• Seka dengan kain lembap.
• Bersihkan sisa makanan dengan kain lembap.
Bagian luar
Permukaan tutup atas dan bagian luar bodi utama:
• Seka dengan kain yang dibasahi air sabun.
• Gunakan hanya kain lembut dan kering untuk menyeka
panel kontrol.
• Pastikan untuk membersihkan semua sisa makanan di
sekeliling panel kontrol.
Aksesori
Spatula, panci bagian dalam, dan tutup lubang uap:
• Rendam di dalam air panas dan bersihkan dengan spons.
7 Daur ulang
Jangan membuang alat bersama limbah rumah tangga biasa
jika alat sudah tidak bisa dipakai lagi, tetapi serahkanlah ke titik
pengumpulan resmi untuk didaur ulang. Dengan melakukan hal ini,
Anda ikut membantu melestarikan lingkungan.
Patuhi peraturan mengenai pengumpulan produk-produk elektrik
dan elektronik di negara Anda. Pembuangan produk secara benar
akan membantu mencegah dampak negatif terhadap lingkungan
dan kesehatan manusia.
8 Garansi dan dukungan
Versuni menawarkan garansi dua tahun setelah pembelian produk
ini. Garansi ini tidak berlaku jika cacat disebabkan oleh kesalahan
penggunaan atau pemeliharaan yang buruk. Garansi kami tidak
mempengaruhi hak berdasarkan hukum Anda sebagai konsumen.
Untuk informasi lebih lanjut atau untuk permohonan terkait
garansi, silakan kunjungi situs web kami www.philips.com/support.
9 Spesifikasi
Nomor Model HD4515
Daya memasak 400W
Kapasitas terukur 5,0L
Kapasitas beras 1,8L
10 Penanganan masalah
Jika Anda menemukan masalah saat menggunakan Penanak nasi
ini, periksa poin berikut sebelum menggunakan layanan servis. Jika
masalah tidak dapat teratasi, hubungi Pusat Layanan Pelanggan
Philips di negara Anda.
Masalah Solusi
Lampu pada tombol
tidak menyala.
Ada masalah sambungan. Periksa apakah
kabel listrik sudah tersambung dengan
benar ke Penanak nasi dan apakah
steker sudah terpasang dengan benar ke
stopkontak.
Lampu rusak. Bawalah alat ke dealer
Philips Anda atau ke pusat layanan resmi
Philips.
Nasi tidak matang.
Air tidak mencukupi. Tambahkan air sesuai
dengan skala pada panci bagian dalam.
Pastikan tidak ada endapan asing pada
elemen pemanas dan di luar panci bagian
dalam sebelum menghidupkan Penanak
nasi.
Elemen pemanas rusak, atau panci bagian
dalam sudah berubah bentuk. Bawalah
Penanak nasi ke dealer Philips atau ke
pusat layanan resmi Philips.
Nasi terlalu kering
dan kurang matang.
Tambahkan lebih banyak air ke dalam nasi
dan masak sedikit lebih lama.
Penanak nasi tidak
secara otomatis
beralih ke mode
tetap-hangat.
Anda mungkin telah menekan tombol
tetap hangat sebelum menekan tombol
mulai. Dalam hal ini, penanak nasi akan
berada pada mode siaga setelah memasak
selesai.
Kontrol suhu rusak. Bawalah alat ke dealer
Philips Anda atau ke pusat layanan resmi
Philips.
Nasi gosong.
Anda tidak membilas beras dengan benar.
Cucilah beras hingga airnya benar-benar
tiris.
Air tumpah dari
Penanak nasi
selama memasak.
Pastikan Anda menambah air hingga
ukuran yang ditunjukkan pada skala di
panci bagian dalam sesuai dengan jumlah
gelas takar beras yang dipakai.
Nasi berbau tidak
enak setelah
memasak.
Bersihkan panci bagian dalam
menggunakan deterjen cuci dan air
hangat.
Setelah memasak, pastikan tutup lubang
uap, tutup bagian dalam dan panci bagian
dalam dibersihkan sepenuhnya.
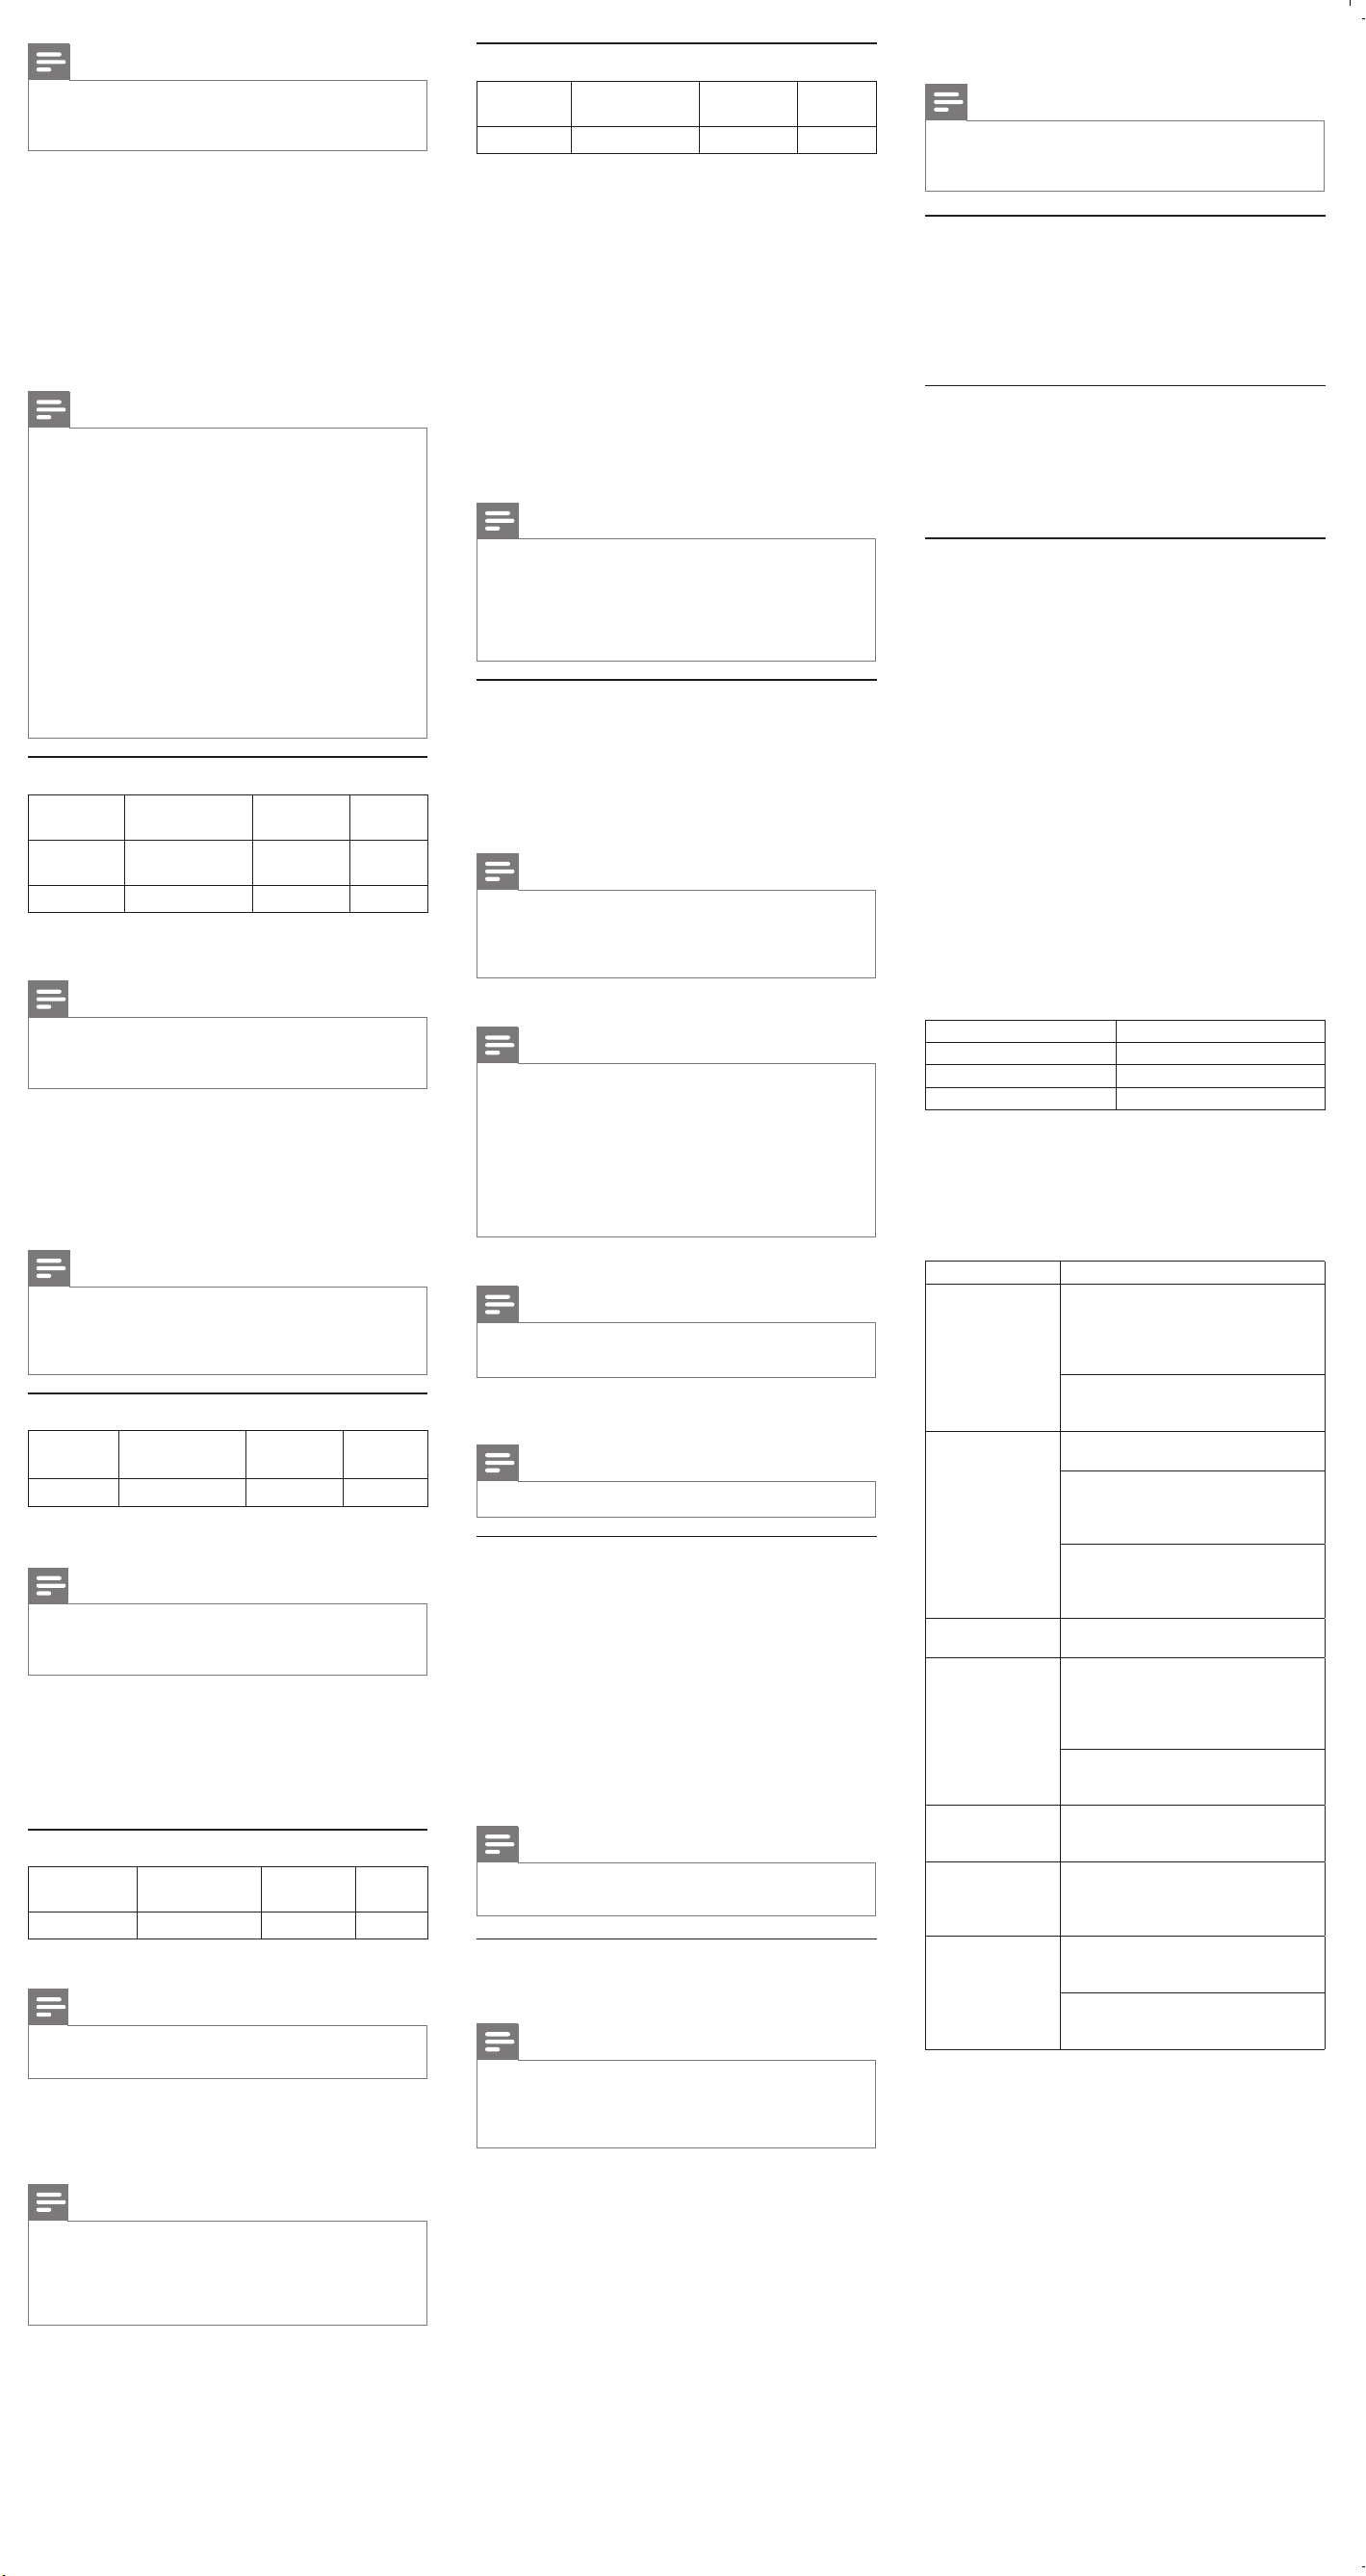