Loading ...
Loading ...
Loading ...
14
Replacing the Scraper Blade
IMPORTANT: Only use original replacement parts specied for
this snow blower.
You can purchase a replacement scraper bar (Model
iON18SB-39) and other genuine replacement parts by visiting
us online at snowjoe.com or calling our toll-free customer
service helpline at 1-866-SNOWJOE (1-866-766-9563).
The use of parts that do not meet the original equipment
specications may lead to improper performance of the snow
blower, may compromise operator safety and will void the
manufacturer's warranty.
1. Turn o the snow blower, remove the batteries and wait
until the snow blower comes to complete standstill.
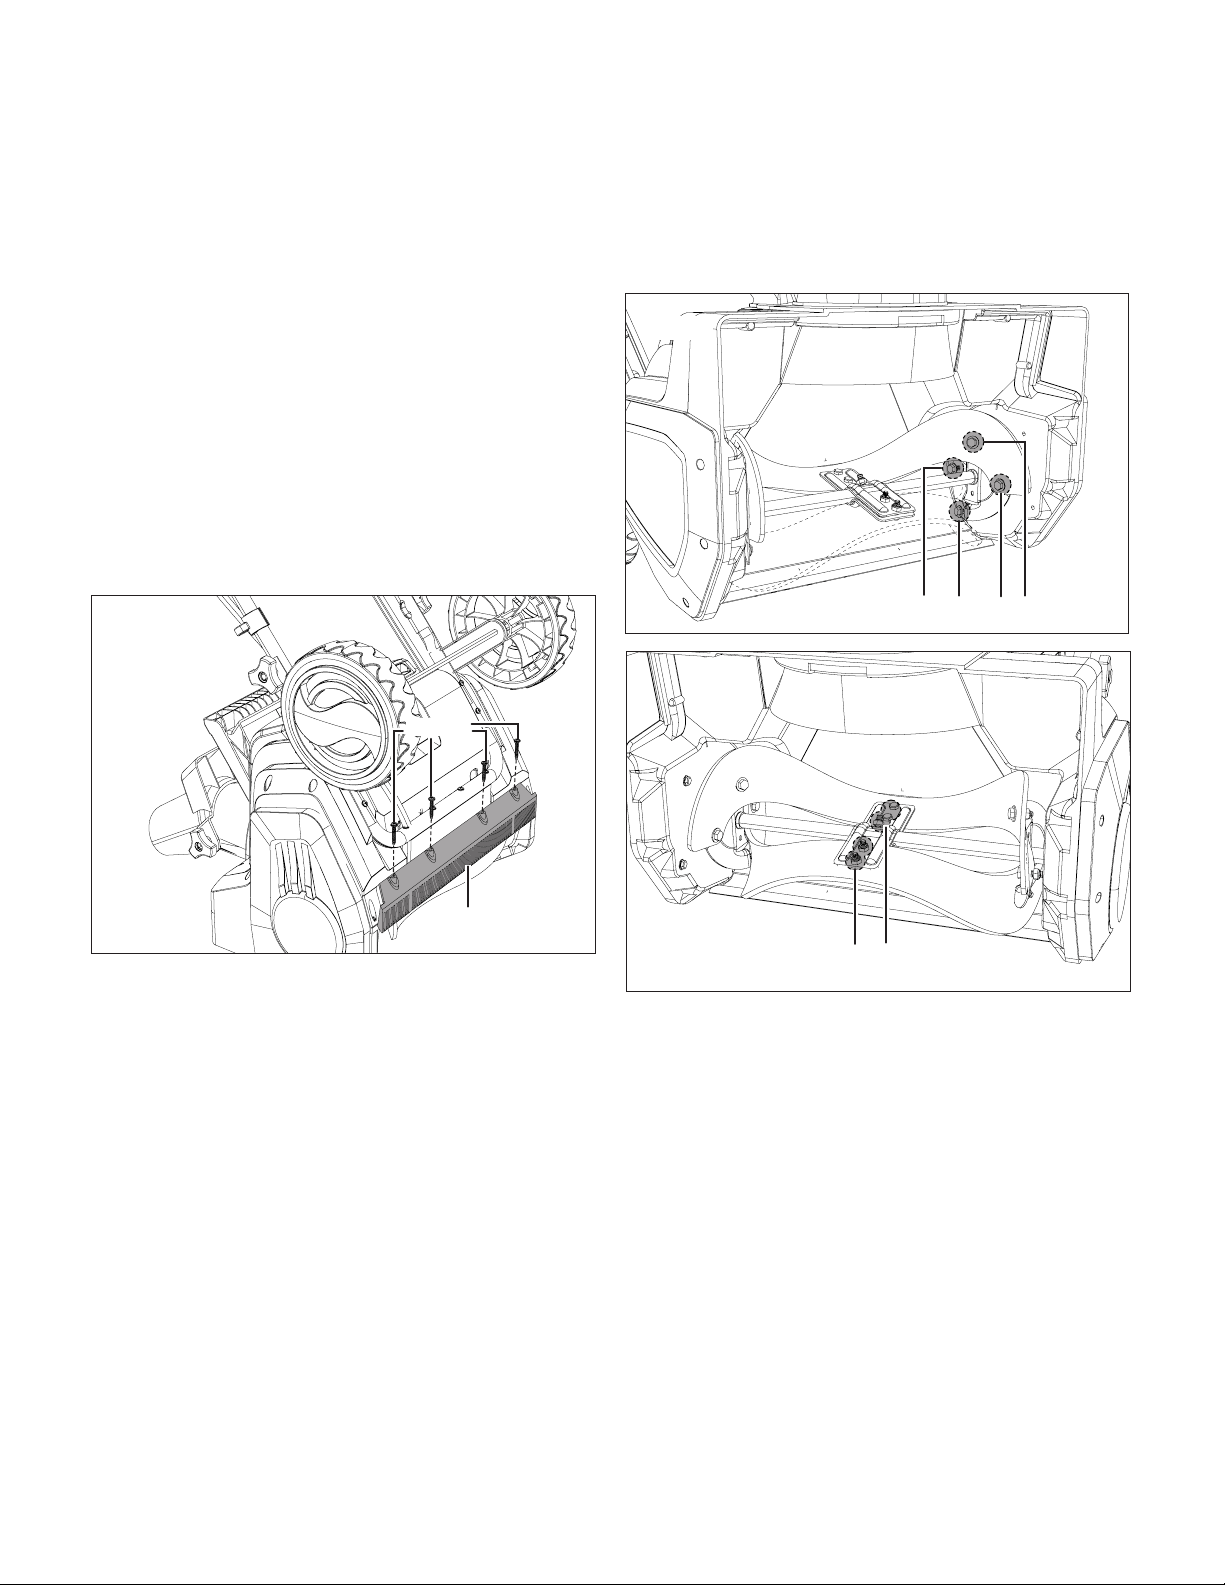
2. The scraper blade is located at the base of the snow
blower beneath the auger housing. Detach the worn
scraper bar from the snow blower by removing the 4
screws that hold it in place (Fig. 18).
3. Install the new scraper blade and fasten it securely to the
snow blower with 4 screws (Fig. 18).
Replacing the Auger Blades
IMPORTANT: Only use original replacement parts specied for
this snow blower.
You can purchase a replacement auger blade (Model
24V-X2-SB18U-AUGER) and other genuine replacement parts
by visiting us online at snowjoe.com or calling our toll-free
customer service helpline at 1-866-SNOWJOE
(1-866-766-9563). The use of parts that do not meet the
original equipment specications may lead to improper
performance of the snow blower, may compromise operator
safety and will void the manufacturer's warranty.
NOTE: When replacing worn auger blades, pay close attention
to any dierent types of bolts, washers and nuts and where
they are positioned. This will ensure that all parts are installed
properly and securely.
1. Turn o the snow blower, remove the batteries and wait
until the snow blower comes to complete standstill.
2. Detach the worn auger blades by removing the 4 sets of
nuts, washers and bolts used to secure the auger blades
on each sides, and the 5 sets of nuts and bolts used to
secure the blades in the middle (Figs. 19 – 20).
3. Install the new blades by tightening the 13 sets of
hardware on both sides and the middle.
Proper Care for Batteries + Charger
mWARNING! To reduce the risk of injury, always unplug
the charger and remove the battery packs from the charger
before performing any maintenance task. Never disassemble
the battery packs or charger. Contact your Snow Joe
®
+
Sun Joe
®
dealer or the Snow Joe
®
+ Sun Joe
®
customer
service center for ALL repairs.
1. To reduce the risk of injury and damage, never immerse
your battery packs or charger in liquid or allow any liquid
to ow inside these components.
2. Clean out dust and debris from charger vents and
electrical contacts by blowing with compressed air.
3. Use only mild soap on a damp cloth to clean the battery
packs and charger, keeping away from all electrical
contacts. Certain cleaning agents and solvents are harmful
to plastics and other insulated parts. Some of these
Fig. 18
Scraper blade
Screws
Fig. 19
Bolts, washers and nuts on sides
Fig. 20
Bolts and nuts in the middle
Loading ...
Loading ...
Loading ...