Loading ...
Loading ...
Loading ...

10
7. When charging is complete, remove the battery from the
charger by pulling the push lock button and sliding the
battery backward to unlock it from the charger (Fig. 10).
8. Timely recharging of the battery will help prolong the
battery's life. You must recharge the battery pack when
you notice a drop in the equipment's power.
IMPORTANT! Never allow the battery pack to become fully
discharged as this will cause irreversible damage to the
battery.
Charging a Hot or Cold Battery Pack
A red and green ashing indicator light on the charger
indicates that the battery pack temperature is outside
the charging range. Once the pack is within the acceptable
range, normal charging will take place and the red light will
be continuous. Hot or cold battery packs may take longer
to charge.
Operation
m
WARNING! Keep the area to be cleared free of stones,
toys or other foreign objects that the rotor blades might pick
up and throw. Such items could be covered by snow and are
easy to overlook, so be sure to conduct a thorough inspection
of the area before beginning work.
NOTE: Before using this machine, make sure that the snow
blower’s roll shaft and rubber plates are rmly secured with
screws, and that the rubber plates are facing the correct
direction. Perform a test run to ensure that the rotor
turns freely.
Starting the Machine
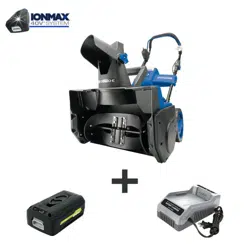
NOTE: While it is recommended to use the supplied iONMAX
iBAT40XR PRO SERIES battery pack with the iON PRO
snow blower for optimal performance, the iON PRO is also
compatible with any iONMAX iBAT40 Series battery packs
should you wish to use these batteries with this machine.
1. Open the battery compartment cover and slide the battery
down until it clicks to lock it into position (Fig. 11).
2. To start the cordless snow blower, rst press the safety
switch button found alongside the switch housing
(Fig. 12).
3. While depressing the safety switch button, pull the
ON/OFF switch lever toward you. Once the machine
powers on, release the safety switch button and begin
operation (Fig. 13). The machine can only be started by
depressing the safety switch button rst, followed by
squeezing the ON/OFF switch lever; reverse operation will
not start the machine.
Fig. 10
Push lock button
Battery Pack
Temperature
Lithium-Ion Charging Status
Too hot Flashing Not charging
Normal range Continuous Normal charging
Too cold Flashing Not charging
Red Charger
Indicator Light
Charging
Status
Fig. 11
Battery
Fig. 12
Safety switch button
Loading ...
Loading ...
Loading ...