
Loading ...
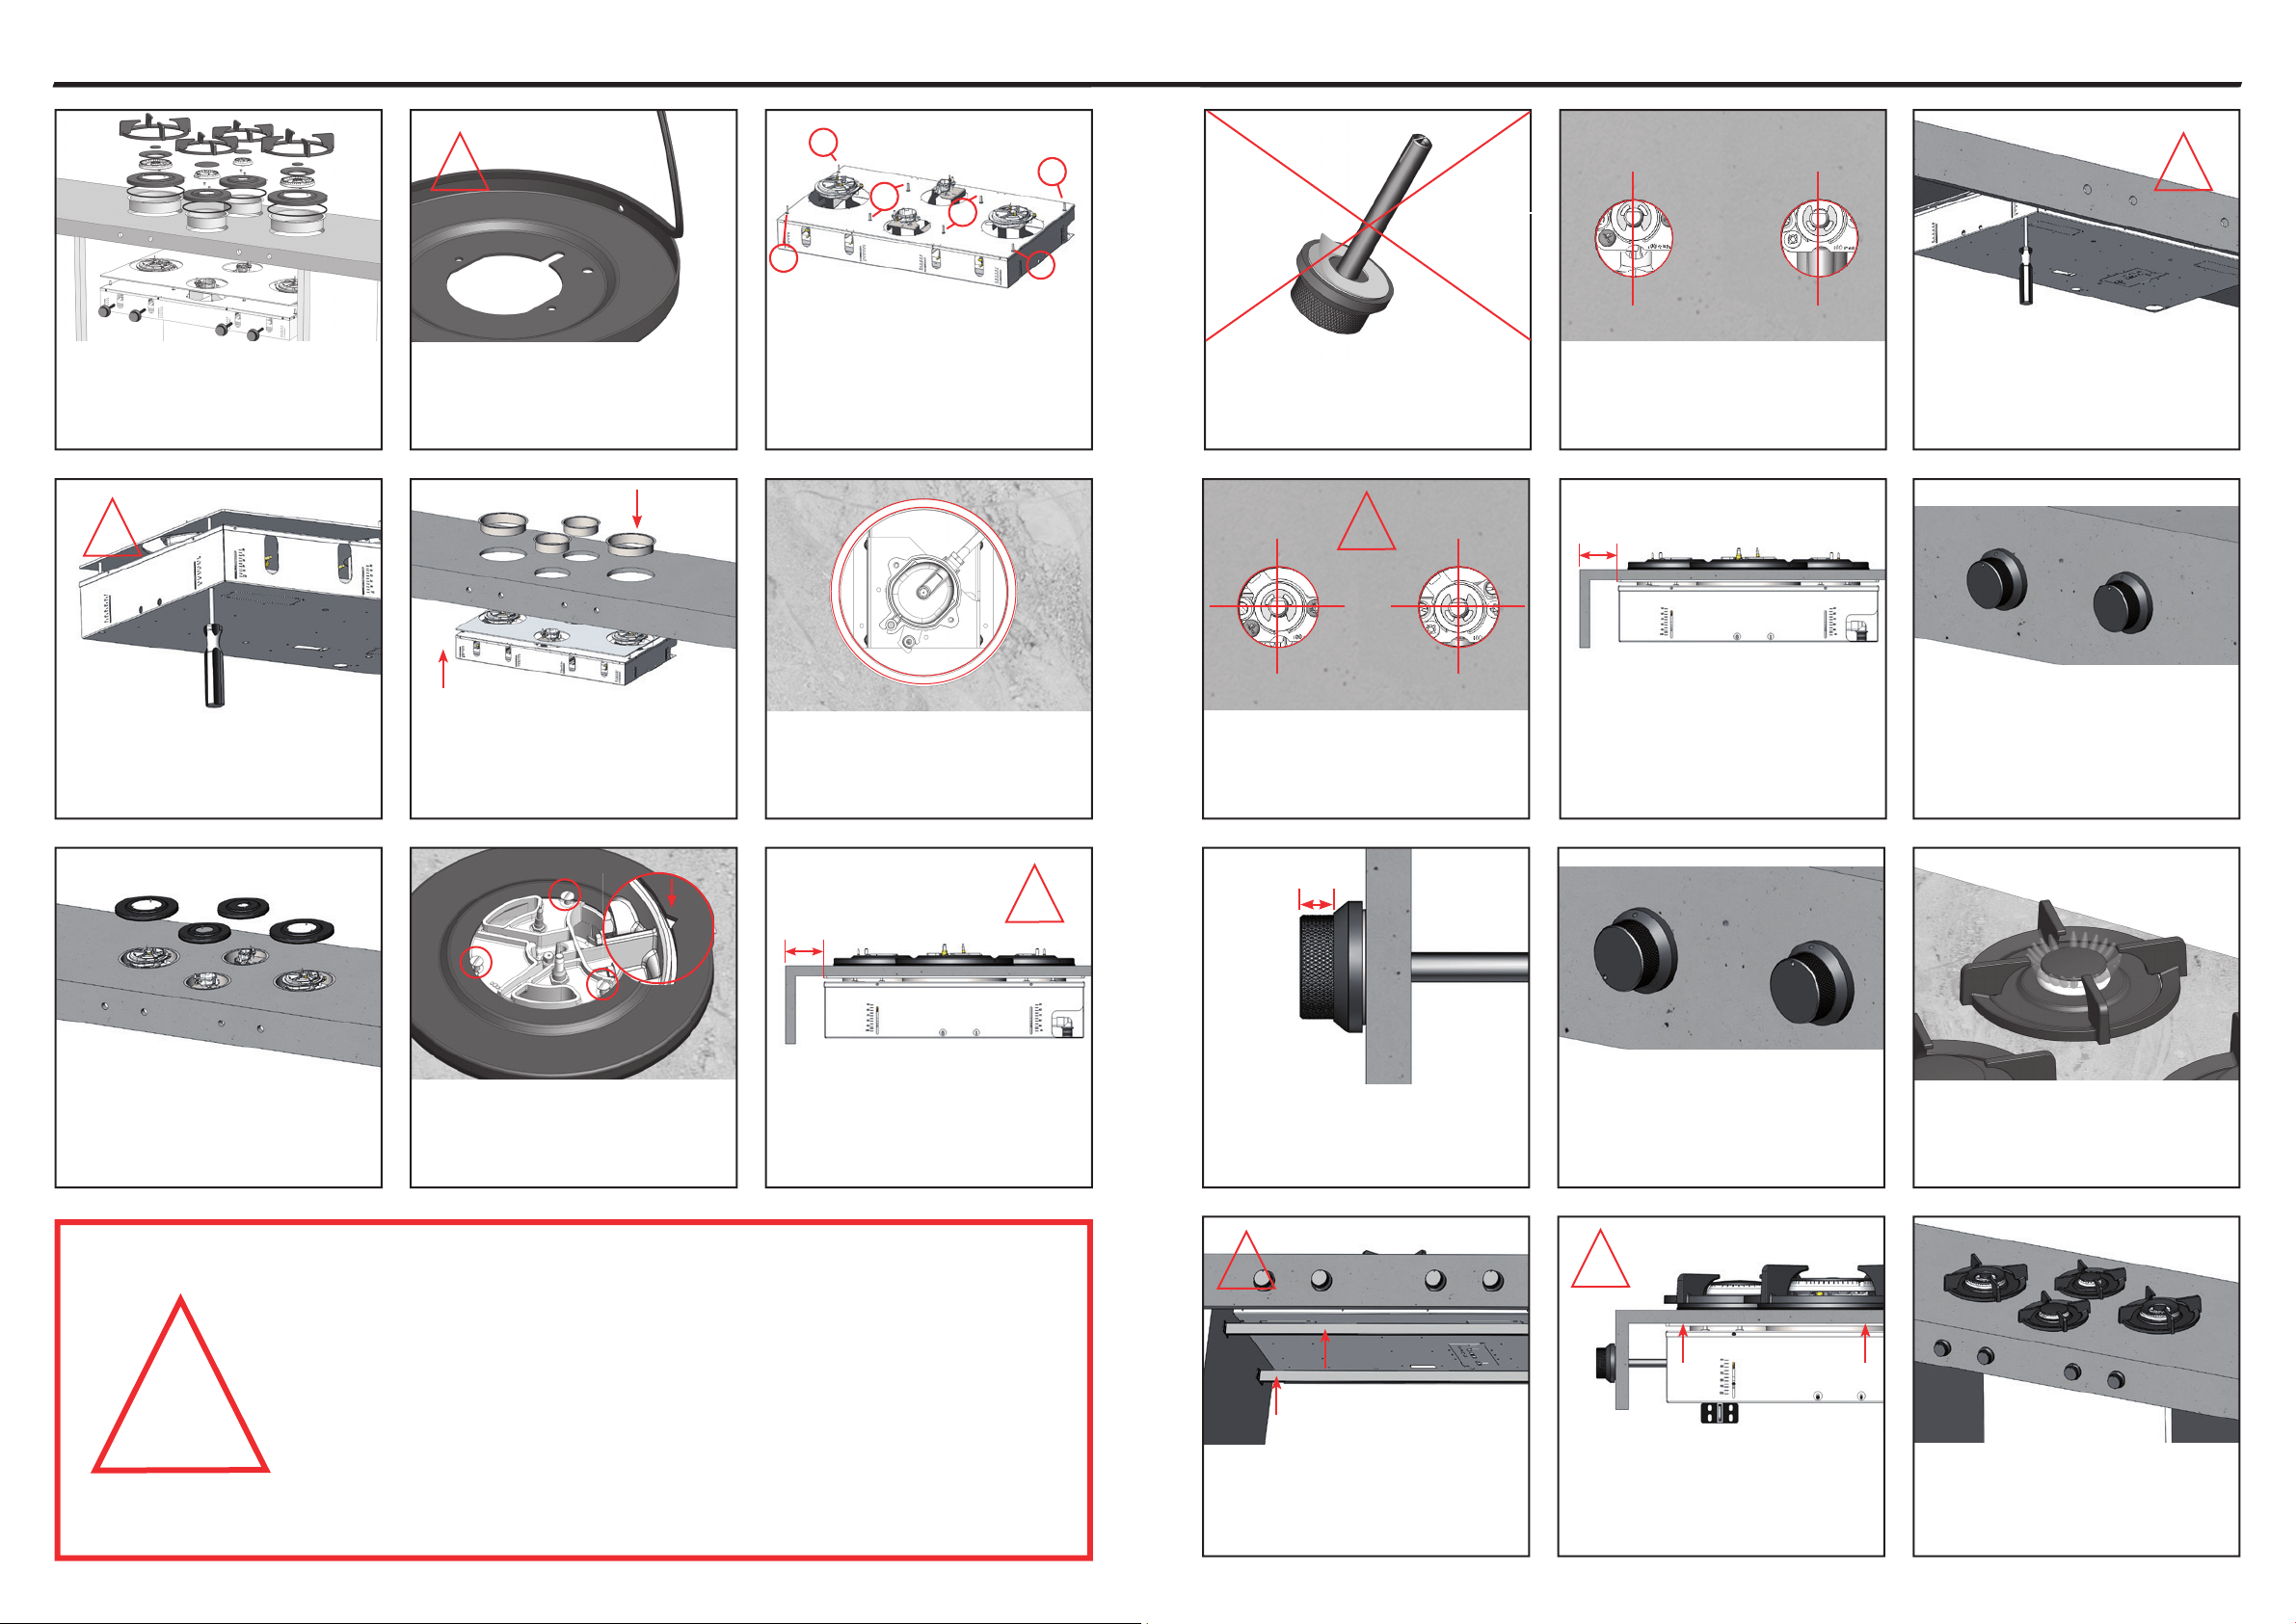
11. Slide the unit carefully into position
until the gas taps are vertically aligned
with the cutouts in the front frame (or
blende).
21. The unit is now ready for use.
10. Note: the adhesive strip under the
sealing scale of the knob may not yet be
removed.
7. Place the heat shields including the
sealing ring (step 2) on the burners and
screw them with the supplied screws.
13. Correct centered gas taps.
12. Tighten the set screws from the back
to the front until the gas taps are centered
with the cutouts. Check that all screws are
tightened.
!
16. Check whether the knobs stick out
sufficiently. The knobs should have a
distance of 13-15 mm above the sealing
scales.
17. Check that the knobs turn smoothly
and return to the rest position after
pressing. If necessary, remove the sealing
scale and replace them again.
19. Support the unit with the double
PITT
®
cooking support set. (see enclosed
installation instructions)
18. Connect the unit to gas and electricity
and ignite the burners. If the flames go
out after ignition, the knobs have to be
adjusted again (step 9).
Installation instructions Front Side
1. Overview of the various parts.
2. Carefully press the sealing ring over
the edge of the heat shield. Check
whether the ring fits well in its entirety.
!
3. Overview of the set screws (S).
S
5. Place the flanges in the designated
cutouts and position the unit carefully
under the worktop. Check that the heat
conductor is positioned correctly.
20. Check that the heat conductor makes
full contact with the worktop.
!
6. Check that the flanges are centered in
the cutouts. Note: if this is not the case,
the flanges will not function properly.
4. Turn all set screws back to approxi-
mately 3 mm above the unit. Then place
the heat conductor on the unit.
8. Always make sure that the V-shaped
indicator is in line with the shaft of the
burner housing of the wok burner. This
heat shield is attached with three screws.
15. Remove the adhesive strip from the
sealing scale. Press the knob and the
sealing scale as a one on the gas tap, so
that they are centered and aligned.
!
!
9. Measure the distance between the
front of the unit and the front frame (or
blende). This distance must be 75mm.
75 mm
S
S
S
S
S
14. Measure the distance between the
front of the unit and the front frame (or
blende) again. This distance must be 75
mm.
75 mm
!
13-15mm
!
Important!
When the control knobs are not properly adjusted the
burners will not ignite or burn evenly.
For warranty and the proper functioning of the cooking
unit ensure the mounting is as described in this manual to
the letter.
!