Loading ...
Loading ...
Loading ...
8
ADJUSTING AND FIXING THE IRONING BOARD (BEFORE FIRST USE)
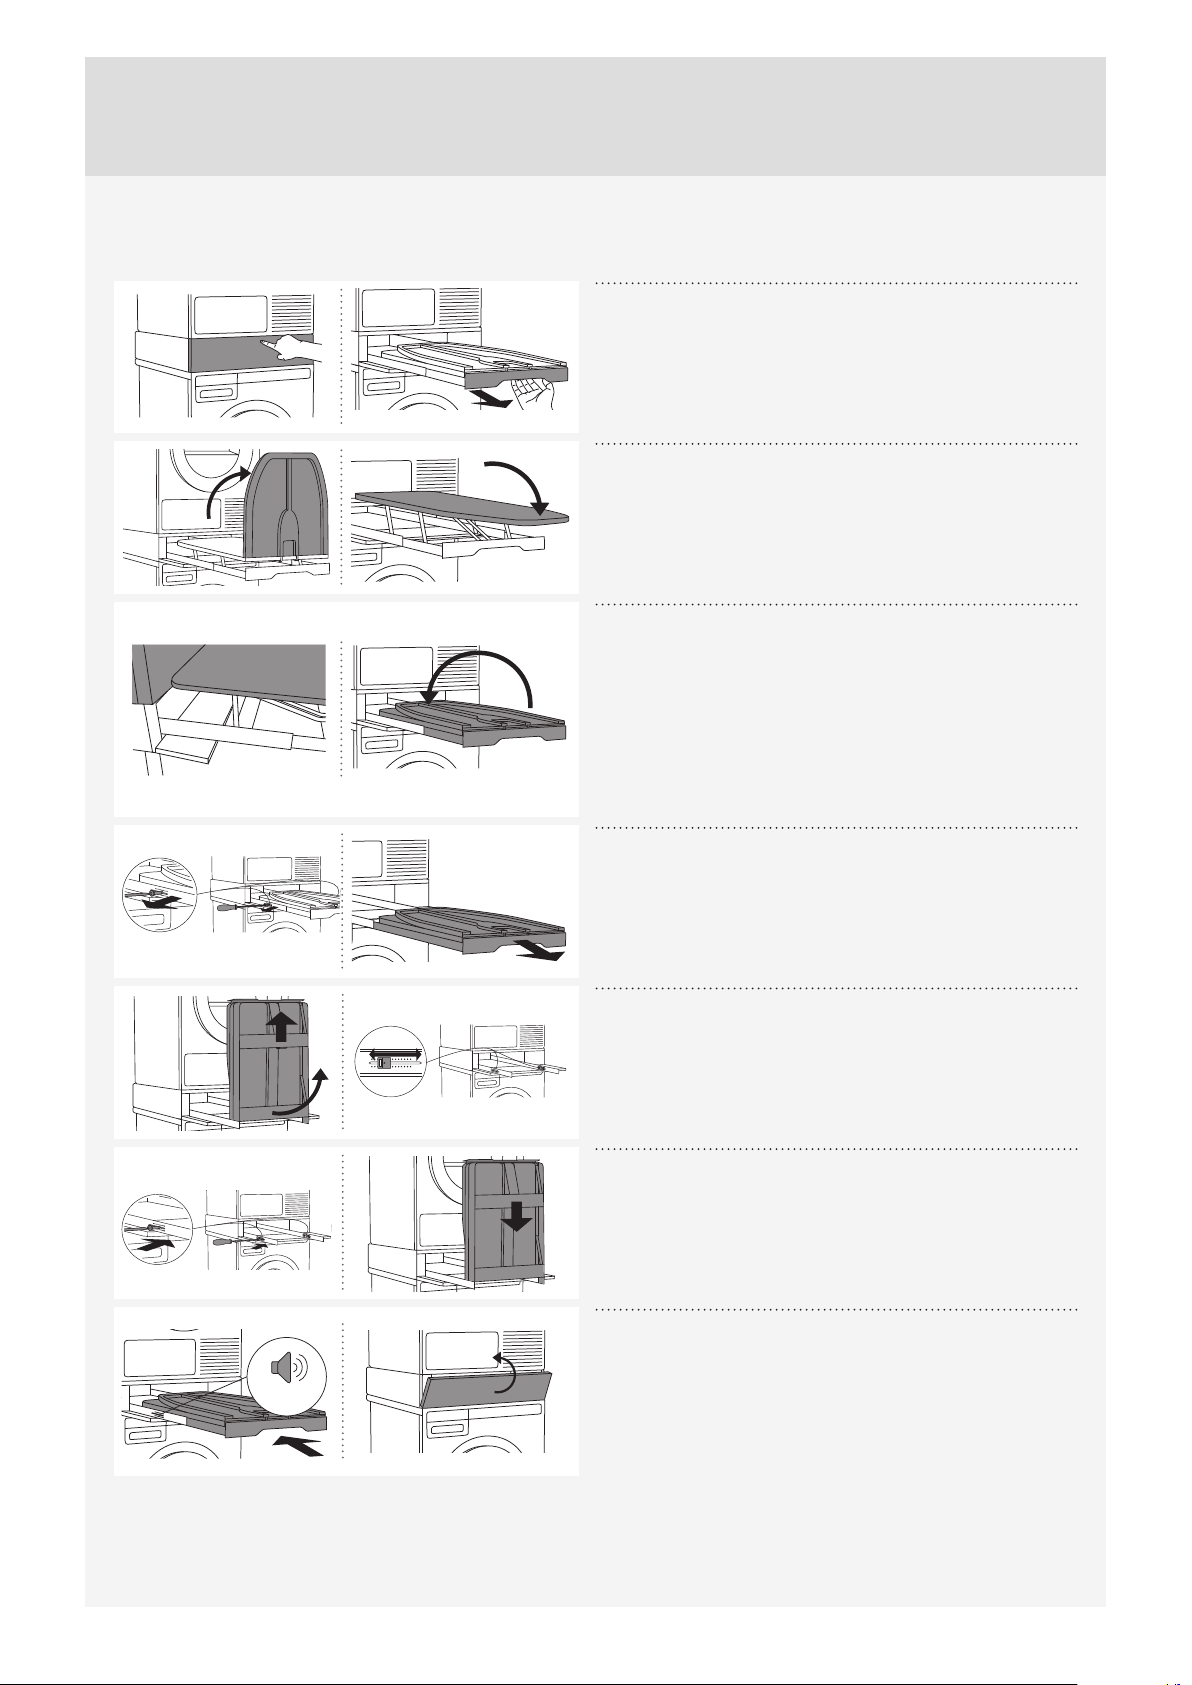
1
Press on the hidden helper door to open it.
Hold the ironing board handle and pull it out towards you as
far as it will go.
2
Unfold (open) the ironing board in the direction indicated
in the fi gure.
3
Check for stability before using for the fi rst time. When
the ironing board is in the locked position, it is very
important that its back part is pressed tightly against the
dryer.
If the ironing board does not fi t tightly, it can be adjusted as
necessary. To do this, fold (close) the ironing board and follow
steps 4, 5 and 6.
4
Use a screwdriver to carefully undo the screws on the
guides on both sides (as shown in the fi gure) and pull out
the ironing board under a right angle (perpendicularly).
5
Detach the ironing board from the guides in the
perpendicular direction, and set the length of the plastic
plug extension on both sides.
6
Then, replace and tighten the screws removed in step 4.
Replace the ironing board (under a right angle).
CLICK
7
When replacing the board (under a right angle), it has to
audibly "CLICK" into place. Then, push the ironing board
towards the inside of the hidden helper.
Close the hidden helper door.
We reserve the right to modifi cations.
Loading ...
Loading ...
Loading ...