Loading ...
Loading ...
Loading ...
10 49-5000155 Rev. 1
Installation Instructions
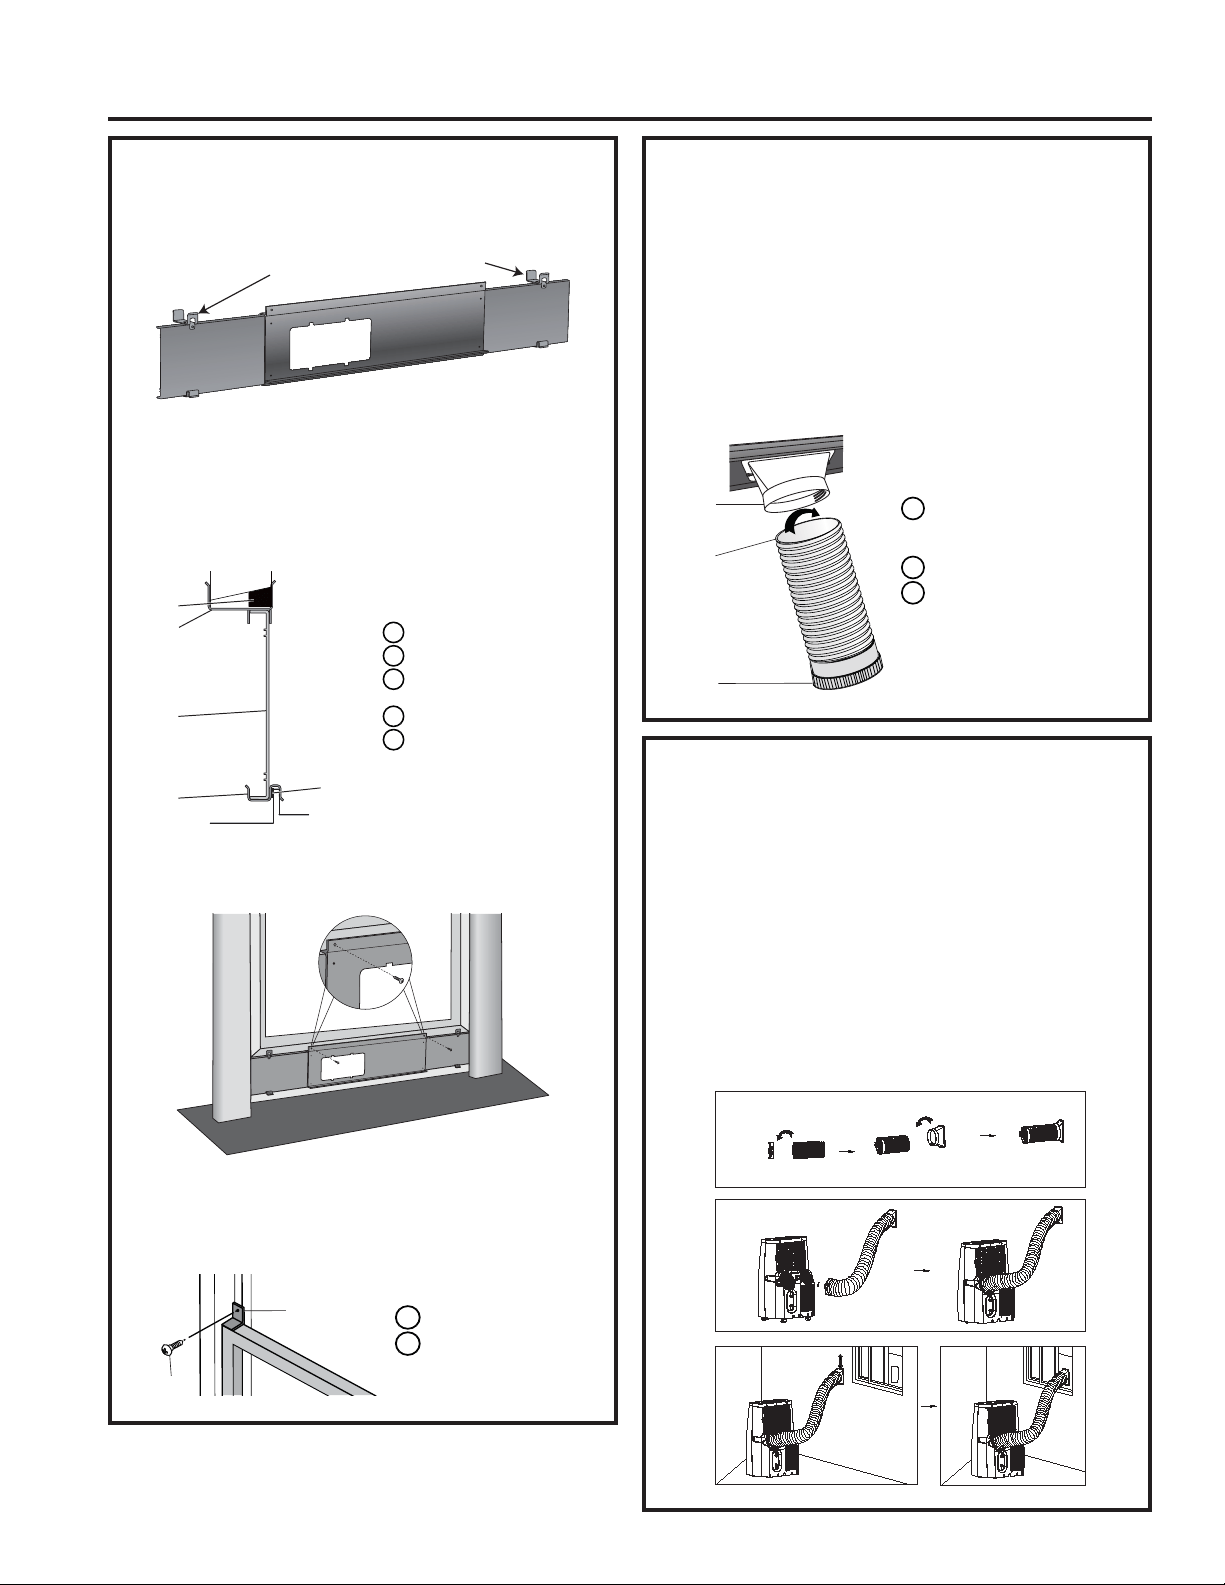
3. Install Main Window Panel and
Extension Panels (cont.)
After assembly:
Attach with pointed screws (2)
5.
Apply the top foam strip (provided) across the
top of the window panel assembly, and then
apply the bottom foam strip (provided) across the
bottom front edge of the window panel assembly,
as shown.
Typical Vinyl Window Installation:
A
Top Foam Strip
B
Top Bracket
C
Extension Panel
D
Bottom Bracket
E
Bottom Foam Strip
A
B
C
D
E
6. Place the window panel assembly in the window,
and using the screws provided, fasten the
assembly to the window sill and window frame.
7. Using one pointed screw, install the Security
bracket to the window.
NOTE: The security bracket prevents the window
from being opened from the outside.
B
A
A
Security Bracket
B
Pointed Screw (1)
4. Attach Exhaust Hose to the
Exhaust Nozzle
1. Grasp both ends of the exhaust hose and gently
pull to expand the hose.
NOTE: Do not attach additional hoses to extend
the length. This would decrease cooling efficiency
and may damage the air conditioner.
2. Using a counterclockwise motion, attach the
open end of the exhaust hose to the exhaust
nozzle.
A
A
Exhaust Nozzle
B
C
(1 or 2 depending
on the model)
B
Hose (open end)
C
Hose (connector)
5. Connect Exhaust Hose to the
Air Conditioner
IMPORTANT: When connecting the hose, the air
conditioner must be close enough to the window that
you will not dislodge the window seal plate. Once
the hose is connected, move the air conditioner 20”
(51 cm) from the wall.
1. Extend the flexible exhaust hose to reach out to
the unit.
2. Aim the opening of the hose to the air exhaust
outlet and push it hard straight into the outlet until
it clicks.
INSTALLATION INSTRUCTIONS
Loading ...
Loading ...
Loading ...