Loading ...
Loading ...
Loading ...
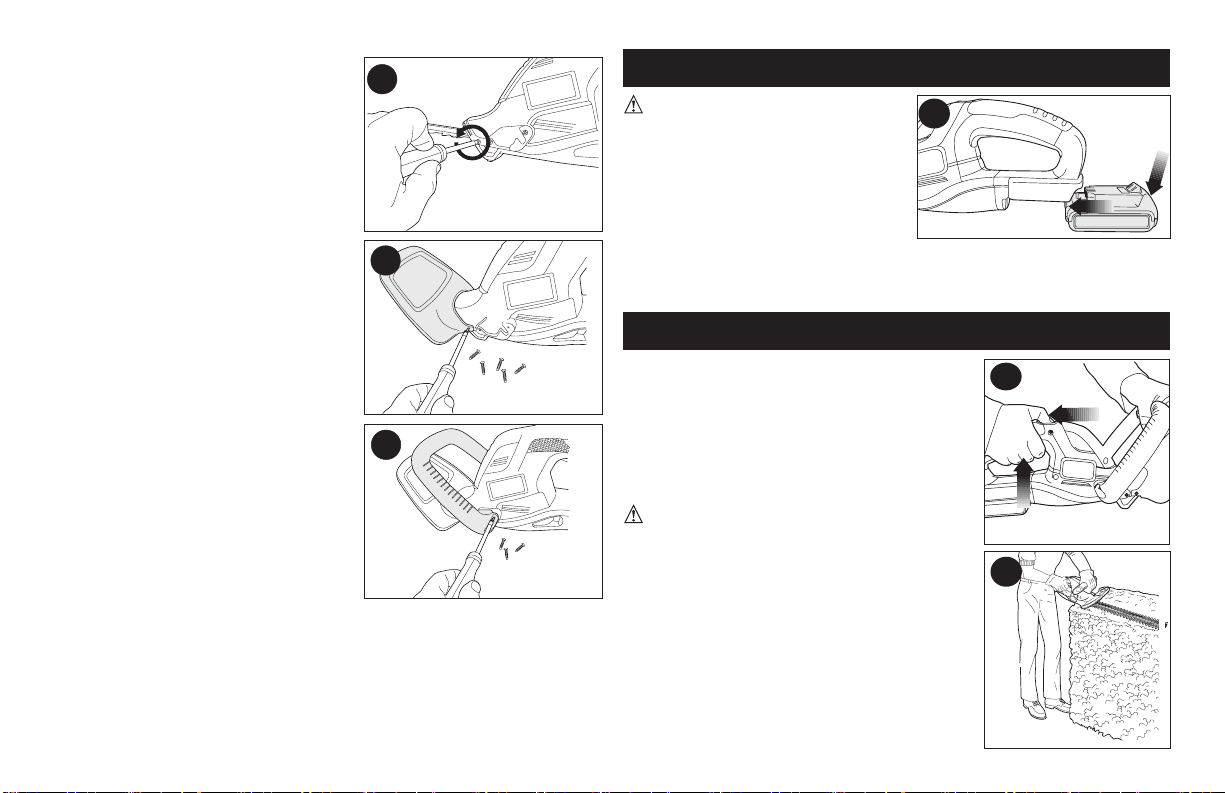
INSTALLING / REmOVING bATTERY pACk
WARNING: Make certain the
lock-off button is engaged to prevent
switch actuation before removing or
installing battery.
TO INSTALL bATTERY pACk:
Insert battery pack into tool until an
audible click is heard . Make
sure battery pack is fully seated and
fully latched into position.
TO REmOVE bATTERY pACk: Depress the battery release button
in the back of the battery pack and pull battery pack out of tool
.
OpERATION
SWITCH
To turn the unit “ON”, slide the lock off
button, shown in , backward and
squeeze the trigger switch. Once the unit is
running, you may release the lock off button.
In order to keep the unit running you must
continue to squeeze the trigger. To turn the
unit “OFF”, release the trigger.
WARNING: Never attempt to lock a
switch in the ON position.
TRImmING INSTRUCTIONS
1. WORkING pOSITION – Maintain
proper footing and balance and do not
overreach. Wear safety goggles, non-
skid footwear when trimming. Hold the
unit firmly in both hands and turn the
unit ON. Always hold the trimmer, as
shown in the illustrations in this manual,
with one hand on the switch handle and
one hand on the bail handle.
8
To assemble to trimmer:
• Cut the plastic zip tie.
• Remove the six screws that are
partially run into the trimmer housing
().
• Slide the guard onto the front of the
trimmer housing.
• Insert two of the six screws into the
openings on the side of the guard
and tighten securely as shown in
.
• Slide the bail handle onto the front
of the trimmer housing behind the
guard.
• Insert the remaining four screws
into the openings on the side of the
bail handle and tighten securely as
shown in .
7
6
5
3
4
2
Loading ...
Loading ...
Loading ...