NEON WIRELESS
HEADPHONES
We love that you are rocking JLab Audio!
We take pride in our products and fully stand behind them.
S
A
T
I
S
F
A
C
T
I
O
N
G
U
A
R
A
N
T
E
E
30
DAY
C
U
S
T
O
M
E
R
S
U
P
P
O
R
T
U
.
S
.
B
A
S
E
D
YOUR SATISFACTION IS GUARANTEED
You may exchange or return merchandise within 30 days of the purchase date.
Learn more at jlabaudio.com/guarantee
YOUR WARRANTY
You may register your product at jlabaudio.com/register. All warranty claims are subject to JLab Audio
authorization and at our sole discretion. Retain your proof of purchase to ensure warranty coverage.
CONTACT US
Reach out to us at [email protected] or visit jlabaudio.com/contact
L
I
M
I
T
E
D
T
W
O
Y
E
A
R
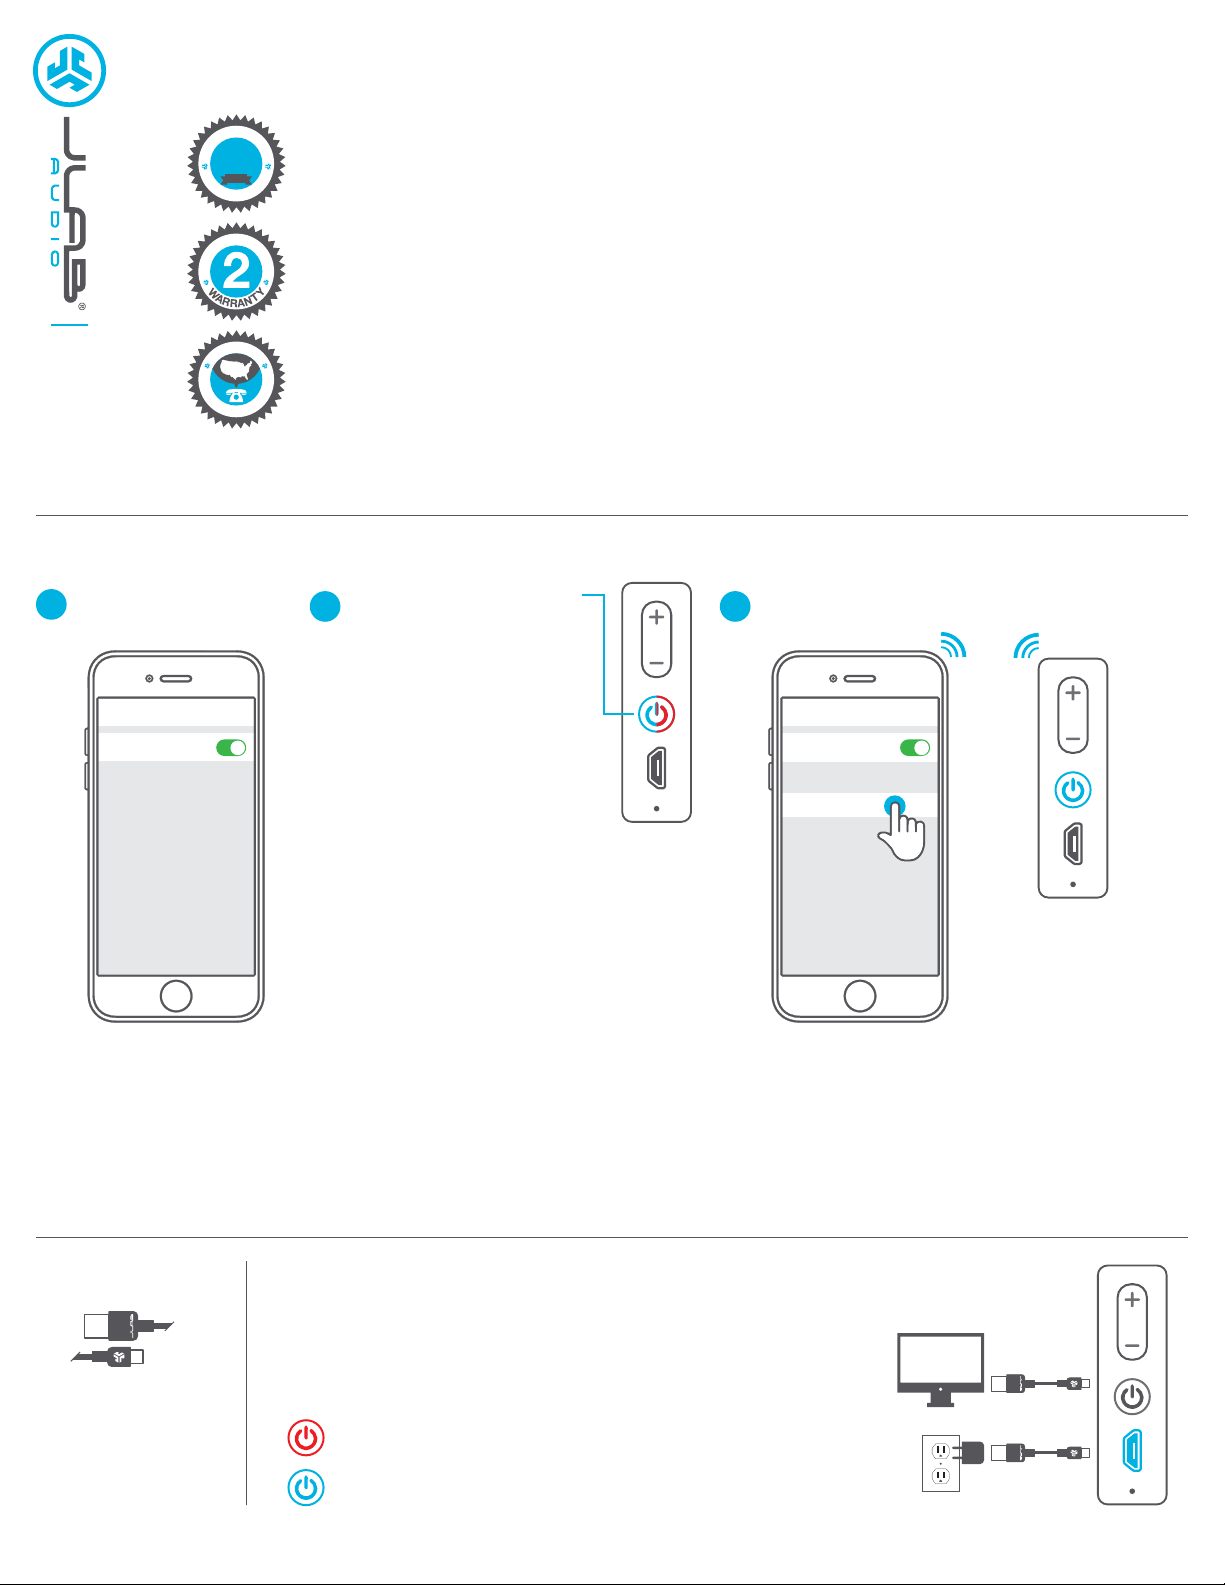
FIRST TIME SETUP: BLUETOOTH PAIRING
Notes:
• Bluetooth is a wireless radio technology, which means it is sensitive to objects between the headphone and the connected device.
The headphone is designed to be used within 33 feet (10 meters) of a connected device, with no major objects in between (walls, etc.).
• Once successfully connected, the headphone will memorize your device and automatically pair when turned on in the future.
Only one device may be connected at a time. To pair a different device, first unpair the current one through its Bluetooth settings.
• If for any reason Bluetooth connection is lost, manually reconnect your Bluetooth device.
Select “JLab Neon BT” in your device settings
to connect.
When the headphones
are paired, voice prompts
“You are connected”
and blue light will
flash slowly.
Bluetooth
JLab Neon BT
Settings
3
When the Neon Wireless
Headphones are powered
off, press and hold
the Power Button for
approximately 10 seconds.
Fast blinking red and blue
light indicates searching
for Bluetooth device.
2
Turn on the Bluetooth
in your device settings.
Bluetooth
Settings
1
CHARGING
Note: For optimum performance, charge overnight with Micro USB
cable prior to using. Allow about 3 hours to fully charge.
Connect the Micro USB (included) to the headphone and connect
the USB into a computer or AC adaptor (not included). Make sure
the USB connection has a power output source.
Solid red light indicates the headphone is charging.
Solid blue light indicates charging is complete.
ACCESSORIES
MICRO USB
CABLE
OR
JLABAUDIO.COM
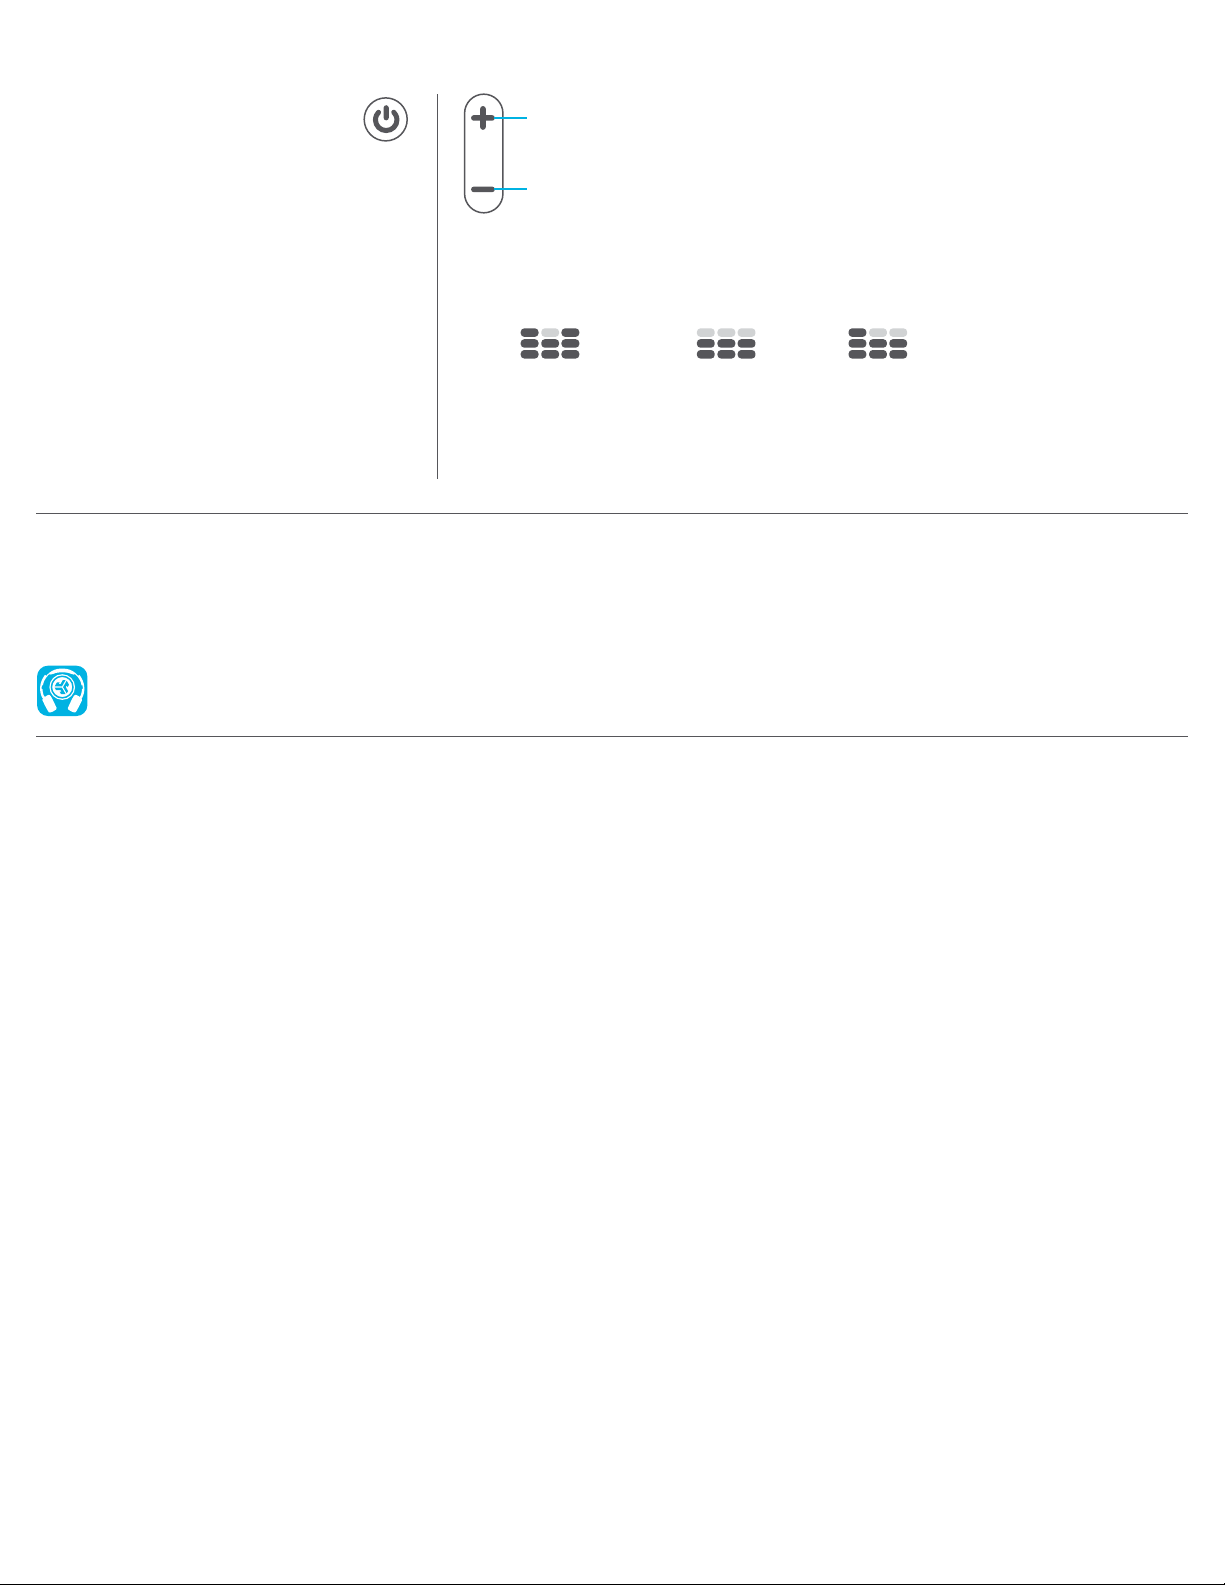
BUTTON FUNCTIONS
CAUTIONS
• Avoid getting moisture or liquids on the headphone cups.
• Avoid extreme heat, cold, and humidity.
• Avoid dropping or crushing headphones, stressing the cable by rapid pulling or extreme force, or bending the cable at a sharp angle.
• Wax may build up in headphone cups, lowering the sound quality. Carefully remove the wax with a cotton swab or other small tool to
improve the sound quality.
• If you experience discomfort or pain, try lowering the volume or discontinuing use temporarily.
• If you experience regular discomfort while using this product, discontinue use and consult your physician.
• We recommend you treat your headphones as you would a nice pair of sunglasses and keep them in safe location when not in use.
BLUETOOTH PAIRING:
(Follow First Time Setup: Bluetooth Pairing)
POWER ON / OFF:
PRESS & HOLD 3 SECONDS
(Slow blinking blue light indicates power is on)
PLAY / PAUSE / ANSWER / HANG UP CALLS:
1 CLICK
ACTIVATE SIRI (iOS) OR
“OK GOOGLE” (ANDROID):
2 CLICK
RE-PAIRING AND ADDITIONAL DEVICES:
When power is off,
PRESS & HOLD 10 SECONDS
WARM-UP YOUR HEADPHONES
Optional: Burn-in is the process for exercising new audio equipment. We recommend 40 hours of burn-in time for most headphones to reach
optimal performance. The main purpose of the process is to loosen the diaphragm of a newly crafted headphone and to stress the headphone
driver. Normal everyday use can also burn-in the headphones, though JLab’s proprietary burn-in provides an ideal mix of sounds and
frequency sweeps to achieve this.
Burn-in your audio equipment with the JLab Audio app available on the App Store and Google Play
Or access the burn-in method at: jlabaudio.com/burnin
VOLUME UP: 1 CLICK
TRACK FORWARD: 2 SECOND HOLD
VOLUME DOWN: 1 CLICK
TRACK BACKWARD: 2 SECOND HOLD
EQ MODES: PRESS & HOLD 1+ SECOND
VOL+ AND VOL- SIMULTANEOUSLY
for different EQ settings (Neon Wireless will cycle 3 EQ settings)
JLab SIGNATURE
(One Beep)
JLab C3™ signature
sound with amplified
bass and vocals
BALANCED
(Two Beeps)
Even sound with
no additional
enhancements
BASS BOOST
(Three Beeps)
Amplified bass
and sub-bass