Instruction Manual for Toaster Oven
IMPORTANT SAFEGUARDS
When using electrical appliances, basic safety precautions should always be followed, including the following:
1. READ ALL INSTRUCTIONS.
2. Do not touch hot surfaces. Use handles or knobs.
3. To protect against electrical shock do not immerse cord, plugs, in water or other liquid.
4. Close supervision is necessary when any appliance is used by or near children.
5. Unplug from outlet when not in use and before cleaning. Allow to cool before putting on or taking off parts.
6. Do not operate any appliance with a damaged cord or plug or after the appliance malfunctions or has been damaged in any manner. Return appliance to the nearest authorized service facility for examination, repair, or adjustment.
7. The use of accessory attachments not recommended by the appliance manufacturer may cause injuries.
8. Do not use outdoors.
9. Do not let cord hang over edge of table or counter, or touch hot surfaces.
10. Do not place on or near a hot gas or electric burner, or in a heated oven.
11. Extreme caution must be used when moving an appliance containing hot oil or other hot liquids.
12. Always attach plug to appliance first, then plug cord into the wall outlet. To disconnect, turn any control to “OFF”, then remove plug from wall outlet.
13. Do not use appliance for other than intended use.
14. Use extreme caution when removing tray or disposing of hot grease
15. Oversize foods or metal utensils must not be inserted in a toaster-oven as they may create a fire or risk of electric shock.
16. A fire may occur if the toaster-oven is covered or touching flammable material, including curtains, draperies, walls, and the like, when in operation.
17. Do not store any item on top of the appliance when in operation.
18. Do not clean with metal scouring pads. Pieces can break off the pad and touch electrical parts involving a risk of electric shock.
19. Extreme caution should be exercised when using containers constructed of other than metal or glass.
20. Do not store any materials, other than manufacturers recommended accessories, in this oven when not in use.
21. Do not place any of the following materials in the oven: paper, cardboard, plastic, etc.
22. Do not cover crumb tray or any part of the oven with metal foil. This will cause overheating of the oven.
23. This appliance is not intended for use by persons (including children ) with reduced physical, sensory or mental capabilities. Or lack of experience and knowledge unless they have been given supervision or instruction concerning use of the appliance by a person responsible for their safety.
24. Children should be supervised to ensure that they do not play with the appliance.
25. The appliance is not intended to be operated by means of an external timer or separate remote-control system.
26. The rear surface of appliance shall be placed against a wall.
FOR HOUSEHOLD USE ONLY SAVE THESE INSTRUCTIONS ADDITIONAL IMPORTANT SAFEGUARDS
NOTES ON THE PLUG
This appliance has a polarized plug (one blade is wider than the other).To reduce the risk of electric shock, this plug will fit in a polarized outlet only one way. If the plug does not fit fully into the outlet, reverse the plug. If it still does not fit, contact a qualified electrician. Do not modify the plug in any way.
NOTES ON THE CORD
The provided short power-supply cord (or detachable power-supply cord) should be used to reduce the risk resulting from becoming entangled in or tripping over a longer cord. Longer detachable power-supply cords or extension cords are available and may be used if care is exercised in their use. If a longer detachable power-supply cord or extension cord is used,
1. The marked electrical rating of the cord set or extension cord should be at least as great as the electrical rating of the appliance, and;
2. The cord should be arranged so that it will not drape over the countertop or tabletop where it can be pulled on by children or tripped over unintentionally.
PLASTICIZER WARNING
CAUTION: To prevent Plasticizers from migrating to the finish of the counter top or table top or other furniture, place NON-PLASTIC coasters or place mats between the appliance and the finish of the counter top or table top. Failure to do so may cause the finish to darken; permanent blemishes may occur or stains can appear.
ELECTRIC POWER
If the electrical circuit is overloaded with other appliances, your appliance may not operate properly. It should be operated on a separate electrical circuit from other appliances.
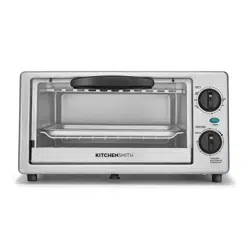
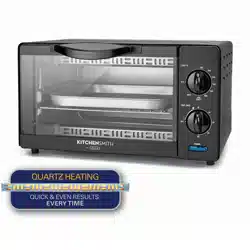
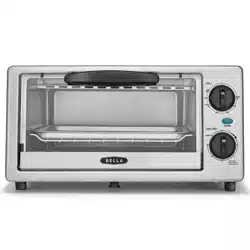
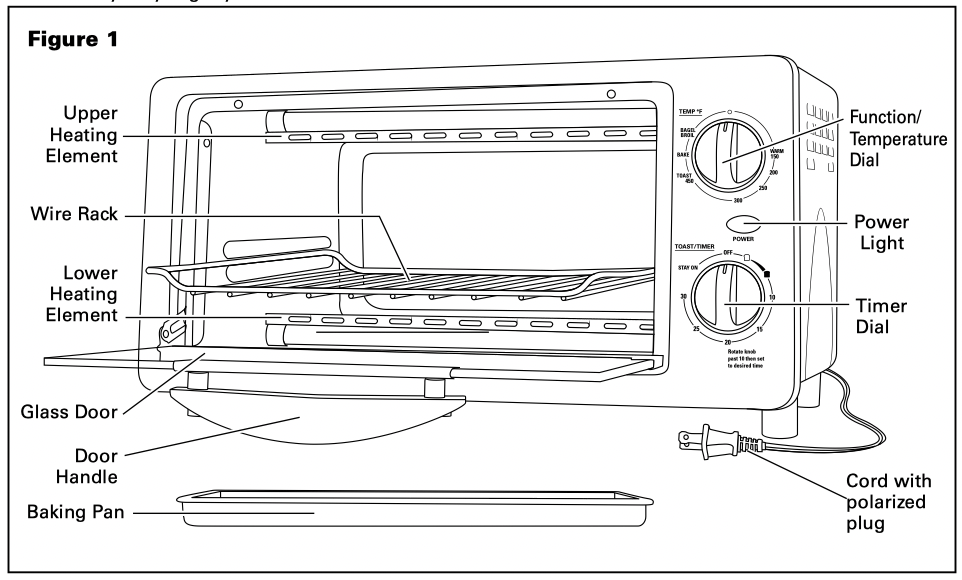
Getting To Know Your Toaster Oven
Product may vary slightly from illustration
Before First Use
1. Remove all protective film, accessories and shipping materials packed inside the Oven; peel off clear protective film from control panel
2. Wash the Rack and Pan in warm soapy water. Wipe the inside of the Oven with a damp cloth or sponge. Blot dry with paper towels to be sure the unit is dry before using.
3. Place Oven on a flat counter or other stable surface. Ensure to leave ample space between the back of the unit and the wall to allow heat to dissipate without damaging walls or cabinets.
DO NOT OPERATE ON THE SAME CIRCUIT WITH ANOTHER APPLIANCE.
4. Make sure the Crumb Tray is properly installed before using. For the first time only, set the Temperature Knob to maximum (450°F), the function setting on toast and the timer to 15 minutes. This will burn off any oils still on the Oven.
NOTE: The oven may smoke during this process. This is normal for a new Oven and will not last more than 10-15 minutes.
Setting The Timer
0-30 MINUTES: The timer can be set up to 30 minutes. When the time knob is in the “OFF” position, the oven will not operate. To set the time, turn the knob clockwise to the desired time. The indicator light is lit only when time has been set. When the timer has reached the OFF position, a signal bell will sound, and the timer control will finish in the OFF position; the Toaster Oven will shut off automatically; the power indicator light will go off.
Adjusting Time
Timer can be changed during the cooking cycle. Just turn the timer knob to the desired time and continue cooking.
NOTE: When setting the timer knob for less than 5 minutes, always rotate timer to over 10 minutes and then rotate back to your chosen time. This will ensure a safe and accurate timer setting.
Temperature Setting
Turn the temperature knob clockwise to the desired temperature setting. The temperature can be set from 150°F to 450°F.
Stay On
To use the Toaster Oven without time control, turn the timer knob to the STAY ON position. In this case, the toaster oven will work until the timer knob is turned to OFF position.
CAUTION: The contents may catch fire if it is left for too long. Close supervision is necessary.
Function Setting
This Oven offers different functions for versatile cooking.
BAKE: The lower heating element is operating during this function.
BROIL: The upper heating element is operating during this function.
TOAST: The upper and lower heating elements are operating during this function.
BAGEL: The upper heating element is operating during this function.
WARM: The upper and lower heating elements are operating during this function.
OFF: No heating elements are operating on this setting.
STAY ON: The heating elements are operating in perpetuity until the user turns the oven off manually.
Operating Instructions
CAUTION: The oven surfaces are hot during and after use.
1. Guide the Wire Rack into the slots on the side of the oven walls.
2. Set the food on the rack. Make sure that you always use an ovenproof container in the oven, never use plastic or cardboard containers in the oven.
3. Never use glass or ceramic pans or lids.
4. Do not let juices run to the bottom of the oven.
5. Set the temperature as suggested by the recipe or as desired.
6. Securely shut the door and set the cooking time to begin operating the oven.
Toast / Bagel
1. Make sure the crumb tray is firmly in place in the bottom of the Toaster Oven.
2. Plug into a 120 V AC outlet.
3. Turn the temperature dial to TOAST or BAGEL/BROIL.
4. Place food in the oven.
5. Rotate the timer past 10 and then back to the desired toast color.
CAUTION: As soon as the timer control is engaged, the Toaster Oven will turn on. Both the top and the bottom heating elements may cycle on and off to maintain temperature for the entire cooking time.
6. Watch toast through the glass door until desired color is achieved.
7. When the TOAST time is complete, a signal bell will sound, and the timer control will finish in the OFF position; the Toaster Oven will shut off automatically; the power indicator light will go off. NOTE: If toasting is completed before the timer control shuts the Toaster Oven off, you may shut the Toaster Oven off manually by turning the timer control to the OFF position. The signal bell will sound and the power indicator light will go off.
8. Open the glass door. Wearing protective oven mitts, pull the wire rack out from the Toaster Oven.
Be careful when removing toast from the back of the wire rack. The inside of the Toaster Oven is very hot. Close glass door.
9. Unplug unit and allow to cool before cleaning.
WARNING: DO NOT LEAVE TOASTER OVEN UNATTENDED DURING TOASTING.
10. Unplug when not in use.
Hints For Toasting
• Remove all protective wrappings from food before placing in Toaster Oven. Follow toaster food directions.
• Frozen and heavy bread require a darker browning setting
• For toasting English muffins and bagels, place the food cut side up.
• For toaster pastries, select a color lighter than medium and toast directly on the rack.
• NOTE: For toasting pastry items with runny-type frosting or open fillings. Use baking pan.
• When toasting, condensation may escape from the oven door. The moisture will slowly escape from the enclosed oven.
• When toasting only two slices of bread, place bread in the middle of oven rack to get even toasting on top and bottom.
• Stale bread, thin bread or sweet bread products, such as tea cakes and fruit loaf, brown much more quickly than ordinary bread, so they should be toasted for less time.
• For best results, clean crumb tray frequently.
Warm
1. Make sure the crumb tray is firmly in place in the bottom of the Toaster Oven.
2. Plug into a 120 V AC outlet.
3. Turn temperature control to the warm setting.
4. Rotate the timer past 10 minutes and then back to the desired time.
CAUTION: As soon as the timer control is engaged, the Toaster Oven will turn on. Both the top and bottom heating elements may cycle on and off to maintain temperature for the entire warming time.
5. When WARM time is completed, a signal bell will sound, and the timer control will finish in the OFF position; the Toaster Oven will shut off automatically; the power indicator light will go off.
NOTE: If warming is interrupted before the timer control shuts the Toaster Oven off, you may shut the Toaster Oven off manually by turning the timer control to the OFF position. The power indicator light will go off. This function is designed to keep food warm after it has been cooked. This function should be used for short periods of time. If not using the oven timer, turn the oven to OFF when not in use.
6. Open the glass door. Wearing protective oven mitts pull the oven rack out from the Toaster Oven.
Be careful when removing food from the back of the oven rack. The inside of the Toaster Oven is very hot. Close glass door.
7. Unplug unit and allow to cool before cleaning.
WARNING: DO NOT LEAVE TOASTER OVEN UNATTENDED DURING TOASTING.
8. Unplug when not in use.
Hints For Warming
• Remove all protective wrappings from food before placing in Toaster Oven.
Follow toaster food directions.
NOTE: For food with runny-type frosting or open fillings. Use baking pan.
• When warming, condensation may escape from the oven door. The moisture will slowly escape from the enclosed oven.
• Place food in the middle of oven rack to get even warming on top and bottom.
• For best results, clean crumb tray frequently.
Bake
1. Make sure the crumb tray is firmly in place in the bottom of the Toaster Oven.
2. Plug into a 120 V AC outlet.
3. Turn temperature control to the desired temperature setting.
4. Rotate timer past 10 and then back to ‘dark toast’ to preheat oven for 5 minutes before beginning to bake. After oven is preheated, set timer to desired baking time or to STAY ON. The power indicator light will illuminate.
NOTE: The Toaster Oven will shut off automatically if timer is set.
5. Carefully center baking dish directly on wire rack and close the glass door. You may place foods such as biscuits directly onto bake/broil pan.
6. If you are using the timer, when the BAKE time is completed, a signal bell will sound, and the timer control will finish in the OFF position; the Toaster Oven will shut off automatically; the power light will go off.
7. If the timer control is set to STAY ON, or if the food is finished cooking before the timer has signaled, turn temperature control to the lowest position and the timer control to the OFF position. Make sure power indicator light is off.
8. Wearing protective oven mitts pull the wire rack out from the Toaster Oven.
9. Unplug and allow to cool completely before cleaning.
Hints For Baking
• Do not totally enclose foods in aluminum foil. Foil can insulate foods and slow down heating.
• To reheat rolls or biscuits, place on baking pan and heat at 300°F for 10 minutes.
• Reheat leftover roasts or casseroles at 350°F for 20 to 30 minutes or until heated through.
• Bake foods such as whole chicken on the low rack position. Place food in baking pan.
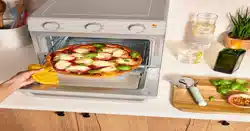
Pizza
Your Toaster Oven has been specially designed to accommodate a 9” (22.7 cm) fresh or frozen pizza. It is best to use the BAKE function.
1. Make sure the crumb tray is firmly in place in the bottom of the Toaster Oven.
2. Set the temperature control to the suggested temperature listed on pizza box.
Allow the Toaster Oven to preheat for 5 minutes.
3. Place pizza directly on wire rack provided.
4. Close the glass door.
5. Set timer control for the recommended time.
NOTE: To set the timer control for less than 10 minutes, turn to 10 minutes and then turn back to the appropriate amount of time.
6. When BAKE time is complete, a signal bell will sound, and the timer control will finish in the OFF position; the Toaster Oven will shut OFF automatically; the power indicator light will go off.
7. Wearing protective oven mitts, pull the wire rack out from the Toaster Oven. Remove cooked pizza carefully and transfer to a serving plate.
8. Turn temperature control to the lowest position. Make sure the timer control is in the OFF position and the power light is off.
9. Unplug and allow to cool completely before cleaning.
Broil
1. Make sure the crumb tray is firmly in place in the bottom of the Toaster Oven.
2. Plug into a 120 V AC outlet.
3. Turn temperature dial to BAGEL/BROIL.
4. Rotate timer past 10 and then back to ‘dark toast’ to preheat oven for 5 minutes before beginning to broil. After oven is preheated, set timer to desired broiling time or to Stay On. The power indicator light will illuminate.
5. Carefully center baking dish directly on wire rack and close the glass door.
NOTE: Broil food until done, turning half way through cooking time.
Wear protective oven mitts to pull the wire rack out from the Toaster Oven. WARNING: NEVER LEAVE TOASTER OVEN UNATTENDED DURING BROILING.
6. If you are using the timer, when the BROIL time is completed, a signal bell will sound, and the timer control will finish in the OFF position; the Toaster Oven will shut off automatically; the power light will go off.
7. If the timer control is set to STAY ON, or if the food is finished cooking before the timer has signaled, turn temperature control to the lowest position and the timer control to the OFF position. Make sure power indicator light is off.
8. Wearing protective oven mitts pull the wire rack out from the Toaster Oven.
9. Unplug and allow to cool completely before cleaning.
Hints For Broiling
• Broiling is used for tender cuts of meats or marinated meats, fish and some fruits and vegetables. Cooking time is determined by the desired doneness and the distance between the food and the element.
• Do not place aluminum foil on top of the bake/broil pan. This traps grease and can cause a fire.
• Trim excess fat from meat and score edges to prevent curling and thaw frozen meats before broiling. This will reduce smoke during broiling.
• Visit foodsafety for safe cooking temperature information
User Maintenance Instructions
Your Toaster Oven should be cleaned regularly for best performance, long life and to reduce the risk of fire hazard. This appliance requires little maintenance. It contains no user serviceable parts. Do not try to repair it yourself. Any servicing that requires disassembly other than cleaning must be performed by a qualified appliance repair technician.
Care And Cleaning Instructions
1. Before cleaning, unplug the toaster oven and allow it to cool completely.
2. Wash all the attachments with mild, soapy water including the rack and the baking tray.
3. Do not use abrasive cleansers, scrubbing brushes and chemical cleaner on the baking tray.
4. Using a wet cloth to wipe the inner of the oven.
5. To clean the door by using a wet cloth saturated with detergent or soap.
6. Never immerse the unit in water or other liquid.
7. Any other servicing should be performed by an authorized service representative.
Storing Instructions
Unplug unit, allow cooling, and cleaning before storing. Store Toaster Oven in its box in a clean, dry place. Never store appliance while it is hot or still plugged in. Never wrap cord tightly around the appliance. Do not put any stress on the cord where it enters the unit, as it could cause the cord to fray and break.