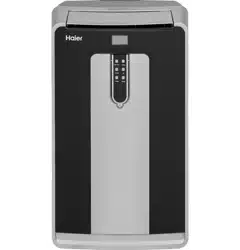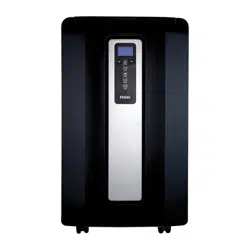
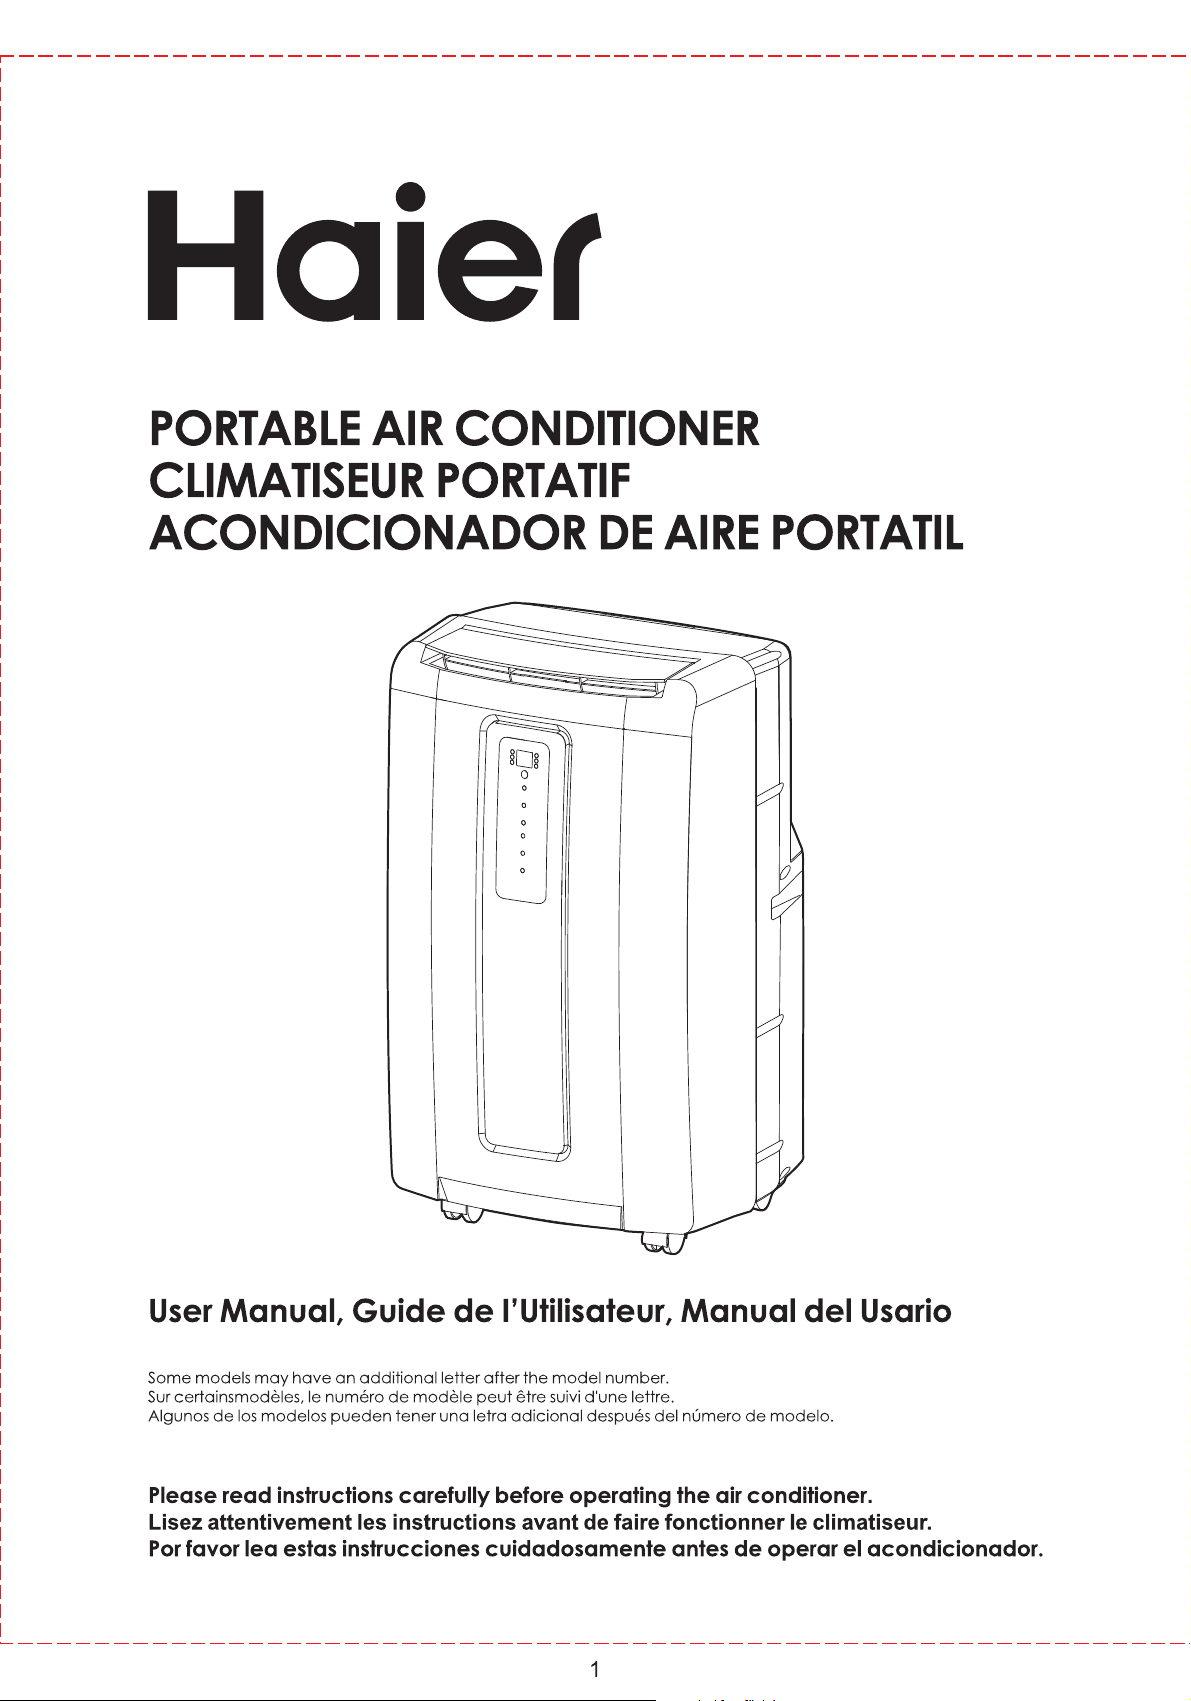
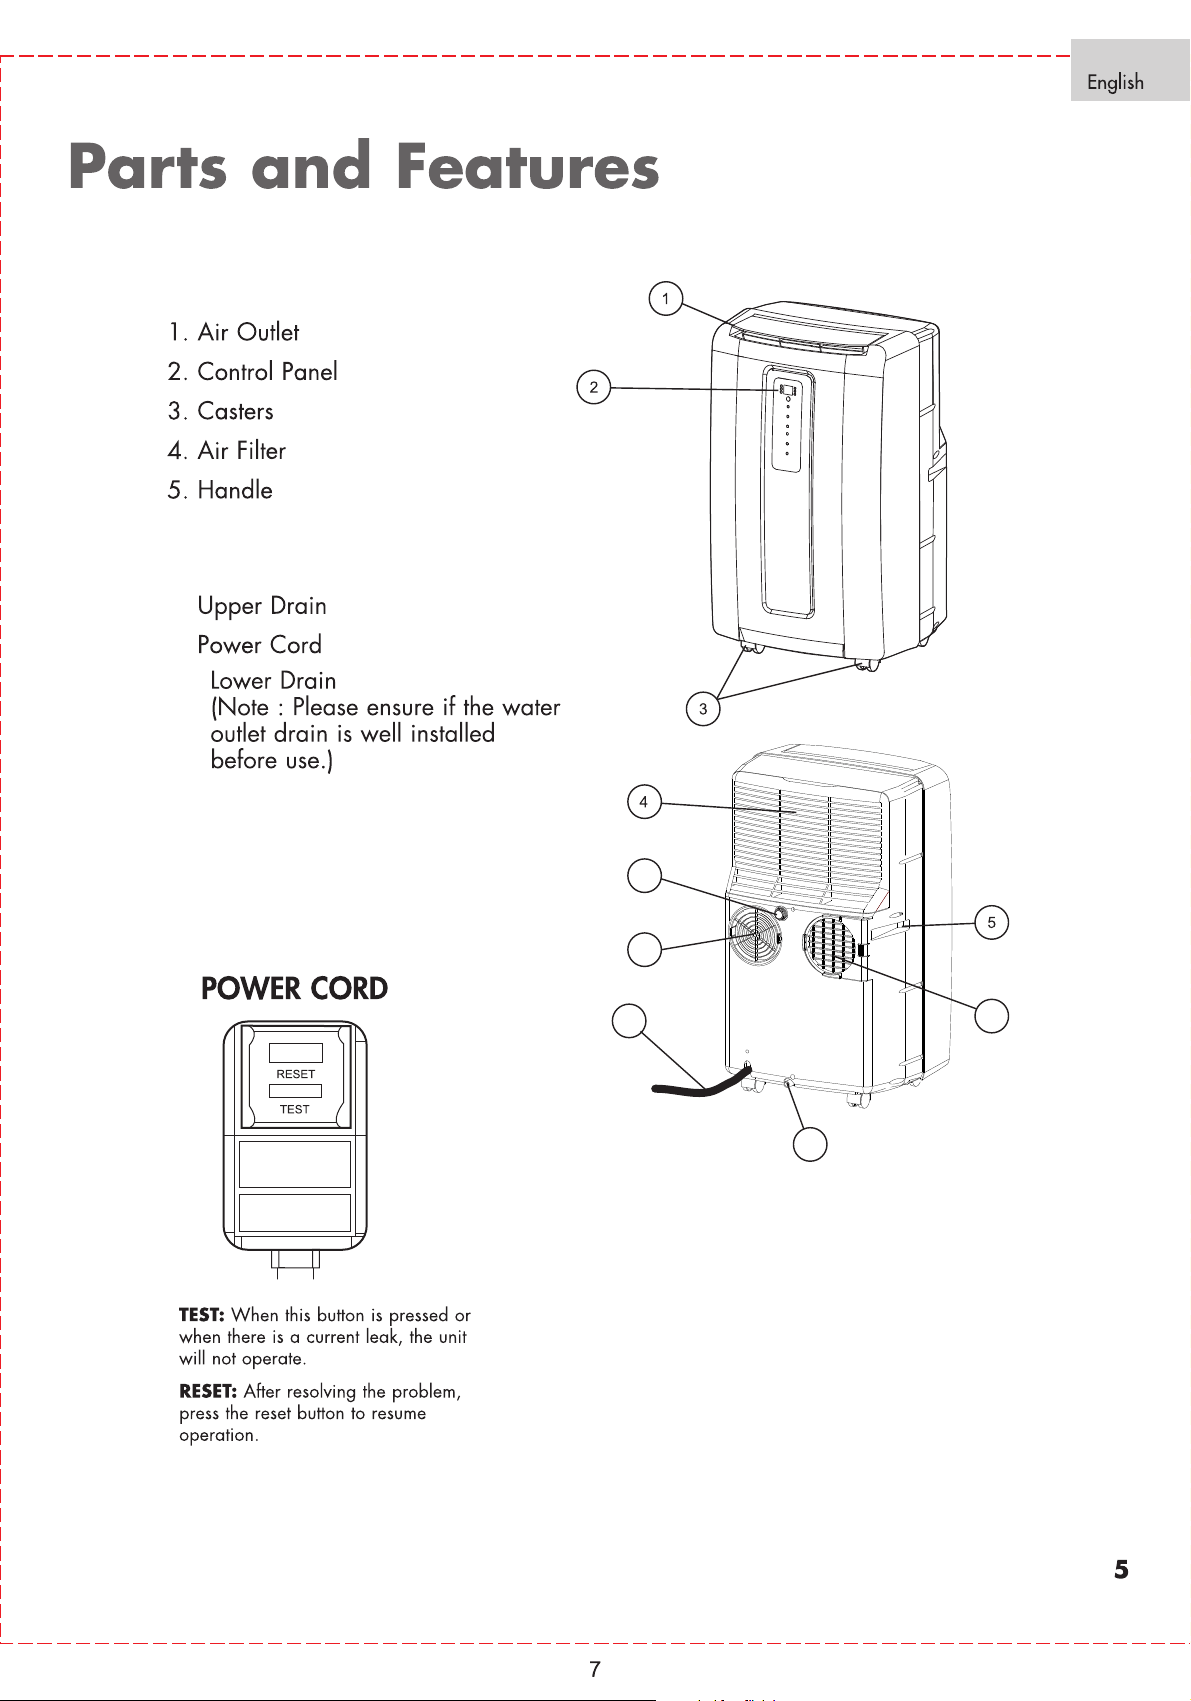
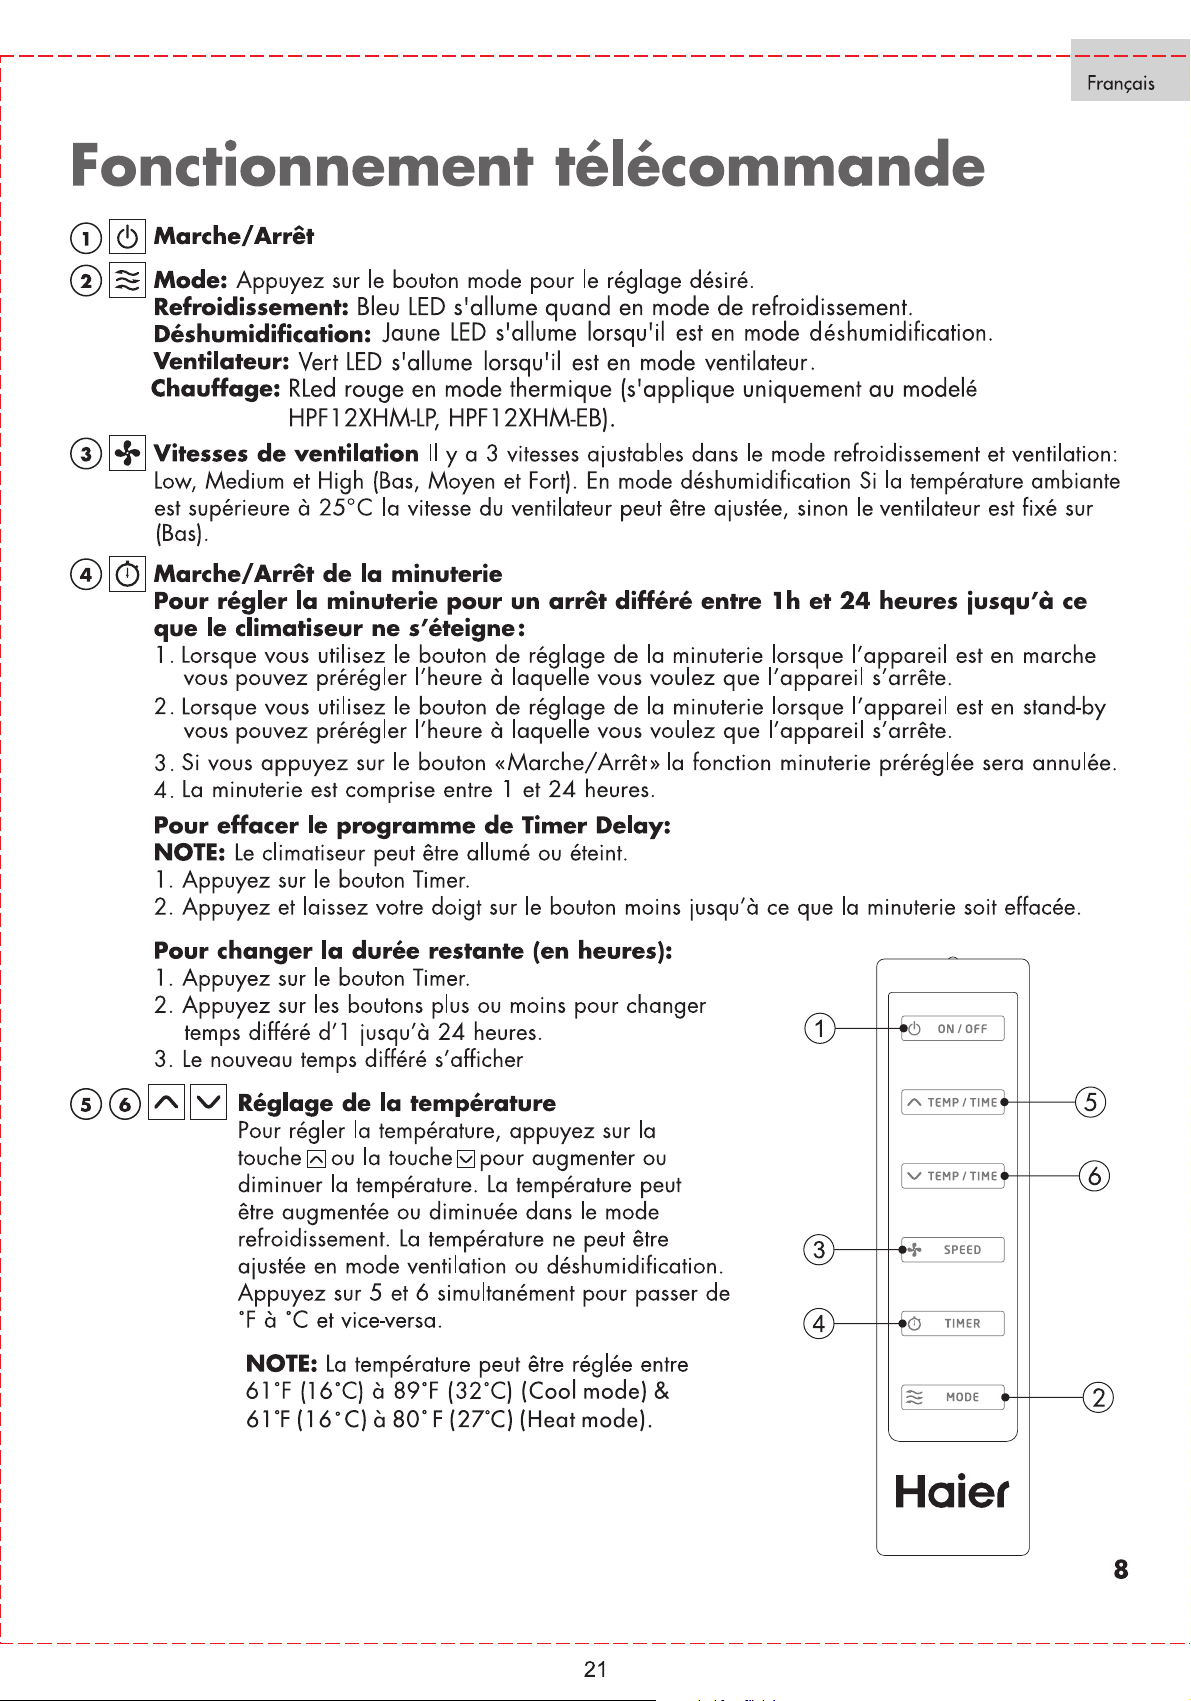
HPFD12XCP, HPFD12XHP


1. Main window panel and extension panels (extends from 20”
up to 46”) ......................................................... 3 pieces
2. Exhaust nozzle with diameter 130mm.....................1 piece
3. Exhaust nozzle with diameter 110mm.....................1 piece
4. Screws..............................................................8 pieces
5. Exhaust hose with diameter 130mm (large)............. 1 piece
6. Exhaust hose with diameter 110mm (small)..............1 piece
7. Cover ...............................................................2 pieces
8. Foam............................................................... .2 pieces
9. Hose connector (air outlet) for large hose with dia.130mm ....
........................................................................1 piece
10. Hose connector (air intake) for small hose with dia. 110mm
........................................................................1 piece
Installation
1) Connect the 3 pieces of window panels (No. 1) by sliding 2 extension panels into the
main window panel.
2) Apply a foam strip (No. 8) to each end of extension panels.
3) Open the window and place the window panel assembly into the window. Adjust the
extension panels to fit the width or height of the window as shown below ( figure A).
Secure the extension panels by using 4 blunt tip screws (No. 4, figure B-1). Secure the
main window panel by using 4 pointed screws (No. 4, figure B-2 and B-3).
4) Expand the 2 ends of large exhaust hose (No. 5). Connect the hose connector (No.9) to
one end of the exhaust hose (No. 5) by turning clockwise. Then insert the exhaust
nozzle (No. 2) at the other end of the exhaust hose by turning clockwise (figure C) to
create the hose assembly.
5) Insert the connector end of the hose assembly (step 4) into the rear of unit and turn
clockwise to secure (left side of figure D).
6) Insert the exhaust with nozzle (step 4, the hose assembly) end into the window panel
(figure E)
7) Expand the 2 ends of small exhaust hose (No. 6). Connect the hose connector (No.10)
to one end of the exhaust hose (No. 6) by turning counterclockwise. Then insert the
exhaust nozzle (No. 3) at the other end of the exhaust hose by turning counterclockwise
(figure C) to create the hose assembly.
8) Sliding in the connector end of the hose assembly (step 7) to the rear of unit (right side
of figure D).
9) Insert the exhaust with nozzle (step 7, the hose assembly) end into the window panel
(figure E)
10) Plug the power cord into the wall outlet and press “Reset” button.
11) Please allow 8” of space around the unit for proper circulation.
12) When removing the portable air conditioner for storage, the window panel may be
left in place. Simply place the covers (No.7) over the nozzle holes (see diagram 3 of
figure 3) to close the openings.
1 2 3 4
5
6 7 8
9
10
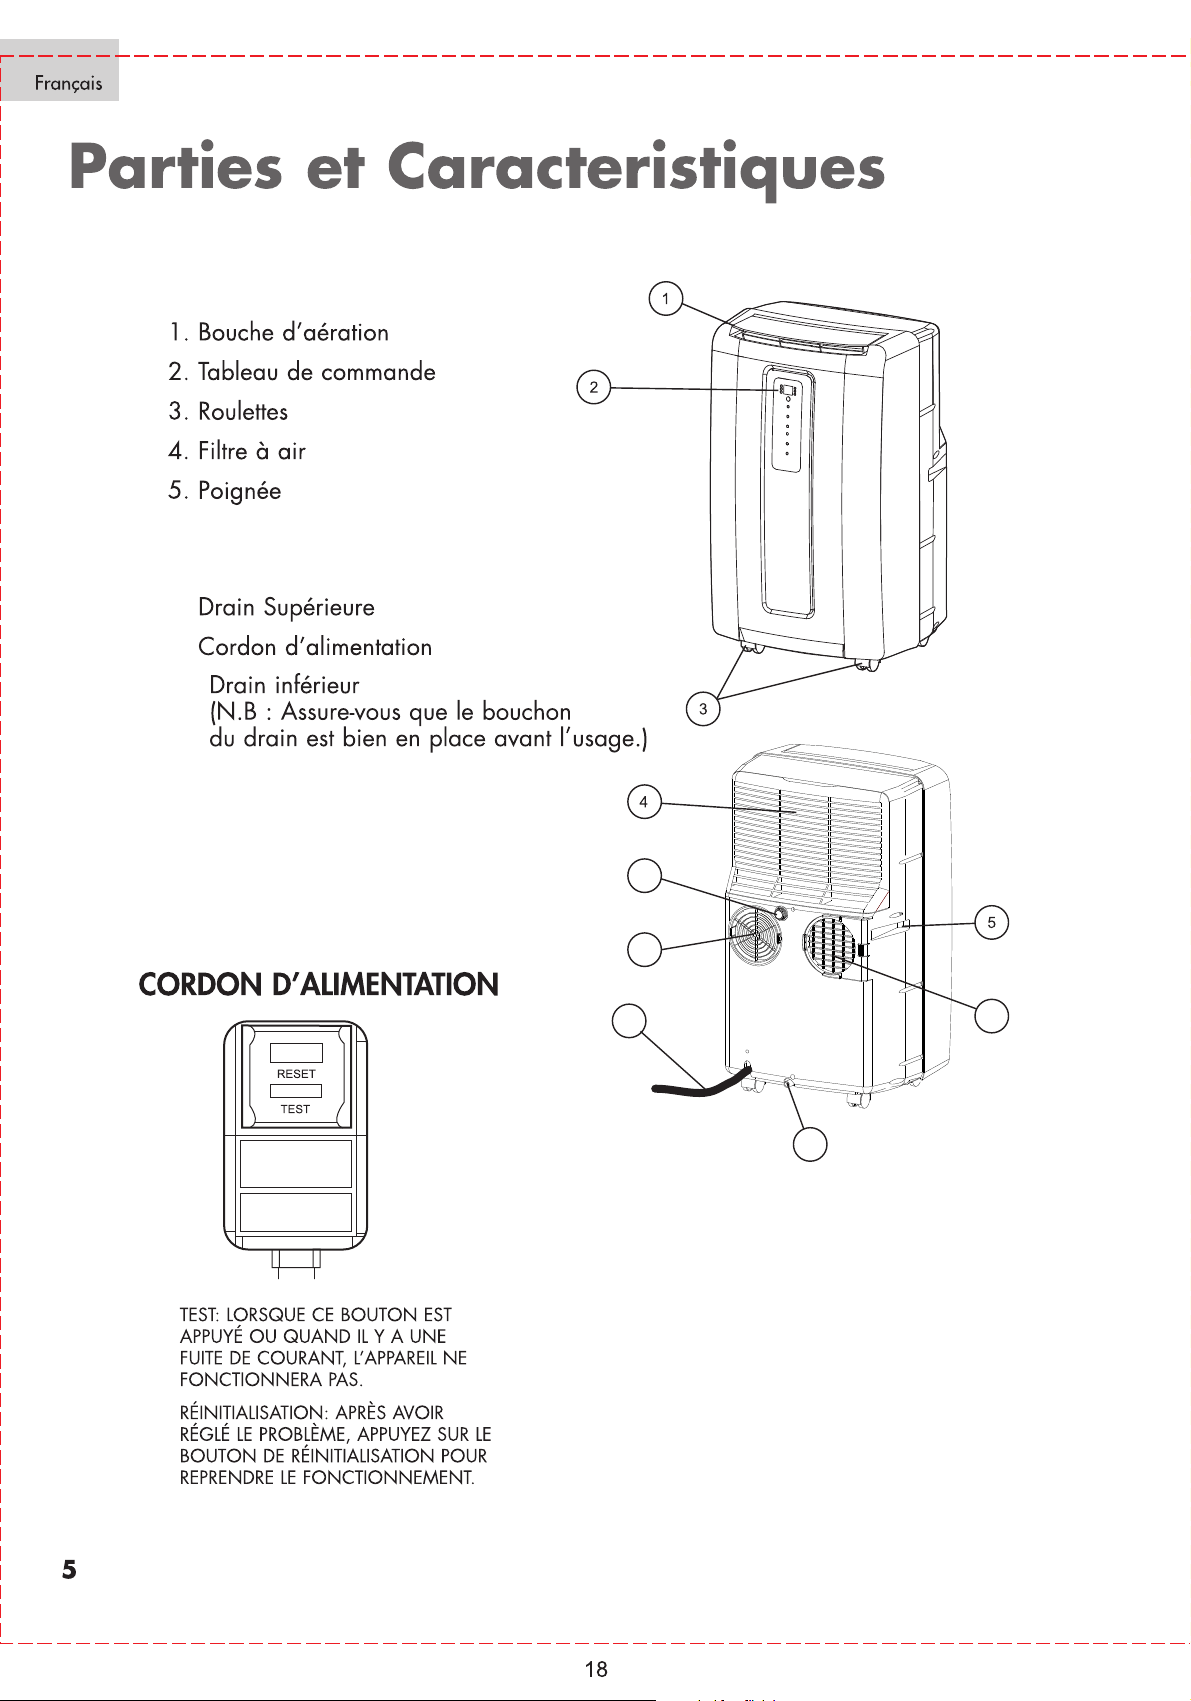
6. Air Inlet
7.
8.
9.
10.
Air Outlet
6
7
8
9
10


1 3 4
5
7 8
9
2
6
10
Accessoires inclus
1. Panneau de fenêtre principal et rallonges (de 20" à 46").....3 pièces
2. Embout d'échappement d'un diamètre de 130mm..............1 pièce
3. Embout d'échappement d'un diamètre de 110mm..............1 pièce
4. Vis.............................................................................8 pièces
5. Tuyau d'échappement d'un diamètre de 130mm (large)..... 1 pièce
6. Tuyau d'échappement d'un diamètre de 110mm (petit).......1 pièce
7. Couvercle...................................................................2 pièces
8. Mousse......................................................................2 pièces
9. Connecteur de tuyau (sortie d'air) pour le tuyau de 130mm de
diamètre ....................................................................1 pièce
10. Connecteur de tuyau (entrée d'air) pour le tuyau de 110mm de
diamètre.....................................................................1 pièce
Installation
1) Connectez les 3 pièces des panneaux de fenêtre (No. 1) en glissant les panneaux de
rallonge dans le panneau principal.
2) Appliquez les bandes de mousse (No. 8) à chaque extrémité des panneaux de rallonge.
3) Ouvrir la fenêtre et placer l'assemblage dans l'ouverture Ajuster les panneaux de rallonge
pour concorder avec la largeur ou la hauteur de la fenêtre, tel qu'indiqué ci-dessous
(figure A). Fixer les panneaux de rallonge à l'aide de 4 vis épointées (No. 4, figure B-1).
Fixer le panneau principal à l'aide de 4 vis pointues (No. 4, figure B-2 et B-3).
4) Étendre les 2 extrémités du tuyau de 130mm (No. 5). Connecter le connecteur de tuyau
(No. 9) à une extrémité du tuyau d'échappement (No. 5) en tournant dans le sens horaire.
Insérer l'embout d'échappement (No. 2) à l'autre extrémité du tuyau d'échappement en
tournant dans le sens horaire (figure C) pour créer l'assemblage de tuyau.
5) Insérer l'embout connecteur du tuyau (étape 4) à l'arrière de l'appareil en tournant dans le
sens horaire pour fixer (à gauche sur la figure D).
6) Insérer l'embout d'échappement (étape 4, assemblage de tuyau) dans le panneau de
fenêtre (figure E)
7) Étendre les 2 extrémités du tuyau de 110mm (No. 6). Connecter le connecteur de tuyau
(No. 10) à une extrémité du tuyau d'échappement (No. 6) en tournant dans le sens horaire.
Insérer l'embout d'échappement (No. 3) à l'autre extrémité du tuyau d'échappement en
tournant dans le sens horaire (figure C) pour créer l'assemblage de tuyau.
8) Faire glisser l'extrémité du connecteur de l'assemblage de tuyau (étape 7) à l'arrière de
l'appareil (à droite dans la figure D)
9) Insérer l'embout d'échappement (étape 7, assemblage de tuyau) dans le panneau de
fenêtre (figure E)
10) Brancher le câble d'alimentation dans la prise murale et appuyer sur le bouton (Reset).
11) Veuillez laisser 8" d'espace autour de l'appareil pour assurer une circulation d'air
adéquate. Lors du rangement du climatiseur portable, le panneau de fenêtre peut être
laissé en place. Il suffit de placer les couvercles (No. 7) sur les embouts (diagramme 3,
figure 3) pour fermer les ouvertures.
6.
7. Sortie d'air
8.
9.
10.
6
7
8
9
10
Entrée d'air
1 3 4
5
7 8
9
2
6
10
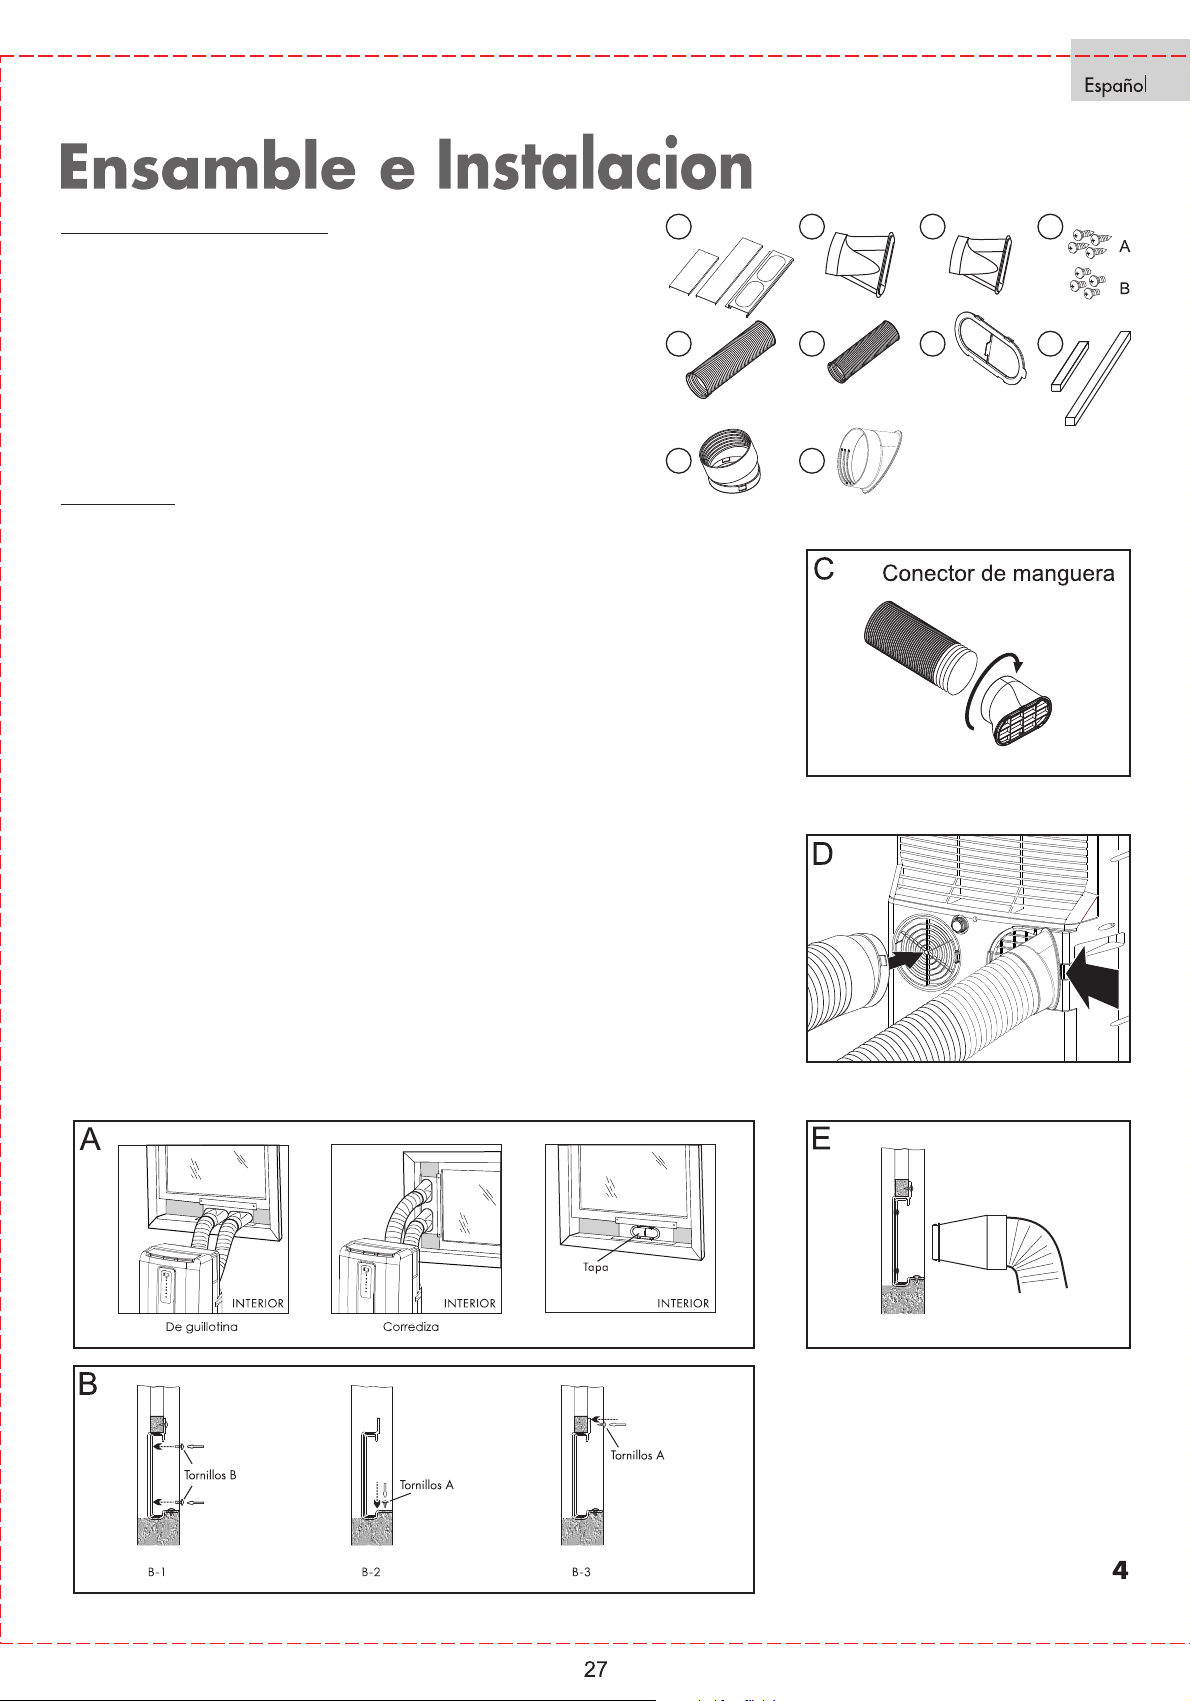
Instalación
1) Conecte las 3 piezas de los paneles para las ventanas (N.˚ 1) deslizando 2 paneles de
extensión en el panel de la ventana principal.
2) Aplique la tira de espuma (N.˚ 8) en cada extremo de los paneles de extensión.
3) Abra la ventana y coloque el conjunto de paneles para la ventana en la ventana. Ajuste los
paneles de extensión para que calcen en el ancho o la altura de la ventana como se
muestra a continuación (Ilustración A). Asegure los paneles de extensión con 4 tornillos de
punta roma (N.˚ 4, ilustración B-1). Asegure el panel principal para la ventana con los 4
tornillos con punta. (N.˚ 4, ilustraciones B-2 y B-3).
4) Extienda los 2 extremos de la manguera de escape grande (N.˚ 5). Conecte el conector
para la manguera (N.˚ 9) con un extremo de la manguera de escape (N.˚ 5) girando hacia
la derecha. Entonces introduzca la boquilla de escape (N.˚ 2) en el otro extremo de la
manguera de salida girando hacia la derecha (ilustración C) para crear el conjunto de la
manguera.
5) Introduzca el extremo del conector del conjunto de la manguera (paso 4) en la parte
posterior de la unidad y gire hacia la derecha para asegurar (lado izquierdo de la
ilustración D).
6) Introduzca el extremo del escape con boquilla (paso 4, conjunto de la manguera) en el
panel para la ventana (ilustración E)
7) Extienda los 2 extremos de la manguera de escape pequeña (N.˚ 6). Una el conector para
la manguera (N.˚ 10) con un extremo de la manguera de escape (N.˚ 6) girando hacia la
izquierda. Entonces introduzca la boquilla de escape (N.˚ 3) en el otro extremo de la
manguera de salida girando hacia la izquierda (ilustración C) para crear el conjunto de la
manguera.
8) Deslice el extremo del conector del conjunto de la manguera (paso 7) en la parte posterior
de la unidad (lado derecho de la ilustración D).
9) Introduzca el extremo del escape con boquilla (paso 7, conjunto de la manguera) en el
panel para la ventana (ilustración E)
10) Enchufe el cable de energía en el toma de la pared y presione el botón “Reset” (Reiniciar).
11) Deben dejarse 8” de espacio alrededor de la unidad para una apropiada circulación.
12) Cuando retire el acondicionador de aire portátil para guardarlo, puede dejarse en el
lugar el panel para la ventana. Simplemente coloque las cubiertas (N.˚ 7) sobre los
agujeros de la boquilla (consulte el diagrama 3 de la ilustración 3) para cerrar las aberturas.
Accesorios que se incluyen
1. Panel principal para ventana y paneles de extensión (se
extienden de 20” hasta 46”)............................................. 3 piezas
2. Boquilla de escape con un diámetro de 130mm.................... 1 pieza
3. Boquilla de escape con un diámetro de 110mm.................... 1 pieza
4. Tornillos.........................................................................8 piezas
5. Manguera de escape con un diámetro de 130mm (grande)....1 pieza
6. Manguera de escape con un diámetro de 110mm (pequeña)...1 pieza
7. Cubierta ....................................................................... 2 piezas
8. Espuma......................................................................... 2 piezas
9. Conector para la manguera (salida de aire) para manguera larga con
un diámetro de 130mm.....................................................1 pieza
10. Conector para la manguera (entrada de aire) para manguera
pequeña con un diámetro de 110mm...................................1 pieza
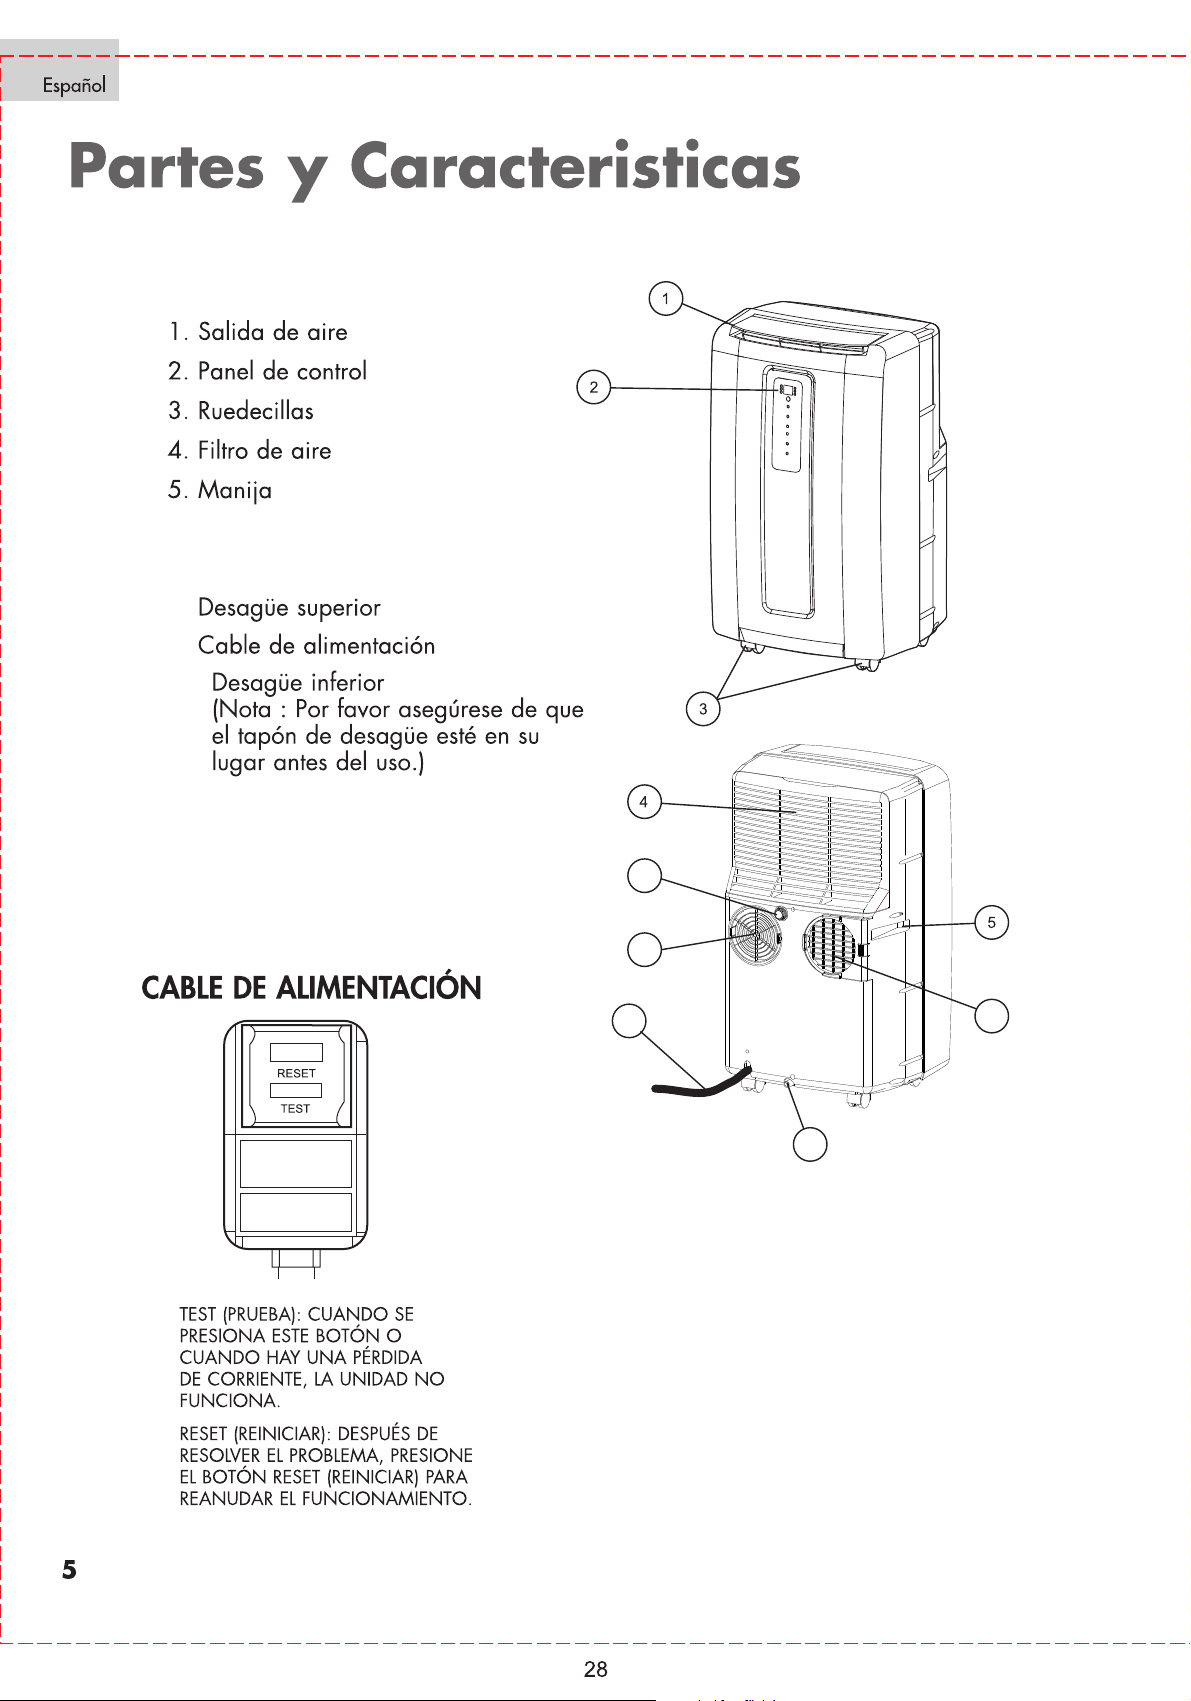
6. Entrada de aire
7. Salida de aire
8.
9.
10.
6
7
8
9
10