Loading ...
Loading ...
Loading ...

10
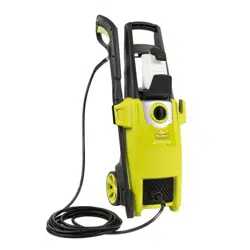
2. Gently pull the onboard detergent tank out of its storage
position. Remove the cap with PVC tube and ll the tank
with detergent designed specically for use with pressure
washers (Fig. 18).
3. Insert the suction tube back into the tank and cap the tank
closed. Push the tank back into storage position on the
unit.
mCAUTION! Always test the detergent in an
inconspicuous area before use.
4. Turn on the pressure washer. Pull the trigger to operate
the unit. The liquid detergent will automatically mix with
water and be discharged through the nozzle.
5 Apply detergent from the bottom to the top of the dry
surface to be cleaned.
NOTE: Wetting the surface rst is not recommended as it
dilutes the detergent and reduces its cleaning ability.
6. Allow the detergent to remain on the surface for a short
time before rinsing. Do not allow the detergent to dry on
the surface.
mCAUTION! Damage may occur to painted surfaces if
the detergent is allowed to dry on the surface. Wash and rinse
a small section at a time. Avoid working on hot surfaces or in
direct sunlight.
7. Rinse with clean water under high pressure. When working
on a vertical surface, rinse from the bottom up, then rinse
from the top down to avoid streaking. Hold the nozzle 6-8
inches away from the work surface at a 45° angle.
8. When you have nished using the detergent injection
system, remove the detergent suction tube from the
detergent tank and insert it into 1.3 gal (5 L) of fresh water.
Siphon water at low pressure for one minute so that all
the detergent is ushed through the system. Remove the
detergent tank and rinse it until it is thoroughly cleaned.
mCAUTION! Failure to follow these cleaning instructions
will cause the injection system to become clogged and
inoperable.
mIMPORTANT! NEVER USE:
• Bleach, chlorine products, and other corrosive chemicals
• Liquids containing solvents (e.g. paint thinners, gasoline,
oils)
• Tri-sodium phosphate products
• Ammonia products
• Acid-based products
These chemicals will harm the unit and will damage
the cleaning surface.
Shutting down
1. Turn the switch to the OFF (0) position and unplug the
power cord from the outlet.
2. Turn o the water source.
3. Hold the trigger to release water pressure.
4. Disconnect the garden hose from the water inlet on
the unit.
5. Disconnect the high-pressure hose connection on the
trigger gun handle.
6. Release the trigger and engage the gun safety lock.
mWARNING! Turn o the water supply and squeeze the
trigger to depressurize the unit. Failure to do so could result in
personal injury due to discharge of high-pressure water.
Taking a break
If you are taking a break of ve minutes or more between
cleaning tasks:
1. Engage the gun safety lock (Fig. 14).
2. Turn the switch to the OFF (0) position.
3. Unplug the power cord from the outlet.
Storage
m
CAUTION! Always store your pressure washer in a
location where the temperature will not fall below 32ºF (0ºC).
The pump in this machine is susceptible to permanent damage
if it freezes. FREEZE DAMAGE IS NOT COVERED BY THE
WARRANTY.
• Store the pressure washer indoors in a dry, covered area
where it is not subject to adverse weather conditions.
• It is important to store this product in a frost-free area.
• Always empty water from all hoses, the pump, and the
detergent tank before storing.
mCAUTION! The use of a pump protector is
recommended to prevent cold weather damage during storage
over the winter months.
Fig. 18
Detergent tank
Pressure washer
detergent
Loading ...
Loading ...
Loading ...