NOTE: Do not tilt or angle the lid when placing or removing. Lift or lower the lid straight up or down to ensure that the wire harnesses in the lid and base connect properly.
FRONT
STAINLESS STEEL INNER POT
The Max Fill Line in the Inner Pot is represented by "FULL CUP". DO NOT fill past the Max Fill Line.
Pressure Lid Underside (with Inner Lid)
Pressure Lid: Inner Lid Center Gasket
Pressure Lid: Inner Lid Outer Gasket
Instructions for Pressure Lid Assembly
INNER LID ASSEMBLY
REMOVING LID
1. Hold the Knob on the underside of the Inner Lid and pull to remove the Inner Lid (see Fig. i).
INSERTING INNER LID
1. Ensure that the Knob on the underside of the Inner Lid is facing outward, away from the Lid.
2. Ensure that the Inner Lid Rubber Gaskets are properly attached to the Inner Lid (see Fig. ii-a & ii-b).
3. Press the hole on the Inner Lid into the Center Knob on the underside of the Lid (see Fig. iii).
4. Ensure that Knob is visible when the Inner Lid is in place and that the Inner Lid Rubber Gaskets are positioned evenly and onto the rim of the Inner Lid (see Fig. ii-a).
CHANGING OR CLEANING THE INNER LID
1. Hold the Inner Lid Knob on the underside of the Inner Lid and pull to remove the Inner Lid (see Fig. i).
2. Pull off the Inner Lid Center Gasket (see Fig. iv) and the Inner Lid Outer Gasket (see Fig. ii-b).
3. Clean the Inner Lid Rubber Gaskets after each use. Inspect the Inner Lid Rubber Gaskets to ensure that they are clear of debris.
4. Place the new or clean Inner Lid Center Gasket in the hole in the Inner Lid (see Fig. v). Attach the new or clean Inner Lid Outer Gasket to the outside of the Inner Lid. When properly attached, the Inner Lid Rubber Gaskets should sit evenly.
5. Ensure that the Knob on the Inner Lid is facing outward, away from the Lid. You should be able to see the Knob (see Fig. ii-a).
6. Press the Inner Lid onto the Lid and press the hole on the Inner Lid onto the Center Knob on the underside of the Lid (see Fig. iii).
7. Ensure that the Inner Lid is facing outward and that the Inner Lid Rubber Gasket sits correctly and evenly on the Inner Lid.
FLOAT VALVE ASSEMBLY
1. Remove the Lid from the Unit and remove the Inner Lid (see INNER LID ASSEMBLY, p. 16).
2. Pull off the Rubber Gasket at the bottom of the Float Valve (see Fig. vi). The Float Valve will be loose in its chamber.
3. Inspect the Float Valve Chamber to ensure that no food is stuck in the chamber. Run water through the Float Valve Chamber to clean it. Be cautious not to submerge the whole Pressure Lid.
4. When the chamber is clear of debris, turn the Pressure Lid right side up to allow the Float Valve to drop into the Float Valve Chamber on the underside of the Lid. Turn the lid to the side so you can view the float valve
5. Stick the pointed end of the Float Valve Pin into the side hole of the Float Valve (see Fig. vii).
6. With the Float Valve Pin inserted into the side hole, slide the Rubber Gasket onto the Float Valve, ensuring that the wider side of the Rubber Gasket is against the Pressure Lid (see Fig. viii).
7. The Rubber Gasket should be snug on the Float Valve.
8. Remove the Float Valve Pin (see Fig. vii).
PRESSURE RELEASE VALVE ASSEMBLY
NOTE: Do not attempt to assemble or disassemble the Pressure Release Valve when the Emeril Lagasse Pressure AirFryer is in use.
1. Pull to remove the Pressure Release Valve (see Fig. ix).
2. Ensure that the Pressure Release Valve and holes are not blocked by food or debris. If blocked, wash out or use a pin to unblock.
3. Look at the clip on the underside of the Pressure Release Valve (see Fig. x). It should not be damaged or severely bent.
4. Press the Pressure Release Valve back into the hole on the Lid. If the Valve does not insert correctly, it may have a bent clip.
Preparing for Pressure Cooking
CHECK PARTS & ACCESSORIES
1. Before first use, remove parts and accessories from the package and ensure all parts have been included before discarding any packaging materials. Remove all packing materials such as plastic film, cardboard, and stickers on the Pressure Release Valve and Condensation Collector (see PARTS & ACCESSORIES, p. 8).
2. CLEAN INSIDE: Remove the Inner Lid from the Pressure Lid by pulling the Knob. Remove the Rubber Gaskets from the Inner Lid (see INNER LID ASSEMBLY, p. 16). Wash the Inner Lid, Rubber Gasket, Inner Pot, and other loose accessories with warm, soapy water; rinse; and dry. NOTE: Be sure to replace the Rubber Gaskets (see CHANGING THE INNER LID RUBBER GASKETS and FLOAT VALVE ASSEMBLY sections) before reinstalling Inner Lid. Periodically check that the Inner Lid Rubber Gaskets are not cracking, breaking, or stretching and are properly installed.
TEST RUN CONDUCTED WITH WATER ONLY
Before first use and periodically afterward, perform a test run conducted with water only to ensure that the Unit is operating properly. To perform the test:
1. Place the Unit on a clean, flat surface.
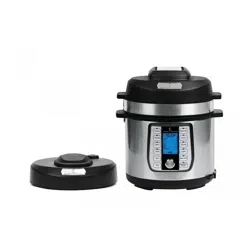
2. Attach the Condensation Collector to the side of the Unit by sliding it into the slots (see Fig. B). NOTE: The Condensation Collector may be preassembled.
3. Remove the Pressure Lid. Place the Inner Lid Outer Gasket around the outside of the Inner Lid and the Inner Lid Center Gasket in the center hole. Make sure the Float Valve and Rubber Gasket are in place in the Pressure Lid (see INSTRUCTIONS FOR PRESSURE LID ASSEMBLY, p. 16).
4. Place the Inner Pot in the Base. Pour 2 cups (473 ml) of water in the Inner Pot.
5. Attach the Power Cord to Unit Base and then a wall outlet (see ATTACHING THE POWER CORD, p. 7). When the Unit is first plugged in, “----” will appear on the LCD Display. The Unit is automatically “ON” when plugged in.
6. ATTACHING LID: With the LCD Display facing you, place the Pressure Lid on the Unit, aligning the Lid Position Mark with the Open Mark (see Fig. C). Twist the Pressure Lid counterclockwise about 30° and align the Lid Position Mark with the Closed Mark (see Fig. D). When the Pressure Lid is locked, the Release Switch will move to the Closed position (see Fig. E).
7. The Magnetic Safety Sensor assures the Pressure Lid is properly closed before the Unit can pressurize. If the Pressure Lid is not closed correctly when starting a cooking cycle, a beeping noise will sound and the word “LID” will appear on the display, indicating the Pressure Lid is not fully closed.
8. Once the Pressure Lid is properly attached, select the Canning Button on the Panel. Turn the Program Dial to the left to select the Short setting and then press the Program Dial to confirm the setting. This setting will automatically set a 10-min. cooking time. The LCD Display will turn orange while pressure builds in the Unit and will turn red when the desired pressure level is reached. CAUTION: DO NOT ATTEMPT TO OPEN LID WHEN LCD DISPLAY IS ORANGE OR RED.
9. SAFELY RELEASE PRESSURE: Once the cycle is complete, the Unit will beep. Press the Cancel Button. Slide the Release Switch from the Closed to the Open position and let go (see Fig. F). Allow all pressure to escape from the Unit. You will notice a slight incline of the Pressure Release Valve while pressure is being released (see Fig. H). After no steam is coming out of the Pressure Release Valve, the Pressure Lid can be removed easily.
WARNING: Keep your body (face, arms, torso) away from Pressure Release Valve area when operating the Release Switch to avoid being exposed to the steam released from the valve. Follow these safety precautions when releasing pressure to prevent serious injury.
10. Allow the water in the Inner Pot to cool. Remove and empty the Inner Pot. Rinse and towel dry.
WARNING: DO NOT LIFT BASE TO REMOVE CONTENTS from Inner Pot. Do not lift Inner Pot from Base when contents are hot.
NOTE: Do not use metal utensils in the Inner Pot.
WARNING: PREVENT BURNS! DO NOT TOUCH THE STAINLESS STEEL EXTERIOR. ONLY USE THE BLACK HANDLE ON THE LID TO OPEN. CONTENTS IN THE UNIT ARE HOT. ALWAYS OPEN THE LID AWAY FROM FACE AND BODY.
Instructions for Pressure Cooking
IMPORTANT: Any function can be stopped immediately by pressing the Cancel Button.
1. Review PREPARING FOR PRESSURE COOKING (see p. 18) to learn about the Unit.
2. Place the Emeril Lagasse Pressure AirFryer on a clean, flat surface.
3. Attach the Condensation Collector to the side of the Unit (see Fig. B).
4. Open the Pressure Lid by sliding and letting go of the Steam Release Switch from the Closed position to the Open position. Then, grab the handle and twist the Lid clockwise to open the Lid see OPEN LID in PREPARING FOR USE.
5. Place the Inner Pot in the Base. Add ingredients to Inner Pot. NEVER FILL THE INNER POT ABOVE THE FULL CUP LINE (see IMPORTANT SAFEGUARDS, p. 4).
6. ATTACHING LID: With the LCD Display facing you, place the Pressure Lid on the Unit, aligning the Lid Position Mark with the Open Mark (see Fig. C). Twist the Pressure Lid counterclockwise about 30° (see Fig. D). When the Pressure Lid is locked, the Release Switch will move to the Closed position (see Fig. E).
7. Attach the Power Cord into the Emeril Lagasse Pressure AirFryer and then into a wall outlet (see ATTACHING THE POWER CORD, p. 7). When the Unit is initially plugged in, “----” will appear on the LCD Display. The Unit automatically powers on when plugged in.
8. SELECT COOKING MODE: You can select a preprogrammed setting (see part A, p. 24–25). The LCD Display will turn blue when a program is selected (see Fig. I).
9. SELECT COOKING TIME: Some presets feature multiple preset cooking times. Turn the Program Dial to the left or right to choose a preset time. (see part B, p. 24–25). Press the Program Dial to confirm the setting. When a cooking preset button is pressed and a food type is selected, the LCD Display will show the default cooking time for that preset.
10. Turn the Program Dial to the left or right to switch between SHORT, MED, or LONG cooking settings and press the Program Dial to select (see part C, p. 24–25).
11. Alternatively, you can select the Timer Button to manually adjust the cooking time (see part D, p. 24– 25).
12. Once a cooking time and temperature have been confirmed, the LCD Display will turn orange (see Fig. J).
13. USE DELAY TIMER: The Delay Timer lets you delay the beginning of the cooking cycle. To use the Delay Timer, select a cooking time and temperature. Instead of pressing the Program Dial to confirm the time and temperature, press the Delay Timer Button. Then, use the Program Dial to select the desired time delay and press the Program Dial to confirm the setting.
NOTE: Using a delay time greater than 2 hrs. is not recommended because bacteria can form when uncooked food sits in the Inner Pot for too long.
14. For pressure cooking settings, once the inside of the Emeril Lagasse Pressure AirFryer has reached the desired pressure level, the LCD Display will turn red (see Fig. K).
NOTE: DURING THIS TIME OR ANY TIME DURING THE COOKING CYCLE, DO NOT ATTEMPT TO MOVE THE UNIT OR OPEN THE PRESSURE LID.
15. At the completion of the cooking cycle, the Unit will “beep” and enter Keep Warm mode until manually cancelled by pressing the Cancel Button.
NOTE: Foods kept at Keep Warm mode for longer than 6–8 hrs. may lose their flavor and texture.
NOTE: When the cooking cycle is complete and the Keep Warm function is in use, the screen will remain Red. Allow sufficient time for the screen to turn blue and release any remaining pressure before opening.
16. Open and remove the Pressure Lid by sliding the Steam Release Switch to the Open position and then letting go. The Pressure Release Valve should move from the Closed position to the Open position (see Fig. H). A quick burst of steam will release from the Pressure Release Valve. If pressure and steam are being released, wait until no steam is being emitted by the Pressure Release Valve before trying to open the Pressure Lid. Do not force the Pressure Lid open until all the pressure is released, which may take several minutes. Next, grab the handle and twist the Pressure Lid clockwise approximately 30°.
NOTE: Some foods, especially thickly textured stews and sauces and oily foods, will percolate and form bubbles. The bubbles can burst and splatter. Before removing the Pressure Lid, gently tap/jiggle the Unit after releasing pressure to burst the bubbles.
Instructions for Air Frying
IMPORTANT: Any function can be stopped immediately by pressing the Cancel Button.
1. Review PREPARING FOR PRESSURE COOKING (see p. 18) to learn about the Unit.
2. Place the Emeril Lagasse Pressure AirFryer on a clean, flat surface.
3. If the Pressure Lid is attached to the Unit, remove the Pressure Lid by sliding and letting go of the Steam Release Switch from the Closed position to the Open position. Then, grab the handle and twist the Pressure Lid clockwise to remove the Lid see OPEN LID in PREPARING FOR USE.
4. Place the Inner Pot in the Base. Place a rack in the Inner Pot. Place ingredients on the rack. NEVER FILL THE INNER POT ABOVE THE FULL CUP LINE (see IMPORTANT SAFEGUARDS, p. 4).
5. ATTACHING LID: Place the Air Frying Lid on top of the Base, aligning the six pins in the Air Frying Lid’s Wire Harness with the six holes in the Base’s Wire Harness. The Air Fry preset will not function unless the Wire Harnesses are aligned properly (see p. 13). Do not twist the Air Frying Lid to close. The Air Frying Lid does not lock.
TIP: Do not tilt or angle the lid when placing or removing. Lift or lower the lid straight up or down to ensure that the wire harnesses in the lid and base connect properly.
6. Attach the Power Cord into the Emeril Lagasse Pressure AirFryer and then into a wall outlet (see ATTACHING THE POWER CORD, p. 7). When the Unit is initially plugged in, “----” will appear on the LCD Display. The Unit automatically powers on when plugged in.
7. SELECT COOKING MODE: Select the Air Fry setting (see part A, p. 24–25). The LCD Display will turn blue when a program is selected (see Fig. L). The Air Fry preset will not function if the Pressure Lid is attached to the Unit.
8. SELECT COOKING TIME AND TEMPERATURE: Turn the Program Dial to the left or right to choose a setting (see part B, p. 24–25). Press the Program Dial to select the setting. When a cooking preset button is pressed and a food type is selected, the LCD Display will show the default cooking time and temperature for that preset.
9. Press the Program Dial to confirm the preset cooking time and temperature (see part C, p. 24–25).
10. Alternatively, you can select the Timer Button to manually adjust the cooking time (see part D, p. 24– 25). You can also select the Temp Button to manually adjust the cooking temperature for most presets to suit the needs of your recipe (see part E, p. 24–25).
11. Once the fan has stopped running, open and remove the Air Frying Lid. The Air Frying Lid will be hot. ALWAYS place the Air Frying Lid, with the heating element facing downward, on a wire rack or heatresistant trivet that overlaps the lid after use to cool. Placing only the heating element on a small heatresistant surface might damage the heating element.
NOTE: DURING THIS TIME OR ANY TIME DURING THE COOKING CYCLE, DO NOT ATTEMPT TO MOVE THE UNIT OR OPEN THE LID.
12. Once the cooking cycle is complete, the LCD Display will display a rotating icon for 2 minutes while the fan cools down the Air Frying Lid (see Fig. N). DO NOT attempt to remove the Air Frying Lid until the LCD Display turns blue to indicate that the Air Frying Lid has cooled.
13. After the LCD Display turns blue (see Fig. L), open and remove the Air Frying Lid. The Air Frying Lid will be hot. ALWAYS place the Air Frying Lid, with the heating element facing downward, on a wire rack after use to cool.
AIR FRYING TIPS
• Foods that are smaller in size usually require a slightly shorter cooking time than larger foods.
• Large quantities of food only require a longer cooking time than smaller quantities.
• Adding a bit of vegetable oil to fresh potatoes is suggested for a crispier result. When adding oil, do so just before cooking and add only a small amount onto the potato.
• Snacks normally cooked in an oven can also be cooked in the Pressure AirFryer.
• Use premade dough to prepare filled snacks quickly and easily. Premade dough also requires a shorter cooking time than homemade dough.
• You can use the Pressure AirFryer to reheat foods. Simply set the temperature and time to however warm you want your food.
Sous Vide
Using traditional cooking methods, heat is transferred from a hot burner or oven to a pan and then to your food, which is heated from the outside to the middle. Using guesswork and a little luck, you sometimes get good results, but the food is often overdone on the outside and sometimes undercooked toward the center. The heat generated by a pan or air inside an oven is usually much hotter than it needs to be. If you don’t remove the food at precisely the right time, results will be inconsistent.
Sous vide cooking utilizes precise temperature control to produce results that you cannot achieve through any other cooking technique. Set up the Emeril Lagasse Pressure AirFryer as shown in this manual; place your seasoned food in a slider, snap shut, or vacuum-sealable food storage bag; place the bag in the water; and set the time and temperature. Your food will cook to perfect doneness. Once cooked, you can leave the food in the water bath until you are ready to serve.
NOTE: Do not keep food heated at the temperature beyond the completion of its cooking cycle. Doing so can cause a loss of flavor or texture.
OPERATING INSTRUCTIONS
1. Put seasoned food in a sealable bag(s).
2. Remove as much air as possible from the bags(s) before sealing. You may use a vacuum sealer for best results.
3. Pour water into the Inner Pot, being careful not to add so much water that the water passes the FULL CUP Line when the bags are added.
NOTE: You can place the food bags in the Inner Pot first and then add the water to ensure that the water does not fill above the FULL CUP Line. Then, remove the bags before beginning the cooking cycle and preheating the water.
4. Press the Sous Vide Button and use the Program Dial to choose the desired cooking preset time. You may choose between the SHORT, MED, or LONG default time settings or press the Timer Button to adjust the time to a custom time setting. Then, press the Temp Button to adjust the cooking temperature to your desired temperature.
NOTE: The SHORT, MED, and LONG settings are default times. You still need to adjust the temperature to the desired doneness.
5. Press the Program Dial to begin cooking cycle. The LCD Display will turn orange. Once the desired cooking temperature has been reached, Unit will beep and the timer will begin counting down.
6. Carefully place the food bag in the water. Make sure you don't drop the bag in the water.
7. Once the timer has completed, use tongs to remove the sealed bag with food. Do not use your hands because the water will be hot. Do not press the Keep Warm Button.
Frequently Asked Questions
What is the material of construction?
This appliance has a stainless steel housing and Inner Pot.
How do you assemble/disassemble the Unit?
This appliance comes fully assembled with the Float Valve, Pressure Release Valve, and Inner Lid already assembled in the Pressure Lid. Attach the Condensation Collector before operation (see PREPARING FOR PRESSURE COOKING, p. 18).
What is the default time?
Each cooking mode has a default time that appears as soon as you select a desired program button. Before the timer on the LCD Display begins counting down, the appliance must first reach the proper pressure and/or temperature for that mode.
How long does it take for the Unit to reach full pressure and for the cook time clock to start a countdown?
When the Unit reaches the desired cooking pressure, the LCD Display will change color from orange to red and the cooking time will begin counting down. The time required to reach the desired pressure setting depends on the volume, concentration, and ratios of solid to liquid in the Unit – generally 5–40 mins.
Can you change the cook time from the default setting?
Yes! You can change the cook time two ways. Select SHORT, MED, or LONG. These are preprogrammed settings that will give a predetermined time. Alternatively, select the Time Button to adjust the cooking time to suit your needs.
Can you leave the Unit on while not at home?
The Emeril Lagasse Pressure AirFryer has a delayed start function, but leaving the Unit on while not at home is not recommended.
Can you put frozen foods into the Unit without defrosting?
Yes! Remember to add an average of 10 extra mins. to the cooking time when cooking frozen meals.
Can I deep fry in this Unit?
No! Do not attempt to deep fry in the Emeril Lagasse Pressure AirFryer. The Unit does not have safety measures to prevent oil fumes and fire. Pressurized oil fumes are very dangerous and can cause an explosion.
How do I turn off the Unit?
Press the Cancel Button on the Control Panel and unplug the Power Cord from the wall outlet and the Unit Base.
Care & Cleaning
CAUTION
Any leftover food or debris remaining in the Unit could prevent safety devices from operating correctly during subsequent use!
FOLLOW THESE CLEANING INSTRUCTIONS AFTER EACH USE.
1. Allow the Unit to cool to room temperature before cleaning. Do not attempt to clean a hot Emeril Lagasse Pressure AirFryer!
2. Unplug the Power Cord from the wall and then from the Unit Base in a straight motion. Do not twist or pull the Power Cord at an angle. Twisting or pulling at an angle may damage the Power Cord, plug, or Base.
3. Clean the exterior of the Unit with a soft, damp cloth or paper towel. Do not immerse the power cord, plug, Unit Base, or Air Frying Lid in water or pour water into the housing.
4. If the Pressure Lid is attached to the Unit, unlock the Pressure Release Valve by sliding the Steam Release Switch to the Open position and let go. Wash with mild, soapy water and rinse well. Use a small pin if necessary to remove any blockages that may have occurred during cooking process. Check to see that the interior spring-loaded part moves freely by pressing down on it. Check to see that it is free from debris.
5. If the Pressure Lid was used, clean the Pressure Lid and Inner Lid (see INNER LID ASSEMBLY, p. 16). Remove the Inner Lid Rubber Gaskets from the Inner Lid. The Inner Lid Rubber Gaskets must be washed separately with a sponge or soft cloth and warm, soapy water. Rinse well. Reattach the Inner Lid Rubber Gasket to the Inner Lid.
NOTE: Check before each use to make sure the Rubber Gasket is clean, flexible, and not torn. If damaged, replace before operating Unit (see INNER LID ASSEMBLY, p. 16).
6. Rinse upper and underside of Lid with warm water, making sure the Float Valve and Pressure Release Valve are free from debris. Both valves should be able to move up and down freely, with the Float Valve stopping only when the Float Valve Rubber Gasket meets the Lid. Dry.
7. Attach the Inner Lid to the Lid. Improper placement of the Inner Lid will prevent the Lid from closing properly. (see INNER LID ASSEMBLY, p. 16).
8. If the Air Frying Lid was used, let the lid cool and then clean it with a damp, moist cloth.
CAUTION: Do not submerge or rinse the Air Frying Lid in water. Only clean it with a damp, moist cloth.
9. Remove the Inner Pot after every use. The Inner Pot is dishwasher safe, but to prolong its use, you should wash it by hand using warm, soapy water and a soft cloth or sponge. Rinse and towel dry. Do not use harsh chemicals or scouring pads.
10. To clean the Condensation Collector, slide to remove it; clean it with warm, soapy water; allow it to dry; and then reattach it.
NOTE: Customer Service should be contacted for any questions or parts (see the back of this manual for contact information).
NOTE: The following parts can be placed in dishwasher: Inner Pot, Measuring Cup, Spoon. We recommend hand washing all parts to prolong the life of the components. Any other servicing should be performed by an authorized service representative.
Troubleshooting
Symptom
Possible Cause
Solution
Cannot open Pressure Lid
DO NOT FORCE OPEN.
Pressure Lid does not lock
Inner Lid Rubber Gasket is not properly installed
Reinstall Inner Lid Rubber Gasket.
Cannot open Pressure Lid after pressure is released
Float Valve and Pressure Release Valve are still raised
Ensure the Pressure Release Valve is open, the Steam Release Switch is in the Open position, and you have let go of the Steam Release Switch. CAUTION: Hot steam may be released during this process. DO NOT FORCE THE UNIT OPEN. Do not place face, hands, or body near valve opening.
Air escapes from the rim of the Pressure Lid and pressure will not increase
Pressure Lid incorrectly installed
See ATTACHING LID in INSTRUCTIONS FOR PRESSURE COOKING, p. 20.
Inner Lid not installed
Install Inner Lid (see INNER LID ASSEMBLY in INSTRUCTIONS FOR PRESSURE LID ASSEMBLY, p. 16).
Inner Lid Rubber Gasket not installed or incorrectly installed
Install Inner Lid Rubber Gasket.
Food residue on Inner Lid Rubber Gasket
Clean Inner Lid Rubber Gasket.
Inner Lid Rubber Gasket is damaged or worn out
Replace Inner Lid Rubber Gasket. Contact Customer Service (see the back of the manual for contact information). for replacement parts.
Air escapes from Float Valve during operation
Food stuck on Float Valve Rubber Gasket
Clean Float Valve Rubber Gasket
Inner Lid not installed
Install Inner Lid
Float Valve does not rise
Float Valve Rubber Gasket is worn out
Replace Float Valve Rubber Gasket. Contact Customer Service for assistance (see the back of the manual for contact information).
Appliance is not filled with enough food or water
Check recipe for proper quantities of solids and liquids.
Air is escaping from rim of Lid and/or from Pressure Release Valve
Contact Customer Service for assistance (see the back of the manual for contact information).
Float Valve not assembled correctly
Float Valve should be able to move up and down, stopping only when its Rubber Gasket meets the Lid interior. Ensure that its Rubber Gasket is clean and the Float Valve can move freely.*
Liquid spitting out of Float Valve
Too much liquid in Unit
Allow the cooking cycle to finish. Clean the Float Valve thoroughly. Use less liquid in future recipes.
Unit turns off unexpectedly
Appliance is overheated
Unplug and let the Unit cool for 30 mins. in order to reset.
Display reads “LID” and beeping sound occurs
Lid not positioned correctly or not fully closed
Adjust Lid by following ATTACHING LID in INSTRUCTIONS FOR PRESSURE COOKING, p. 20.
NOTE: Non-pressure programs require the Glass Lid and not the main Lid. Air frying presets require the Air Frying Lid.
Lid does not open
Lid is put on incorrectly
DO NOT FORCE LID OPEN. Unplug the Unit and allow to cool down. Then, attempt to remove the Lid.
Air Fryer does not work
Air Frying Lid is put on incorrectly
The Wire Harness must be firmly connected.
*NOTE: If necessary to reassemble Float Valve, see FLOAT VALVE ASSEMBLY, p. 17.
DISPLAY ERROR INDICATOR
Error Code
Cause of Error
Solution
E1
Bottom sensor open
Contact Customer Service*
E2
Bottom sensor short circuit
Contact Customer Service*
E3
Unit has overheated
Let the Unit cool down before use
E4
Pressure switch malfunction
Contact Customer Service*
E5
Air Fryer Lid short circuit
Contact Customer Service*
E6
Air Fryer Lid Overheating
Let the Air Fryer Lid cool down before use
LID
Wrong lid
Attach the correct lid before use
NOTE: DO NOT use or attempt to repair a malfunctioning appliance.
*See the back of the manual for Customer Service contact information.


 If pressure and steam are being released, wait until no steam is being emitted by the Pressure Release Valve before trying to open the Pressure Lid. Do not force the Pressure Lid open until all the pressure is released, which may take several minutes. Next, grab the handle and twist the Pressure Lid clockwise approximately 30°.