USER INSTRUCTIONS
SCOLA™ FM SYSTEM
SCOLA TALK TRANSMITTER

CONTENTS
INTRODUCTION ..................................................
GETTINGSTARTED................................................
THEFMSYSTEM ..................................................
BATTERYINFORMATION ..........................................
Batterytype ....................................................
Insertingthebatteries . . . . . . . . . . . . . . . . . . . . . . . . . . . . . . . . . . . . . . . . . .
Batterylifetimeandpowerlevel.................................
ChargingbatterieswithSCOLATALK ............................
TurningSCOLATALKonandoff .................................
SettingSCOLATALK ...........................................
Connectingtheexternalantenna ................................
DIFFERENTWAYSTOUSESCOLATALK ...........................
Attachingtheneckcord ........................................
Connectingaudioequipment ...................................
Connectinganexternalmicrophone ............................
Channelselection ..............................................
ADVICEONTHEUSEOFTHESCOLA™FMSYSTEM .................
CAREANDMAINTENANCE.......................................
2

WARNINGS ....................................................
INCASEOFMALFUNCTION......................................
WARRANTY....................................................
SAFETYWARNING..............................................
REGULATORYINFORMATION....................................
SYMBOLS......................................................
SETTINGS......................................................
3

4
INTRODUCTION
We hope you will be pleased with your SCOLA product.
SCOLA provides hearing aid users with additional opportunities
in difficult listening situations.
WARNING
This booklet contains important information and instructions. Read
this booklet carefully before you start using the device.
NOTE
Your SCOLA TALK device and accessories may not look exactly as illus-
trated in this booklet. We furthermore reserve the right to make any
changes considered necessary.

5
GETTING STARTED
To benefit fully from your SCOLA™ FM system, it is important that
you make yourself familiar with its functions.
It is therefore a good idea to consider the kind of situations in
which you will be using the FM system, and what would be the
best SCOLA TALK settings in different situations.
You will often obtain the best result from the FM system if others
around you help in taking an active part in using it. Your SCOLA
TALK could conveniently hang around the neck of the person you
are communicating with, while during dinner and conferences it
could be placed on the table. In order to determine the best set-
tings, it is a good idea to practise first with your family and friends
to become familiar with the various possibilities.

6
THE FM SYSTEM
An FM system is a wireless communication system which allows
the sound from the microphone (SCOLA TALK) to be sent directly
to the hearing aid via a small receiver (SCOLA FLEX or SCOLA
BUDDY), in the same way that a radio receives a signal from a
radio transmitter.
7
The SCOLA TALK FM transmitter:
SCOLA TALK transmits signals to one or more receivers. With the
external antenna, the operating range will be up to 20 metres in
ideal transmitting conditions. Without the external antenna, the
operating range will be up to 1 metre.
1. Switch
2. Microphone grille
3. Antenna jack
4. Charge jack
5. Audio input/microphone
jack
6. Table stand/battery cover
7. Display and buttons
8. Clip
4.
5.
3.
1.
2.
8.
7.
6.

8
The following accessories are available for the SCOLA™ FM sys-
tem:
Storage case Bag External antenna
Audio cord Neck cord Battery charger
User instrUctions
SCOLA™ FM SySteM
scoLA tALK trAnsmitter
Two rechargeable batteries (NiMH) User instructions

9
BATTERY INFORMATION
Battery type
Two AAA batteries are required for your SCOLA TALK. These can
either be rechargeable or standard alkaline non-rechargeable
batteries. If you have any questions about the type, acquisition
or use of batteries, please consult the hearing care professional
where you acquired your SCOLA™ FM system.
The rechargeable batteries included are nickel-metal-hydride
(NiMH) type batteries. They are environmentally friendly and
do not contain heavy metals. The contact surface at the nega-
tive pole ensures that only this type of battery can be charged
directly in SCOLA TALK.

10
WARNING
If you use other types of rechargeable batteries for your SCOLA TALK,
they must be charged in a separate charger. Of non-rechargeable bat-
teries, only alkaline batteries may be used. If you try to charge this type
of battery, all that will happen is that all the battery symbol bars will
start to flash in the display.
For optimum battery life, please charge the batteries for at least
10 hours the first time, before you begin using your SCOLA TALK.
BE SURE to change alkaline batteries as soon as they are
exhausted, to avoid battery leakage.
ALWAYS remember to remove the batteries – irrespective of type
– if the transmitter will not be used for several weeks.
11
Inserting the batteries
First, open the table stand. Squeeze the sides of the stand to lift
off the battery cover, and insert the batteries as indicated by the
symbols in the bottom of the table stand.
If the SCOLA TALK is used by young children, the cover may be
provided with a tamper-resistant screw (1) to prevent battery
removal. The screw is available as an optional accessory.
1.

12
Battery lifetime and power level
Two rechargeable batteries are included. With fully charged bat-
teries, your SCOLA TALK can operate continuously for ten hours.
The display shows the battery power level. If the batteries are flat,
this will be indicated by a flashing bar. We recommend that you
always have a set of spare batteries with you.
WARNING
Low battery can cause the sound transmission to suddenly stop.
WARNING
Batteries that are no longer usable should be disposed of in accordance
with applicable environmental requirements.

13
Charging batteries with SCOLA TALK
The charger works within the range of 110 V to 240 V. It is impor-
tant to only use the charger supplied. During charging, the bars
of the battery symbol on the display will flash. It takes about ten
hours for flat batteries to be fully charged. It will not damage the
batteries if the charger is connected for a longer period of time.
Turning SCOLA TALK on and off
You turn the SCOLA TALK on by pushing the switch forwards to
the desired setting and off by pushing it backwards to the (•) set-
ting.

14
Setting SCOLA TALK
The mode switch on your SCOLA TALK allows
you to choose between various microphone
settings according to the listening situation
you are in.
You have the following options:
In this setting your SCOLA TALK is switched off.
In this setting your SCOLA TALK is on, and the microphone
receives speech and sound from all directions. This mode
is called ”omnidirectional”. We recommend that you use
this mode when the people or sounds you wish to hear
are situated all around the microphone. Your SCOLA TALK
could, for example, be placed in the middle of a table.

15
In this setting, SCOLA TALK is in the mode called
“directional”. It mostly picks up sound signals coming
from in front, attenuating unwanted sounds coming from
beside or behind you. We recommend that you use this
mode when you want to listen to a person located in front
of the microphone.
In this setting, SCOLA TALK’s directionality is even more
effective. This mode is called ”super-directional”. We
recommend that you use this mode in difficult listening
situations with loud noise levels, or when the sound source
is further away.
16
Connecting the external antenna
The best signal without noise is
obtained by connecting the external
antenna. The noise-free signal trans-
mission range is highly dependent
on the surroundings. If you put down
the SCOLA TALK or give it to some-
one to hold, it is a good idea to use the external antenna. If you
hold the SCOLA TALK in your hand, it can be used without the
external antenna.

17
DIFFERENT WAYS TO USE SCOLA TALK
SCOLA TALK can be used in a number of different ways:
• Itcanhangaroundtheneckorbeclippedontotheclothesof
thepersonspeaking
• Itcanbeplacedonatable
• Youcanholditinyourhandpointingitatthepersonspeak-
ing
• Itcanbeconnectedtovariouskindsofaudioequipment
suchasatelevisionorradioortoanexternalmicrophone

18
Attaching the neck cord
1. Place the provided neck cord holder on
the SCOLA TALK.
2. Press the neck cord holder against the
SCOLA TALK and push it forward until it
snaps into place in the hole of the clip.
The cord can be attached and removed
at the side of the holder. The neck cord
length can be adjusted as required.

19
Connecting audio equipment
The audio cord provided is used to connect the SCOLA TALK to
audio equipment (e.g. TV and radio). Plug the audio cord directly
into the headphone jack of the audio equipment. Plug the other
end of the audio cord into the audio jack of the SCOLA TALK. If
the SCOLA TALK is off, it will automatically turn on when you con-
nect it to the audio equipment, if the audio signal level is suffi-
ciently high.
The sound signal volume can usually be adjusted using the vol-
ume control of the audio equipment. If the signal from the audio
equipment is too weak, the SCOLA TALK will automatically turn
off after five minutes. To prevent this from happening, you must
increase the volume on the audio equipment, or set the SCOLA
TALK in the
(omnidirectional) setting, which will switch on
SCOLA TALK’s own microphone. In the two other settings, the
audio input function is deactivated.
Other connection possibilities include SCART (e.g. for TV or video)
and phono plugs (e.g. for hi-fi).

20
Connecting an external microphone
You can connect an external microphone to the SCOLA TALK.
There are various types available, including lapel and boom
microphones. An external microphone is an optional accessory.
Plug the microphone into the audio jack of the SCOLA TALK.
Switch the SCOLA TALK on, in the
(omnidirectional) setting.
The external microphone is not active in the two other micro-
phone settings
(directional) and (superdirectional).
Audio button

21
Press the audio pen-push button once so that the display shows
the channel number and “HI” alternately. This indicates that the
audio input function is now ready for connection of a microphone.
Press the audio button again if you wish to use the audio input
function for ordinary audio or multimedia equipment. This will
turn off the ”HI” symbol and “LO” will be briefly displayed.
Consult your hearing care professional to establish whether you
can benefit from an external microphone.

22
Channel selection
Channel selection button
In the SCOLA TALK display you can see the current FM transmit-
ting channel. The channels selected for the SCOLA receiver and
for SCOLA TALK must be the same in order for the system to
work.
When the SCOLA TALK is switched on, the display shows the cur-
rent FM transmitting channel. Your SCOLA TALK is preset to use
the same channel as the SCOLA receiver. The channel selection
button should only be used in cases where there is a mismatch
between the two channels, or if there is interference on the chan-
nel. You can press the channel selection button using a pen, or
the like.

23
You can also select another channel (both on the SCOLA receiver
and SCOLA TALK) if there is interference on the starting channel.
NOTE
Note that what is being tranmitted from the SCOLA TALK could possibly
be picked up by another FM system.

24
ADVICE ON THE USE OF THE SCOLA™ FM SYSTEM
To benefit fully from your SCOLA™ FM system, it is important that
you choose the right settings and wearing style for the SCOLA
TALK.
Listening
situation
Use and setting of SCOLA TALK
• Classrooms
• Lectures
Ask the teacher / lecturer to wear the SCOLA TALK
around their neck, or clipped onto their clothes.
• Meetings
• Group work
• Meals
Place the SCOLA TALK in the middle of the table and
set it in the omnidirectional mode.
Or set SCOLA TALK in the directional or superdirec-
tional mode and place it in front of you, pointing it
at the person speaking.

25
Listening
situation
Use and setting of SCOLA TALK
• Shopping with a
companion
Ask your companion to wear the SCOLA TALK
around his/her neck and set it in the directional
mode.
• In a car Ask your companion to wear the SCOLA TALK
around his/her neck and set it in the directional
mode.
Or set the SCOLA TALK in the superdirectional mode
and hold it in your hand, pointing it towards the per-
son speaking.
• Group conversa-
tion
Let the SCOLA TALK point towards the person
speaking. Choose the mode that provides the best
speech understanding in the current noise situation.
• In aircraft Transmitting is normally not allowed.

26
Listening
situation
Use and setting of SCOLA TALK
• Abroad When travelling abroad it may not be permitted to
use the same channels as in your own country.
• Hospitals Use requires permission.

27
CARE AND MAINTENANCE
In general, your SCOLA™ FM system should be cared for in the
same way as your hearing aid. It is a good idea to clean and
remove dirt and debris from the FM system on a daily basis. Fur-
thermore, there are special precautions to be taken.
• RemoveanydirtdebrisfromtheSCOLAproductsusinga
drysoftcloth
• DonotdisassembleanyoftheSCOLAproductsorhearing
aidasthiswillvoidtheguarantee
• DonotusewateralcoholortheliketocleantheFMsystem
• Makesurethattheantennaaudioandpowersupplycords
donotbecometangledup
• Do not expose the SCOLA system to cosmetics, hair spray,
water or cleaning solutions.
28
WARNINGS
WARNING
• Make sure to keep the batteries for SCOLA TALK out of reach of chil-
dren, who might place them in their mouths. Discard used batteries
carefully. Do not change batteries in front of children and do not let
them see where you keep your supply.
• If you do not use the rechargeable batteries from Widex, then use
only high quality batteries where the risk of leakage is limited, for
example alkaline batteries.

29
IN CASE OF MALFUNCTION
The following pages include some quick advice to follow if you
experience problems with your SCOLA™ FM system. If the prob-
lem continues, consult the hearing care professional where you
acquired your SCOLA™ FM system:
If there is no sound from the SCOLA™ FM system or the audio
equipment, or the sound is distorted, it could be because:
• The hearing aid, SCOLA receiver or SCOLA TALK is not in the
correct setting. Check that all the settings are correct for the
desired use.
• The SCOLA TALK and SCOLA receiver are not set to the same
channel. Check that the channel number in the display of the
SCOLA TALK is the same as the noted starting channel.

30
If there is noise in the hearing aid, it could be because:
• You are at or outside the limit of your SCOLA TALK’s operat-
ing range. Reduce the distance between the SCOLA TALK and
SCOLA receiver, and use the external antenna.
• Noise and whistling are interfering with the reception, possibly
because two or more FM transmitters are transmitting on the
same channel as your receiving channel.
To avoid this type of interference, make sure that only one FM
transmitter is transmitting on your receiving channel.
Try turning off your SCOLA TALK. If you hear another FM
signal, this is what is causing the noise. There are ways to avoid
interference:
1. Have only one FM transmitter turned on.
2. Find another available channel and select this channel on
both the SCOLA TALK and SCOLA receiver.
3. Increase the distance between the interfering FM transmitter
and the SCOLA TALK until the interference stops.

31
If there is no sound from the audio equipment, but the sound
from the SCOLA TALK’s microphone signal is OK, it could
because:
• The audio cord is not correctly plugged into the audio jack on
the SCOLA TALK. Check that it is correctly plugged in.
• The signal from the audio equipment is too weak. Turn up the
volume of the sound signal on the audio equipment’s volume
control, if possible.
If the batteries are quickly drained of power even after a full
charge cycle with correct charging indication in the display, it
could be because:
• The batteries are defective. Contact the hearing care profes-
sional where you acquired your SCOLA FM system to have
the batteries changed. You can use standard alkaline (non-
rechargeable) batteries until this is done.

32
If the batteries do not charge and the display does not indicate
that the batteries are charging, it could be because:
• There is no power in the socket. Check that the socket func-
tions.
• The power supply unit, cord or jack is defective. Consult the
hearing care professional where you acquired your SCOLA™ FM
system.
• Connectingterminalsonthebatteryorbottomcoveraredirty
ordefective
Consultthehearingcareprofessionalwhereyouacquired
yourSCOLA™FMsystem

33
WARRANTY
A warranty of two years is provided. The warranty covers
any defects in manufacture or materials. Defects arising from
improper handling or repairs carried out by an unauthorised
party are not covered by this warranty.

34
Directive 1999/5/EC
Hereby, Widex A/S declares that this SCOLA TALK is in compli-
ance with the essential requirements and other relevant provi-
sions of Directive 1999/5/EC.
A copy of the Declaration of Conformity according to 1999/5/EC
can be found at:
http://www.widex.com/doc

35
SAFETY WARNING
This device can be powered by an external power supply.
• Always use the power supply/charger that is supplied with
SCOLA TALK.
Audio connector (3.5 mm jack):
• ThesafetyoftheuseofSCOLATALKisdeterminedbyany
externalequipmentthatisconnectedtotheSCOLATALKvia
theaudioconnector
WhentheSCOLATALKisconnectedtoexternalmains-op-
eratedequipmentviatheaudioconnectorthisequipment
mustcomplywithIEC-IECIEC--or
equivalentsafetystandards

36
REGULATORY INFORMATION
FCC ID: BRG-871T
IC: 5676A-871T
Federal Communications Commission Statement
This device may not interfere with TV reception or Federal Government
radar.
Industry Canada Statement / Déclaration d’industrie Canada
Under Industry Canada regulations, this radio transmitter may only
operate using an antenna of a type and maximum (or lesser) gain
approved for the transmitter by Industry Canada.
To reduce potential radio interference to other users, the antenna
type and its gain should be so chosen that the equivalent isotropically
radiated power (e.i.r.p.) is not more than that necessary for successful
communication.
This device complies with Industry Canada licence-exempt RSS
standard(s). Operation is subject to the following two conditions:

37
(1) this device may not cause interference, and
(2) this device must accept any interference, including interference that
may cause undesired operation of the device.
Conformément à la réglementation d’Industrie Canada, le présent
émetteur radio peut fonctionner avec une antenne d’un type et d’un
gain maximal (ou inférieur) approuvé pour l’émetteur par Industrie
Canada.
Dans le but de réduire les risques de brouillage radioélectrique à
l’intention des autres utilisateurs, il faut choisir le type d’antenne et
son gain de sorte que la puissance isotrope rayonnée équivalente
(p.i.r.e.) ne dépasse pas l’intensité nécessaire à l’établissement d’une
communication satisfaisante.
Le présent appareil est conforme aux CNR d’Industrie Canada
applicables aux appareils radio exempts de licence. L’exploitation est
autorisée aux deux conditions suivantes:
(1) l’appareil ne doit pas produire de brouillage, et
(2) l’utilisateur de l’appareil doit accepter tout brouillage radioélectrique
subi, même si le brouillage est susceptible d’en compromettre le
fonctionnement.
38
Electrical and electronic equipment (EEE) contains
materials, components and substances that can be
hazardous and present a risk to human health and
the environment when waste electrical and elec-
tronic equipment (WEEE) is not handled correctly.
Do not dispose of hearing aids, hearing aid accessories and bat-
teries with ordinary household waste.
Hearing aids, batteries and hearing aid accessories should be
disposed of at sites intended for waste electrical and electronic
equipment, or given to your hearing care professional for safe
disposal. Proper disposal helps to protect human health and the
environment.

39
Symbols commonly used by Widex A/S in medical device labelling
(labels/IFU/etc.)
Symbol Title/Description
Manufacturer
The product is produced by the manufacturer whose name
and address are stated next to the symbol. If appropriate,
the date of manufacture may also be stated.
Date of manufacture
The date when the product was manufactured.
Use-by date
The date after which the product is not to be used.
Batch code
The product’s batch code (lot or batch identification).
SYMBOLS

40
Symbol Title/Description
Catalogue number
The product’s catalogue (item) number.
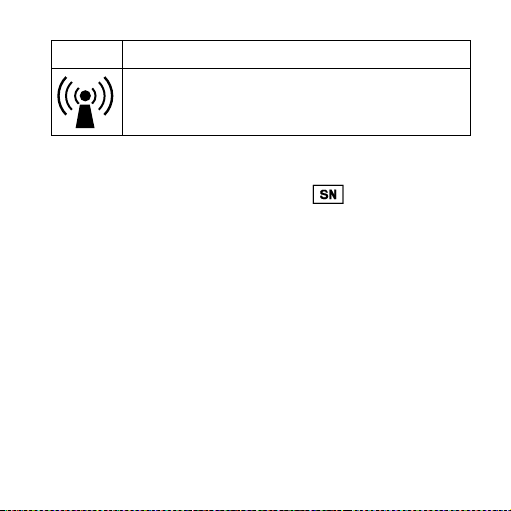
Serial number
The product’s serial number.*
Keep away from sunlight
The product must be protected from light sources and/or
The product must be kept away from heat
Keep dry
The product must be protected from moisture and/or The
product must be kept away from rain
Lower limit of temperature
The lowest temperature to which the product can be safely
exposed.

41
Symbol Title/Description
Upper limit of temperature
The highest temperature to which the product can be
safely exposed.
Temperature limits
The highest and lowest temperatures to which the product
can be safely exposed.
Consult instructions for use
The user instructions contain important cautionary infor-
mation (warnings/precautions) and must be read before
using the product.
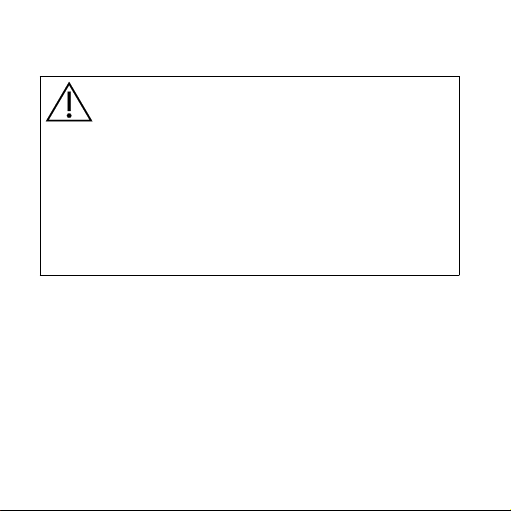
Caution/Warning
Text marked with a caution/warning symbol must be read
before using the product.

42
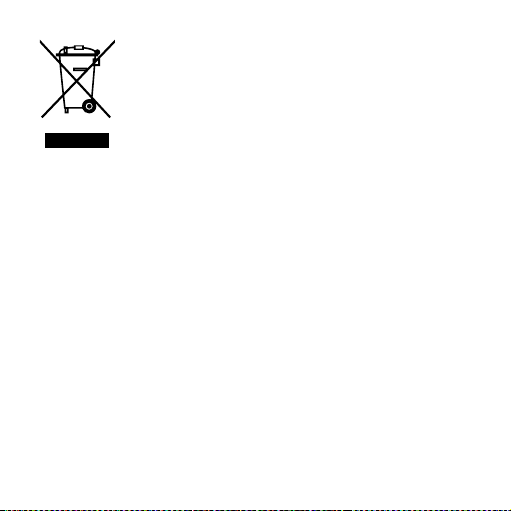
Symbol Title/Description
WEEE mark
“Not for general waste”
When the product is to be discarded, it must be sent to a
designated collection point for recycling and recovery.
CE mark
The product is in conformity with the requirements set out
in European CE marking directives.
Alert
The product is identified by R&TTE Directive 1999/5/EC as
an equipment Class 2 product with some restrictions on
use in some CE member states.
C-Tick mark
The product complies with EMC and radio spectrum
regulatory requirements for products supplied to the
Australian or New Zealand market.
43
Symbol Title/Description
Interference
Electromagnetic interference may occur in the vicinity of
the product.
*The six- or seven-digit number on the product is the serial number. Se-
rial numbers may not always be preceded by

44
SETTINGS
SCOLA TALK
Serial number: ______________________________
Starting channel: ____________________________

45

46

47

É[5qr0q9|g;;a;g]
WIDEX A/S Nymoellevej 6, DK-3540 Lynge, Denmark
www.widex.com
Manual no.:
9 514 0195 001 #03
Issue:
2015-06