Loading ...
Loading ...
Loading ...
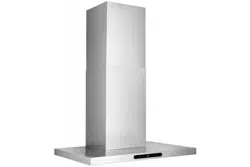
MODELS EWT1306SS • EWT1366SS
Page 7
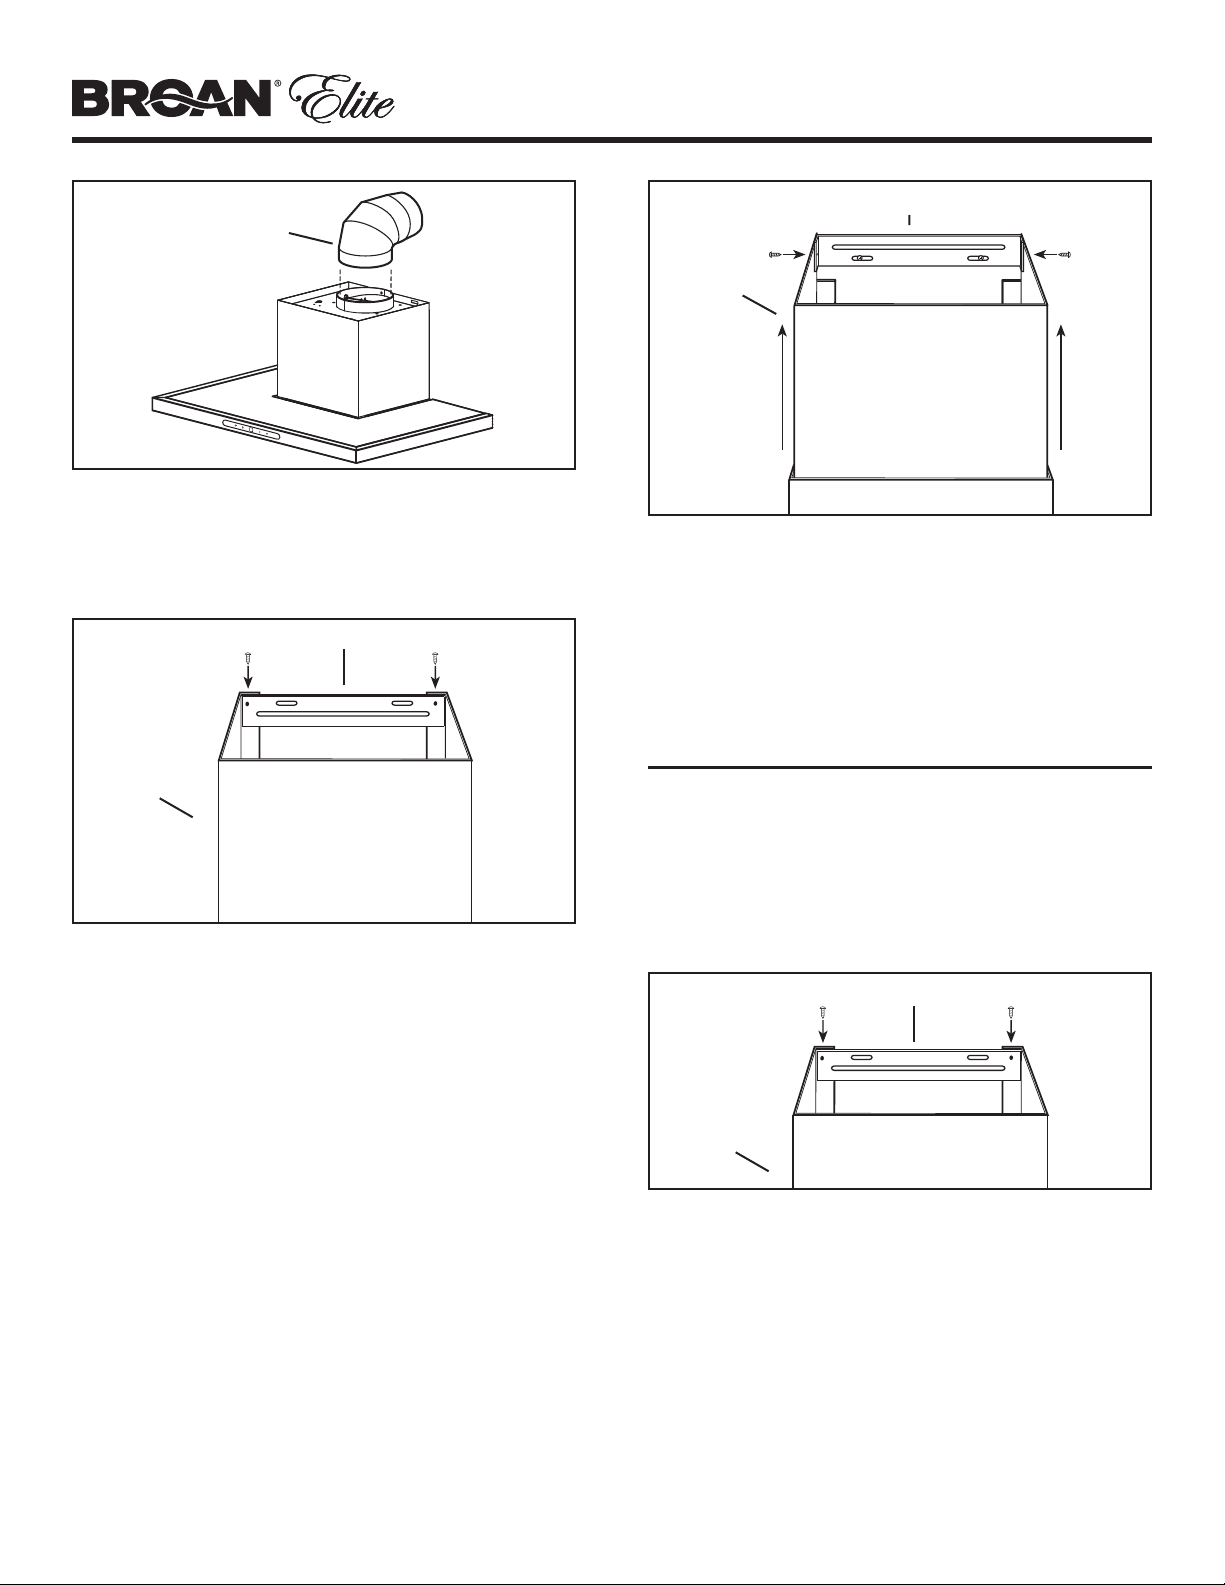
HD1179
LOWER FLUE MOUNTING BRACKET
LOWER
FLUE
NOTE: 10-ft. ceilings require 10-ft. Flue Extension Model
FXN53SS (purchase separately). Discard the upper flue
supplied with your hood and replace it with the Model
FXN53SS flue extension.
11. Remove the upper flue from inside the lower flue. Install
the lower flue bracket to the lower flue using (2) flue
bracket screws (no. 8 x 3/8”). Make sure that the bracket is
positioned inside of the lower flue flanges - with the slots on
top. Carefully replace the upper flue inside the lower flue.
Remove protective plastic film covering the lower flue only.
12. Carefully place both flues into the recessed area of hood
top. Slightly push aside the upper flue to avoid any
damage while installing the lower flue to the hood top using
(2) no. 8 x 3/8” screws through the lower flue side slots.
13. Slightly push aside the upper flue to avoid any damage
while installing the lower flue to the hood top. Secure the
lower flue bracket to the wall using (2) no. 8 x 1½” mounting
screws.
14. Slide the upper flue upward until it is aligned with its upper
flue mounting bracket. The bracket should be inside the flue.
Secure the upper flue to the upper flue mounting bracket
using (2) no. 8 x 3/8” mounting screws.
15. Remove protective plastic film covering the upper flue and
the hood.
HO0366
UPPER
FLUE
UPPER FLUE MOUNTING BRACKET
8.8.
6” ROUND
DUCT ELBOW
9. Measure and install 6” round steel ductwork to roof cap or
wall cap and 90
o
elbow over the blower exhaust opening on
top of hood. Use duct tape to make all joints secure and air
tight.
10. Plug hood power cord into the outlet.
INSTALL THE HOOD
(Vertically Ducted Hoods Only)
1. DO NOT REMOVE the protective plastic film covering the
decorative flue and the hood at this time.
2. Lay the back side of the hood flat on a table. Use a piece of
cardboard to avoid damaging the table or the hood.
3. Remove the grease filters by pulling down the metal latch
tab and tilting filters downward to remove.
4. Carefully rotate hood upright.
HD1179
LOWER FLUE MOUNTING BRACKET
LOWER
FLUE
NOTE: 10-ft. ceilings require 10-ft. Flue Extension Model
FXN53SS (purchase separately). Discard the upper flue
supplied with your hood and replace it with the Model
FXN53SS flue extension.
5. Remove the upper flue from inside the lower flue. Install
the lower flue bracket to the lower flue using (2) flue
bracket screws (no. 8 x 3/8”). Make sure that the bracket is
positioned inside of the lower flue flanges - with the slots on
top. Carefully replace the upper flue inside the lower flue.
Remove protective plastic film covering the lower flue only.
6. Carefully place both flues into the recessed area of hood top.
Loading ...
Loading ...
Loading ...