Loading ...
Loading ...
Loading ...

BATTERY PRECAUTIONS
• Use only the size and type of batteries specified.
• When installing batteries, observe proper +/- polarities. Incorrect installation of
battery may cause damage to the unit.
• Do not mix different types of batteries together (e.g., alkaline with carbon-zinc or
old batteries with new ones).
• If the unit is not going to be used for a long period of time, remove batteries to
prevent damage due to possible battery leakage.
• Do not dispose of batteries in fire. Batteries may explode or leak.
• Dispose of used batteries properly in accordance with all state, province, and
county regulations.
ASSEMBLY AND INSTRUCTIONS FOR USE
Unpack the unit carefully. Remove all the accessories from the carton. Do not
remove any labels or stickers on the bottom of the unit or adapter. Before setting up
the unit, verify that the following contents are present:
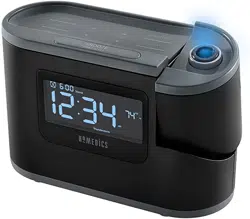
• Sound Spa Auto Set Clock Radio x 1
• AC Adapter and power cord x 1
POWER SOURCE
This unit is supplied with an AC adapter; take the following steps to connect the adaptor.
1. Unwind the power cord of the AC adaptor to its full length.
2. Flip unit over and remove backup battery pull tab.
3. Connect the AC adapter to the DC5V Input.
4. Plug the AC adapter into an outlet (100V – 240VAC 50/60 Hz).
5. To power the unit off completely, unplug the AC adapter from the wall outlet.
Note: Connecting this system to any other power source may cause damage to the
system. For sufficient ventilation, keep other objects at least 4 inches away from the unit.
SETTING CLOCK TIME
Press and hold (3 seconds) the TIME SET button on back of unit (Fig. 2), the hour
will begin to flash. Select the hour by using the VOLUME or TUNE button on the top
of the unit, paying attention to the AM and PM indicators. Press the TIME SET but-
ton again to select the minute using the VOLUME or TUNE button on the top again
to adjust. Press TIME SET button again, now time is set.
4
5
Loading ...
Loading ...
Loading ...