2
Table of Contents
Use and care manual
Safety Definitions 3
IMPORTANT SAFETY INSTRUCTIONS 4
Proper Installation and Maintenance 4
Fire Safety 4
Burn Prevention 5
Child Safety 6
Cleaning Safety 6
Cookware Safety 6
State of California Proposition 65 Warnings 6
Causes of damage 7
Protecting the environment 7
Tips for saving energy 7
Getting to know the appliance 8
Oven 8
Displays and controls 9
Symbols 9
Colors and display 10
Automatic door opening 10
Additional information ( and ) 10
Cooling fan 10
Program selection positions 11
Accessories 12
Special accessories 12
Before first use 13
Setting the language 13
Setting the time format 13
Setting the time 13
Setting the date format 13
Setting the date 14
Setting the temperature format 14
Completing initial set-up 14
Heating up the oven 14
Cleaning accessories 14
Activating the appliance 15
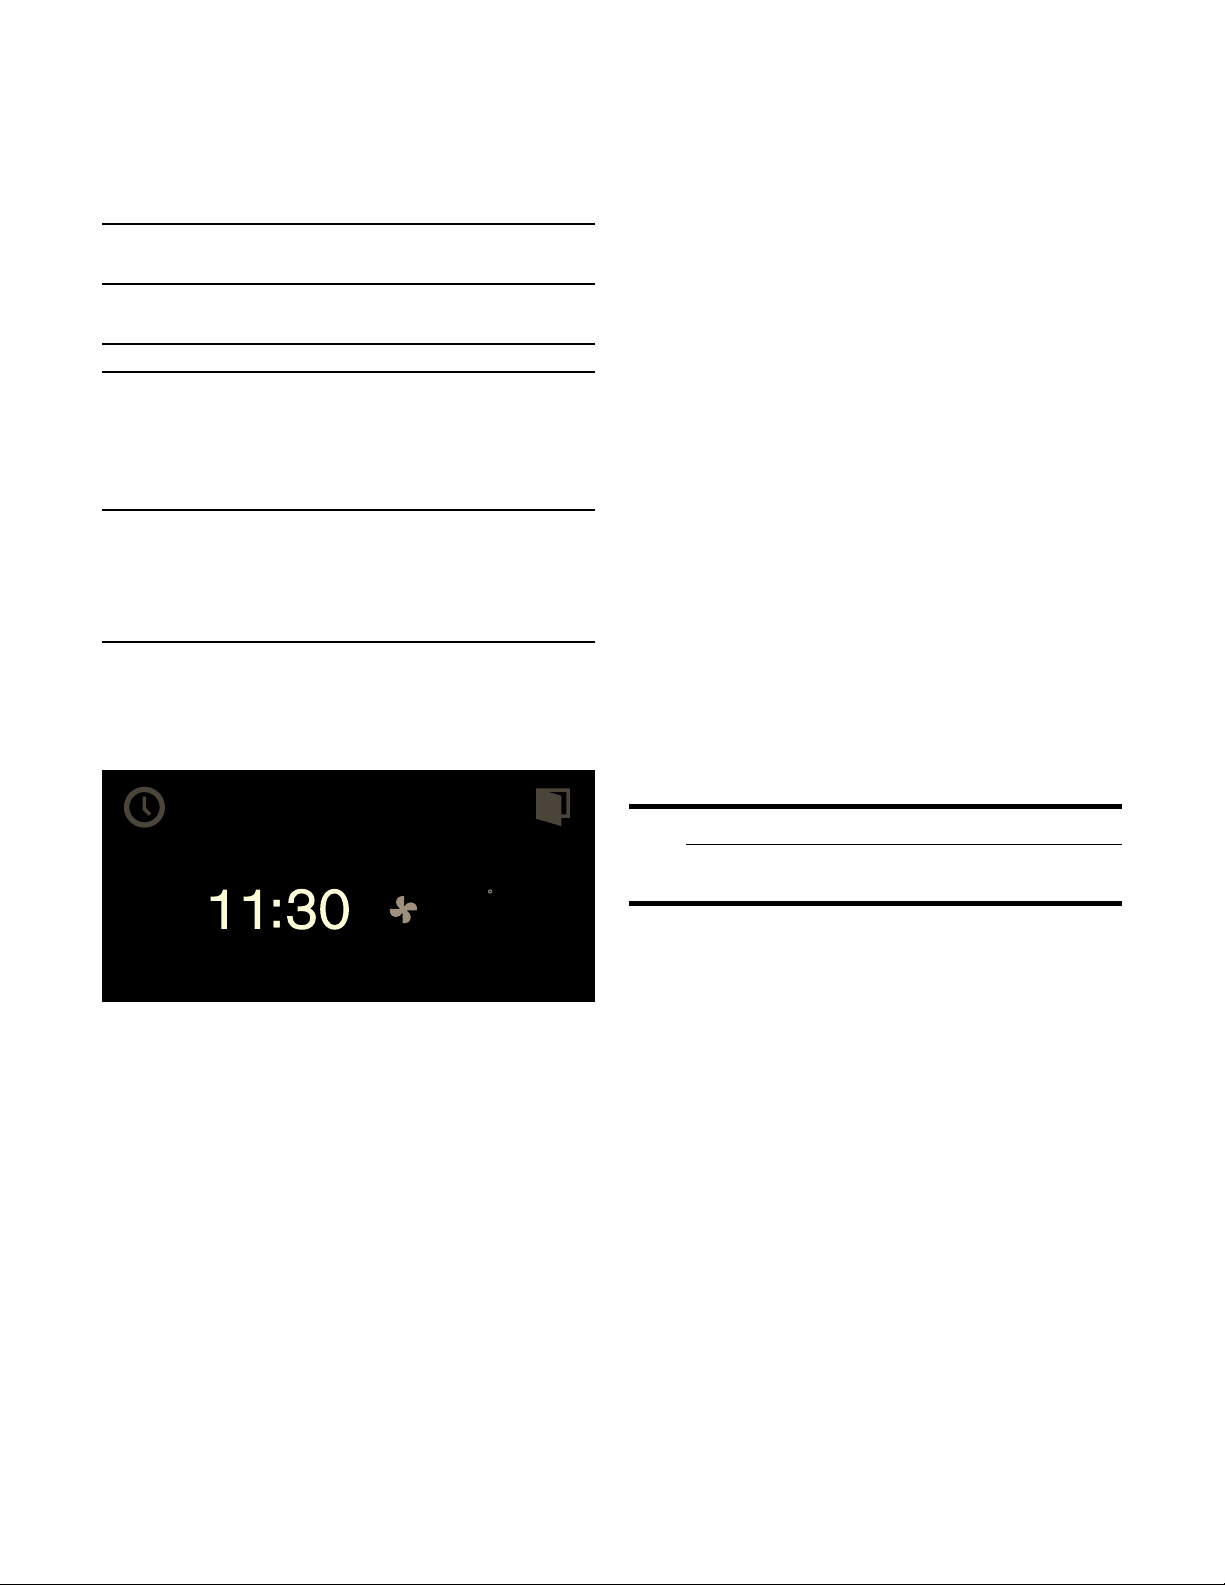
Standby 15
Activate appliance 15
Operating the appliance 15
Oven interior 15
Inserting accessories 15
Turning on 16
Quick heat 16
Safety lock 16
Timer functions 16
Launching the timer menu 16
Timer 16
Stopwatch 17
Cooking time 18
End of cooking time 19
Sabbath mode and Yom Tov mode 20
Sabbath mode 20
Yom Tov mode 21
Personal recipes 22
Recording a recipe 22
Programming a recipe 22
Entering a name 23
Starting a recipe 23
Deleting a recipe 23
Core temperature probe 24
Insert the core temperature probe in the food
to be cooked 24
Setting the core temperature 25
Core temperature guidelines 25
Child lock 27
Activating the child lock 27
Deactivating the child lock 27
Factory setting 28
Cleaning and maintenance 30
Cleaning agents 30
Removing slide-in racks 31
Self-clean (pyrolysis) 32
Preparing self-clean (pyrolysis) 33
Starting self-clean (pyrolysis) 33
Cleaning accessories with self-clean (pyrolysis) 33
Troubleshooting 34
Power cut 34
Demo mode 34
Replacing the oven lamp 35
Customer service 35
Tables and tips 36
Baking table 36
Baking tips and tricks 37

3
Roasting table 38
Roasting tips and tricks 39
Grilling table 40
Thawing 41
Acrylamide in foodstuffs 41
Additional information on products, accessories,
replacement parts and services can be found at
www.gaggenau.com and in the online shop
www.gaggenau-eshop.com
Safety Definitions
9 WARNING
This indicates that death or serious injuries may
occur as a result of non-observance of this
warning.
9 CAUTION
This indicates that minor or moderate injuries
may occur as a result of non-observance of this
warning.
NOTICE: This indicates that damage to the appliance
or property may occur as a result of non-compliance
with this advisory.
Note: This alerts you to important information and/or
tips.

9 IMPORTANT SAFETY INSTRUCTIONS
READ AND SAVE THESE INSTRUCTIONS
4
IMPORTANT SAFETY INSTRUCTION
READ AND SAVE THESE INSTRUCTIONS
WARNING
When properly cared for, your new appliance has
been designed to be safe and reliable. Read all
instructions carefully before use. These precautions
will reduce the risk of burns, electric shock, fire, and
injury to persons. When using kitchen appliances,
basic safety precautions must be followed, including
those in the following pages.
Proper Installation and Maintenance
Have the installer show you the location of the circuit
breaker or fuse. Mark it for easy reference.
This appliance must be properly installed and
grounded by a qualified technician. Connect only to
properly grounded outlet. Refer to Installation
Instructions for details.
This appliance is intended for normal family
household use only. It is not approved for outdoor
use. See the Warranty. If you have any questions,
contact the manufacturer.
Do not store or use corrosive chemicals, vapors,
flammables or nonfood products in or near this
appliance. It is specifically designed for use when
heating or cooking food. The use of corrosive
chemicals in heating or cleaning will damage the
appliance and could result in injury.
Do not operate this appliance if it is not working
properly, or if it has been damaged. Contact an
authorized servicer.
Do not obstruct oven vents.
Do not repair or replace any part of the appliance
unless specifically recommended in this manual. Refer
all servicing to a factory authorized service center.
In the event of an error the display flashes and beeps
continuously. Disconnect appliance from the power
supply and call a qualified technician.
WARNING
When removing the door make sure oven is cool and
power to the oven has been turned off before
removing the door. Failure to do so could result in
burns.
The oven door is heavy and fragile. Use both hands to
remove the oven door. The door front is glass. Handle
carefully to avoid breaking.
Grasp only the sides of the oven door. Do not grasp
the handle as it may swing in your hand and cause
injury or damage.
Failure to grasp the oven door firmly and properly
could result in personal injury or product damage.
Lay the door on a flat smooth surface so that the door
cannot fall over. Failure to do so may result in
personal injury or damage to the appliance.
WARNING
To avoid injury from hinge bracket snapping closed,
be sure that both levers are securely in place before
removing door. Also, do not force door open or closed
- the hinge could be damaged and injury could result.
WARNING
Make sure the appliance and lights are cool and
power to the appliance has been turned off before
replacing the light bulb(s). Failure to do so could
result in electrical shock or burns.The lenses (if
equipped) must be in place when using the
appliance.The lenses (if equipped) serve to protect
the light bulb from breaking.The lenses (if equipped)
are made of glass. Handle carefully to avoid breaking.
Broken glass can cause an injury.
WARNING
Light socket is live when door is open if main power
supply is not turned off.
Fire Safety
WARNING
NEVER cover any slots, holes or passages in the oven
bottom or cover an entire rack with materials such as
aluminum foil. Doing so blocks air flow through the
oven. Aluminum foil linings may also trap heat,
causing a fire hazard.

5
9 IMPORTANT SAFETY INSTRUCTIONS
READ AND SAVE THESE INSTRUCTIONS
If materials inside an oven or warming drawer should
ignite, keep door closed. Turn off the appliance and
disconnect the circuit at the circuit breaker box.
WARNING
Use this appliance only for its intended use as
described in this manual. NEVER use this appliance
as a space heater to heat or warm the room. Doing so
may result in overheating the appliance. Never use the
appliance for storage.
Always have a working smoke detector near the
kitchen.
In the event that personal clothing or hair catches fire,
drop and roll immediately to extinguish flames.
Have an appropriate fire extinguisher available,
nearby, highly visible and easily accessible near the
appliance.
Smother flames from food fires other than grease fires
with baking soda. Never use water on cooking fires.
WARNING
TO REDUCE THE RISK OF INJURY TO PERSONS IN
THE EVENT OF A GREASE FIRE, OBSERVE THE
FOLLOWING:
a) SMOTHER FLAMES with a close-fitting lid,
cookie sheet, or metal tray, then turn off the
burner. BE CAREFUL TO PREVENT BURNS. If
the flames do not go out immediately, EVACUATE
AND CALL THE FIRE DEPARTMENT.
b) NEVER PICK UP A FLAMING PAN – You may be
burned.
c) DO NOT USE WATER, including wet dishcloths
or towels – a violent steam explosion will result.
d) Use an extinguisher ONLY if:
‒ You know you have a Class ABC extinguisher,
and you already know how to operate it.
‒ The fire is small and contained in the area
where it started.
‒ The fire department is being called.
‒ You can fight the fire with your back to an exit.
Burn Prevention
DO NOT TOUCH HEATING ELEMENTS OR
INTERIOR SURFACES OF OVEN - Heating elements
may be hot even though they are dark in color. Interior
surfaces of an oven become hot enough to cause
burns. During and after use, do not touch, or let
clothing, potholders, or other flammable materials
contact heating elements or interior surfaces of oven
until they have had sufficient time to cool. Other
surfaces of the appliance may become hot enough to
cause burns. Among these surfaces are oven vent
openings, surfaces near these openings and oven
doors.
Exercise caution when opening the appliance.
Standing to the side, open the door (or drawer) slowly
and slightly to let hot air and/or steam escape. Keep
your face clear of the opening and make sure there
are no children or pets near the unit. After the release
of hot air and/or steam, proceed with your cooking.
Keep doors shut unless necessary for cooking or
cleaning purposes. Do not leave open doors
unattended.
Do not heat or warm unopened food containers. Build-
up of pressure may cause the container to burst and
cause injury.
Use caution when cooking foods with high alcohol
content (e.g. rum, brandy, bourbon) in the oven.
Alcohol evaporates at high temperatures. There is a
risk of burning as the alcohol vapors may catch fire in
the oven. Use only small quantities of alcohol in foods,
and open the oven door carefully.
Always place oven racks in desired location while
oven is cool. Always use oven mitts, when the oven is
warm. If a rack must be moved while oven is hot, do
not let potholder contact the heating elements.
CAUTION
To avoid possible injury or damage to the appliance,
ensure rack is installed exactly per installation
instructions and not backwards or upside down.
Always use dry potholders. Moist or damp potholders
on hot surfaces may result in burns from steam. Do
not let potholder touch hot heating elements. Do not
use a towel or other bulky cloth.
Secure all loose garments, etc. before beginning. Tie
long hair so that it does not hang loose, and do not
wear loose fitting clothing or hanging garments, such
as ties, scarves, jewelry, or dangling sleeves.

9 IMPORTANT SAFETY INSTRUCTIONS
READ AND SAVE THESE INSTRUCTIONS
6
Child Safety
When children become old enough to use the
appliance, it is the legal responsibility of the parents
or legal guardians to ensure that they are instructed in
safe practices by qualified persons.
Do not allow anyone to climb, stand, lean, sit, or hang
on any part of an appliance, especially a door,
warming drawer, or storage drawer. This can damage
the appliance, and the unit may tip over, potentially
causing severe injury.
Do not allow children to use this appliance unless
closely supervised by an adult. Children and pets
should not be left alone or unattended in the area
where the appliance is in use. They should never be
allowed to play in its vicinity, whether or not the
appliance is in use.
CAUTION
Items of interest to children should not be stored in an
appliance, in cabinets above an appliance or on the
backsplash. Children climbing on an appliance to
reach items could be seriously injured.
Cleaning Safety
IMPORTANT SAFETY NOTICE: The California Safe
Drinking Water and Toxic Enforcement Act requires
the Governor of California to publish a list of
substances known to the state to cause cancer, birth
defects or other reproductive harm, and requires
businesses to warn customers of potential exposure to
such substances. The burning of gas cooking fuel and
the elimination of soil during self-cleaning can
generate some by-products which are on the list. To
minimize exposure to these substances, always
operate this unit according to the instructions
contained in this booklet and provide good ventilation.
When self-cleaning, confirm that the door locks and
will not open. If the door does not lock, do not run
Self-Clean. Contact service.
Wipe out excessive spillage before self-cleaning the
oven.
Birds have very sensitive respiratory systems. Keep
pet birds out of the kitchen or other rooms where
kitchen fumes could reach them. During self-clean,
fumes are released that may be harmful to birds.
Other kitchen fumes such as overheating margarines
and cooking oils may also be harmful.
Keep oven free from grease build up.
Cookware Safety
NOTICE: Do not place food directly on oven bottom.
Follow the manufacturer’s directions when using
cooking or roasting bags.
Do not clean parts or accessories in the self-clean
oven.
WARNING
Risk of electric shock
Use of a wrong core temperature probe can damage
the insulation. Use only the core temperature probe
intended for this appliance.
State of California Proposition 65
Warnings
WARNING
This product contains chemicals known to the State of
California to cause cancer, birth defects or other
reproductive harm.

7
Causes of damage
NOTICES:
▯ Accessories, foil, baking paper or cookware on
the bottom of the oven interior: do not place any
accessories on the bottom of the oven interior. Do
not line the bottom of the oven interior with any
type of foil whatever or baking paper. Do not
place cookware on the bottom of the oven interior
when a temperature above 122°F (50 °C) is set.
This produces a build-up of heat. Baking and
roasting times are no longer correct and the
enamel is damaged.
▯ Water in the hot oven interior: Never pour water
into the hot oven interior. Steam is produced.
Damage to the enamel can arise due to the
temperature change.
▯ Do not leave moist groceries in a closed oven for
an extended period of time. It can lead to
corrosion inside the oven.
▯ Fruit juice can leave stains in the oven. Always
remove fruit juice immediately and wipe up first
with a damp and then a dry cloth.
▯ Cooling with the appliance door open: only allow
the oven cavity to cool when it is closed. Even if
the appliance door is only open a little, front
panels of adjacent units could be damaged over
time.
▯ Highly soiled door seal: the appliance door will no
longer close properly during operation if the door
seal is highly soiled. Adjoining furniture fronts
may be damaged. Always keep the door seal
clean.
▯ Appliance door as a seat or storage surface: do
not stand, sit or hang on the appliance door. Do
not place any cookware or accessories on the
appliance door.
▯ Inserting accessories: depending on the
appliance type, accessories can scratch the door
pane when closing the appliance door. Always
slide accessories fully into the oven interior.
▯ Do not hold or carry the appliance by the door
handle. The door handle cannot carry the weight
of the device and could break off.
Protecting the environment
Unpack the appliance and dispose of the packaging in
line with environmental requirements.
Tips for saving energy
▯ Open the appliance door as little as possible
while cooking, baking or roasting.
▯ Use dark, black-painted or enameled baking
forms. These absorb the heat particularly well.
▯ It is best to bake several cakes in succession. The
oven is still warm. This shortens the baking time
for the second cake. You can also slide in two loaf
tins next to each other.
▯ In the hot air mode, you can bake simultaneously
on several levels.
▯ For longer cooking times, you can switch off the
oven 10 minutes before the end of the cooking
time and you can use the residual heat to finish
cooking.
8
Getting to know the appliance
You will get to know your new appliance here. We
explain the control panel and the individual controls to
you. You are informed about the oven interior and
accessories.
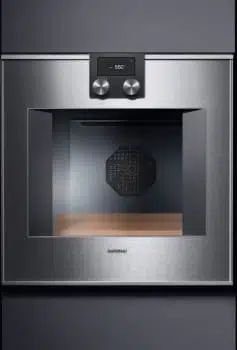
Oven
NOTICE: Do not place food directly on oven bottom.
Do not obstruct oven vents.
1 Door seal
2 Grill heating element
3 Oven vents
4 Socket for additional heating element (special
accessory for baking stone and roaster)
5 Socket for core temperature probe
6 Recessed handle
9
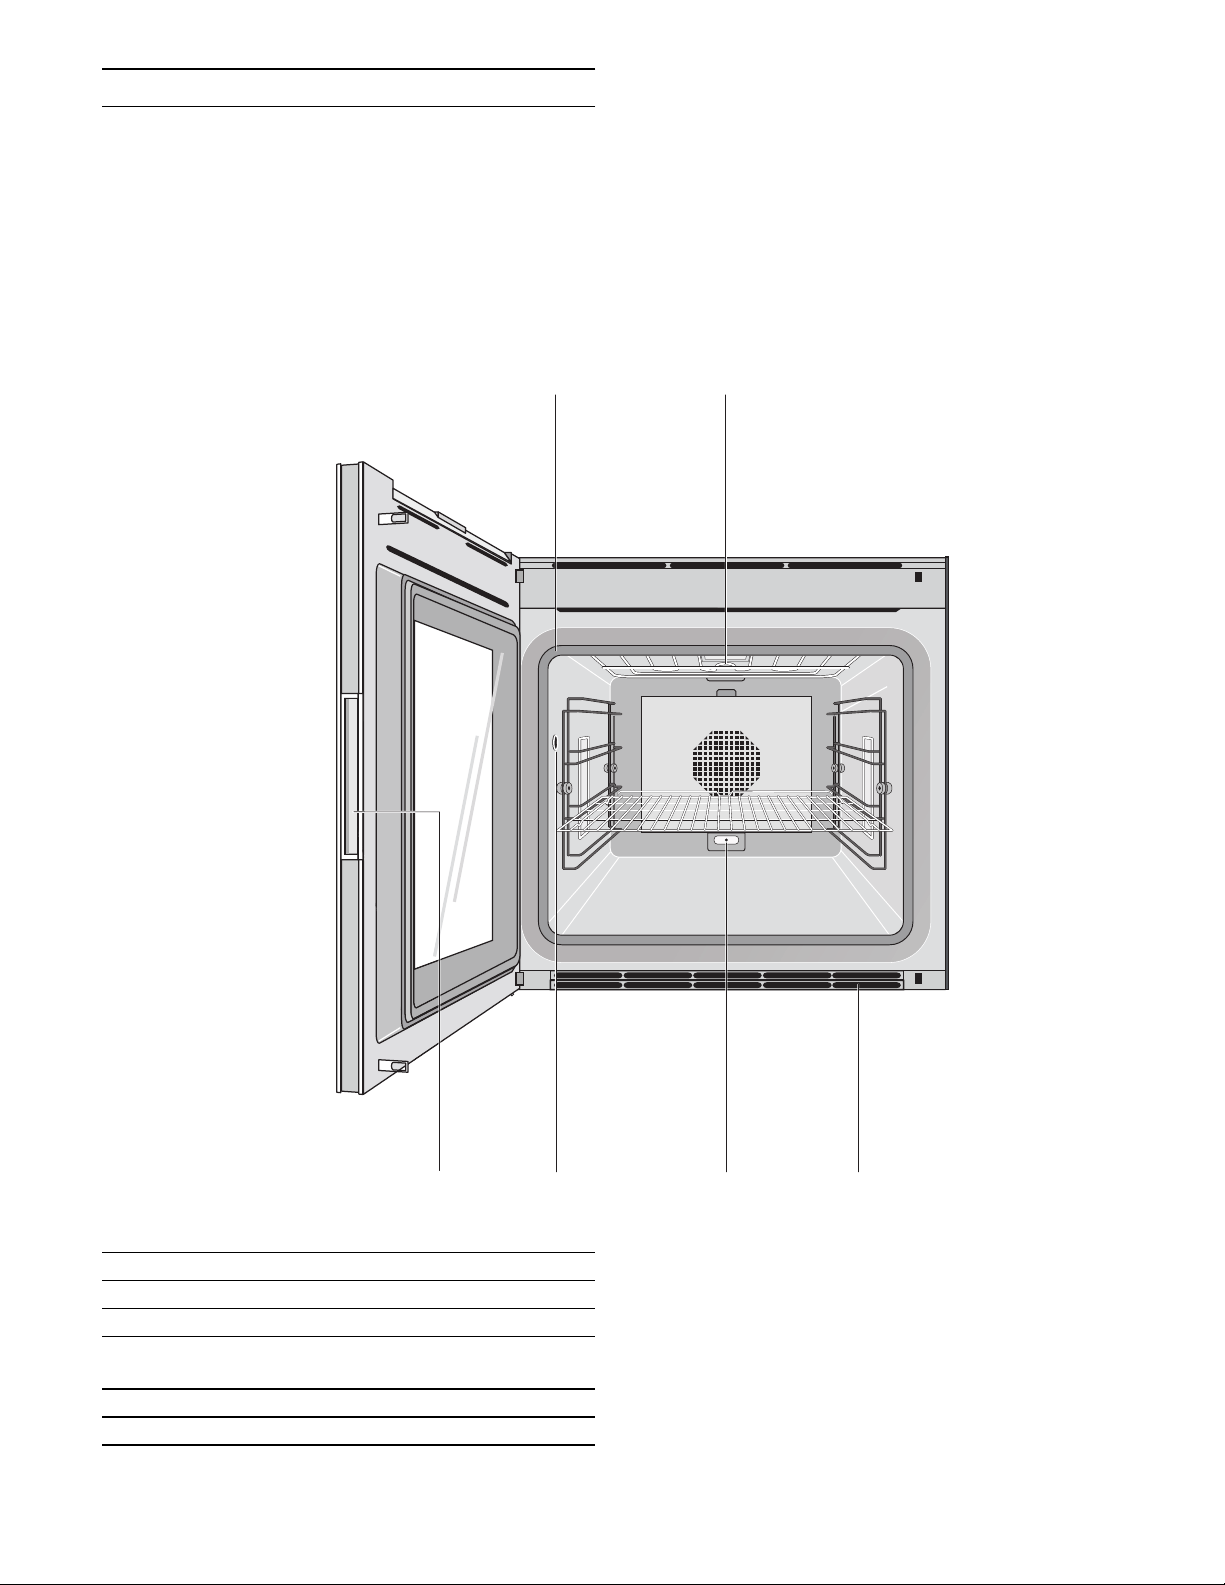
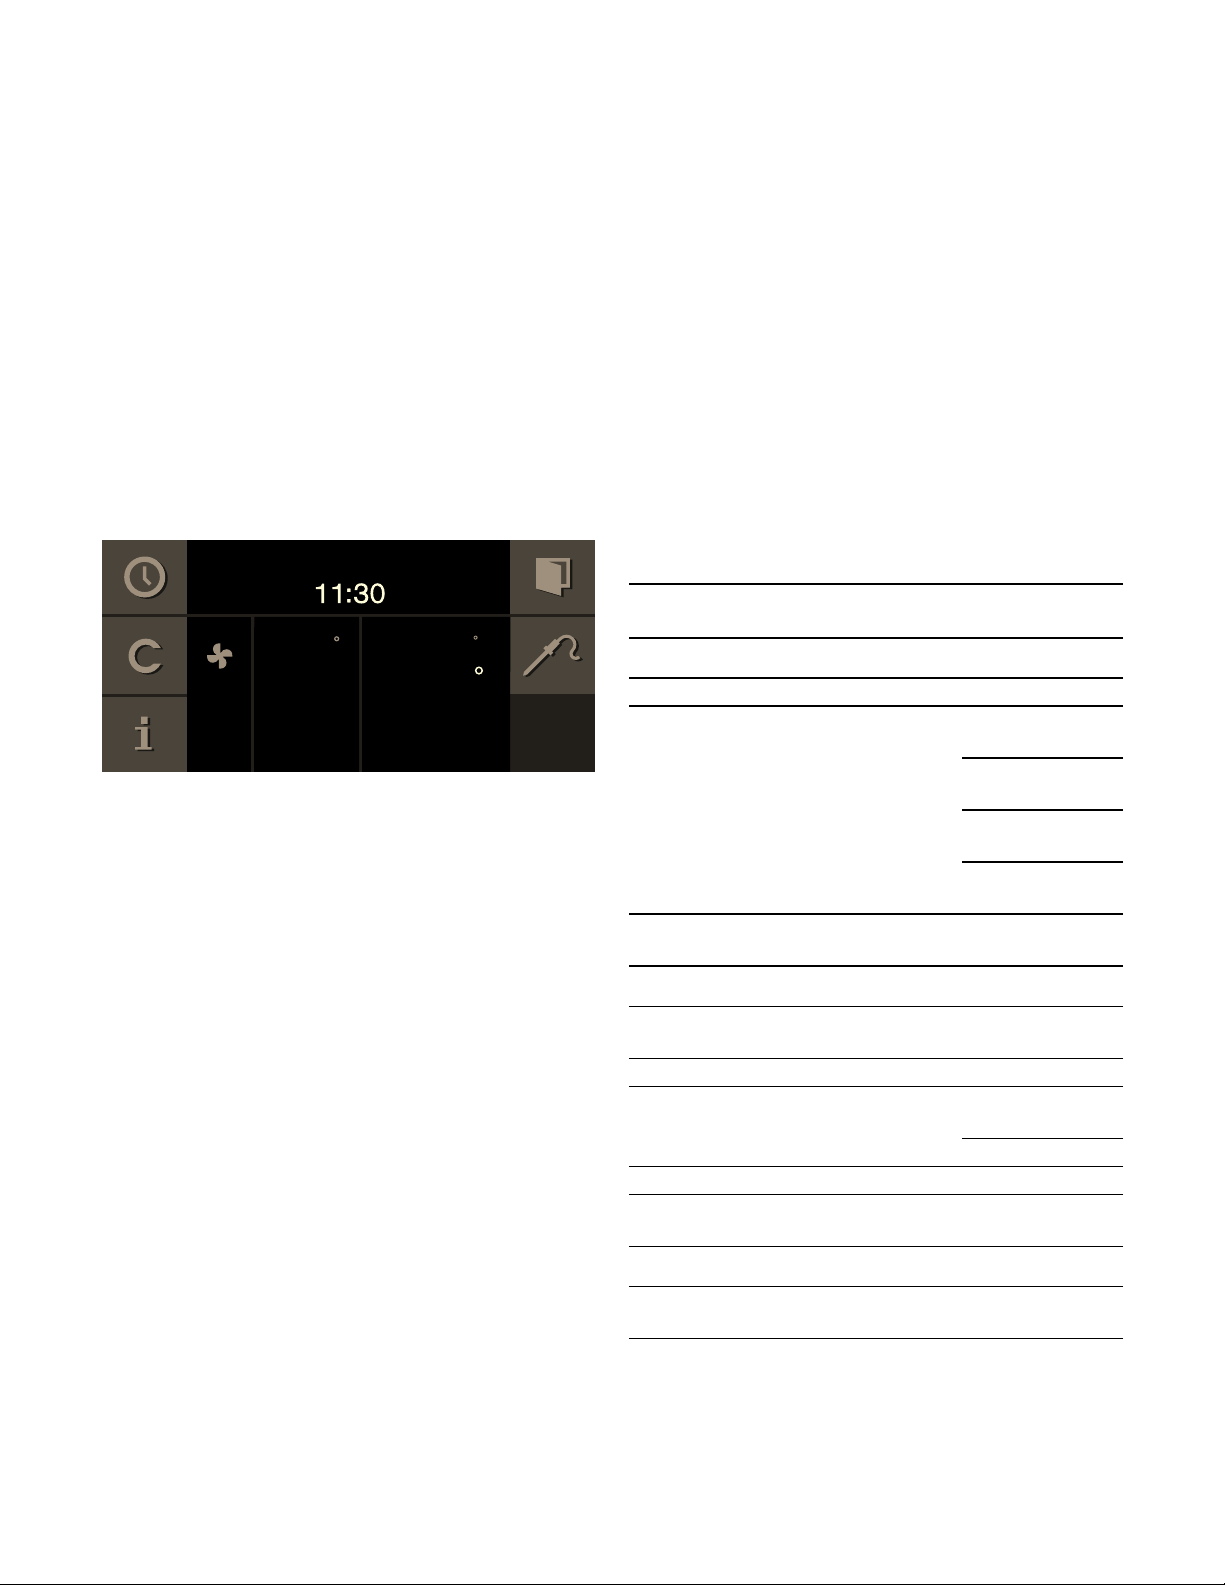
Displays and controls
These instructions apply to different versions of the
appliance. Slight deviations are possible depending
on the appliance type.
Operation is identical for all appliance versions.
--------
Symbols
--------
1 Control panel These areas are touch-sensitive.
Touch a symbol to select the
applicable function.
2 Display The display shows current set-
tings and options, for example.
3 Rotary selector With the rotary selector you can
select the temperature and make
other settings.
4 Program selector With the program selector, you
can select the heating function,
the cleaning function or the basic
settings.
)
Symbol Function
I
Start
Ø
Stop
H
Pause/end
'
Cancel
Ž
Delete
™
Confirm/save settings
C
Selection arrow
!
Open appliance door
(
Launching additional information
“
Preheating with status display
i
Launching personal recipes
g
Recording a menu
%
Edit settings
4
Enter a name
l
Delete letters
0
Child lock
M
Launching the timer menu
/
Launching the Sabbath mode
°
Demo mode
+
Core temperature probe
10
Colors and display
Colors
The various colors serve to guide you in the various
adjustment situations.
Presentation
The presentation of symbols, values or the entire
display changes depending on the situation.
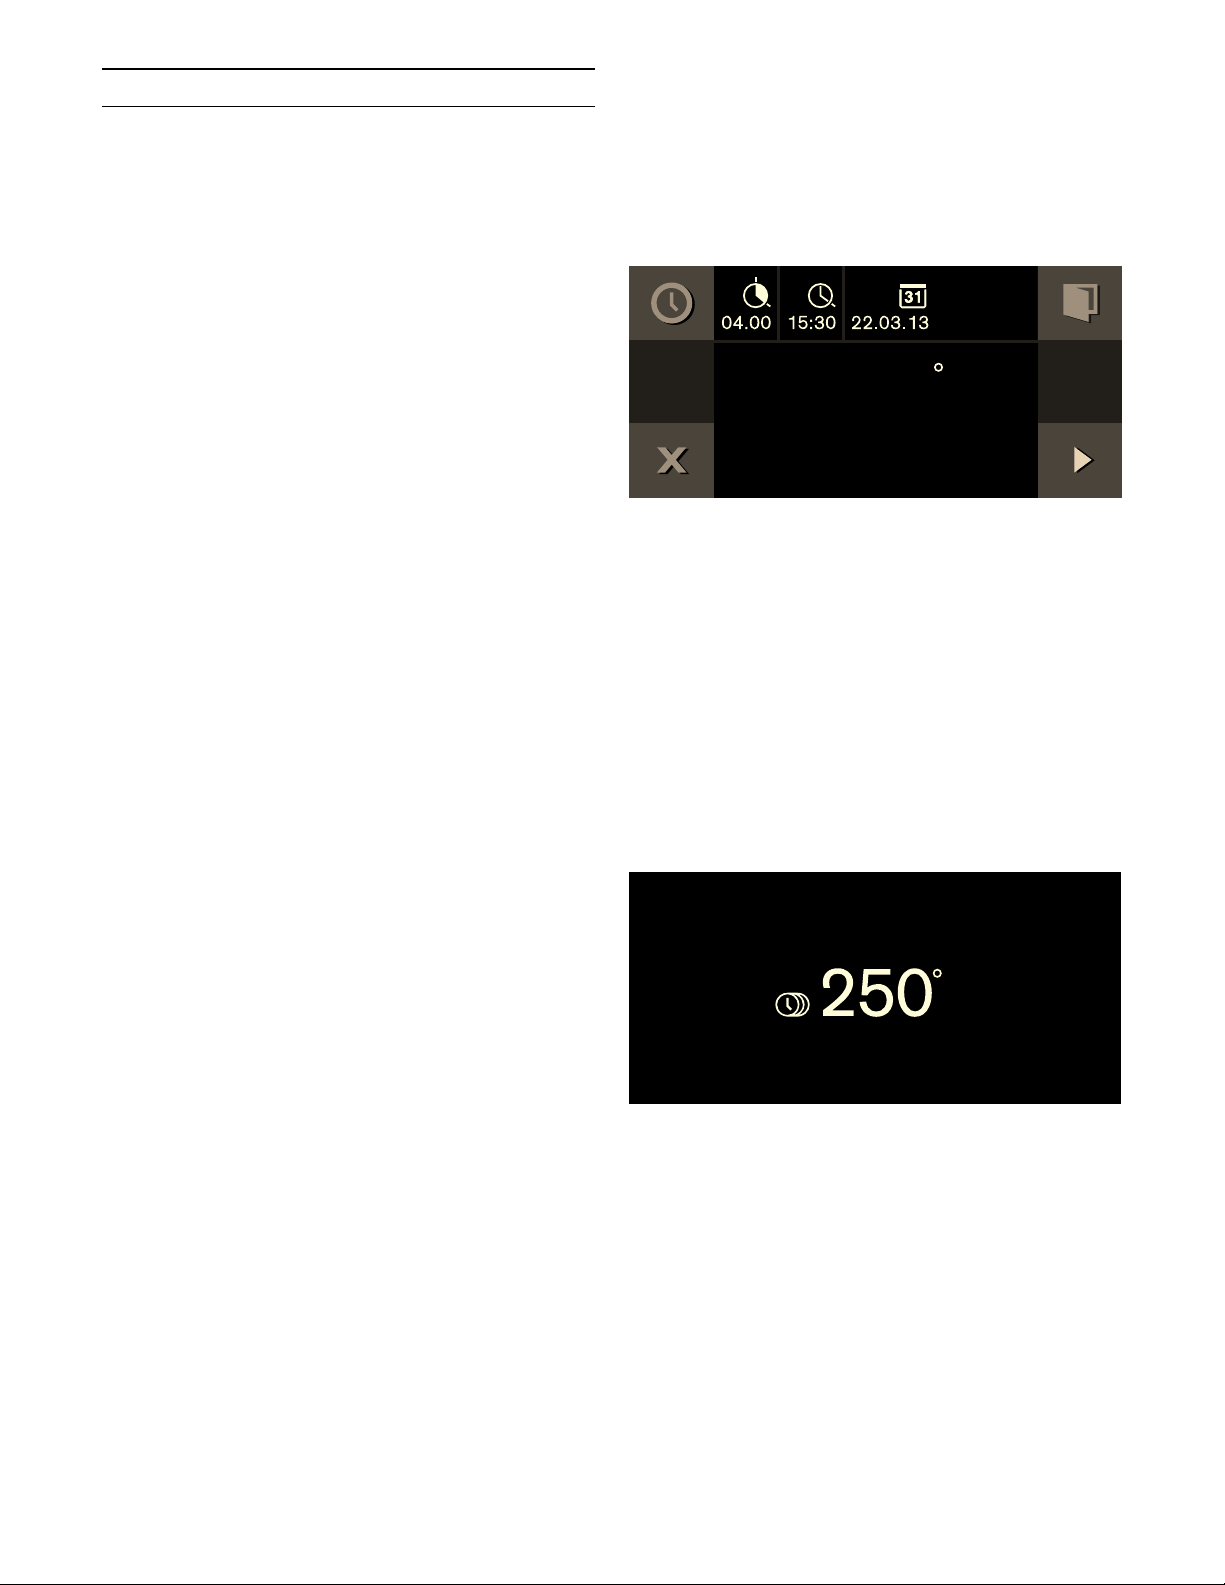
Automatic door opening
When you touch the ! symbol, the appliance door
springs open and you can open it fully with the handle
recess at the side.
Automatic door opening does not work when the child
lock is activated or in the event of a power failure. You
can open the door manually with the handle recess at
the side.
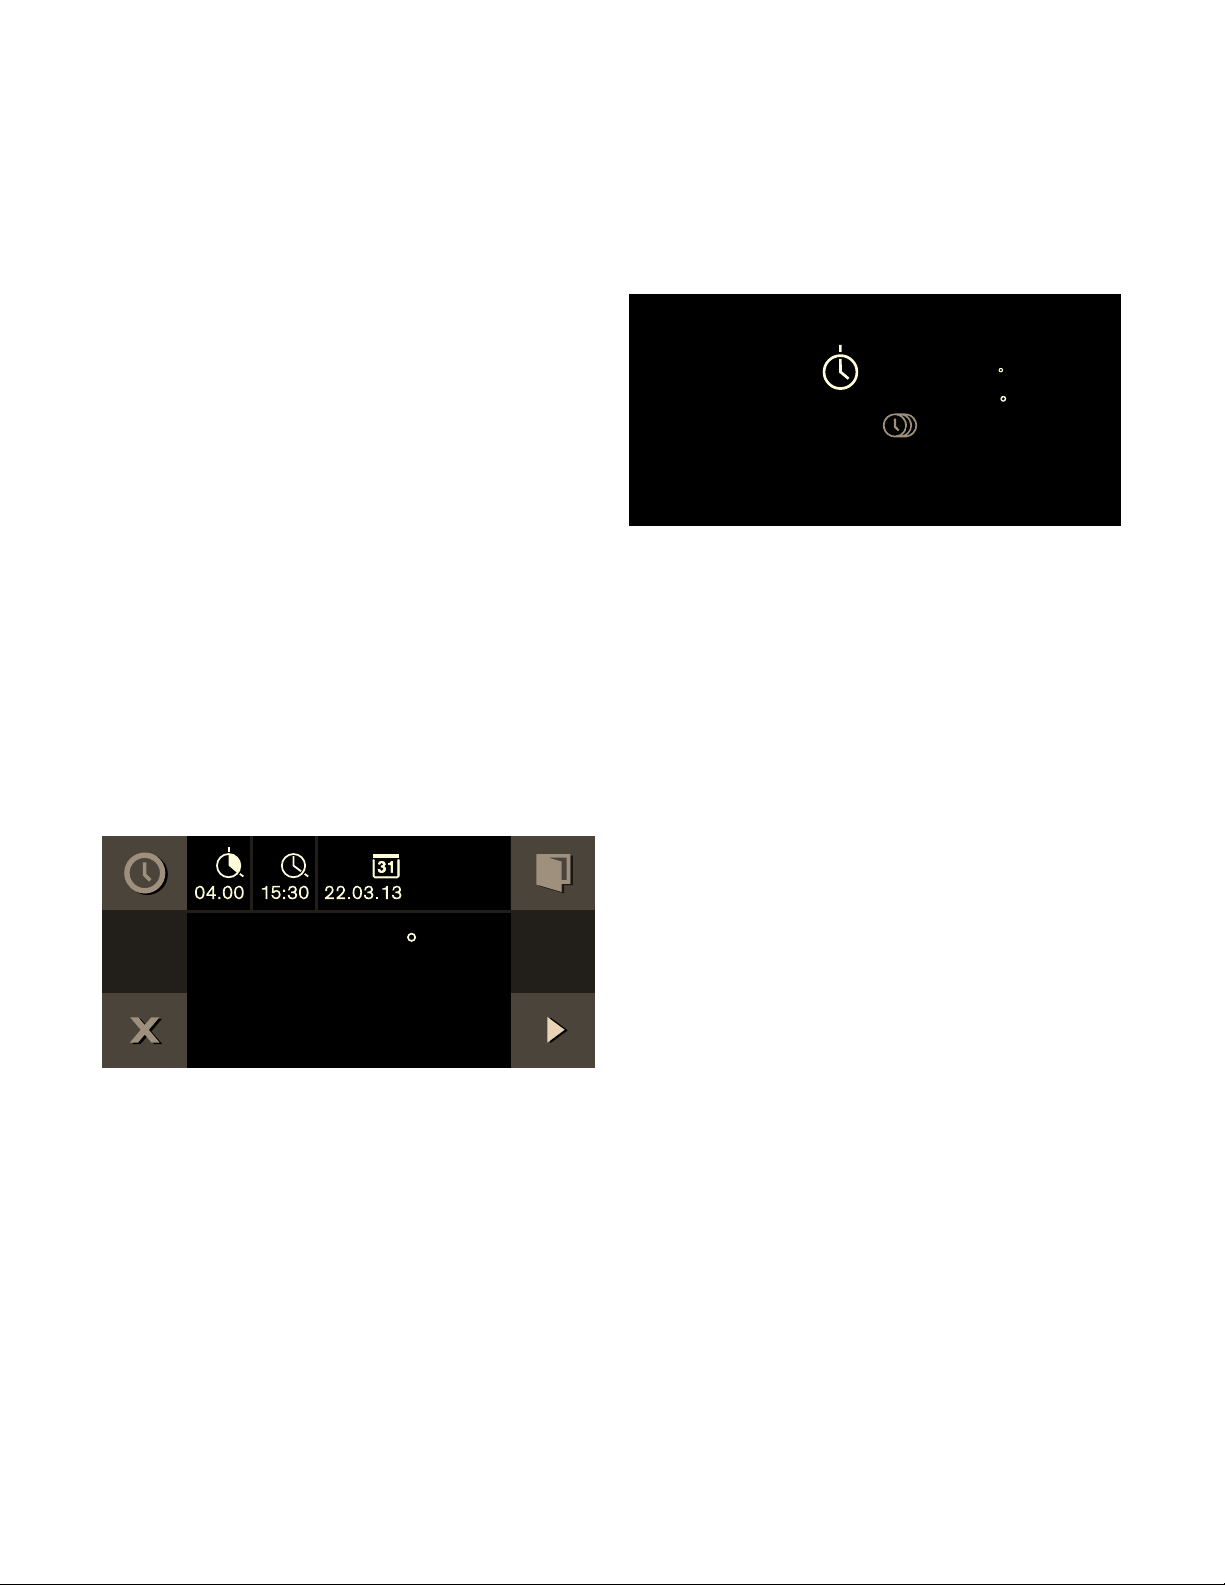
Additional information ( and )
By touching the ( symbol, you can call up additional
information. For example, information on the heating
function set or on the current temperature of the
cooking compartment.
Note: During continuous operation, small fluctuations
in temperature are normal after the oven has heated
up.
The ) symbol is displayed for important information
and action prompts.Important information on safety
and operation mode are occasionally shown
automatically. These messages either disappear
automatically after a few seconds or must be
confirmed with ™.
Cooling fan
Your appliance has a cooling fan. The cooling fan
switches on during operation. Depending on the
appliance version, the warm air escapes above or
under the door.
After removing cooked food, keep the door closed
until the appliance cools down. The appliance door
must not be left ajar, as adjoining kitchen furniture
may be damaged. The cooling fan continues to run for
a while and then switches off automatically.
9 CAUTION
Do not cover up the ventilation slots. Otherwise,
the appliance will become overheated.
Orange First settings
Main functions
Blue Basic settings
Cleaning
White Adjustable values
Zoom The display of the setting you are just
changing is enlarged.
Just before it elapses, a duration that is
just elapsing is enlarged (e.g. the last
60 seconds in the case of timers).
Minimized
display screen
After a short time, the display screen is
minimized and only the most important
things are displayed. This function is the
default and can be modified in the basic
settings.
)
11
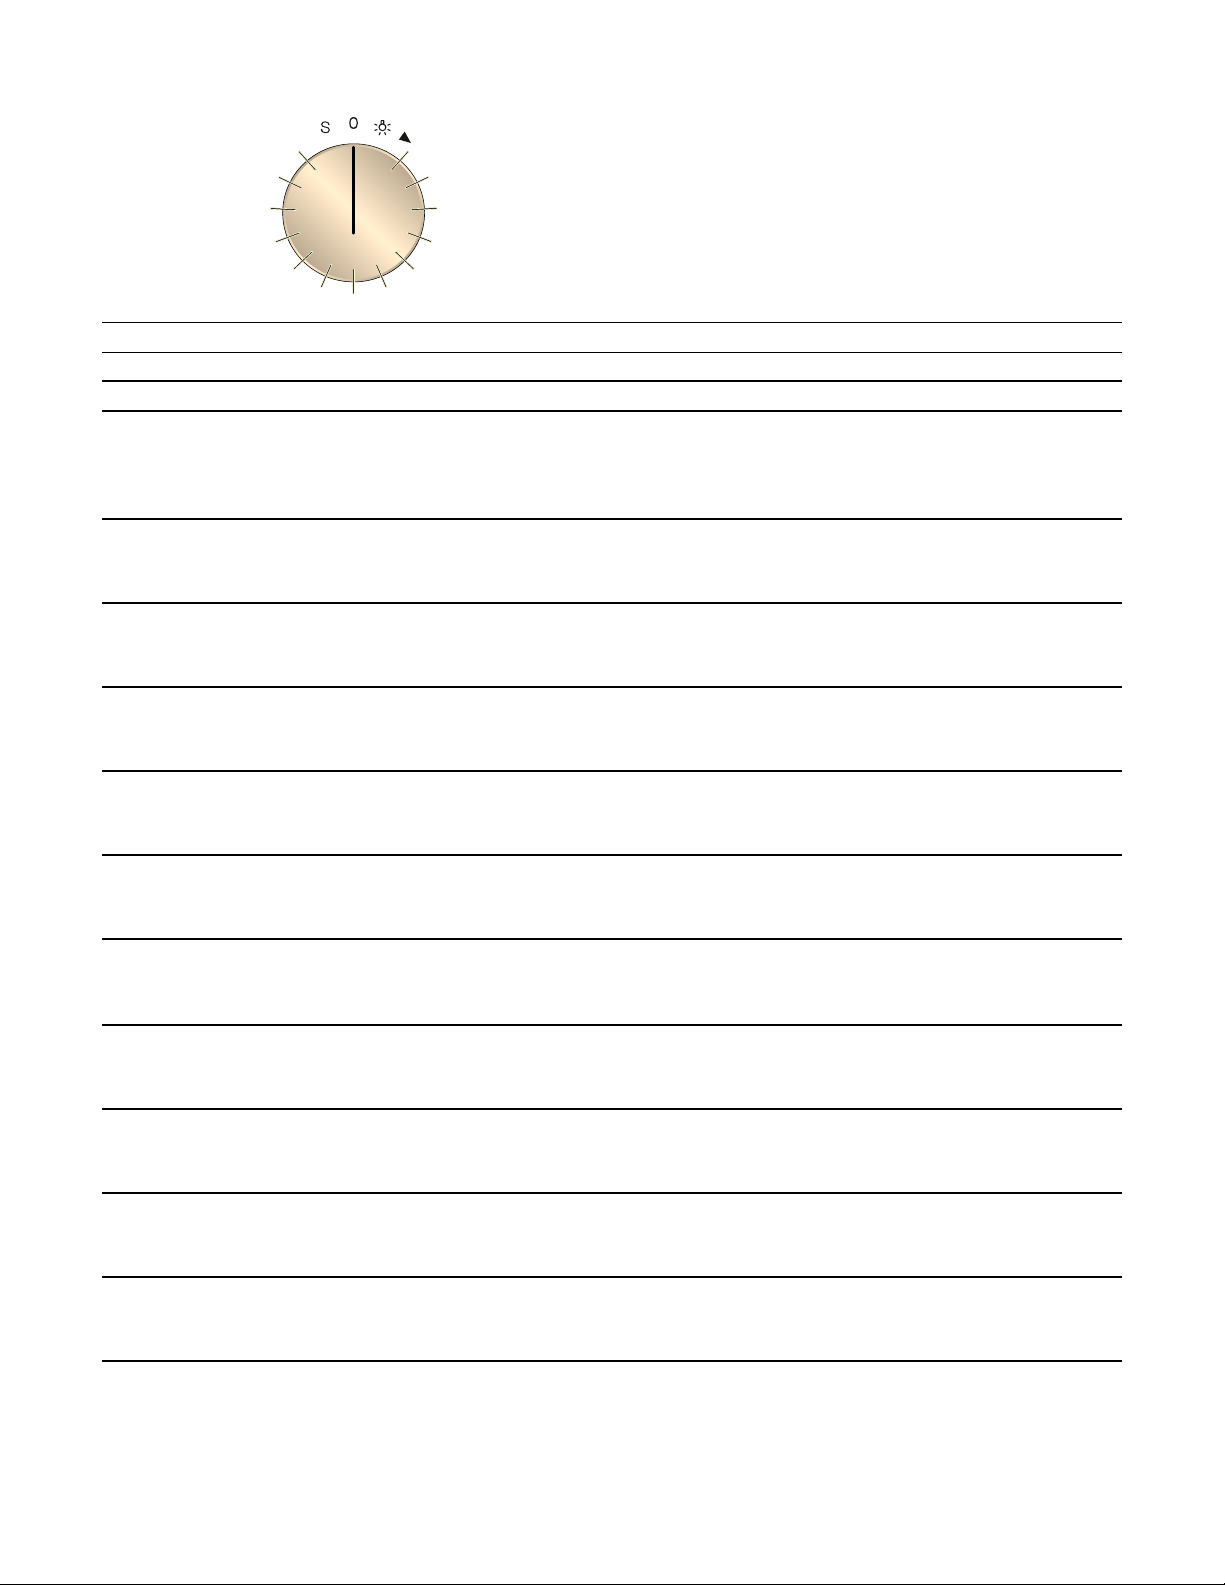
Program selection positions
Position Function/heating function Temperature Application
0 Zero position
ž
Light
2
H
Convection
120- 550°F (50 - 300°C)
Default temperature 340°F
(170°C)
Hot air: for cakes, cookies and soufflés on
several levels.
The fan on the rear wall distributes the heat
evenly in the oven interior.
3
I
Economy
120- 550°F (50 - 300°C)
Default temperature 340°F
(170°C)
Energy-saving hot air operation for cakes,
cookies, soufflés and gratins. The oven lighting
stays off.
4
N
Top + bottom heat
120- 550°F (50 - 300°C)
Default temperature 340°F
(170°C)
For cakes in tins or on a tray, soufflés, roasts.
5
P
Top heat
120- 550°F (50 - 300°C)
Default temperature 340°F
(170°C)
Targeted heat from above, e.g. baking over fruit
tarts with meringues.
6
L
Bottom heat
120- 550°F (50 - 300°C)
Default temperature 340°F
(170°C)
For after-baking, e.g. for moist fruit tarts, for pre-
serving or for dishes in a water bath.
7
K
Convection + bottom heat
120- 550°F (50 - 300°C)
Default temperature 340°F
(170°C)
Heat from below for moist cakes such as fruit
tarts.
8
Z
Full surface grill +
circulated air
120- 550°F (50 - 300°C)
Default temperature 430°F
(220°C)
Even all-round heating of meat, poultry and
whole fish.
9
Q
Full surface grill
120- 550°F (50 - 300°C)
Default temperature 430°F
(220°C)
Flat pieces of meat, sausages, or fish fillet. Bak-
ing over and preparing au gratin.
10
S
Compact grill
120- 550°F (50 - 300°C)
Default temperature 430°F
(220°C)
Only the middle part of the grill heating element
is heated. Energy-saving grilling of small quanti-
ties.
11
T
Baking stone operation
120- 550°F (50 - 300°C)
Default temperature 480°F
(250°C)
With special baking stone accessory only
Baking stone heated from below for crispy pizza,
bread or bread rolls like out of a stone oven.
12
U
Roaster operation
120- 430°F (50 - 220°C)
Default temperature 360°F
(180°C)
With special roaster accessory only
Heatable cast roaster for large amounts of meat,
soufflé or holiday roast.
13
V
Dough proofing
85 - 120°F (30 - 50°C)
Default temperature 100°F
(38°C)
Raising: for yeast and sour dough.
The dough rises much faster than at room tem-
perature. The optimum temperature setting for
yeast dough is 38°C (approx. 100 °F).
12
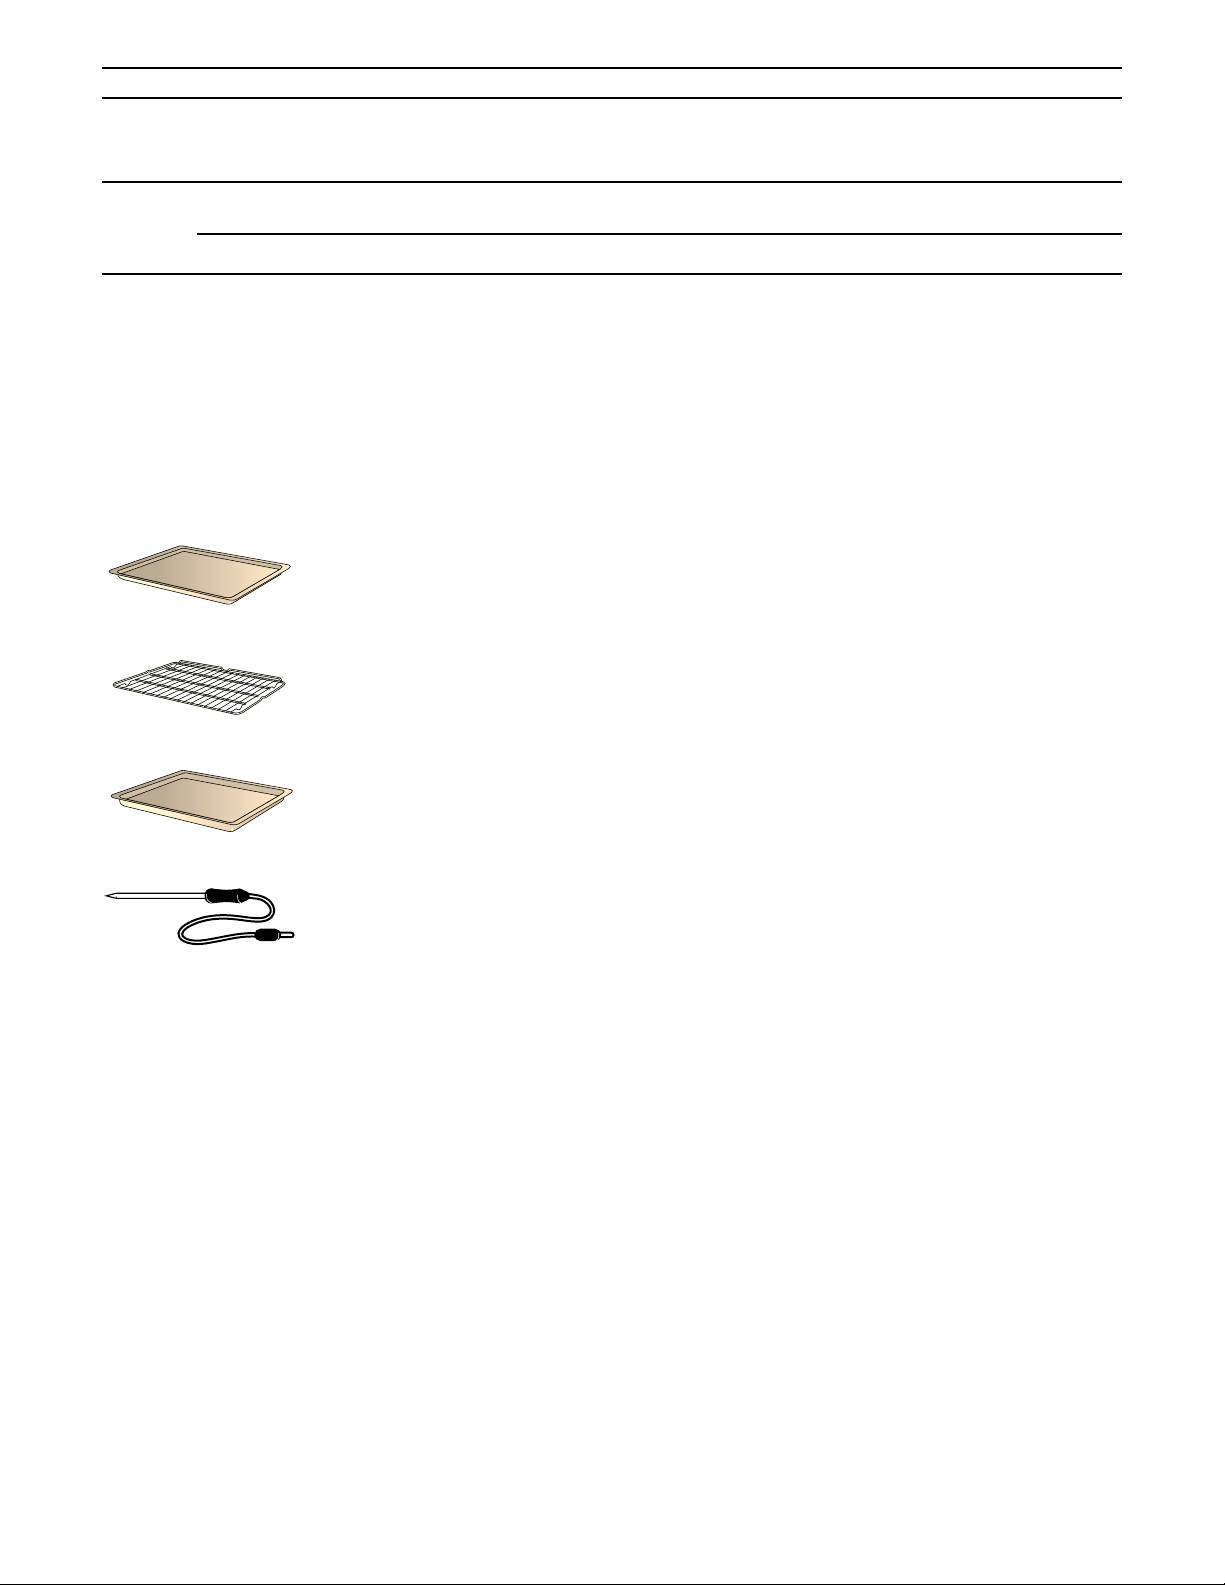
Accessories
Use only the accessories included or obtainable from
after-sales service. It has been specially adapted to
your appliance. Make sure you always insert
accessories into the interior the right way round.
Your appliance comes with the following accessories:
Special accessories
You can order the following accessories from your
specialist dealer:
Use the accessories only as indicated. The
manufacturer assumes no liability for incorrect usage
of the accessories.
14
W
Defrosting
100 - 140°F (40 - 60°C)
Default temperature 115°F
(45°C)
For vegetables, meat, fish and fruit.
S
t Factory setting
In the factory setting, you can adapt your appli-
ance individually.
œ Pyrolysis
905°F (485°C) Self-cleaning
Position Function/heating function Temperature Application
Baking tray, enameled
Wire grill tray
Grill tray
Plug-in core temperature
probe
BA 016 103 Pull-out system
Fully extendable telescopic pull-out
rack and pyrolysis-proof cast frame
BA 026 113 Baking tray, enameled, 15 mm deep
BA 036 103 Wire rack, chrome-plated, without
opening, with feet
BA 226 103 Grill tray, enameled, 30 mm deep
BA 046 113 Glass tray, 24 mm deep
BA 056 113 Heating element for baking stone and
roaster (230 V)
BA 056 123 Heating element for baking stone and
roaster (400 V)
BA 056 133 Baking stone
Including baking stone support and
pizza paddle (order heating element
separately)
BS 020 002 Pizza paddle, set of 2
GN 340 230 Cast aluminum roaster GN 2/3, 165 mm
high, non-stick
13
Before first use
Here you find out what you have to do before
preparing meals with your appliance for the first time.
Read the section entitled Important safety notes
beforehand.
The appliance must be completely fitted and
connected.
The "First settings" menu appears in the display after
the mains has been connected. You can now set your
new appliance:
▯ Language
▯ Time format
▯ Time
▯ Date format
▯ Date
▯ Temperature format
Notes
‒ The "First settings" menu only appears the first
time the appliance is switched on after
connection to the mains or if the appliance had no
power supply for several days.
After connection to the power, the GAGGENAU
logo first appears for about 30 seconds, after
which the "First settings" menu appears
automatically.
‒ You can change the settings at any time (see the
section entitled Factory setting).
Setting the language
The default language appears in the display.
1 Select the desired display language with the
rotary selector.
2 Confirm with ™.
Note: When the language is changed, the system is
restarted; this procedure takes a few seconds.
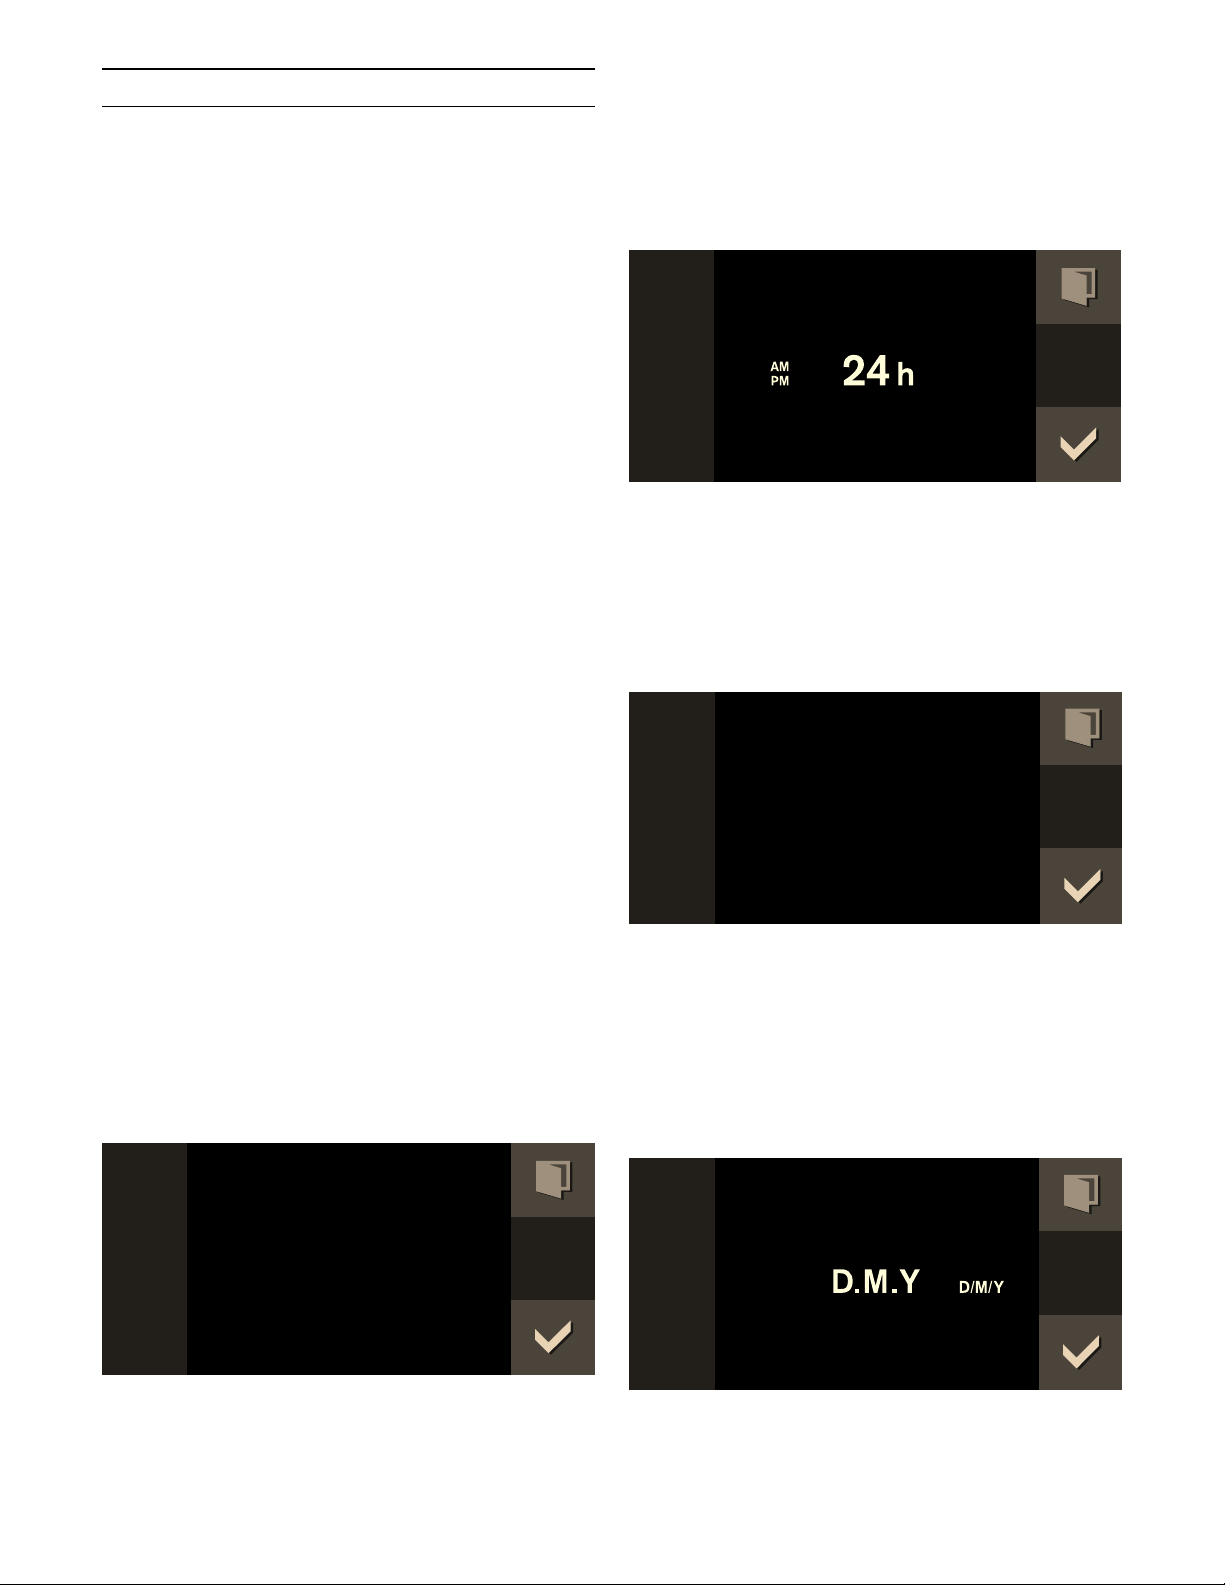
Setting the time format
the two possible formats 24h and AM/PM appear in
the display. The default format is 24h.
1 Set the required format with the rotary selector.
2 Confirm with ™.
Setting the time
The time appears in the display.
1 Set the required time with the rotary selector.
2 Confirm with ™.
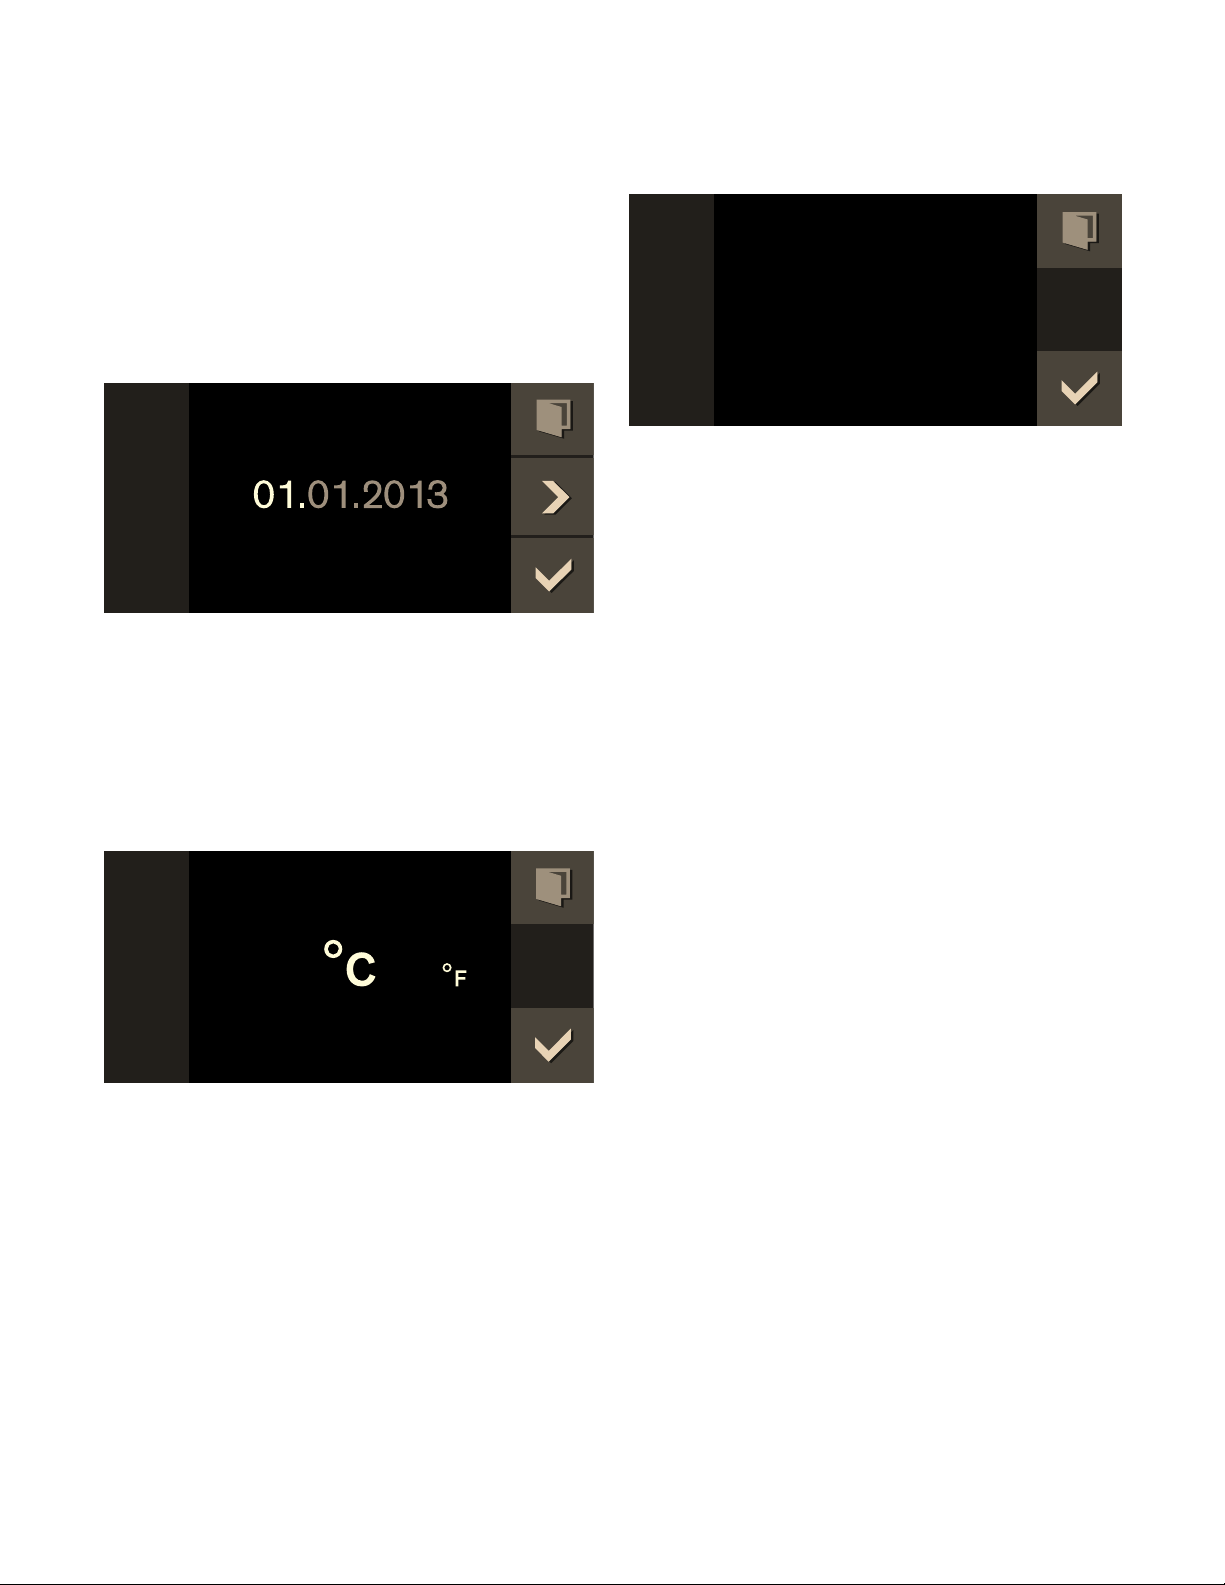
Setting the date format
The three possible formats D.M.Y, D/M/Y and M/D/Y
appear in the display. The D.M.Y is the default.
1 Set the required format with the rotary selector.
2 Confirm with ™.
'HXWVFK
6SUDFKH
7LPHIRUPDW
7LPH
'DWHIRUPDW
14
Setting the date
The default date appears in the display. The day
setting is already active.
1 Set the required day with the rotary selector.
2 Switch to the month setting with the C symbol.
3 Set the month with the rotary selector.
4 Switch to the year setting with the C symbol.
5 Set the year with the rotary selector.
6 Confirm with ™.
Setting the temperature format
The two possible formats °C and °F appear in the
display. The °C format is selected by default.
1 Set the required format with the rotary selector.
2 Confirm with ™.
Completing initial set-up
"Initial set-up complete" appears in the display.
Confirm with ™.
The appliance enters the standby mode and the
standby display appears. The appliance is now ready
for operation.
Heating up the oven
Make sure there are no packaging remainders left in
the interior.
Heat up the empty, closed oven to dispel the 'new'
smell. An hour with convection H at 390° F (200°C)
is ideal. For details of how to set this heating function,
refer to the section entitled Operating the appliance.
Cleaning accessories
Before using accessories for the first time, thoroughly
clean them with hot soapy water and a soft dish cloth.
'DWH
7HPSHUDWXUHIRUPDW
,QLWLDOVHWXS
FRPSOHWH
15
Activating the appliance
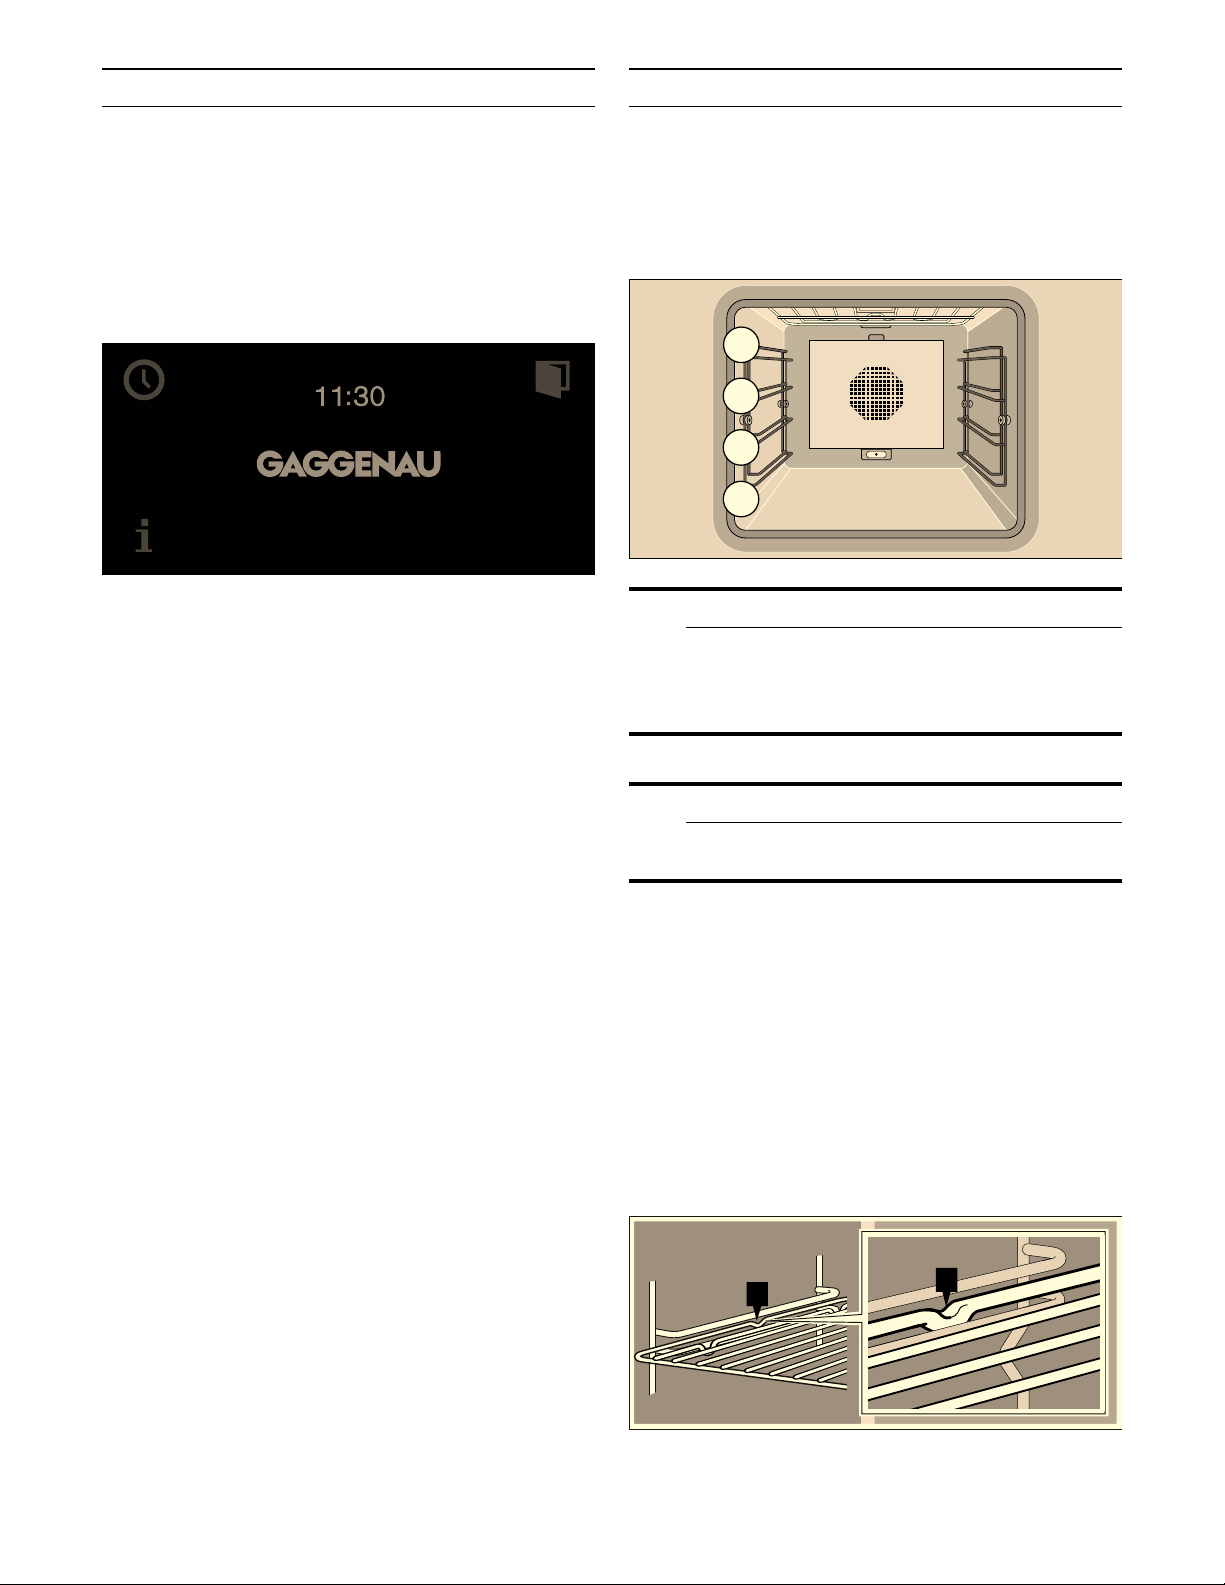
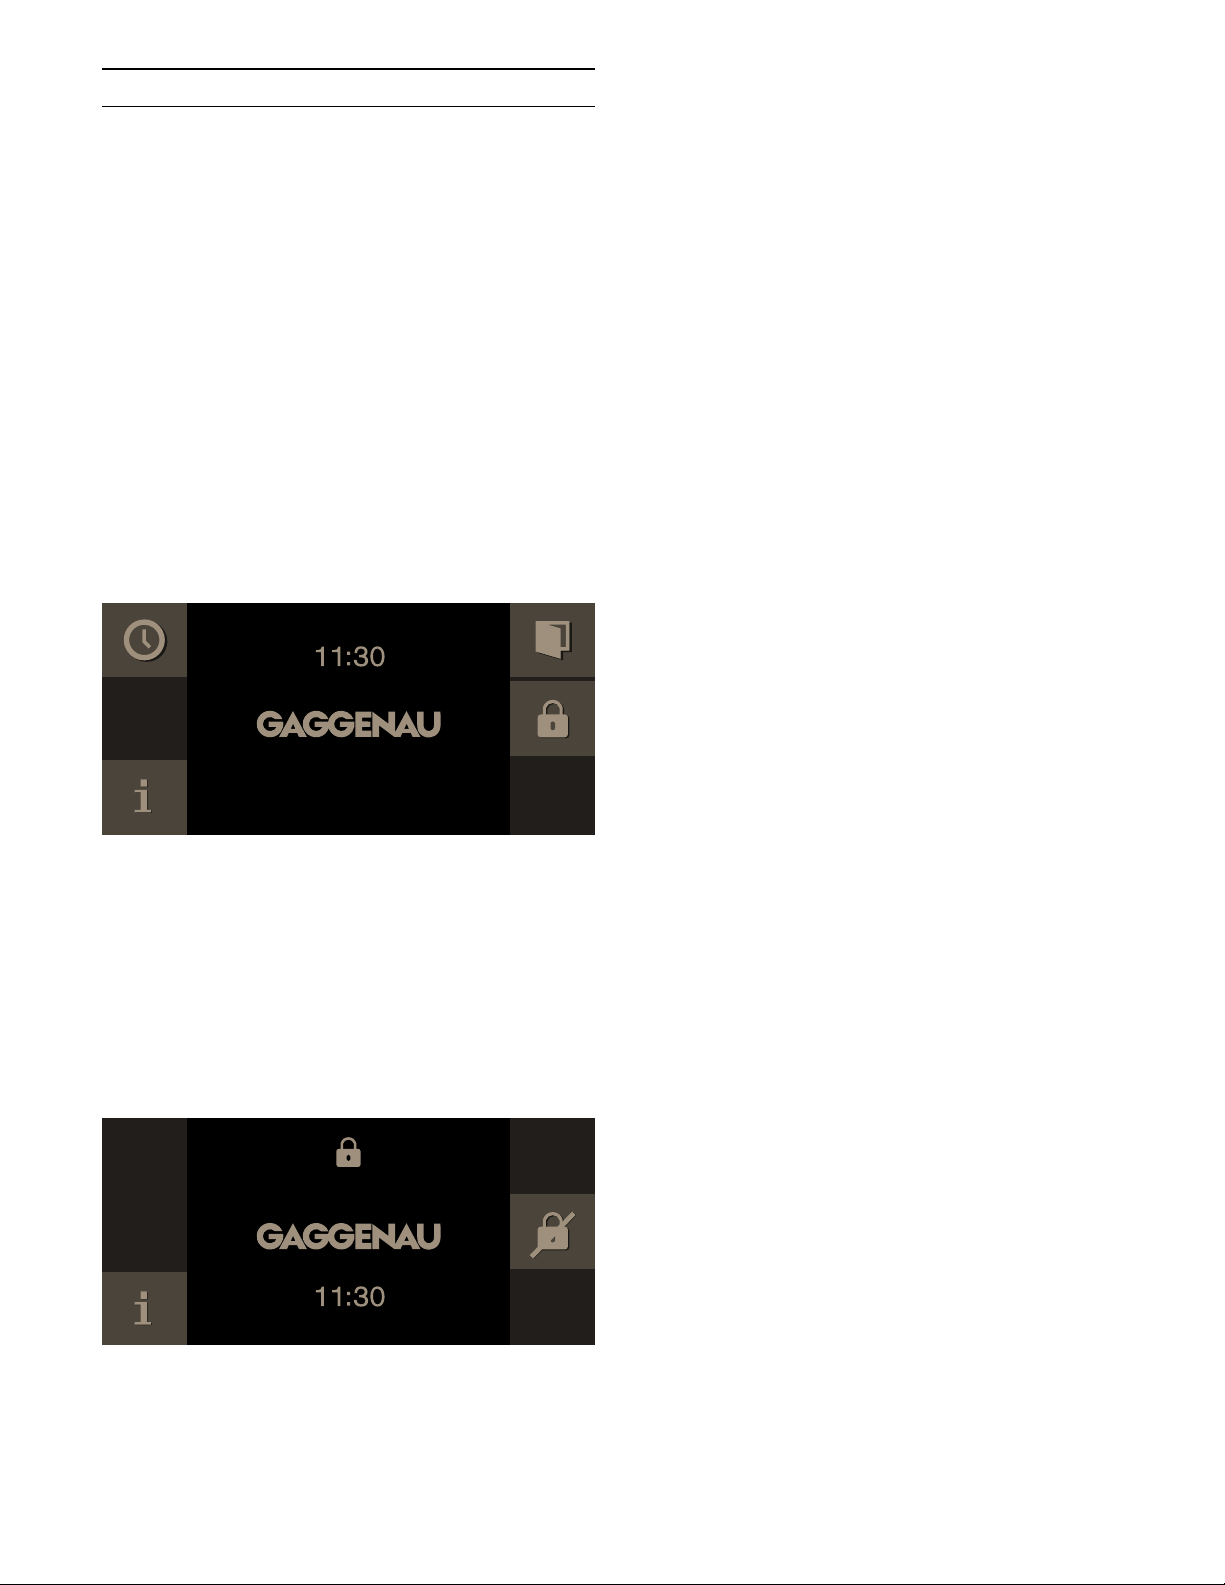
Standby
The appliance is in the standby mode when no
function is set or the child lock is activated.
The control panel's brightness is reduced in the
standby mode.
Notes
‒ There are various displays for the standby mode.
The GAGGENAU logo and the time are set by
default. Refer to the section entitled Factory
setting
if you would like to change the display.
‒ The display's brightness depends on the vertical
viewing angle. You can adjust the display by way
of the "Brightness" setting in the factory settings.
Activate appliance
In order to exit standby mode, you can either
▯ Set the function selector,
▯ Touch a control panel,
▯ or open or close the door.
Now you can set the desired function. Read the
appropriate chapters to learn how to set functions.
Notes
‒ If "Standby display = off" is selected in the factory
setting, you must turn the function selector to exit
the standby mode.
‒ The standby display appears again if you have not
made any settings for a long while after activation.
‒ The cooking compartment lighting goes out after
a little while if the door is open.
Operating the appliance
Oven interior
The oven interior has four insertion levels. These are
counted from the bottom up.
9 CAUTION
Do not place anything on the cooking
compartment floor. Do not cover it with
aluminium foil. A build-up of heat could damage
the appliance or cause injury.
9 CAUTION
Do not slide any accessories between the shelf
positions, or they may tip.
Inserting accessories
The accessories feature a latching function. The
latching function prevents tilting of accessories when
pulling them out. You must insert accessories in the
oven interior correctly so that tilt protection will work.
When inserting the rack, make sure
▯ that the engaging lug (a) points downward
▯ that the rack's safety clip is at the rear and top.
D
D
16
Turning on
1 Set the required heating mode using the function
selector. The chosen heating mode and the
default temperature are displayed.
2 If you want to change the default temperature:
set the required temperature with the rotary
selector.
The preheating symbol “ appears on the display.
The bar continuously shows the preheating status.
When the set temperature is reached, a signal sounds
and the preheating symbol “ goes off.
Note: The oven interior lighting stays switched off at a
temperature setting below 160° F (70°C).
Switching off:
Turn the function selector to 0.
Quick heat
Your appliance reaches the required temperature
particularly fast with the "Quick heat" function.
So you achieve a uniform cooking result, do not place
your meal in the oven interior until "Quick heat" has
ended.
You must activate the "Quick heat" function in the
factory setting (see section entitled Factory setting).
Safety lock
For your protection, the appliance has a safety shut-off
feature. Every heating operation is switched off after
12 hours if the appliance is not operated during this
time. A message appears in the display.
Exception:
programming with the long-term timer.
Turn the program selection to 0, after which you can
operate the appliance in the manner to which you are
accustomed.
Timer functions
In the timer menu, set:
Š Timer
p Stopwatch
6 Cooking time (not in the idle state)
5 Cooking time end (not in the idle state)
Launching the timer menu
You can launch the timer menu from any mode. Only
from the factory settings, program selection is set to
S, the time menu is not available.
Touch the M symbol.
The timer menu appears.
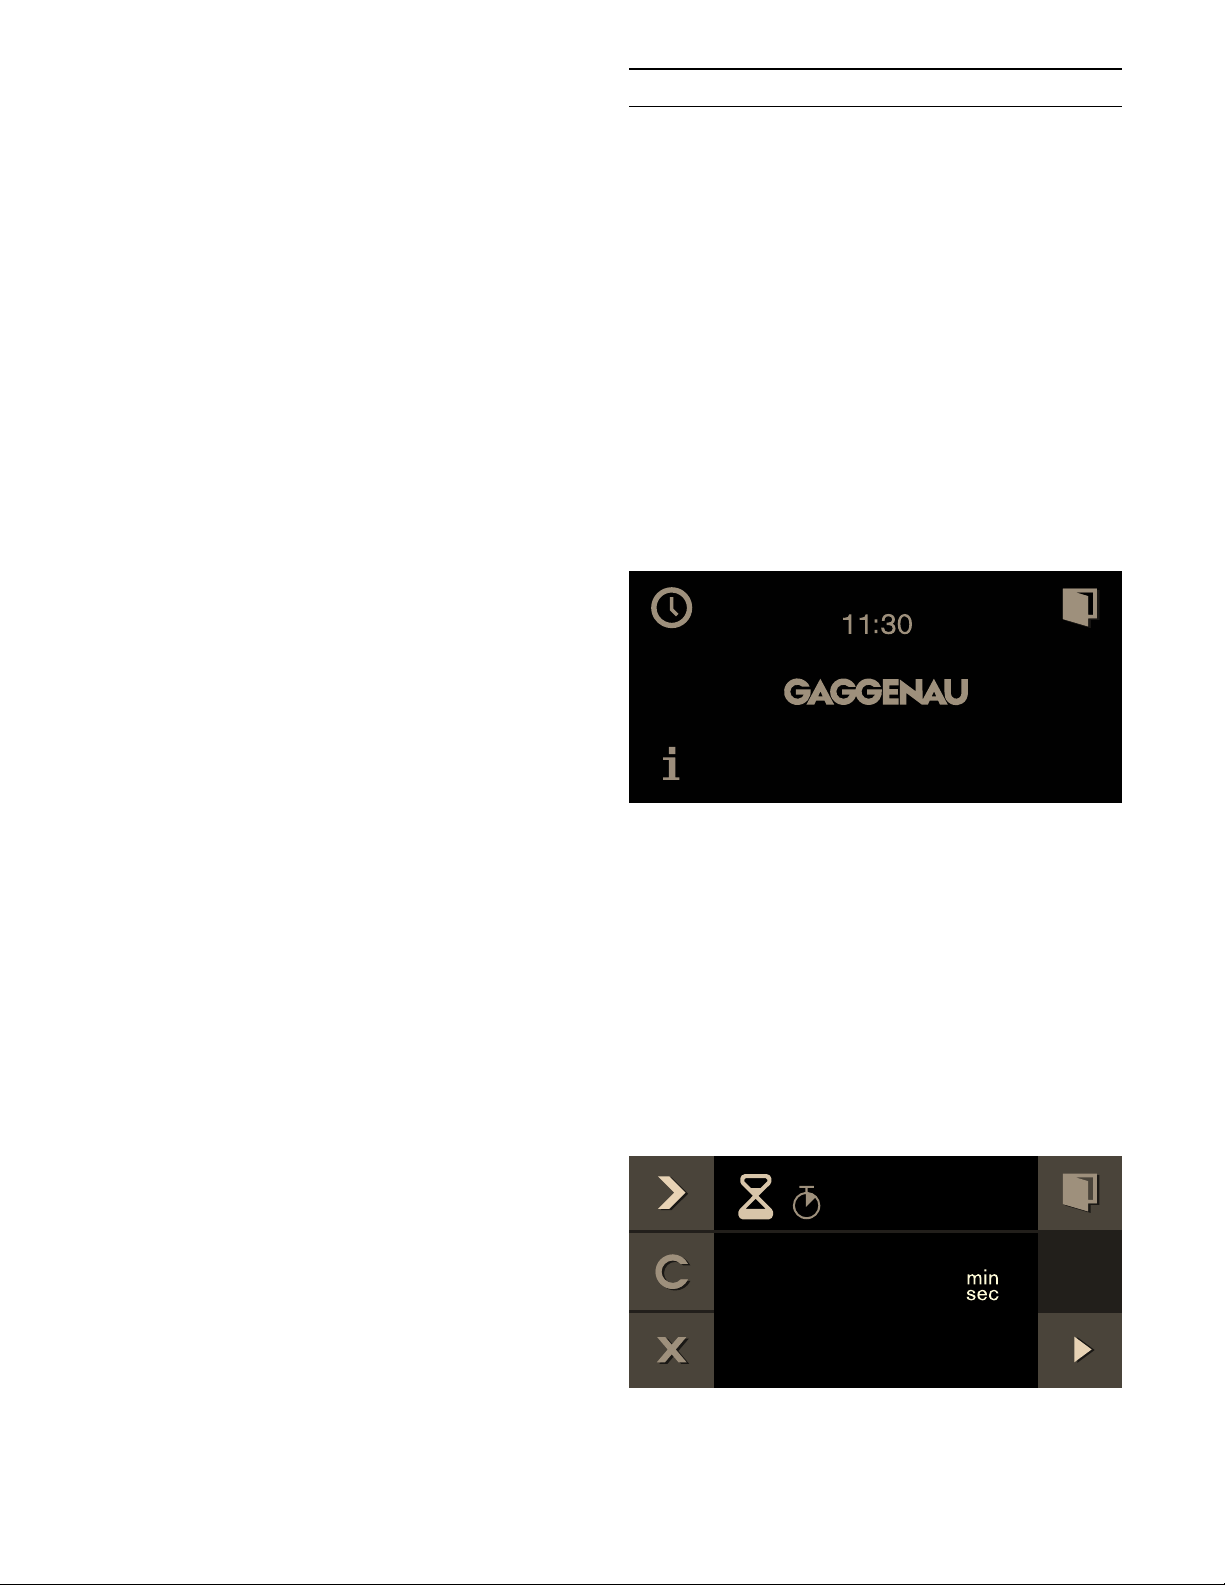
Timer
The timer runs independently of the other appliance
functions. You can enter a maximum of 90 minutes.
Setting the timer
1 Call up the Timer menu.
The "Timer" function Š is displayed.
2 Turn the rotary selector to set the desired time.
7LPHU
17
3 Start with I.
The Timer menu closes and the timer starts to run.
The symbol for the timer Š appears on the display and
the time can be seen counting down.
A signal sounds once the time has elapsed. The
audible signal ceases if you touch the ™ symbol.
You can exit the Timer menu at any time by touching
the ' symbol. This way, the settings are lost.
Suspend timer:
Call up the Timer menu. Select the "Timer" function
with C, select Š, and touch the H symbol. To let the
timer run on, touch the I symbol.
Switch off the timer early:
Call up the Timer menu. Select the "Timer" function
with C, select Š, and touch the Ž symbol.
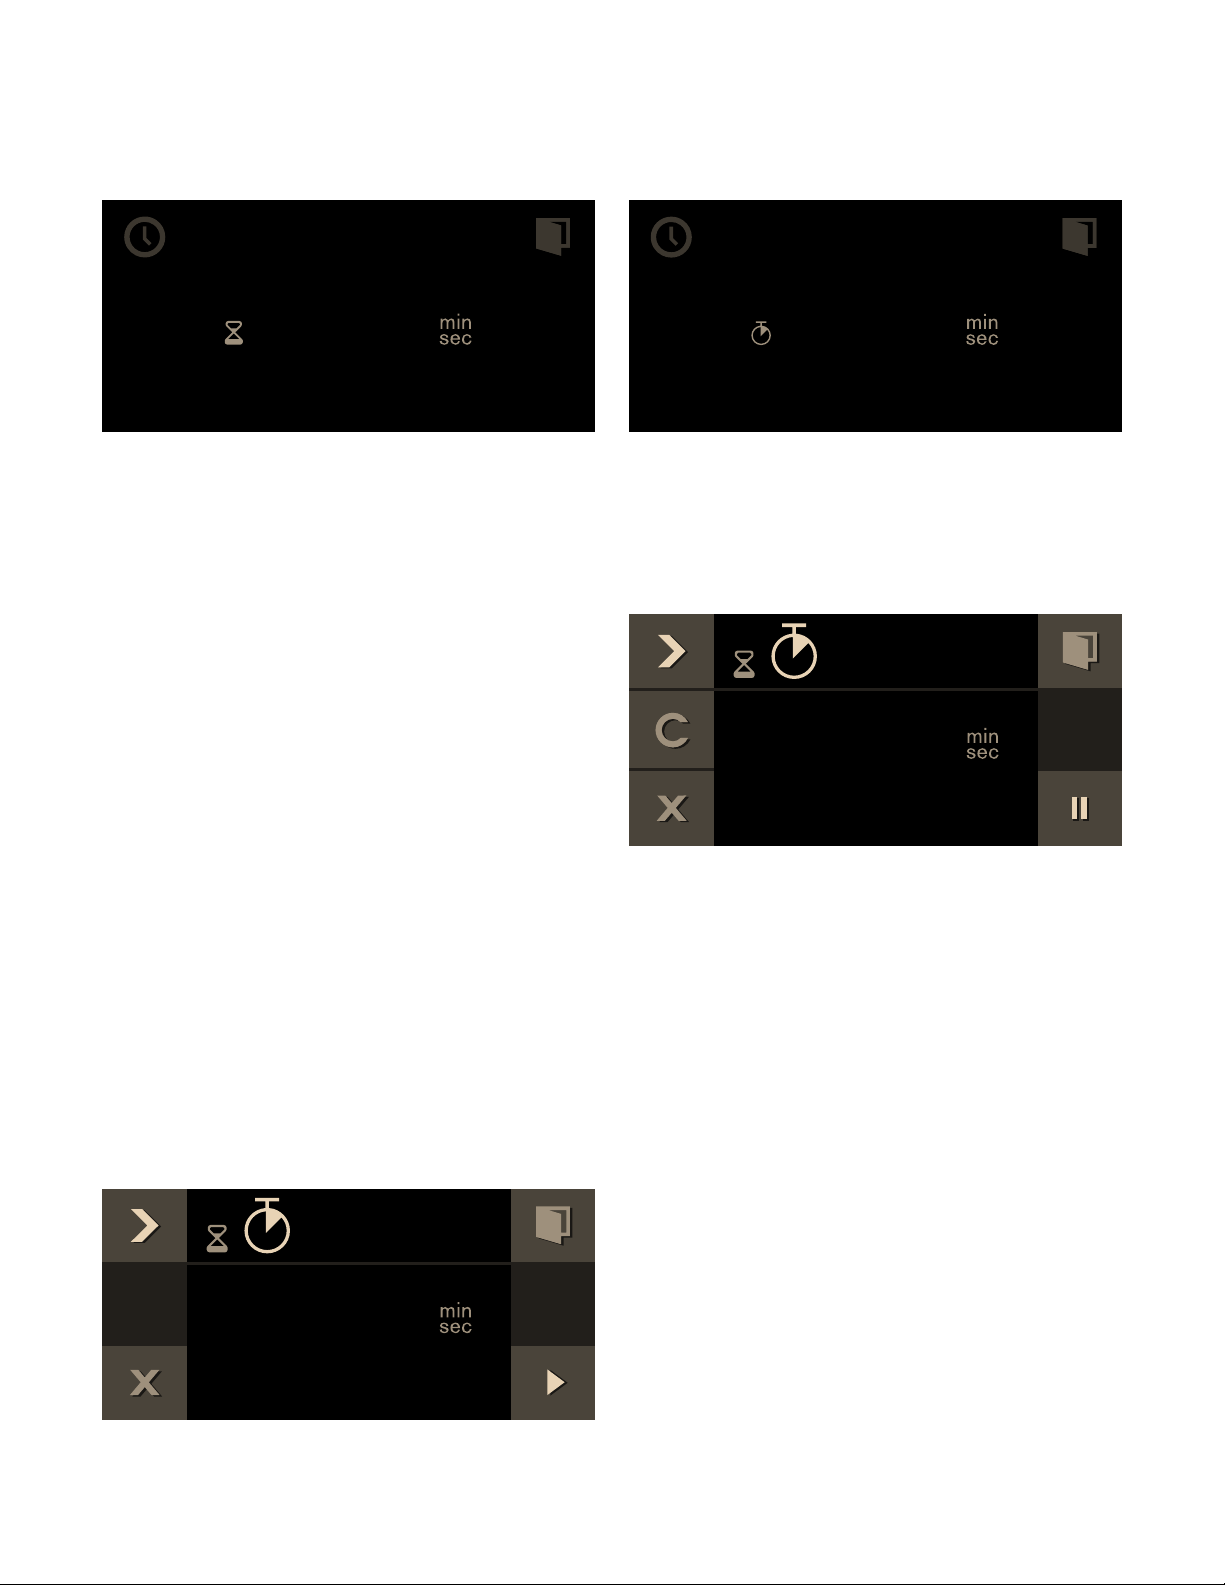
Stopwatch
The stopwatch runs independently of the other
appliance functions.
The stopwatch counts up from 0 seconds to 90
minutes.
It has a pause function. Therefore, you can stop the
timer in between times.
Starting the stopwatch
1 Launch the timer menu.
2 With C, select the "Stopwatch" function p.
3 Start with I.
The timer menu is closed and the time runs. The p
symbol and the elapsing timer are shown in the
display.
Stopping and restarting the stopwatch
1 Launch the timer menu.
2 With C, select the "Stopwatch" function p.
3 Touch the H symbol.
The time stops. The symbol changes to Start I
again.
4 Start with I.
The time continues to run. Once 90 minutes have been
reached, the display pulsates and a signal sounds. It
goes off when you touch the ™ symbol. The p
symbol disappears from the display. The operation has
ended.
Switching off the stopwatch:
Launch the timer menu. With C, select the
"Stopwatch" function p and touch the Ž symbol.
6WRSZDWFK
6WRSZDWFK

18
Cooking time
If you set a cooking time for your meal, the appliance
switches off heating automatically after this time has
elapsed.
You can set a cooking time from 1 minute to 23:59
hours.
Setting the cooking time
You have set the heating function and temperature and
you have placed your dish in the oven interior.
1 Touch the M symbol.
2 With C, select the "Cooking time" function 6.
3 Set the required cooking time with the rotary
selector.
4 Start with I.
The appliance starts. The timer menu is closed. The
temperature, the operating mode, the remaining
cooking time and the end of the cooking time appear
in the display.
One minute before expiration of the cooking time, the
expiring cooking time is enlarged in the display.
The appliance switches off after expiration of the
cooking time. The 6 pulsates and a signal sounds. It
goes off prematurely if you touch the ™ symbol, open
the appliance door or set the program selection to 0.
Interrupting the cooking time:
Launch the timer menu. With C, select the "Cooking
time" function 6. With H interrupt the cooking time.
With I continue the cooking time.
Changing the cooking time:
Launch the timer menu. With
C, select the "Cooking
time" function 6. Set the cooking time with the rotary
selector. Start with I.
Clearing the cooking time:
Launch the timer menu. With C, select the "Cooking
time" function 6. Clear the cooking time with Ž.
Return to normal operation with '.
Canceling the entire operation:
Set the program selection to 0.
Note: You can also change the heating function and
temperature during the cooking time.
&RRNLQJWLPH
)
)

19
End of cooking time
You can defer the end of the cooking time until later.
Example: it is 2 pm. The meal takes 40 minutes to
cook. It should be ready by 3.30 pm.
Enter the cooking time and shift the end of the
cooking time to 3.30 pm. The electronic circuitry
calculates the starting time. The appliance starts
automatically at 2:50 pm and switches off at 3.30 pm.
Note that easily perishable foodstuffs must not be left
in the oven for too long.
Shifting the end of the cooking time
You have set the heating function, the temperature
and the cooking time.
1 Touch the M symbol.
2 With C, select the "End of cooking time"
function 5.
3 Set the required cooking time end with the rotary
selector.
4 Start with I.
The appliance assumes a waiting mode. The operating
mode, the temperature, the cooking time and the end
of the cooking time appear in the display. The
appliance starts at the calculated time and switches
off automatically when the cooking time has elapsed.
Note: If the 6 symbol flashes: you have not set a
cooking time. Always set a cooking time first.
The appliance switches off after expiration of the
cooking time. The 5 pulsates and a signal sounds. It
goes off prematurely if you touch the ™ symbol, open
the appliance door or set the program selection to 0.
Changing the cooking time end:
Launch the timer menu. With
C, select "End of
cooking time" 5. Set the required cooking time end
with the rotary selector. Start with I.
Canceling the entire operation:
Set the program selection to 0.
&RRNLQJWLPHHQG
)
20
Sabbath mode and Yom Tov mode
Sabbath mode
With this function, the appliance maintains a
temperature between 120 and 450°F (50 and 230°C)
with the convection heating function.
You can keep dishes warm for up to 74 hours without
having to switch on or off.
Note that easily perishable foodstuffs must not be left
in the oven for too long.
Note: You must activate the Sabbath mode in the
factory setting in order to operate the mode.
Follow these steps:
1 Set the program selector to S.
2 Select "Factory setting" with the rotary selector.
3 Confirm by touching the ™ symbol.
4 Rotate the selector to Sabbath mode :.
5 Confirm by touching the ™ symbol.
6 Rotate the selector to “activate”.
7 Corfirm by touching the ™ symbol.
8 Turn the oven off.
Setting the Sabbath mode
1 Set the program selector to ž.
2 Touch the / symbol.
The suggested value of 24h at 185° F (85°C)
appears in the display. Start with I
- or -
Change the cooking time and the temperature.
3 Changing the cooking time 6 :
Touch the $ symbol. Set the preferred cooking
time with the rotary selector. You can set up to 74
hours. Confirm by touching the ™ symbol. Then
changing the temperature becomes an option.
4 Changing the temperature:
Set the required temperature with the rotary
selector.
5 Start with I .
The appliance starts. / and the temperature appear
in the display. The Sabbath screen will appear as
shown.
The oven and display lighting is off. The control panel
is blocked and no tone can be heard when you touch
it.
The appliance no longer heats after expiry of the time.
The display is blank. Set the program selector to 0.
Switching off:
To cancel the operation, set the program selector to 0.
6DEEDWKPRGH
)
)
21
Yom Tov mode
With this function, the appliance is programmed to
perform in three stages.
Stage 1 and 2 can be programmed for a maximum total
duration of 74 hours. The duration of Step 3 is 1 hour
and cannot be modified.
Stage 1: maintains a warm temperature of 122° F
(50°C) in the convection heating function. The interior
oven lights remain off through this stage.
Stage 2: the appliance raises to a desired temperature
setting and maintains a temperature between 120 and
450° F (50 -230°C). For warming and cooking foods
in the convection heating function. The desired time
can be adjusted for this stage. The interior oven lights
will be on during this time.
Stage 3: maintains a warm temperature of 122° F
(50°C) in the convection heating function for 1 hour
after stage 2 has ended. The interior oven lights will
be on during this time.
Note that easily perishable foodstuffs must not be left
in the oven for too long.
Setting the Yom Tov mode
1 Set the program selector to
ž .
2 Touch the / symbol.
The suggested value of 24h at 185° F (85°C)
appears in the display.
To set Stage 2 cooking time with rotary selector:
1 Touch the $ symbol to adjust the duration of
Stage 2 cooking time 6 .
2 Set the desired Stage 2 cooking time with the
rotary selector.
3 Touch the C symbol to adjust the end of Stage
2 cooking time 5 .
4 Select the end time with the rotary selector.
5 Change the date if needed by touching the C
symbol to V .
6 Rotate the selector to the desired date.
7 Confirm settings by touching the ™ symbol.
To set Stage 2 temperature:
1 Rotate selector to desired Stage 2 temperature.
2 Start with I.
The temperatures of Stage 1 and Stage 2 appear in
the display. The remaining time to the beginning of
Stage 2 is counted down in the display. The Yom Tov
screen will appear as shown.
The program will begin with the pre-set warm
temperature without light, then advance to the
programmed temperature with light until the end of
the set date and time, and then maintain the pre-set
warm temperature for 60 minutes.
The appliance no longer heats after expiry of the time.
The display is blank. Set the program selector to 0.
Switching off:
To cancel the operation, set the program selector to 0.
6DEEDWKPRGH
)
)
)
Æ
22
Personal recipes
You can save up to 50 individual recipes. You can
record a recipe. You can assign these recipes a name
so that you can fall back on them quickly and
conveniently if you need them.
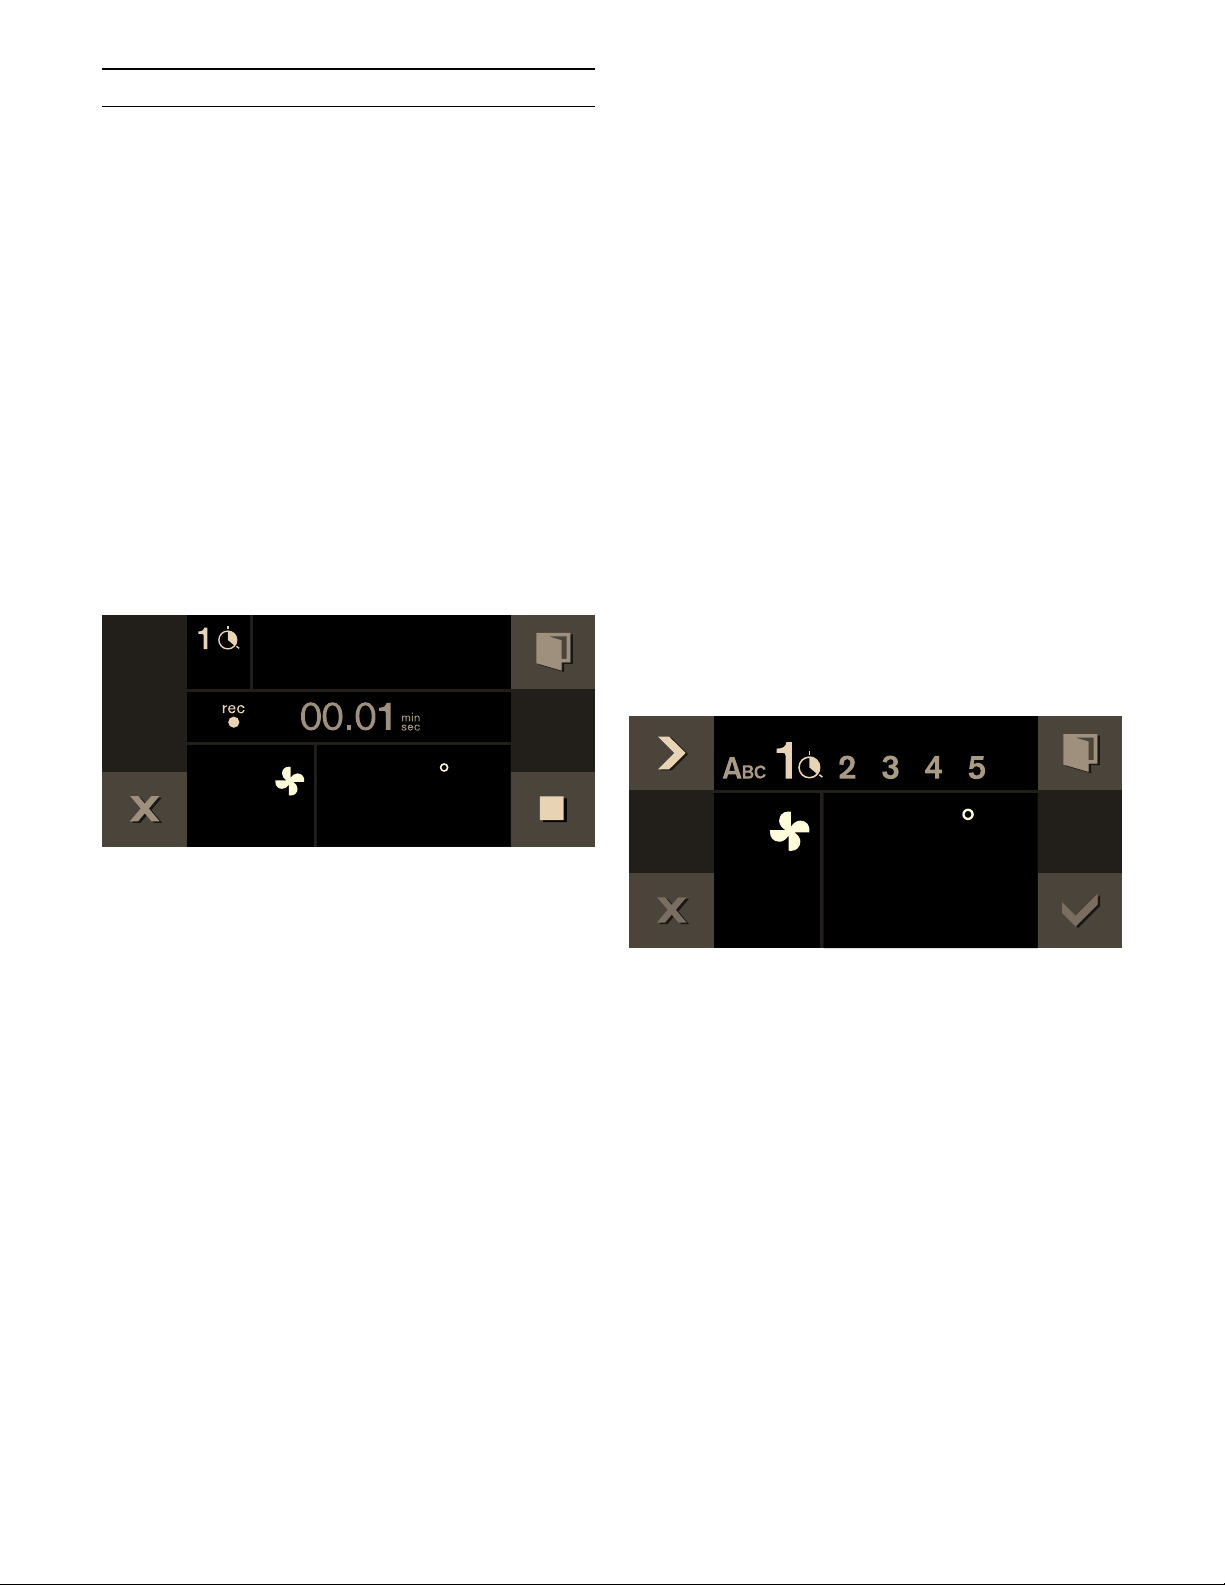
Recording a recipe
You can set up to five phases in succession and you
can record them.
1 Set the program selection to the required heating
function.
The i symbol is displayed.
2 Touch the i symbol.
3 Choose a free storage location with the rotary
selector.
4 Touch the g symbol.
5 Set the desired temperature with the rotary
selector.
6 The cooking time is recorded.
7 Recording another phase:
Set the program selection to the required heating
function. Set the required temperature with the
rotary selector. A new phase begins.
8 Once the appliance has achieved the desired
cooking result, touch the & symbol to end the
recipe.
9 Enter the name under "ABC" (see Section entitled
Entering names).
Notes
‒ Recording a phase does not begin until the
appliance has reached the set temperature.
‒ Every phase must last at least one minute.
‒ During the first minute you can change the
heating function or the temperature.
Enter the core temperature for a phase:
Insert the core temperature probe in the socket in the
oven interior. Set the heating function and
temperature. Touch the + symbol. With the rotary
selector, enter the required temperature and confirm it
with +.
Programming a recipe
You have the option of programming and saving up to
five phases of preparation.
1 Set the program selection to the required heating
function. Set the required temperature with the
rotary selector.
The
i symbol is displayed.
2 Touch the i symbol.
3 Choose a free storage location with the rotary
selector..
4 Touch the % symbol.
5 Enter the name under "ABC" (see Section entitled
Entering names).
6 Choose the first phase with the C symbol.
The heating function and temperature set at the
start are displayed. You can change the heating
function and temperature with the rotary
selectors.
7 Choose the time setting with the C symbol.
8 Set the required cooking time with the rotary
selector.
9 Choose the next phase with the C symbol.
- or -
Preparation is complete, end input.
10 Save with ™.
- or -
Cancel with ' and quit the menu.
Enter the core temperature for a phase:
Choose the next phase with the C symbol. Set the
heating function and temperature. Touch the +
symbol. With the rotary selector, enter the required
temperature and confirm it with +.
Note: For phases for which a core temerature has
been programmed you cannot set a cook time.
)
)
23
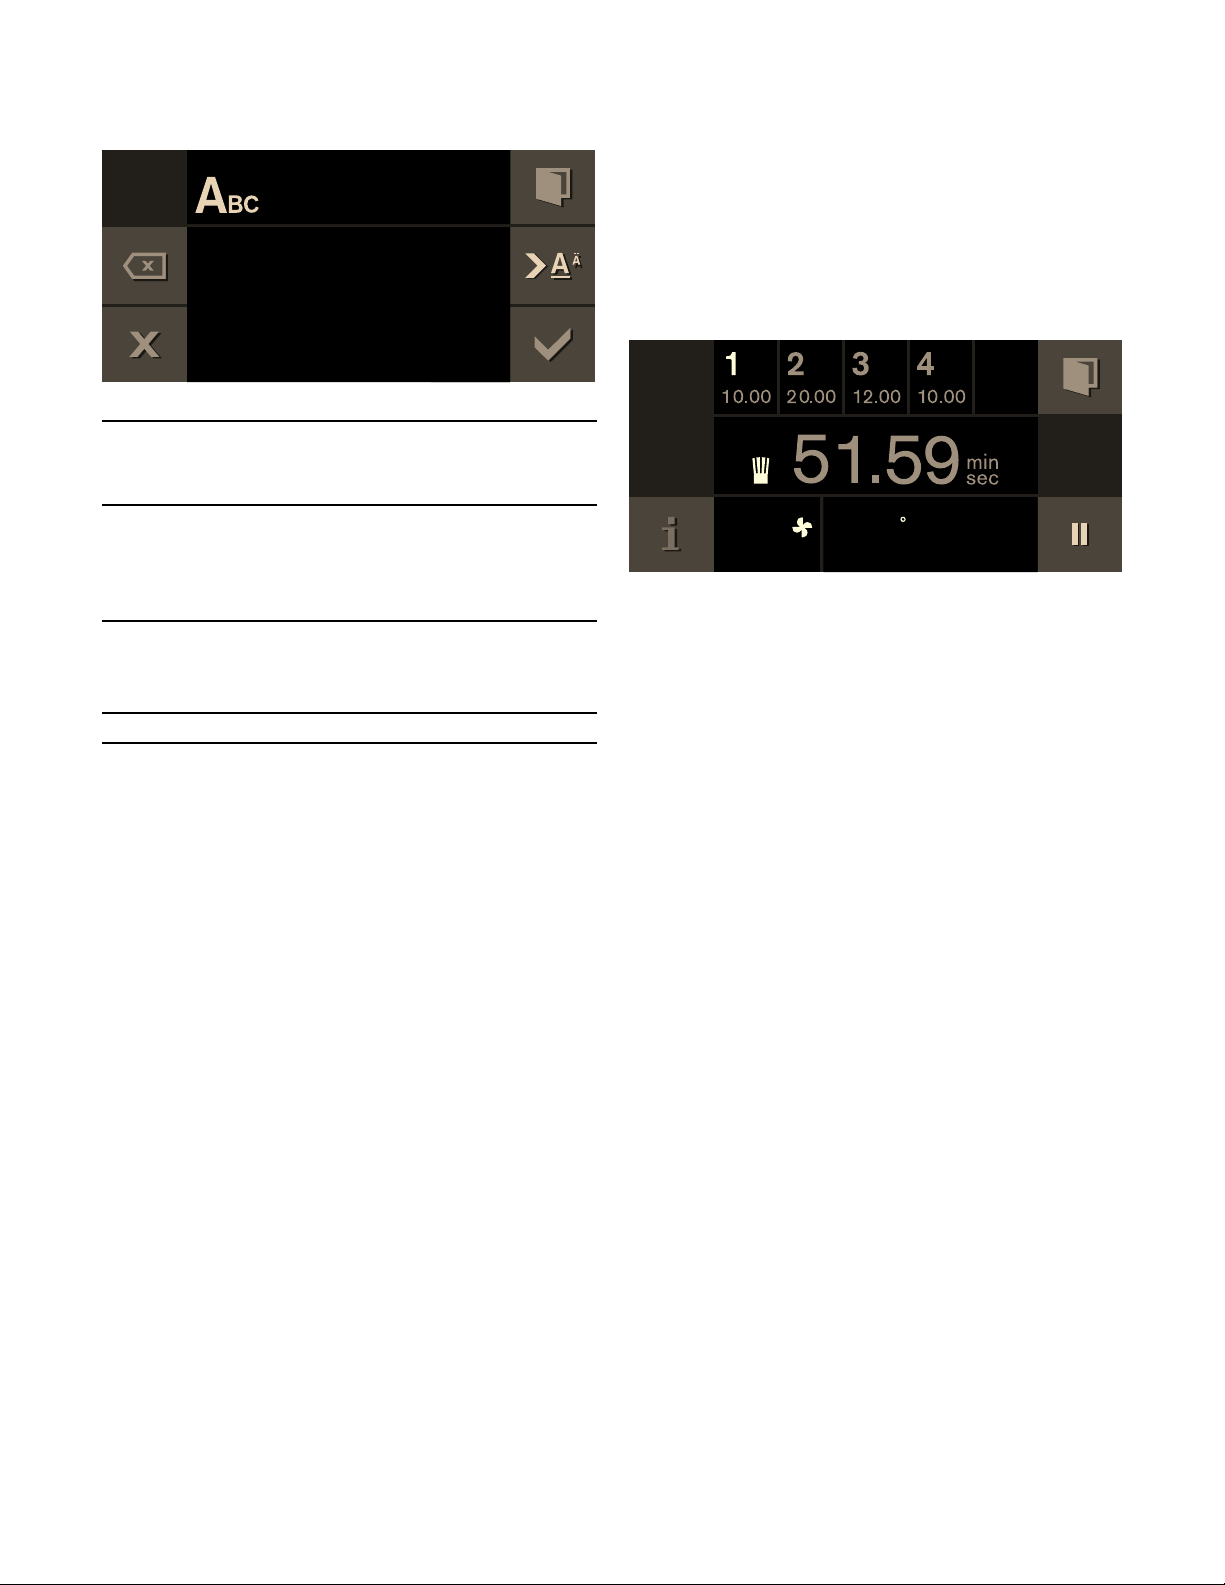
Entering a name
1 Enter the recipe's name under "ABC".
2 Save with ™.
- or -
Cancel with ' and quit the menu..
Note: For entering a name, Latin characters, certain
special characters and numbers are available.
Starting a recipe
1 Set the program selection to any heating function.
The i symbol is displayed.
2 Touch the i symbol. Set the required recipe with
the rotary selector.
3 Start with I.
Operation begins. Its duration elapses visibly.
The settings of the phases appear in the display
bar.
Notes
‒ The cooking time does not start counting down
until the appliance has reached the set
temperature.
‒ You can use the rotary selector to change the
temperature while the recipe is in progress. This
does not change the saved recipe.
Deleting a recipe
1 Set the function selector to any type of heating.
The i symbol is displayed.
2 Touch the i symbol.
3 Use the rotary selector to select the desired
recipe.
4 Delete the recipe with Ž.
5 Confirm with ™.
Rotary
selector
Selecting letters
A new word always beings with an upper
case letter.
4
Press briefly: cursor to the right
Press long: switch to diacritics and special
characters
Press twice: insert line space
5
Press briefly: cursor to the right
Press long: switch to normal characters
Press twice: insert line space
l
Clear letters
$B
)
24
Core temperature probe
The core temperature probe enables exact cooking to
the spot. It measures the temperature inside the food
being cooked. Automatic switching off when the
desired core temperature is reached ensures that
each cooked food is cooked precisely.
Use the included core temperature probe only. You
can purchase one as a spare part from after-sales
service or in the online shop.
The core temperature probe is damaged at
temperatures above 480°F (250°C). Therefore, only
ever use it in your appliance at a maximum
temperature setting of 445°F (230°C).
Always remove the core temperature probe from the
oven interior after use. Never store it in the oven
interior.
After every use, clean the core temperature probe with
a moist cloth. Do not wash it in a dishwasher!
9 WARNING
Risk of electric shock
Use of a wrong core temperature probe can
damage the insulation. Use only the core
temperature probe intended for this appliance.
9 WARNING
Risk of burns
The oven interior and the core temperature
probe become very hot. Use oven mitts to plug
and unplug the core temperature probe.
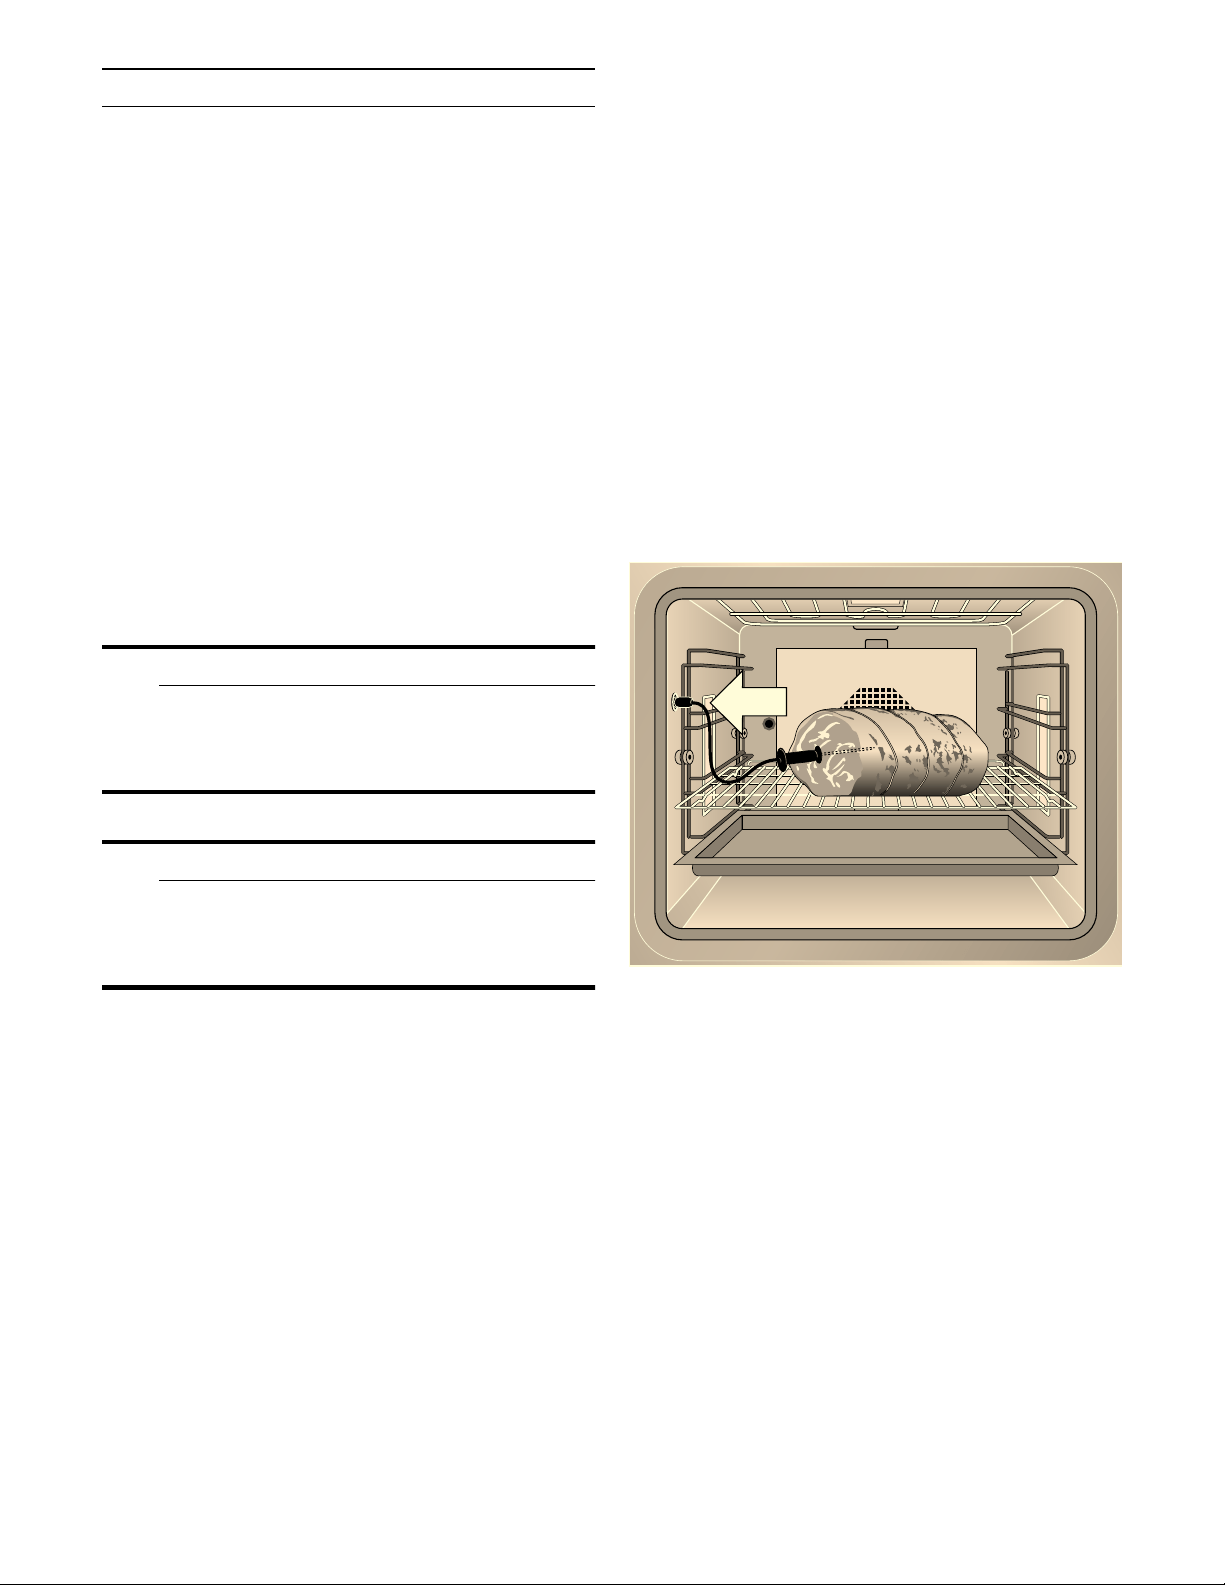
Insert the core temperature probe in
the food to be cooked
Insert the core temperature probe in the food to be
cooked before you place it in the oven interior.
Insert the metal tip at the thickest point in the food
you are cooking. Make sure that the end of the tip is
approximately in the center. It must not be placed in
the fat and must not touch any cookware or bones.
If there are several pieces, insert the core
temperature probe in the middle of the thickest piece.
Insert the core temperature probe completely, if
possible.
In the case of poultry, make sure that the tip of the
core temperature probe is not in the cavity in the
center, but in the meat between the belly and upper
leg.
25
Setting the core temperature
1 Insert food into the oven interior with the core
temperature probe inserted. Insert the core
temperature probe in the socket in the oven
interior and close the appliance door.
Do not jam the core temperature probe's cable!
+ and the current core temperature appear in
the display.
2 Set the program selection to the required heating
function.
3 Set the oven interior temperature with the rotary
selector.
4 Touch the + symbol. With the rotary selector,
set the required core temperature and confirm it
with +.
The set core temperature must be higher than the
current core temperature.
5 The appliance heats with the set heating function.
The current core temperature is displayed and,
under it, the set core temperature.
You can change the set core temperatur at any
time.
A signal sounds when the set core temperature in the
food has been reached. The cooking mode is ended
automatically. Confirm with ™ and turn the program
selection to 0.
Notes
‒ The measurable range is 59 to 210° F (15 to
99°C). Outside the measurable range, "--°F" is
displayed for the current core temperature.
‒ If you leave the food in the cooking compartment
for some time after cooking, the core temperature
will continue to rise somewhat due to the residual
heat in the cooking compartment.
‒ If at the same time you adjust a programming with
the core temperature probe and the cooking time
timer, then the programming switches the device
off that reaches the specified value first.
Changing the core temperature set:
Touch the
+ symbol. Use the rotary selector to
change the set core temperature for the food and
confirm with +.
Deleting the core temperature set:
Touch the + symbol. Delete the set core
temperature with Ž. The appliance continues heating
in normal cooking mode.
Core temperature guidelines
Use chilled food only, not frozen food. The details
given in the table are guidelines. Results depend on
the quality and composition of the food.
For hygiene reasons, critical foodstuffs such as fish
and game should reach a core temperature of 143 -
158° F (62 – 70 °C); for poultry and minced meat this
should be as high as 176 - 185° F (80 – 85 °C).
)
)
)
Food Core tempera-
ture guideline
Beef
Sirloin, tenderloin, entrecôte
very rare
rare
medium
well-done
113 - 117°F
(45 - 47 °C)
122 - 126°F
(50 - 52 °C)
137 - 140°F
(58 - 60 °C)
158 - 167°F
(70 - 75 °C)
Roast beef 176 - 185°F
(80 - 85 °C)
Pork
Pork roast 162 - 176°F
(72 - 80 °C)
Pork loin
medium
well-done
149 - 158°F
(65 - 70 °C)
167°F (75 °C)
Meat loaf 185°F (85 °C)
Fillet of pork 149 - 158°F
(65 - 70 °C)
Veal
Veal roast, well-done 167 - 176°F
(75 - 80 °C)
Breast of veal, stuffed 167 - 176°F
(75 - 80 °C)

26
Saddle of veal
medium
well-done
137 - 140°F
(58 - 60 °C)
149 - 158°F
(65 - 70 °C)
Fillet of veal
rare
medium
well-done
122 - 126°F
(50 - 52 °C)
137 - 140°F
(58 - 60 °C)
158 - 167°F
(70 - 75 °C)
Game
Saddle of venison 140 - 157°F
(60 - 70 °C)
Leg of venison 158 - 167°F
(70 - 75 °C)
Venison loin steaks 149 - 158°F
(65 - 70 °C)
Saddle of hare or rabbit 149 - 158°F
(65 - 70 °C)
Poultry
Chicken 185°F (85 °C)
Guinea fowl 167 - 176°F
(75 - 80 °C)
Goose, turkey, duck 176 - 185°F
(80 - 85 °C)
Duck breast
medium
well-done
131 - 140°F
(55 - 60 °C)
158 - 176°F
(70 - 80 °C)
Ostrich steak 140 - 149°F
(60 - 65 °C)
Lamb
Leg of lamb
medium
well-done
140 - 149°F
(60 - 65 °C)
158 - 176°F
(70 - 80 °C)
Saddle of lamb
medium
well-done
131 - 140°F
(55 - 60 °C)
149 - 167°F
(65 - 75 °C)
Food Core tempera-
ture guideline
Mutton
Leg of mutton
medium
well-done
158 - 167°F
(70 - 75 °C)
176 - 185°F
(80 - 85 °C)
Saddle of mutton
medium
well-done
158 - 167°F
(70 - 75 °C)
176 °F (80 °C)
Fish
Fillet 144 - 149°F
(62 - 65 °C)
Whole 149°F (65 °C)
Terrine 144 - 149°F
(62 - 65 °C)
Other provisions
Bread 194°F (90 °C)
Paté 162 - 167°F
(72 - 75 °C)
Terrine 140 - 158°F
(60 - 70 °C)
Foie gras 113°F (45 °C)
Food Core tempera-
ture guideline
27
Child lock
The appliance has a child lock to make sure children
cannot operate it inadvertently.
Notes
‒ You must set the child lock in the factory setting
to "Available" (see section entitled Factory
setting
).
‒ If there is a power cut while the child lock is
activated, it may be deactivated when the power
returns.
Activating the child lock
Requirement:
Program selector is set to 0.
Touch the 0 symbol for at least 6 seconds.
The child lock is activated. The standby screen
appears. The 0 appears at the top of the display.
Deactivating the child lock
Requirement:
Program selector is set to 0.
Touch the 1 symbol for at least 6 seconds.
The child lock is deactivated. You can switch on the
appliance in the usual manner.
28
Factory setting
In the factory settings, you can adapt your appliance
individually.
1 Set the program selector to
S.
2 Select "Factory setting" with the rotary selector.
3 Touch the ™ symbol.
4 Set the required factory setting with the rotary
selector.
5 Touch the % symbol.
6 Set the factory setting with the rotary selector.
7 Save with ™ or cancel with ' and quit the
current factory setting.
8 Turn the program selector to 0 to quit the factory
setting menu.
Changes are saved.
Basic setting Possible settings Explanation
Brightness Stages 1, 2, 3, 4, 5*, 6, 7, 8 Setting display brightness
Standby screen On*/Off
- Clock
- Clock + GAGGENAU logo*
- Date
- Date + GAGGENAU logo
- Clock + date
- Clock + date + GAGGENAU logo
Appearance of the standby screen.
Off: no display. Use this setting to reduce
the standby consumption of your appliance.
On: several displays can be set, confirm
"On" with ™ and choose the desired dis-
play with the rotary selector.
The selection is displayed.
Display screen Minimized*/Standard When Minimized is set, only the most
important details are displayed after a short
time.
Touchpad color Gray*/White Select the color of symbols on the touch-
pads
Touchpad tone Tone 1*/Tone 2/Off Select the signal tone when touching a
touchpad
Touchpad volume Levels 1, 2, 3, 4, 5*, 6, 7, 8 Sets the volume of the touchpad tone
Preheating speed/sig-
nal
Heat + signal*
Quick heat + signal
Heat no signal
Quick heat no signal
The signal sounds when the required tem-
perature is reached during heating. When
quick heat is chosen, the required tempera-
ture is reached particularly fast.
Signal volume Levels 1, 2, 3, 4, 5*, 6, 7, 8 Sets the volume of the signal tone
Time format AM/PM / 24 h* Time display in 24 or 12-hour format
Time Current time Setting the time
Daylight savings Manual*/Automatic Automatic time changeover when changing
daylight savings time. If automatic: setting of
the month, day and week when the time is to
be changed. To be set separately for sum-
mer and winter time.
29
--------
Date format D.M.Y*
D/M/Y
M/D/Y
Setting the date format
Date Current date Setting the date. Switch between the year/
month/day with the C symbol.
Temperature format °C*/°F Set the temperature unit
Language German* / French / Italian / Spanish /
Portuguese / Dutch / Danish / Swedish
/ Norwegian / Finnish / Greek / Turkish
/ Russian / Polish / Czech / Slovenian /
Slovakian / Arabic / Hebrew / Japanese
/ Korean / Thai / Chinese / English US
/ English
Select language for the text display
Note: When the language is changed, the
system is restarted; this procedure takes a
few seconds.
Then the Factory setting menu is closed.
Factory settings Restore appliance to factory settings Confirm the question "Delete all individual
settings and restore appliance to factory
settings?" with ™ or cancel with '.
Note: When restoring factory settings, the
individual recipes are also deleted.
After restoring the factory settings, you will
see the "Initial settings" menu.
Demo mode On/Off* For presentation purposes only. The appli-
ance does not heat in the demo mode, but
all other functions are available.
The "Off" setting must be activated for nor-
mal operation. The setting is only possible
in the first three minutes after connecting
the appliance.
Sabbath mode Not Available* / Available Available: Sabbath mode can be set; see
the section entitled Sabbath mode.
Door lock Off*/On The door lock prevents unintentional open-
ing of the appliance door. When "On" is set,
you must touch the " symbol for several
seconds before the door opens.
Child lock Not Available* / Available Available: the child lock can be activated
(see section entitled Child lock).
* Factory settings

30
Cleaning and maintenance
If taken care of and cleaned conscientiously, your
appliance will stay beautiful and intact for a long time.
Here we explain how to take care of and clean your
appliance correctly.
9 WARNING
Risk of burns
The appliance becomes very hot. Never touch
the hot inside surfaces of the oven interior or
heating elements. Always allow the appliance to
cool down. Keep children away.
9 WARNING
Risk of electrical shock
Moisture entering the appliance can cause an
electrical shock. Don't use a high-pressure
cleaner or steam cleaner.
9 WARNING
Risk of injury
Scratched glass in the appliance door can
burst. Do not use any glass scrapers or strong
or abrasive cleaning agents.
9 WARNING
Do not clean the appliance while it is still hot.
Some cleaners produce noxious fumes when
applied to a hot surface. Wet clothes and
sponges can cause burns from steam.
Cleaning agents
Pay attention to the information in the table to ensure
that the various surfaces are not damaged by
incorrect cleaning agents.
Do not use any
▯ sharp or abrasive cleaning agents
▯ metal or glass scrapers to clean the glass on the
appliance door.
▯ metal or glass scrapers to clean the door seal.
▯ hard abrasive pads or cleaning sponges.
Thoroughly rinse out new sponge cloths before use.
Area Cleaning agents
Door panels Glass cleaner: Clean with a soft cloth
and dry with a microfiber cloth.
Do not use a glass scraper.
Display Wipe with a microfiber cloth or a
slightly damp cloth.
Do not wipe off wet.
Stainless steel Hot soapy water: Clean with a dish-
cloth and dry with a soft cloth. Remove
traces of limescale, grease, starch and
albumin (e.g. egg white) immediately.
Corrosion can form under such resi-
dues. Special stainless steel cleaning
agents can be obtained from the after-
sales service or from specialist shops.
Aluminum Clean with a mild window cleaning
agent. Using a window cloth or a non-
fluffing microfiber cloth, wipe over the
surfaces lightly in a horizontal direc-
tion.
Cooking
compartment
Hot soapy water: Clean with a dish-
cloth and dry with a soft cloth.
Very dirty cooking
compartment
Oven cleaner gel (order number
463582 from customer service or in
the online shop).
Please note:
▯ May not get on the door seal.
▯ Soak for max. 12 hours.
▯ Do not use on warm surfaces.
▯ Rinse thoroughly with water.
▯ Observe the manufacturer's
instructions.
Glass cover for the
cooking compart-
ment light
Hot soapy water: Clean with a dish-
cloth.
Door seal
Do not remove.
Hot soapy water: Clean with a dish-
cloth, do not scour.
Do not use a metal or glass scraper for
cleaning.
Core temperature
probe
Wipe with a damp cloth.
Do not clean in the dishwasher!
31
Microfiber cloth
The honeycomb-structure microfiber cloth is
particularly suitable for cleaning sensitive surfaces
such as glass, glass ceramics, stainless steel or
aluminum (order No. 460770 available from after-sales
service or in the online shop). It removes watery and
greasy soiling in one go.
Removing slide-in racks
You can remove the slide-in racks for cleaning.
Removing slide-in racks
1 Place a dish cloth in the oven interior to protect
the enamel against scratches.
2 Undo the knurled nuts (Figure A).
3 Detach the slide-in racks (Fig. B).
You can clean the slide-in racks in a dishwasher.
Hooking in slide-in racks
1 Fit slide-in racks the right way round: with the
longer side pointing up. The left and right-hand
racks are identical.
2 Tighten the knurled nuts.
Accessories Hot soapy water: Soak and clean with
a dishcloth or brush.
Plug-in grid Dishwasher, see chapter Removing the
plug-in grid
Telescopic shelf
(special
accessories)
Hot soapy water: Clean with a dish-
cloth or brush.
Do not soak or clean in the dish-
washer.
Baking stone
(special
accessories)
Clean burned-on residues with a
brush.
Never clean the baking stone with
water.
Area Cleaning agents
$
%

32
Self-clean (pyrolysis)
During self-clean (pyrolysis), the oven heats up to
905°F (485°C). Thus, remainders from roasting,
grilling or baking are burnt up and all you have to do is
wipe the ash out of the interior.
Self-clean (pyrolysis) takes three hours. You can move
the self-clean switch-off time (for example, if you
would like it to run at night).
9 WARNING
During the elimination of soil during self-
cleaning, small amounts of Carbon Monoxide
can be created and the fiberglass insulation
could give off very small amounts of
formaldehyde during the first several cleaning
cycles. To minimize exposure to these
substances, provide good ventilation with an
open window, or use a ventilation fan or hood.
Wipe out excessive spillage before self-cleaning the
oven.
9 WARNING
Risk of fire
The appliance becomes very hot during
pyrolytic self-cleaning. Never hang flammable
items such as dishcloths on the door handle.
Keep the front of the appliance clear. Keep
children away.
9 WARNING
Severe health risk
The appliance becomes very hot during
pyrolytic self-cleaning. The non-stick coatings
on trays and forms are destroyed and toxic
gases are produced. Never leave trays and
forms with non-stick coatings in the oven during
pyrolytic self-cleaning. Only leave enameled
accessories in oven during self-clean cycle.
Do not clean parts or accessories in the self-clean
oven.

33
Preparing self-clean (pyrolysis)
9 CAUTION
Fire risk! Loose food remainders, fat and roast
juice can catch fire. Wipe out the oven interior
with a moist cloth.
▯ Remove coarse soiling and food remainders from
the oven.
▯ Clean the door seals manually, the inside of the
door and the glass pane because the self-clean
(pyrolysis) does not clean these parts.
▯ Remove all loose interior parts from the oven
interior. The slide-in racks are pyrolysis-proof.
There must be no objects left in the interior.
▯ Close the oven door.
Starting self-clean (pyrolysis)
1 Set the program selector to S.
2 The œ symbol is displayed. Confirm with ™.
3 The turn-off time for when the self-clean
(pyrolysis) will be completed is displayed. If
preferred, the turn-off time can be changed with
the rotary selector. Confirm with ™.
4 Remove all accessories and coarse soiling from
the oven interior. Confirm with ™.
5 Start with I. The cleaning time counts down on
the screen. If the turn-off time was changed, the
time until the self-clean (pyrolysis) starts counts
down on the screen. The oven light remains off.
After 3 hours, a signal sounds. A message will appear
on the screen. Once the appliance is cool, wipe out
the remaining ash from the oven with a damp cloth.
Note: The oven door is locked for your safety. After
cooling down, the door is unlocked as soon as the
temperature has dropped below 390 °F (200 °C).
Cleaning accessories with self-clean
(pyrolysis)
Gaggenau baking trays and grill trays are coated with
pyrolysis-proof enamel. To arrive at an optimum
cleaning result, you are nevertheless advised to
remove all accessories from the oven before the self-
clean (pyrolysis). Only this will ensure optimum heat
distribution.
If you would like to remove burnt-in residues from your
baking tray or your grill tray with self-clean (pyrolysis),
it is imperative that you observe the following notes:
Notes
‒ Remove extreme soiling, roast juice and food
remainders before self-clean (pyrolysis). Food
remainders, grease or roast juice can catch fire
during self-clean (pyrolysis).
‒ Only insert one baking tray or one grill tray in the
lowest shelf in the oven.
‒ Insert the baking tray or the grill tray fully.
‒ Do not clean the wire rack, rotisserie spit, cast
roaster, baking stone, core temperature probe or
other accessories with self-clean (pyrolysis).
3\URO\VLV
_
)

34
Troubleshooting
You can often easily eliminate problems that may
occur on your own. Before calling customer service,
take into account the following information.
9 WARNING
Risk of electric shock
Improper repairs are dangerous. Only an after-
sales technician trained by us may perform
repairs and may replace damaged connecting
leads. Remove the mains plug or deactivate the
fuse in the fuse box if the appliance is defective.
Call after-sales service.
Power cut
Your appliance can bridge a power cut of a few
seconds. Operation continues.
If the power cut was for a longer period and the
appliance was in operation, a message appears in the
display. Operation is interrupted.
Set the function selector to 0, then the appliance can
be operated again as usual.
Demo mode
The demo mode is activated if the ° symbol appears
in the display. The appliance does not heat up.
Briefly disconnect the appliance from the mains
(switch off the domestic fuse or the circuit-breaker in
the fuse box). Then deactivate the demo mode within 3
minutes in the factory setting (see section entitled
Factory setting).
Disruption Possible cause Solution
Appliance not working, no display Plug not inserted Connect the appliance to the electricity
mains
Power failure Check whether other kitchen appliances
are working
Fuse defective Check in the fuse box whether the fuse
for the appliance is in working order
Operating error Switch off the fuse for the appliance in
the fuse box and switch it on again after
about 10 seconds
Appliance cannot be started Appliance door is not quite closed Close appliance door
Appliance is not working, display is not
responding. 0 appears in the display.
Child lock activated Deactivate child lock (see section enti-
tled Child lock)
Appliance switches off automatically Safety deactivation: the appliance has
not been operated for longer than 12
hours
Confirm the message with ™, switch off
the appliance and set it again.
Appliance does not heat up, ° appears
in the display
Appliance is in the demo mode Deactivate demo mode in the basic set-
tings
Error message "Exxx" If an error message appears, turn the
program selection to 0; if the display
goes off, it was a one-time problem. If
the problem occurs repeatedly or if the
display stops, please contact after-sales
service and inform them of the error
code.

35
Replacing the oven lamp
You can replace the oven lamps. You can obtain
replacement lamps after-sales service or from trade
dealers. Use the same type of halogen bulbs only.
▯ Top lamp:
60 W/230 V/G9
▯ Side lamp: 10 W/12 V/G4
9 WARNING
Risk of electric shock
When you replace the oven interior lamp, the
contacts of the lamp holder are live. Before
replacing the lamp, remove the mains plug or
deactivate the fuse in the fuse box.
Note: Always use a dry cloth to remove the halogen
lamp from its packaging. This lengthens the lamp's
useful life.
Replacing the top oven lamp
1 Undo the screw on the lamp cover. The lamp
cover folds down.
2 Take out the halogen lamp. Insert the new
halogen lamp.
3 Fold up and screw down the lamp cover.
4 Switch on the fuse in the fuse box again.
Replacing the side oven lamp
1 Place a dishcloth in the oven to avid damage.
2 Undo the knurled screws on the slide-in rack.
Remove the slide-in rack.
3 Press the top retaining spring to the side. Remove
the glass cover.
4 Take out the halogen lamp. Insert the new
halogen lamp.
5 Insert the glass cover at the bottom into the
retaining spring and latch it at the top. The
beveled side of the glass cover must point toward
the oven.
6 Remove the dishcloth from the oven.
7 Switch on the fuse in the fuse box again.
Replacing the glass cover
The glass cover in the oven must be replaced if it is
damaged. You can obtain covers from after-sales
service. Always specify the E number and the FD
number of your appliance.
Customer service
If your appliance needs repairs, our customer service
is there for you. We work hard to help solve problems
quickly and without unnecessary service calls, getting
your appliance back up and running correctly in the
least amount of time possible.
When you call, please indicate the product number
(E-Nr.) and serial number (FD-Nr.) so that we can
support you in a qualified manner. You will find the
type plate with these numbers on the bottom of the
appliance. To avoid having to search for a long time
when you need it, you can enter your appliance data
and the customer support telephone number here.
Please read the use and care instructions provided
with your appliance. Failure to do so may result in an
error in using the appliance. This could result in a
service call that instead of fixing a mechanical issue is
only needed for customer education. Such calls are
not covered by the appliance warranty.
Please find the contact data of all countries in the
enclosed customer service list.
To book an engineer visit and product advice
You can rely on the manufacturer’s expertise. Rest
assured that the repair will be handled by trained
service technicians who have the original replacement
parts for your appliance.
E-Nr. FD-Nr.
Customer Service O
USA 877 442 4436
toll-free
CANADA 800 828 9165

36
Tables and tips
Notes
‒ The specified values are for your orientation. The
temperature and duration depend on the quality
and condition of foods.
‒ Always preheat the oven. This ensures you
achieve the best cooking results.
The specified cooking times apply to a preheated
appliance.
‒ Pay attention to only opening the door of the
preheated oven briefly and to filling the appliance
swiftly.
‒ Temperature ranges are specified in the tables.
We recommend that you begin for the first time
with the lowest temperature. If required, set it
higher the next time. A lower temperature
produces more even browning.
‒ The recommended mode is printed in bold.
Baking table
▯ We advise you to use dark, metal bake pans
because they absorb heat better.
▯ To find out when your cake is ready, pierce it at
the highest point with the small wooden stick at
the end of the baking time. The cake is finished if
dough no longer sticks to the stick.
▯ Baked items using yeast come out best when
using the convection mode.
▯ Raising dough (proofing):
‒ Set the dough proofing mode. The basic
temperature setting is 100° F (38°C).
‒ Set 100 - 104° F (38-40°C) for large volumes
(e.g. bread). This will ensure that the dough
rises evenly from the center to the edge.
‒ You can enter 104 - 113° F (40-45°C) for small
items (such as Schneckennudeln (Swabian
twirls) or bread rolls).
Baked items Shelf level
with 4 levels
(with 5 levels)
Convection
Temperature
in °F (°C)
Economy
Temperature
in °F (°C)
Convection +
bottom heat
Temperature
in °F (°C)
Top +
bottom
heat
Temperature
in °F (°C)
Baking
time
in min.
Swiss roll 2 (3) 410 (210) 7 - 9
Cake base 2 (3) 330 - 345
(165 - 175)
30 - 35
Fruit cake on a yeast batter 2 (3) 330 (165) 330 - 345
(165 - 175)
40 - 45
Fruit cake on a shortcake base 2 (3) 330 (165) 330 (165) 330 (165) 330 - 345
(165 - 175)
40 - 45
Small puff pastry items 2 / 1+3*
(3 / 2+4*)
355 (180) 355 (180) 375 (190) 15 - 20
Cheesecake (high) 2 (3) 330 (165) 330 (165) 330 (165) 330 - 340
(165 - 170)
90 - 100
Open-cheese sandwiches (flat) 2 (3) 330 (165) 330 (165) 330 (165) 330 - 345
(165 - 175)
45 - 50
Sponge cake (round) 2 (3) 320 - 340
(160 - 170)
320 - 345
(160 - 175)
340 - 345
(170 - 175)
50 - 60
Cakes 2 (3) 320 - 340
(160 - 170)
320 - 345
(160 - 175)
340 - 345
(170 - 175)
50 - 60
Yeast cake (high) 1 (2) 320 - 345
(160 - 175)
330 - 345
(165 - 175)
40 - 50
Cookies 2 / 1+3*
(3 / 2+4*)
320 - 345
(160 - 175)
320 - 345
(160 - 175)
330 - 340
(165 - 170)
15 - 20
* In the Economy and convection operating modes, you can bake on several levels at the same time.
** Pre-heat the appliance to the specified temperature. When putting in the food to be cooked, switch back to the second
temperature specification.
37
Baking tips and tricks
Hefezopf 2 (3) 330 (165) 330 - 340
(165 - 170)
30 - 40
Sheet cake (dry topping) 2 (3) 330 - 340
(165 - 170)
330 - 340
(165 - 170)
330 - 340
(165 - 170)
40 - 50
Sheet cake (wet topping) 2 (3) 330 - 340
(165 - 170)
330 - 340
(165 - 170)
340 (170) 330 - 340
(165 - 170)
40 - 50
Cream puffs 2 / 1+3*
(3 / 2+4*)
355 (180) 355 (180) 355 - 375
(180 - 190)
20 - 25
Multigrain bread 2 (3)
390/340**
(200/170**)
410/340**
(210/170**)
40 - 50
What to do if... The solution
... your cake baked on a tray is too light at the bottom? Insert the cake one level lower and take accessories that you
don't need out of the oven.
... your cake baked in a tin is too light at the bottom? Do not insert the cake pan in the oven on the tray, but on the
rack.
... your cake/cookies are too dark at the bottom? Insert the cake/cookies at a higher level.
... your cake is too dry? Set the oven temperature slightly higher. Preheat the oven.
... your cake is doughy inside or meat is not done inside? Set a slightly lower baking or roasting temperature. Note: you
cannot shorten baking or roasting times by increasing tempera-
tures. It is better to choose a slightly longer baking or roasting
time if cake dough is to rise longer.
... your tin-baked or loaf cake is too dark at the back when
using hot air?
Don't place the cake pan directly in front of the oven's rear wall,
but in the center.
... the cake collapses? Next time, use less liquid or set the oven temperature lower by
10°C (approx. 50 °F). Pay attention to the mixing times speci-
fied in the recipe. Do not open the oven door too early.
... the cake has risen in the middle and is lower at the sides? Grease the springform's edge. After baking, loosen the cake
carefully with a knife.
... your cake is too dark at the top? Insert it at a lower level, choose a lower temperature and bake
the cake slightly longer.
... your cake is too dark at the bottom? Insert it at a higher level and choose a lower temperature the
next time.
... your fruit flan becomes too light at the bottom and fruit
juice overflows?
You are best advised to use the deeper grill tray for baking next
time.
... your cake is too dry at the bottom? Use a toothpick to pierce small holes in the finished cake. Then
trickle fruit juice or something alcoholic over it. The next time,
choose a temperature 10°C (approx. 50 °F) higher and shorten
the baking time.
... your bread or cake looks good (done) from the outside,
but is doughy or too moist on the inside?
Next time, use a little less liquid and bake a little longer at a
lower temperature. In the case of cakes with a moist topping,
pre-bake the base first, scatter almonds or breadcrumbs over it
and then add the topping. Pay attention to recipes and baking
times.
Baked items Shelf level
with 4 levels
(with 5 levels)
Convection
Temperature
in °F (°C)
Economy
Temperature
in °F (°C)
Convection +
bottom heat
Temperature
in °F (°C)
Top +
bottom
heat
Temperature
in °F (°C)
Baking
time
in min.
* In the Economy and convection operating modes, you can bake on several levels at the same time.
** Pre-heat the appliance to the specified temperature. When putting in the food to be cooked, switch back to the second
temperature specification.

38
Roasting table
▯ You can basically use any heat-resistant
cookware. Place cookware in the middle of the
rack. For large roasts, you can also use the grill
tray.
▯ You can remove the side slide-in racks to prepare
bulky food. Place the wire rack directly on the
bottom of the oven and then place the food or the
roaster on the wire rack. Do not place the food or
the roaster directly on the enameled bottom.
▯ When removing it, place glass cookware on a dry
dishcloth or rack and not on a cold or wet
surface. The glass could crack.
▯ Once the roast is finished, you should leave it for
another 10 minutes in the switched off, closed
oven. This way, meat stays juicier.
▯ Poultry becomes particularly crispy brown if you
coat it with butter, salty water, dripped off fat or
orange juice towards the end of the cooking time.
▯ In the case of duck or goose, pierce the skin
under the wings to allow the fat to drip off.
▯ Use the insert rack (depending on the version, an
accessory or special accessory) in the grill tray
for roasting. If you add a little water to the grill
tray, the meat juice will be collected and the oven
will stay cleaner.
... you have baked on several levels and the result on the top
tray is darker than on the lower one?
Choose a slightly lower temperature and the result will be
evenly brown. Trays you have inserted at the same time need
not be finished at the same time. Leave the bottom trays to bake
a little longer for 5 - 10 minutes or insert them earlier.
... cookies do not come off the tray? Briefly place the tray in the oven again and immediately remove
the cookies.
... your cake does not come off when you turn it out? Carefully loosen the edge with a knife. Turn out the cake again
and cover the tin several times with a wet, cold cloth. Next time,
grease the tin well and additionally scatter breadcrumbs into it.
What to do if... The solution
Dishes Shelf level
with 4 levels
(with 5 levels)
Convection
Temperature
in °F (°C)
Full surface
grill
+ circulated
air
Temperature
in °F (°C)
Top +
bottom heat
Temperature
in °F (°C)
Cooking
time
in min.
Core tem-
perature
in °F (°C)
Beef
Beef roast (1.5 kg)* 2 (3) 355 (180) 355 (180) 60 - 90
English roast beef (1.5 kg) 2 (3) 445/355**
(230/180**)
445/355**
(230/180**)
45 - 50 115 - 120
(45 - 50)
Medium roast beef (1.5 kg) 2 (3) 445/355**
(230/180**)
445/355**
(230/180**)
60 - 70 130 - 150
(55 - 65)
Well-done roast beef (1.5 kg) 2 (3) 445/355**
(230/180**)
90 - 100 160 - 175
(70 - 80)
Pork
Pork roast (1.5 kg) 2 (3) 445/355**
(230/180**)
445/355**
(230/180**)
60 - 70 170 - 175
(75 - 80)
Pork roast with crust (1.5 kg) 2 (3) 355 - 390
(180/200***)
355/390***
(180/200***)
60 - 70 170 - 175
(75 - 80)
Smoke-cured pork (1.5 kg) 2 (3) 355/320**
(180/160**)
40 - 50 150 - 160
(65 - 70)
Pork knuckles 2 (3) 300/390***
(150/200***)
300/390***
(150/200***)
50 - 60 175 - 185
(80 - 85)
* First cook meat in a casserole on the burner.
** Brown the meat at high temperature, after 15 - 20 min. switch back to a lower temperature.
*** Cook meat at a low temperature, set the temperature higher for the last 15 - 20 min.
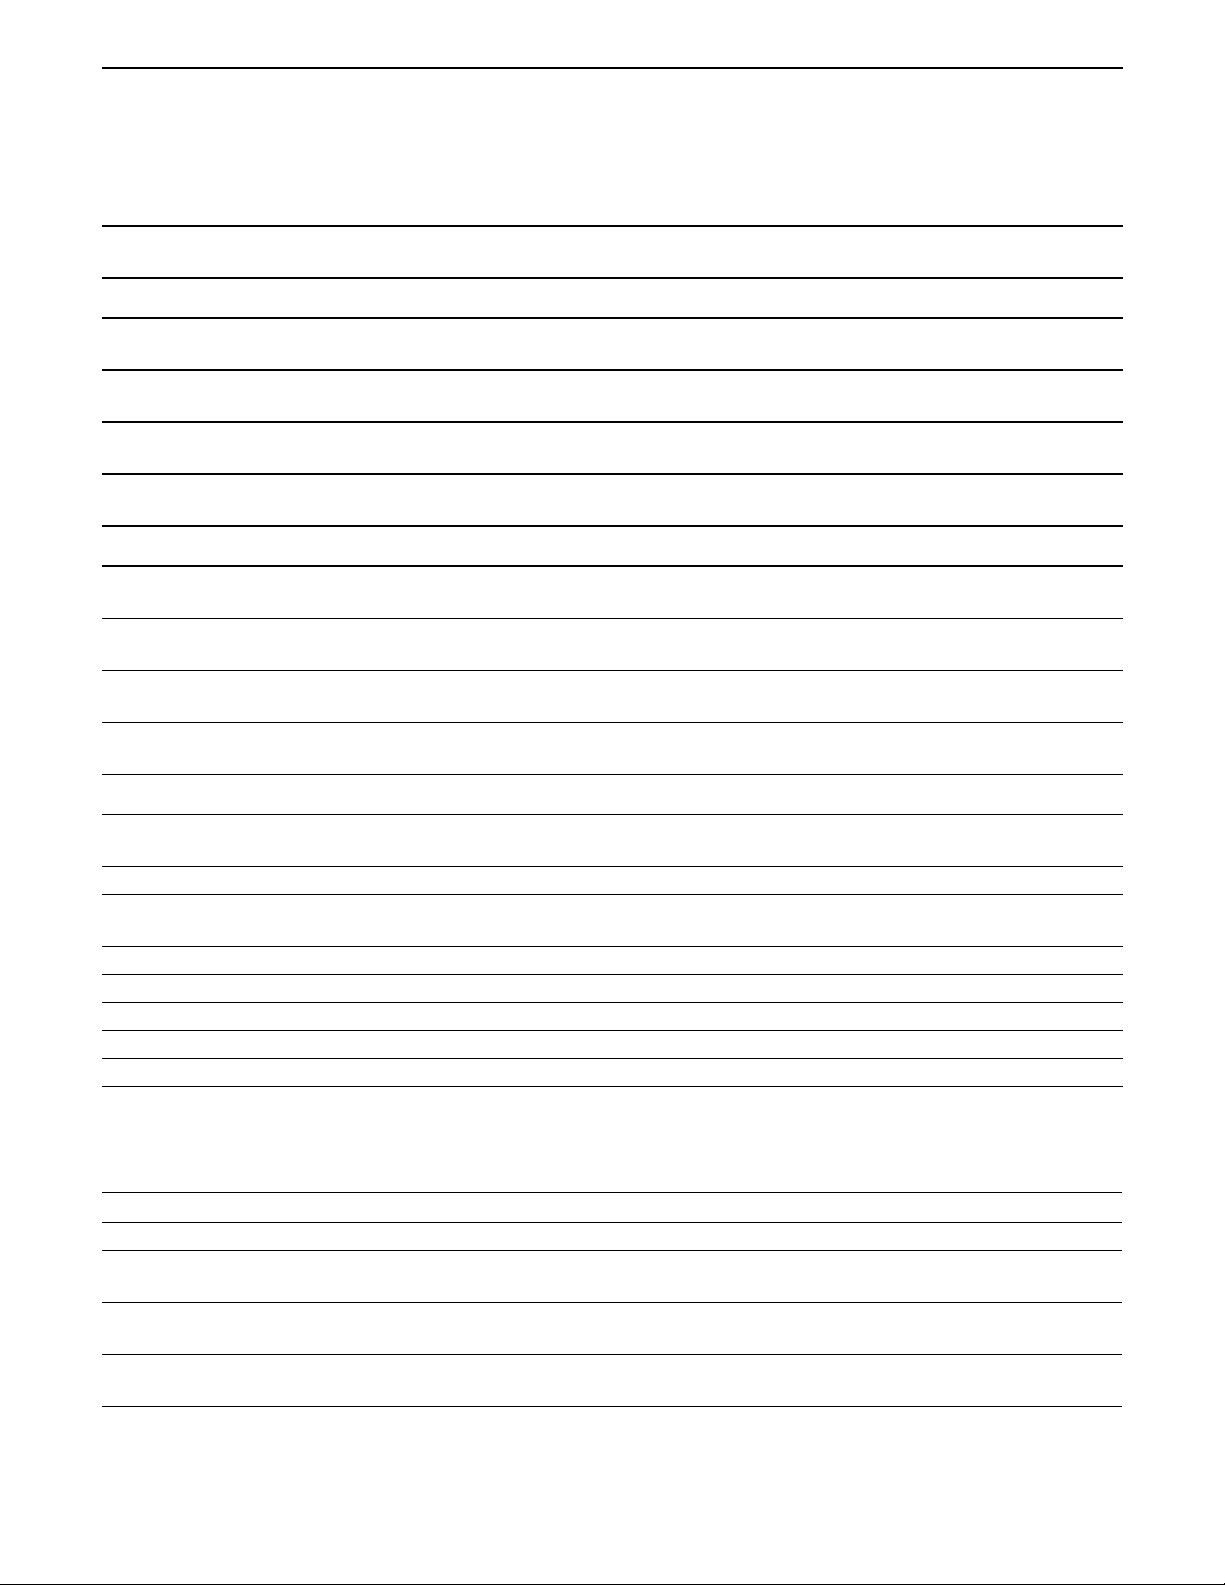
39
Roasting tips and tricks
Rolled pork 2 (3) 445/355**
(230/180**)
445/355**
(230/180**)
60 - 70 170 - 175
(75 - 80)
Veal
Veal roast 2 (3)
445/355**
(230/180**)
445/355**
(230/180**)
60 - 70 170 - 175
(75 - 80)
Veal knuckles 2 (3) 300/355***
(150/180***)
300/355***
(150/180***)
50 - 60 80 (75)
Veal loin 2 (3)
320 - 340
(160 - 170)
20 160 - 170
(70 - 75)
Stuffed breast of veal* 2 (3) 250 - 265
(120 - 130)
120 170 - 175
(75 - 80)
Game
Roast game* 2 (3) 340 - 355
(170 - 180)
60 - 90
Leg of venison* 2 (3) 340 - 355
(170 - 180)
60 - 80 170 - 175
(75 - 80)
Saddle of venison 2 (3) 330 - 350
(165 - 175)
340 - 355
(170 - 180)
20 - 25 150 - 160
(65 - 70)
Leg of lamb* 2 (3) 355 - 390
(180 - 200)
35 - 45 150 - 170
(65 - 75)
Poultry
Duck (2 - 3 kg) 2 (3) 320/375
(160/190***)
320/375***
(160/190***)
100 - 120 175 - 185
(80 - 85)
Duck breast 2 (3) 320 (160) 320 (160) 15 - 20 160 (70)
Goose ( 2 - 3 kg) 2 (3) 320/375
(160/190***)
320/375***
(160/190***)
100 - 120 185 - 195
(85 - 90)
Chicken ( 3 - 4 kg) 2 (3) 160/190*** 160/190*** 120 - 180 85 - 90
Roast chicken 2 (3) 355 (180) 355 (180) 50 - 60 85
What to do if... The solution
... the roast has gone dark and the crust is burnt in places? Check the insertion level and the set roasting temperature.
... the roast looks good, but the sauce has baked on? Choose smaller roasting cookware the next time and add more
liquid.
... the roast looks good, but the sauce is too light and
watery?
Choose larger roasting cookware the next time and use less liq-
uid.
... the table does not contain any data for the weight of the
roast?
Choose the data according to the next lowest weight and
extend the time.
Dishes Shelf level
with 4 levels
(with 5 levels)
Convection
Temperature
in °F (°C)
Full surface
grill
+ circulated
air
Temperature
in °F (°C)
Top +
bottom heat
Temperature
in °F (°C)
Cooking
time
in min.
Core tem-
perature
in °F (°C)
* First cook meat in a casserole on the burner.
** Brown the meat at high temperature, after 15 - 20 min. switch back to a lower temperature.
*** Cook meat at a low temperature, set the temperature higher for the last 15 - 20 min.

40
Grilling table
9 CAUTION
Only grill with the oven door closed.
▯ For roasting use the wire rack that fits the grilling
tray (accessory or special accessory, depending
on the version). Pour a small amount of water into
the grilling tray to collect dripping fat and keep
the oven clean.
▯ The pieces of meat should be evenly thick (at
least 1 - 2 in (2 - 3 cm). Thus they will brown
evenly and remain juicy inside. Do not salt steaks
before grilling. Place the food directly on the wire
rack.
Dishes Shelf level
with 4 levels
(with 5 levels)
Temperature
in °F (°C)
Full surface grill
in min.
1st side/2nd
side
Full surface grill
+ circulated air
in min.
1st side/2nd
side
Total cooking
time
in min.
Pork belly in slices 3 (4) 355 - 390
(180 - 200)
6 / 4 5 / 5 10
Shish kebab 3 (4) 375 (190) 8 / 8 16
Bratwurst 3 (4) 390 (200) 5 / 4 9
Merguez (grilling sausage) 3 (4) 390 (200) 6 / 6 12
Roast chicken* 2 (3)
do not preheat
355 (180) 30 / 30 60
Chicken legs 3 (4) 355 (180) 20 / 20 15 / 15 30 - 40
Spare Ribs 3 (4) 355 - 390
(180 - 200)
15 / 15 12 / 12 24 - 30
Pork knuckles** 2 (3) 300/390
(150/200)
50 - 60
Trout 3 (4) 355 - 390
(180 - 200)
8 / 8 16
Vegetable skewers 3 (4) 390 (200) 7 / 7 14
Shrimp skewers 3 (4) 350 (175) 7 / 7 14
Cooking "au gratin"
Open-faced sandwiches 3 (4) 375 (190) 5 - 7
Crème caramel*** 4 (5)
do not preheat
480 (250)
Crème brulée*** 4 (5)
do not preheat
480 (250)
Cake with meringue*** 3 (4)
do not preheat
480 (250)
* For appliances with a rotary spit, use the rotary spit in grill mode.
** Do not turn the pork knuckles. Set the temperature high for the last 15 - 20 min.
*** For this food, cook "au gratin" to the desired degree of browning.

41
Thawing
▯ Set the defrosting mode.
▯ Put the grill rack with the frozen food on the
second level (with 5 levels on the third level), then
insert the grill pan to catch the defrosting liquids.
▯ Defrost large pieces of meat (roasts, chickens,
etc.) at 115 - 120° F (45 - 50°C) so that the outer
part does not get cooked. Small or flat pieces can
be defrosted at 120 - 130° F (50 - 55°C.)
▯ Remove the food from the packaging before
defrosting.
▯ Only defrost the quantity that you need right away.
▯ Please consider: defrosted food will not last as
long as frozen food and will spoil more quickly
than fresh food. Prepare defrosted food
immediately and cook it thoroughly.
9 WARNING
Health risk
When defrosting food from animal sources, you
must remove the liquid that escapes during
defrosting. It must never come into contact with
other food. Bacteria could be transferred.
Insert the grill pan under the food. Throw away
the liquid that collects from defrosting meat and
poultry, then clean the sink thoroughly and rinse
it with a lot of water. Clean the grill pan in hot
soapy water or in the dishwasher. After
defrosting, operate the oven for 15 minutes
using convection at 355° F (180°C).
Acrylamide in foodstuffs
Which foods are affected?
Acrylamide is mainly produced in grain and potato
products that are heated to high temperatures, such
as potato crisps, chips, toast, bread rolls, bread, fine
baked goods (biscuits, gingerbread, cookies).
Tips for keeping acrylamide to a mini-
mum when preparing food
General Keep cooking times to a minimum. Cook
meals until they are golden brown, but
not too dark. Large, thick pieces of food
contain less acrylamide.
Baking With convection max. 355° F (180°C).
Cookies Egg or egg yolk reduces the production
of acrylamide. Spread out a single layer
evenly on the baking tray.
Oven fries Cook at least 400 g at once on a baking
tray so that the fries do not dry out.


Gaggenau
BSH Home Appliances Ltd.
1901 Main Street, Suite 600
Irvine, CA 92614
+1.877.442.4436
USA
www.gaggenau-usa.com
Gaggenau Hausgeräte GmbH
Carl-Wery-Straße 34
81739 München
GERMANY
*9000872554*
9000872554 en-us (940207)