Loading ...
Loading ...
Loading ...
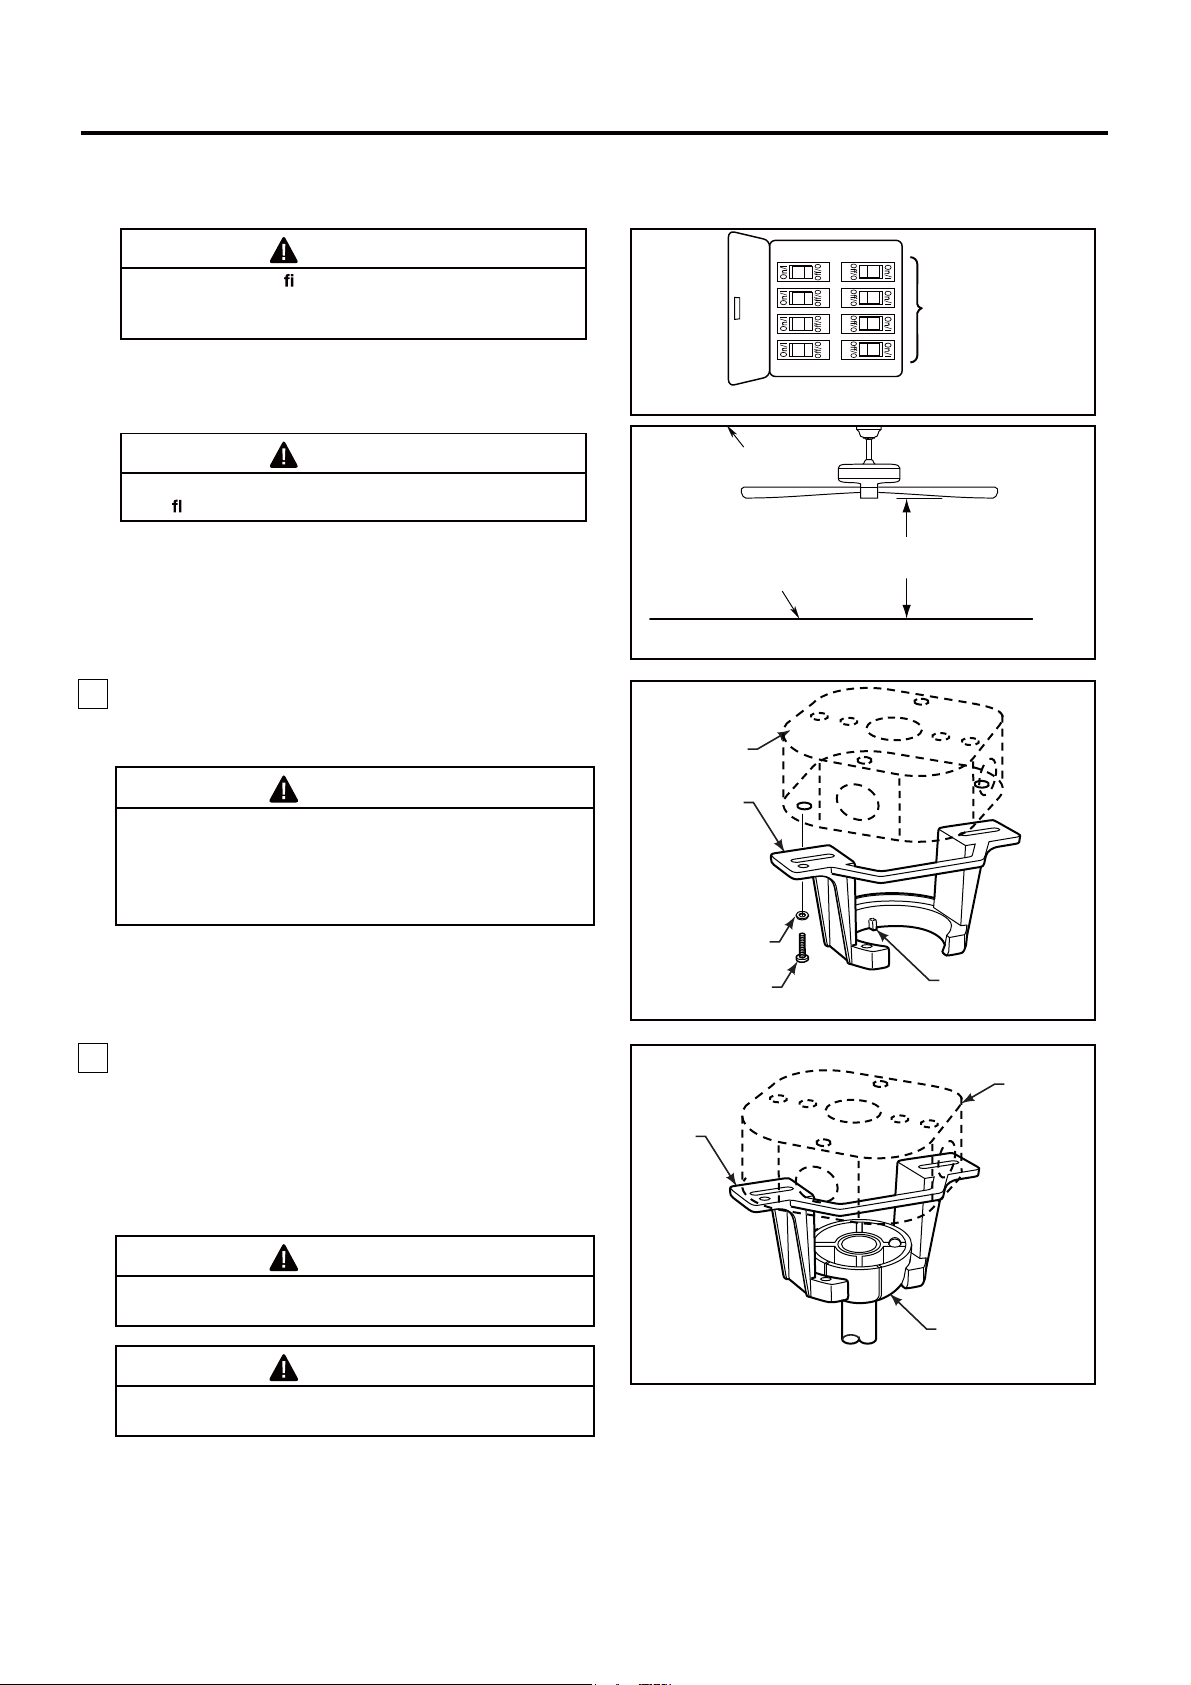
2. Carefully lift the fan and seat the downrod/hanger ball
assembly on the hanger bracket that was just attached
to the outlet box. Be sure the groove in the ball is lined
up with tab on the hanger bracket. (Figure 4)
This fan is intended for standard or angled mounting
only. Closemount and flushmount options are not
available. For angled ceilings, note the angle can be
no more than 19°.
WARNING
Failure to seat tab in groove could cause damage to
electrical wires and possible shock or ſre hazard.
WARNING
To avoid possible shock, do not pinch wires between
the hanger ball assembly and the hanger bracket.
1. Securely attach the hanger bracket to the outlet box
(not included) using the outlet box screws and washers
supplied with the outlet box. (Figure 3)
WARNING
The outlet box must be securely anchored. Hanger
bracket must seat ſrmly against outlet box. If the
outlet box is recessed, remove wall board until bracket
contacts box. If bracket and /or outlet box are not
securely attached, the fan could wobble or fall.
Figure 3
Figure 4
Outlet Box
Hanger
Bracket
Downrod/Hanger
Ball Assembly
Outlet Box
Hanger
Bracket
Screw (2)
Supplied with
Outlet Box
Tab
Flat Washer
9
How to Hang Your Ceiling Fan
NOTE: If you are not sure if the outlet box is grounded,
contact a licensed electrician for advice, as it must be
grounded for safe operation.
WARNING
The fan must be hung with at least 10´of clearance
from
oor to blades. (Figure 2)
WARNING
To avoid possible re or shock, be sure electricity is
turned off at the main fuse box before hanging.
(Figure 1)
Figure 2
CEILING
FLOOR
NO LESS
THAN
10 FEET
Figure 1
MAIN FUSE BOX
Loading ...
Loading ...
Loading ...