Loading ...
Loading ...
Loading ...
MODELS BW5030SSL • BW5036SSL
Page 7
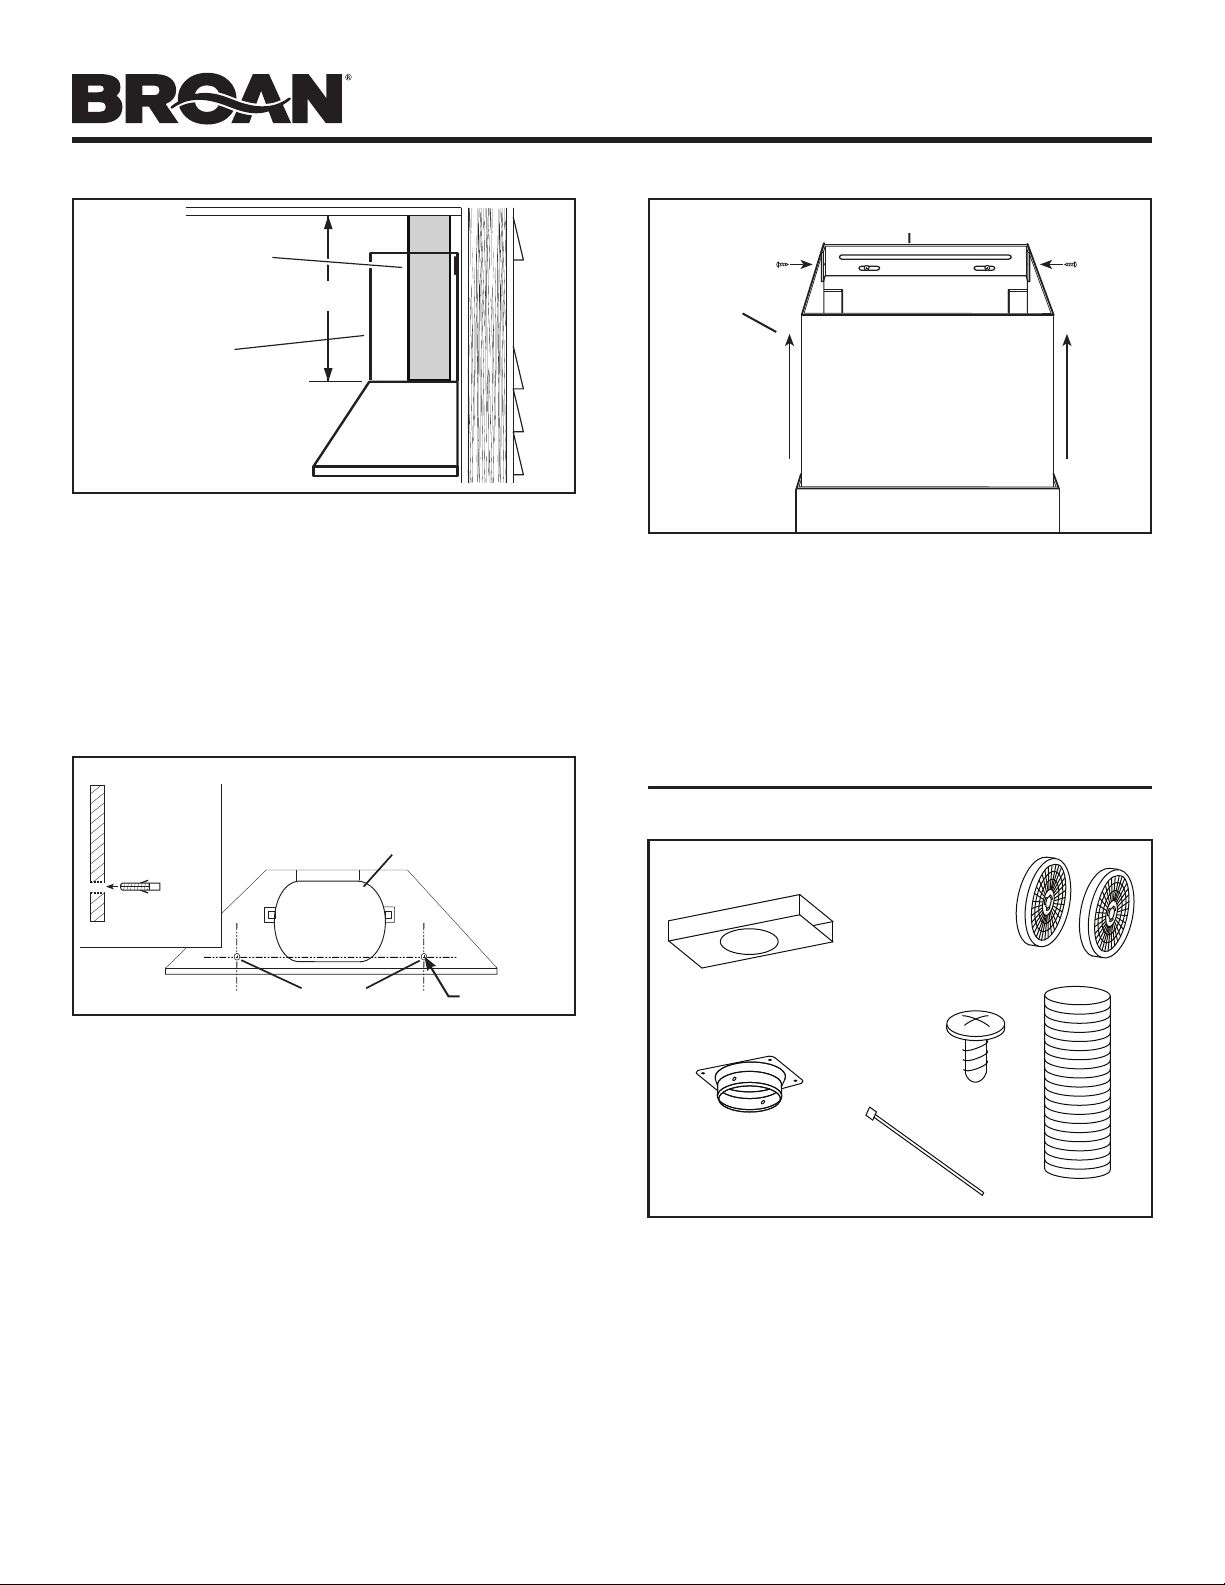
INSTALL THE HOOD
(Non-Ducted Hoods Only)
8. Measure and install 6” round steel ductwork to hood duct
connector. Use duct tape to make all joints secure and air
tight.
9. Hold hood up close to wall mounting location and plug
power cord into wall outlet.
10. Align the hood and center it above the hood mounting
bracket. Make sure ductwork on hood lines up and attaches
to ductwork in ceiling. Gently lower the hood until it securely
engages the bracket.
11. Use duct tape to make all joints secure and air tight.
INSIDE BACK OF HOOD
MOTOR/BLOWER
ASSEMBLY
HOLES LOCATION
SIDE VIEW
Ø 5/16” TYP.
12. With the hood hanging in place, drill through both holes
located in the inside lower back of hood using a 5/16” drill
bit. Insert the included drywall anchors into the drilled holes
(one for each hole). Install (2) washers and (2) no. 8 x 1½”
mounting screws through the hood back and into the drywall
anchors. Verify that the hood is centered and leveled. Tighten
all screws completely.
13. Reinstall grease filters by aligning rear filter tabs with slots
in the hood. Pull down the metal latch tab, push filter into
position and release. Make sure filters are securely engaged
after installation.
14. Slightly push aside the upper flue to avoid any damage while
installing the lower flue to the hood top using (2) no. 8 x 3/8”
screws through the lower flue side slots.
15. Slide the upper flue upward until it is aligned with its upper
flue mounting bracket. The bracket should be inside the flue.
Secure the upper flue to the upper flue mounting bracket
using (2) no. 8 x 3/8” mounting screws.
16. Remove protective plastic film covering the upper flue and
the hood.
UPPER
FLUE
UPPER FLUE MOUNTING BRACKET
DUCT LENGTH
DECORATIVE
FLUE
6” ROUND
STEEL DUCT
NOTE: Non-ducted installations require Non-Duct Kit,
Model RK58 (purchase separately).
1. CAUTION: Use only flexible duct provided.
2. Do not remove the protective plastic film covering the
decorative flue and the hood at this time.
3. Lay the back side of the hood flat on a table. Use a piece
of cardboard to avoid damaging the table or the hood.
4. Attach damper / duct connector to top of hood using
(4) no. 8 x 3/8” Pan Head mounting screws.
5. Remove damper flaps from damper / duct connector and
discard flaps.
NON-DUCT KIT MODEL RK58 CONTENTS
NON-DUCT
PLENUM
2 TIE
WRAPS
FLEXIBLE DUCT
NON-DUCTED
RECIRCULATION
FILTERS
NON-DUCT PLENUM
COLLAR
8 MOUNTING
SCREWS
(ST4 x 8
Round Head)
Loading ...
Loading ...
Loading ...